3 Elements of Buying a Tripod

By Jason

More often than not, blur in photos is a result of movement in the camera.  This means that you are likely shooting with your shutter speed set to open and close more slowly than you can hold it in place to freeze the image in place.  So, it may make sense to think that all you have to do is increase the shutter speed to one where you can hold it long enough, right?  Well, maybe, but there are many scenarios where that option may not be available.

Shooting in low light is often a time when we find ourselves compromising our sharpness by trying to hold our camera slower than what we are capable of in order to capture an image.  Another example would be where you want to smooth the water of an ocean view, a waterfall, or some other water scene.  You may also want to introduce blur in one area of an image (say a race car), while keeping everything else sharp to convey the sense of speed and motion.  In these scenarios, you can do one of a several things to increase the stability of your camera.  One of the most popular is:

Add a monopod or tripod to the equation. 

The reason why the tripod route is popular is because it is also one of the best ways to stabilize a camera, because let’s face it… a stationary object is better at holding our camera steady than we ever will.  If you can’t use a tripod though, monopods are excellent secondary devices at minimizing the movement that may happen when shooting at slow shutter speeds.  Choosing a tripod is a matter of personal preference and there are many things that can tie into your decision including budget, weight, and portability. Let’s consider each of these independently.

Budget

When it comes to budget, a tripod can be as cheap as $20, and can run upwards of $2000! Factors that will come into play include the weight element – carbon fiber is very sturdy, and very lightweight, but very expensive too.  Aluminum counterparts are heavier, and while equally sturdy, you can save money by going with an aluminum equivalent.

Weight

As just mentioned, weight can have both upsides and downsides.  If you are a landscape shooter, lightweight tripods can easily be blown over by even a slight breeze.  You can ensure stability by going with a heavier tripod, or by weighing it down (some folks use sandbags, camera bags, or other gear to help stabilize a tripod even further), but nothing is 100%.  As you get heavier weights, it also can be a detractor, because now that’s additional weight that you have to carry with you (or maybe it’s your photo assistant, but someone is carrying it!)
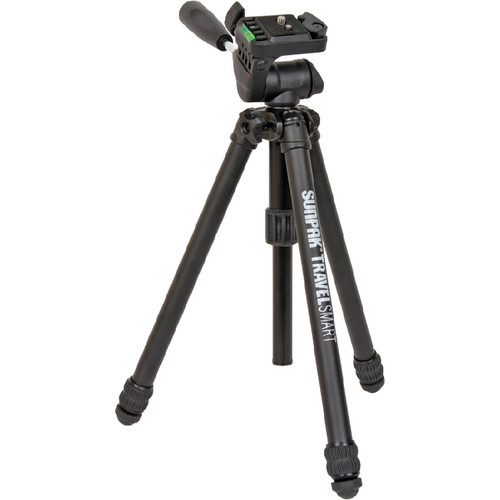
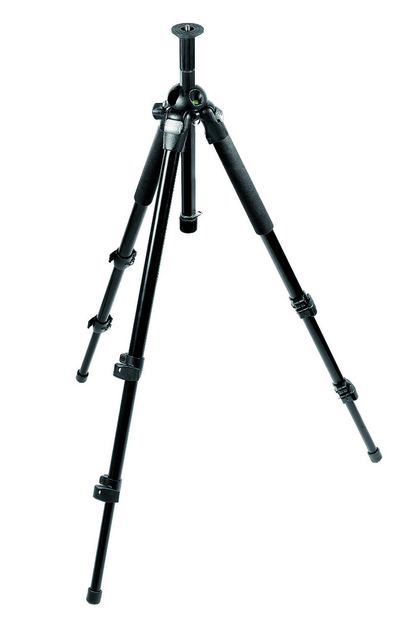
3. Size:

Another factor that comes into play is size.  If you want something small and lightweight, then a tripod that has only 3 collapsing legs might not fit with an on-the-go lifestyle.  You can opt for something smaller and more compact, but stability will be compromised.  For instance, take a look at the popular Gorilla-pods  (I own one and love it).  These are super small, the legs can wrap around anything, but they are not the most stable tripod in the world.  The legs can be contorted, but it also means that striking that perfect balance can be trickier.

Size

It’s all about trade-offs when you go to choose a tripod.  Invariably, people will consider budget first and foremost in their decision (I know I did)… for which tripod to purchase, but I can tell you from experience, that you will quickly migrate from the $20 Wal-Mart one to a $100 one from elsewhere, and ultimately upgrade to a $300-$500 one from one of the big guns out there (i.e. Bogen, Gitzo, Vanguard, etc.).  My one recommendation would be to just go in to the more expensive class first, because you will save yourself a lot of frustration and money in the end.  Ultimately, your photos will be sharper and you’ll get much more gratifiying results because you got the right tool for the job – a tripod!

Five Key Elements of Tripod Leg Purchasing


Mac Madness (Mac Systems)

It doesn’t matter whether you are a seasoned veteran or new to the field, the purchase of a tripod  is something that we all consider and eventually make the plunge with in the field of photography.  Let’s face it, we get sharper shots, are forced to plan composition more carefully, and in general, a tripod will improve your photography ten-fold over not using one.  Having said that, there are degrees of effectiveness in a tripod, and as in most things – you typically get what you pay for. Continue reading “Five Key Elements of Tripod Leg Purchasing”

Practice What You Preach

It’s one thing to come out every day with good solid advice for how to do anything, whether it’s manage your finances, run a business, or (as is the case here), how to take better pictures.  It’s another thing entirely to follow ones’ own advice.  There are countless instructors out there that offer great learning resources, and have an online presence that illustrates how to do things correctly, yet many would have to fall back on the axiom of “Do as I do, not as I say.”  We’re all guilty of this occasionally, but I try to stay more to the side of practicing what I preach. Continue reading “Practice What You Preach”

Steady as She Goes…

This first day after a long Memorial weekend, things are a little slow out of the starting gate, but as luck would have it, slow and steady is the theme for today, because my gear review that I postponed from yesterday is none other than the trusty tripod!

The tripod is probably one of the most basic and easy-to-understand pieces of equipment in a photographer’s gear bag – yet likely one of the least used.  I can’t tell you the number of times (myself included) I have heard someone utter “Argh!  I left my tripod back in my car!”  We’ve all done it, so the question becomes one of how to ensure you take the tripod with you.  The answer lies in making the right investment the first time.

FOr me, the first investment (because we all invariably try this route first), was a cheap an economical one from Wal-Mart for roughly $20.  I was quickly disavowed of its ability to support even a Canon XT with a 70-200 lens on it.  I went so far as to weigh down the plastic center column with my gear bag to little avail.  It was just not built for my gear.  Perhaps such a tripod would be good for the P&S crowd, because I would rather not disparage any gear intended to provide an increase in stability.

Anyone who goes to any length to increase their camera stability recognizes the benefit of a tripod.  So many pictures out there can benefit from increased stability – yet they continue to pepper the internet in perpetuity.  So, if you really are strapped for cash – something is better than nothing.  But, if you would like to invest a little in “some legs” (parlance for a tripod among photog-types apparently), then take a look at Bogen/Manfrotto.

Bogen/Manfrotto gear is recognized as one of the industry leaders in tripods, monopods, and camera equipment.  Another serious name in the game is Gitzo, and I’ve heard good things about them too – but for my money, I went with Bogen a few years back in my pursuit of stability.  My choice?  The Bogen 3021BPro:

tripod

This set is really sturdy – made of aluminum and an extended eight of nearly 70″ (69.29 technically), this was a great investment for me.  I stand at 6’1″ (73″)  so the height appeal was a major contributing factor.  Cost-wise, it also came in within my range at roughly $150-$200 new.  With quick-clamp leg extensions, and the ability to set up at varying ranges of 25°,  43°, 73° and  90° it was a great investment for me.

With the stability and low price though, came a downside – weight.  The legs themselves weigh in at a little over 5 lbs, but I did not plan on being very mobile with the set.  So, it was a great starter set for me.  The reason why I said “set” though is because any good tripod also needs a good head.  You’ll notice from the inserted image that the legs have a lonely screwmount at the top.  This does not give you much mobility for the camera when attached, so you really need to also invest in a head.

The head attaches to the tripod, and then in turn attaches to your camera and allows you a little more flexibility in moving the camera position around to get the right angle on your shot.  There are many types of heads including trigger mounts, ball heads, and pan-and-tilt heads.  Rather than get into an extensive discussion of the various heads as well, here it’s sufficient to say I chose the ballhead route.  Specifically, I went with the Bogen 488RC2.

ballhead

This is super nice because it allows you to pivot your camera around very easy and go from landscape to portrait mode in a snap.  Also nice is the fact that the head comes with a quick-release plate, basically allowing you to go mobile from your stationary tripod in a snap.  I’ll go into the various heads and how they work in some future post.  For here though, I got the ehad at about $120, so for less than $300 total, I had a pretty decent workhorse for a tripod/head set.   Here again, the only downside I can think of is weight.  The head also weighs in at 1.5 lbs so I am getting near 7 lbs of tripod weight total.  It doesn’t sound like much, but if you’ve tried lugging a tripod/head combo around on a photowalk, it can get pretty heavy pretty quick if you don’t have some strapped method for carrying it while walking or traveling.  For the most part though, it’s lasted me well and worked gloriously – when I remember to take it out of my car!

Eventually I will probably either upgrade this set of legs to the more lightweight, yet also sturdy, carbon fiber material that is becoming more cost effective.  At the time when I got this set, carbon fiber was very new on the scene, and thus very expensive.  As we see the presence of carbon fiber increase in the market place, the price has also come down some.  Not a lot, but enough for me to start considering it.  In all likelihood, I could see myself hanging on to this set for studio or location work while also adding to the gear bag with the more lightweight carbon fiber legs for on-the-go types of photography.

All in all though – if you don’t have a set of legs, this would be an excellent starter set.  For under $300 your pictures will undoubtedly see marked improvement – that’s assuming of course you don’t forget the gear in your car!  Happy shooting all and we’ll see you back here again tomorrow!