Aspect Ratio adjustments explained

I can’t tell you the number of times I’ve gone to print pictures I’ve taken only to find that I had composed it in a way that a portion of the image was lost when printed because it had to be cropped out to fit on the paper.  Today I am going to share a technique in Photoshop that will help you get around that pesky limitation.

First a little background – the reason why we are losing part of the picture is because we are changing the aspect ratio.  What is aspect ratio?  Simply enough, it’s the relative size of the long side of the picture to the short side.  Aspect ratios are often referred to by their lowest common factor.  So, a 4×6 print uses a 3:2 aspect ratio.  (Aspect ratios usually are stated with the larger of the numbers coming first…)  An 8×10 has an aspect ratio of 5:4.  Want to print a 16×20?  Guess what – it’s got an aspect ratio of 5:4 too!  Here are some of the most common aspect ratios that you see in photography:

4:3 – Point and Shoot Cameras
3:2 – 35mm Film cameras and most APS-C sensor cameras (SLR’s)
1.81:1 – APS-H Mode (High Def)
3:1 – APS-P (Panoramic)

So, with an SLR camera, since your sensor approximates an aspect ratio of 3:2, getting an 8×10 print means you need to keep your subject matter in from the edges because when you crop to the new ratio, at least one of those edges (and a little of the other) will be lost from the crop.  So, having now explained  “why”, let’s now look at the “how” (as in how to fix it!) in the delayed tutorial for the week:

Quick Tip Day – Photoshop Crop Tool

The podcast was supposed to go live today, but I have been sorta swamped with some other stuff (including fixing the RSS feed for y’all – now fixed w/ my apologies for the technical glitch).  So, in lieu of that, a quick tip to share:

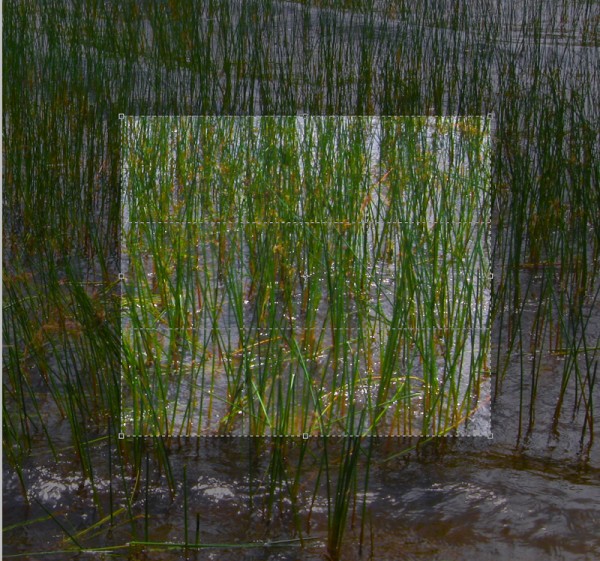
In Photoshop CS5 one of the JDI (just do it) features that was “fixed” was to add a Rule of Thirds guide to the crop tool.  It’s quiet handy to have and is turned on by default:

Crop Guides in Photoshop

Most people I know (granted they are photographers and not graphics designers) absolutely love this functionality!  However, a few have asked me if there is a way to disable it.  Naturally, pretty much anything in Photoshop is customizable for your own purposes.  So, if these “Marching Ants” lines are distracting to you though, and you want to turn them off, you can do this from the Options bar at the top of your display.  Simply look for the dropdown menu just to the right of “Crop Guide Overlay”  and choose the option that best suits your needs.

No Overlay

As with most tools in Photoshop, the Options menu gives you a lot of flexibility to configure things however you like for most purposes.  So, be sure to check the Options bar the next time you are inside of Photoshop!

Got an idea for another Photoshop or Lightroom tip?  Feel free to share your own ideas and questions in the comments section!  Have a great day and we’ll see you back here again tomorrow…

Walk, listen, and ask…

Lame blog post title segue alert – too late!  This week’s podcast is completed and available from the always generous hosting of the folks over at Personal Life Media, and over on iTunes, so download from your favorite option and enjoy!  Here’s the show notes:

I give a roundup review of the Scott Kelby Worldwide photowalk, along with a more detailed back story on the Canon Confession, which was outed yesterday here on the blog.

Rich Charpentier of The Airstream Chronicles also stops in for a really great interview with me – we probably could have talked for quite a while longer, but tried to keep things managable.  On our discussion we learn about his HDR work, his printing work, and his travels from within an Airstream.  He’s got some great stories including mountain lions, sock puppets, and much more.

A couple administrative notes and links from the show.

Here’s links to Rich’s website and his blog, as well as his book, The Digital RV

A couple other things we talked about included:

Arctic Butterfly sensor Cleaner

Bert Gildart’s Photography

Stuck in Customs

Also, don’t forget the OnOne Software Plugin Suite 4.5 Giveaway is coming to an end soon!  You could win this software suite, valued at $500 retail just by entering your “Numbers” themed photo (taken in July) over at the Flickr thread before July 31st.  Good luck and I expect a lot of entries will be coming soon as people reveal the fruits of their labor, and the results of their work over the month (especially given the photo walk from this last weekend)!   I could amuse you with more, but then would have nothing for tomorrow, so don’t forget to stop back in for another fun day of photography news, information and discussion.  Happy shooting everyone!

Grab the Feed

Win, Listen, and Bang!

This week’s show is a doozy – I talk about the latest contest, (#3 for 2009), have a fun conversation with Jason Loucks, then tackle some tips on photography fireworks.  Of course the show always takes care of a couple listener questions and answers, so it’s 45 jam-packed minutes of photography fun.  Here’s the show notes:

The Third Photo Contest, sponsored by OnOne software.  Rules and entry information are posted on Tuesday’s blog, and you can enter your photos here.

Here’s the sites and twitter folk we talk about during the show:

  • www.freelanceswitch.com
  • www.smashingmagazine.com
  • www.tutsplus.com
  • www.css-tricks.com & Chris Coyer on Twitter
  • www.w3schools.com

Shooting Fireworks

  • Use a tripod
  • Make sure you have spare batteries (and fully charge all batteries)
  • Shoot with a low ISO
  • Set your shutter between 4-8 seconds for best results
  • Try adjusting the zoom in or out for attention grabbing light trails

Enjoy the show, hosted by the folks over at Personal Life Media!  Happy shooting, and be sure to share your own tips and tricks for shooting fireworks by tomorrow and I’ll try to put all of them together along with some (hopefully) inspiring photos for enjoyment.  In the spirit of the show, don’t forget the trailing question:  What was your first camera?

Monday Muscle Failure

Muscles

This was quite the weekend!  Two of three bedrooms have been cleaned up, packaged, and taken to an off-site storage so we can “stage” the house.  Apparently staging a house is very important when selling.  It helps “define the space” for the prospective buyer.  Anyway, as a result of all the lifting, bending, pushing, pulling, hauling, and shoving (oh yeah, we packed some boxes too!), we are very much in a state of “muscle failure”.  For the more athletically inclined, you know what I am talking about.  For the rest, when you push your muscles to the brink of not being able to work, they quiver visibly, and that is called muscle failure.  Suffice to say, our normally light-hearted fare transitioned very quickly to a Whopper with fries and an ice cold beer afterwards.

Anyway, no glory shots from the new 40D to share…sorry.  Although I am stopping by the storage unit later on today, so will likely have the camera with me.  Whilst organizing that, I did notice a few “photo opportunities” (whenever I hear that phrase, I think of Ron White and a  bit he did – see reference link from the 4:30 mark to 6:00 mark) , so may have some better post material tomorrow or later on today.  Tomorrow will be another fun video too…so a little teaser there just to keep you interested.  Until then though, take a moment and stop over at ProPhotoLife.  They put out a great video on how to light tabletop stills wit just one light and mirrors as your other light sources.  Very cool – especially for the DIYer (I am going to go retrieve a mirror I was going to throw out in the move now!)

Happy shooting, watch those apertures, and we’ll see you tomorrow!

Pics, Trips, and Tips

What's This? - Week3

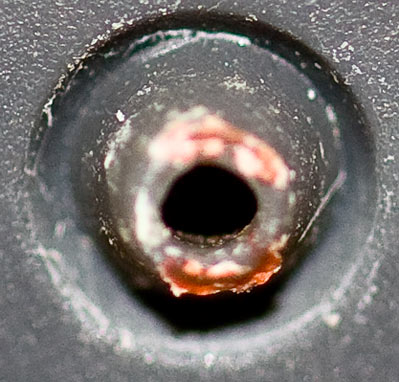
Welcome to week 3 of the “What’s This?” series! Last week I had a close-up shot with some great guesses including carpet, a towel, and a toothbrush – but the answer, as it turns out, is a candle wick!

What's This? - Week 2

I had cropped out a portion of it, to give kind of a different twist! Thanks to all for participating! So, as we move into week3, here is another everyday object that I’ve zoomed in on, and taken a cropped portion to share. Can you guess what this is?

In other news, it seems I will be somewhat busy over the next few weeks with several trips on the horizon. Late June, a friend is getting married, and that will require a trip to NC. Then, shortly after that, I will be traveling (driving) to New York for the 4th of July festivities. Very shortly after I get back, I will likely be accompanying my wife out to Colorado as we transition to that area from SC. She’ll move on ahead to start her job, while I stay behind to close up shop and sell the house. Oh yeah, did I mention? We’re moving to Colorado!!!

So, for the last tidbit of news, I did actually knock out the tip for the week as previously mentioned: displacement maps! I read about this technique in my most recent issue of NAPP and had a few images that I thought it may work for, so thought to give it a whirl! Pretty neat effect, so feel free to try it out yourself!

CB Episode #44: Displacement Maps

Digital Frames

Too often we take our work and share it out on the web in galleries, on blogs, and at various community forums to see the background colors don’t really do our shots much justice. I’ve seen forums with blue background colors, others with yellow, and much much more. This has the net effect of casting a hue across every image in that space. Your images take on that hue to a certain degree, and it can often negate an image more than many realize.

Forum administrators and bloggers are starting to realize that neutrals are the best way to go, but there are still some web outlets that hang on to some rather outlandish color schemes. To accommodate the creative (and sometimes sensitive) differences that exist, it can often help to present your images with some digital framing. That is the focus of this weeks’ tutorial, and I share a rather simple but effective technique to create a digital frame to enhance or accentuate and draw attention to your imagery.

As I mention at the end of the post, there are some automated ways to create digital frames via plugins and actions. The one I reference can be found at www.atncentral.com People labor often in anonymity and share their work with the world and give it freely for others to use. Enjoy the benefits of generous folks and for those occasional ones that ask for donations, kick in a buck or two – it always helps to keep the creative spirit alive. In the meantime, keep on shooting (happily), and watch those apertures (carefully)!

Flash Version: Digital Framing

PlayPlay

PlayPlay