After posting about exposure triangle and how blurring water means decreasing aperture, I got a few questions about other ways to blur the water in your composition. So, here you go.
It seems that water always seems to attract attention in photography…whether it’s an ocean at sunrise, dew on a flower, or waterfalls gushing through a mountain stream, the impact that water can have on our imagery is very powerful. Harness that power to your own creative ends by recognizing 5 ways to blur it to your advantage:
Slow Down!
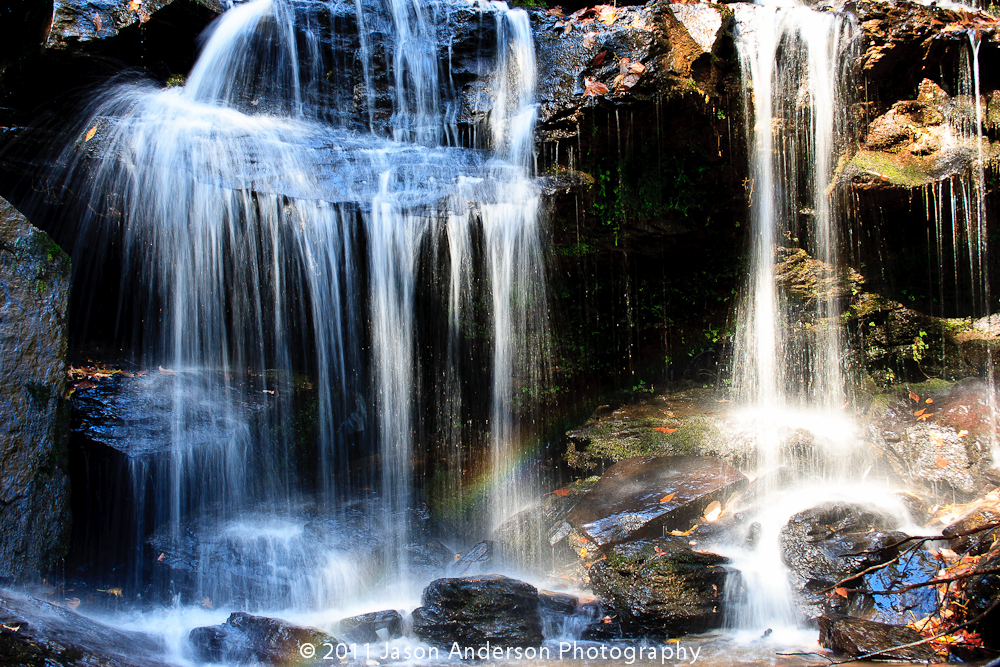
1. Slow that shutter speed down! Your shutter speed is the best way to blur water…taking things down to at least 1/4 of a second, if not longer. This is what I did in my last post about the exposure triangle. It’s still my favorite way of blurring water to a creamy smooth texture in photography.
Use a Tripod
2. Steady those shots – even without slowing your shutter speed, to seconds, keeping the camera stable to prevent shake when hand holding is near impossible, so please take and use your tripod! Of course, it goes without saying that when shooting at slower shutter speeds, it helps immensely to be solidly mounted on a good set of legs. Without getting into the pros and cons of various features and qualities of various tripods, if you are shooting a 10 second exposure of a beach at sunrise, you need legs!
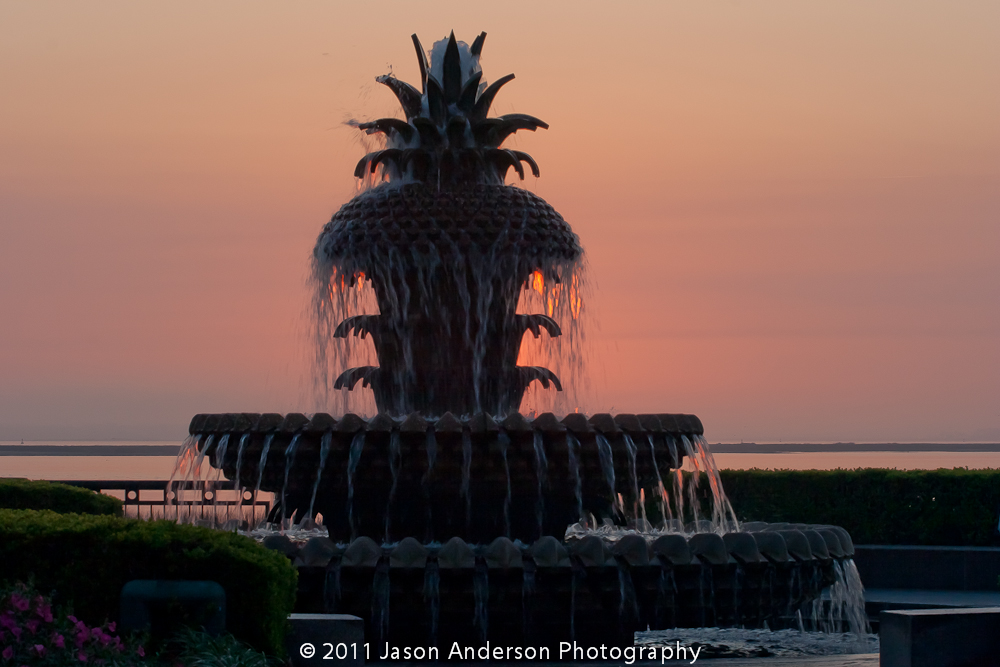
Palmetto Statue
ND Filters
3. Sometimes even with slowing shutters and using tripods, it’s just not enough. So, you need to find another way to control the light. ND filters are the answer. I’ve seen a lot of people run into an invariably brighter exposure… and to combat extra ambient light in the scene, they use ND filters. These filters essentially prevent those extra rays of light from hitting your sensor. Polarizers can work too, but they are less effective as they can have some downsides to them including elimination of reflections, casting a specific tone on your entire image, and more. When in doubt, always use ND filters.
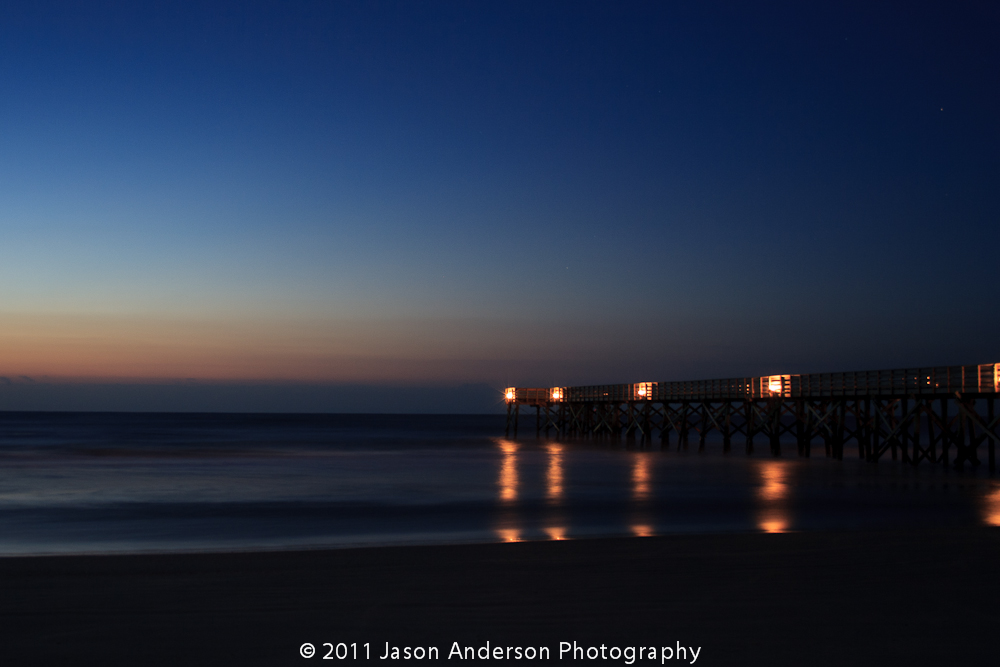
SC Pier at sunrise
As always, there’s more than one way to skin a can (or blur water)! More involve shutter dragging with fill flash, and lots of others. What ways do you use to blur and control waters’ appearance in your images? Sound off in the comments with tips and tricks of your own! Happy shooting all, and we’ll see you back here again next time with more photo goodness!
I’m coming out of silence for Wordless Wednesday…primarily because so many people are asking me questions via email, Twitter, and FB to share details about the composition, post production, and other details. Instead of just spitting out metadata and other information, I’ve got questions and answers from now on:
#1 – What rule of composition did I use and why?
I chose the Rule of Thirds for this shot, and specifically chose the lower left third to be the grabber. I didn’t want this to be an overpowering shot, for the eye to just enjoy the plethora of tulips…but the little tiny yellow and red amongst the larger red ones struck me for some reason, so I framed it to the lower left – thus giving more space for the eye to expand out from there to the rest of the scene.
#2 – Are any rules of composition broken?
Here, I don’t think so – in general, the Rule of Thirds applies, and the Golden K also applies if you look at it for more than a second or two…see the K lines appear in the red tulips? Kinda neat, eh?
#3 – What camera/lens combo did I use?
For this shot, I was on my trusty Canon 40D, and the lens mount was none other than the Canon kit 18-55mm (nonIS)! I went with the 18-55 mm lens because this is a very good lens for approximating the equivalent of what the human eye sees, and for this photo shoot, I wanted that effect.
#4 – What lighting did I use?
Here, there were no lights…it was au naturale: S=1/60th, f7.1, focal length = 50mm, and an ISO of 1250! (Yep, ISO 1250 – I was hand holding and wanted to keep it bright! The scene was actually much darker, because the sun was going down, and I really wanted the colors to pop! Depth of field was also important to me, because all the flowers needed to stay relatively sharp. Since I was shooting light and on the fly (no tripod or monopod), my only option for getting the brightness in the scene that I wanted was to push the ISO settings up to maintain correct exposure.
#5 – How did I process it?
I processed this in Lightroom, using just a few tweaks on the right panel: I had under-exposed a little (especially given the fading lighting conditions), so upped that by .76. I also set Clarity, Vibrance and Saturation to 50, +10, and +10 accordingly. These settings helped bring out more of the color and vibrance that I was seeing but was not in the default raw file. My sharpening and noise levels were also set to +73 and +50…the sharpening was up that high because,w ell, we always have to sharpen at least a little, and a went a little higher to help define that depth of field. Lastly, the noise levels were pushed up to help counter the impact of the ISO when I was shooting.
Hopefully this will help those of you who are interested in learning what I see with my eye and why I capture certain images. If you have more questions, or thoughts on improvement, feel free to share those in the comments!
A while back I teased about a forthcoming lens review (nearly 3 months ago actually, in the Teaser Alert), and after several project shoots, the holidays, and scheduling delays, I am finally getting my act together to bring you the latest gear review…that of the Sigma 50-500mm. As a word of caution, you should be forewarned that the Sigma line-up of lenses that I have reviewed has become quite extensive. Right away this should tell you two things:
Sigma has been quite generous with me in terms of making a variety of lenses available. They likely are doing this for a number of reasons, but primarily because they know that I will give a fair, honest, and 9 times of out 10, a positive review of their equipment.
I like Sigma lenses! It should be no secret by now that I do like their lenses. They are optically on par with what one would expect from lens manufacturers by todays standards. Heck, sometimes I think the optical quality even exceeds that of the main brands out there (of course here I mean Canon and Nikon). The price is almost always right on – sometimes the price tag is a little high for my taste, but the advantage that Sigma has is that they are what is considered a “third party lens”, and because of that designation, their pricing is a notch below comparable lenses made by either Canon or Nikon for equivalent glass.
So, when Sigma came calling (actually I called Sigma), with the 50-500, the game face was put on. Right off the bat, here Sigma has been more than generous because I have now had this lens in my possession for nearly 3 months! I’ve posted a few photos from this lens over the past three months, so you may see some repeated images here, but they serve the purpose of demonstrating the various settings that I have used to shoot and test this glass. Having set the stage, let’s get started with the review. In the past, I’ve talked about things in terms of Pros and Cons, listing first the things I like, then the things I was not as much a fan of. While it has worked to a degree, I am trying to make things more uniform in the review section, so will start adhering to some more concise points and then indicating whether it is a pro or a con. Ladies and gentlemen, I give you the
Sigma 50-500mm f4.5-6.3 Review
1. Focal Range: The focal range is how lenses are most commonly identified, and this is the measure of how much “zoom” there is in the lens. Here, the description says it all. This lens ranges from a widest point of 50mm to an impressive “zoom” of 500mm. On a crop sensor camera, that means you are looking at a range of 80 to 800mm! By any standard, this is a pretty wide range, encompassing a difference of nearly 700mm in focal adjustments. I am going to call this one a Pro.
2. F-Stop Range: The f-stop range is the measure of the minimum (or maximum depending on your way of thinking) aperture the lens can handle at various lengths. When dealing with a zoom lens, as you move further out, the elements have to compensate for the change in the length by increasing the size of the opening of the aperture, so you will see adjustments as the lens “zoom” increases. The Sigma 50-500mm is dialed in to a minimum aperture opening of f4.5 to f6.3. So, at the widest zoom of 50mm, the lowest aperture setting you can get is f4.5. Likewise, if you zoom this all the way out to 500, the minimum aperture is f6.3. So, don’t be misled by the numbers, shooting this lens at 500mm will not afford you the f4.5 that is capable at the widest setting any more than the f2.8 is available on a 70-200 at the longest zoom. When you have zoom lenses, there is a compromise in aperture capabilities that must be met when zooming out, and such is the case here. I did some experimenting at various focal lengths, and here are some apparent limits at different zooms:
Focal Length
Minimum Aperture
50mm
f 4.5
70mm
f 5.0
100mm
f 5.0
135mm
f 5.6
200mm
f 5.6
250mm
f 6.3
300mm
f 6.3
400mm
f 6.3
500mm
f 6.3
Given the technology of aperture limitations in zooms, I would say that the Sigma is on par with what the expectations would be for this range. To build this lens for any lower aperture settings would make the lens both heavier and longer. I don’t even want to think about what it would do to the price either! It’s not the greatest in aperture abilities, but it’s no slouch either. I’m going to have to thrown an “Even” flag on this.
3. Noise: I brought in the noise consideration based on my first Sigma lens I ever purchased, the 70mm Macro (f2.8) which did not have HSM. The inclusion of HSM in almost every lens since has been a Godsend. This holds true for the 50-500mm as well. It’s super quiet and has convinced me that I will never stray off the Hyper Sonic Motor (or USM on Canon glass, ever gain! ‘Nuff said. Pro
4. Size/Weight: My last big lens I reviewed here was the 18-250. It was a respectable weight, but this is by far the heaviest lens I’ve ever tested. Weighing in at a shade upder 4.5 lbs (that’s 1970 grams for you Metric folks), it can cause some serious arm strain after extensive shooting. I would recommend using either a monopod or a tripod for this lens whenever possible. It also bears mentioning here that due to the weight of the lens, you want to support it in the provided collar. Supporting the rig by the camera can result in some serious shear force, which can rip the lens right off the camera. Other size considerations involve the length of the lens both fully closed and fully extended. This will draw some eyes at either end…whether it be the short side (8.5″) or the long side (12″)! Here’s a comparison shot with it next to several other lenses so you can get an idea of its relative size:
Another consideration to take into account about this size is the filter required. For those interested in using the ND filters to protect front elements, you will need a 95mm filter to cover this – not a cheap thing to purchase by any means. Ultimately the size/weight considerations really will depend on your personal ability to handle it effectively. For me, most of the time it was not a factor, so I’ll acquiesce and call it a Pro.
5. Build Quality: In line with expectations, the Sigma quality showed here. Their now easily recognizable textured exterior exudes professionalism, and just feels good in your hands. Given the weight of the lens, you don’t want to hold this gingerly, but at the same time, if the body took a slight bump from another lens in your bag, the “other lens” would likely bear the brunt of it. No questions here. It’s a Pro.
6. OS/IS/VR: Due to the limited aperture range, and the weight, the presence of OS is invaluable. Using the OS allows you to keep your aperture value low, allowing for bother faster manipulation and shorter shutter speeds, as well as some nice bokeh in the background when your distances are good. What was extra nice about this is the ability to toggle between the vertical and horizontal planes to control vibration in different circumstances. When I was on a monopod, I switched to OS 2 to help control vertical (or up and down) vibration. When shooting handheld, I was on OS 1 most of the time, under the premise that my own face, body and camera holding helped to minimize the vertical and thus needed more help with horizontal. When I was on a tripod, I turned it off per normal procedures for when using OS/IS/VR. In my book, having versus not having OS/IS/VR is definitely a Pro.
7. Cost: The average retail market for this lens is approximately $1500. Given the focal range, the aperture range, and other considerations thus far, it seems to be pretty competitive. The Canon lens with the longest zoom range is their 100-400 and that factors in at $1800. Nikonians can salivate over their 80-400 for $1850. Both price in over the Sigma lens, and it still gives an extra 110-150mm of variable range. For my own personal budget, that’s a tougher call because while I would love to own this lens – I would have to sell something else to do so, and am not sure I want to dispose of anything else in my camera bag at the moment…the jury is out on this for me personally, but for those interested in purchasing any time soon: Pro
8. Image Quality: Image quality is always subjective to the viewer/shooter, so here I will just let everyone defer to their own tastes by sharing a few sample images taken over the last few months:
Kissing Squirrels
Chopper Series
Miscellany:
Other features that bear mentioning here include the locking mechanism and the focusing rings. I thought about including the latter in the build quality, but decided to bring it in here for discussion. First, the locking mechanism is a handy feature to have for keeping the lens locked in place to prevent lens creep. The idea is a good one, but for this particular lens, it would not lock in the “zoomed” position, where I would have thought lens creep would be more of an impact, than in the “closed” position. Having said that, from the lunar shots I did (as shown above), the fully extended lens did not experience much, if any, creep. This could be because the lens was recently brought back from a service stop where knobs and buttons and toggles were all tightened and such.
This brings me to the focusing rings. The rear focusing ring is the one used for fine tuning and the front ring is for zoom. This was an adjustment for me as my other zoom lenses have these rings reversed (where the zoom is on the back ring and the focus is on the front ring). it forced me to change my style of shooting a little, but since I was working off a lens-mounted setup most of the time rather than a camera-mounted setup, my shooting habits were already being adjusted anyway. The last part is that the zoom ring did seem a bit tight to move. Whether this is by design or because of the recent factory adjustments, I am not sure, but it was just a tad stiff to adjust.
Summary:
All in all, the Sigma 50-500mm is a great lens. It stood up for the challenges of both wildlife and aerial photography, as well as lunar and even a portrait shot of the canine companion. The compression it exhibits at the far end (which is characteristic of these long zooms) is to be expected, but I would probably not be using this for landscapes unless I was in a pinch and had no other lens with me. Still, it could be done, depending on what kind of landscape you are trying to capture. The zoom really had no noticable effect on image quality without going into some serious pixel peeping, and thus, meets or exceeds all criteria that I can think of. I would definitely make a positive recommendation on this lens for either a wildlife or sports shooter where distance from subjects is often greater than 10-15 feet. (The minimum focusing distance at 500mm is something like 6 feet!)
That does it for today – I hope you enjoyed the review and photo gallery from the Sigma 50-500. Here’s the final results/scores I give the lens:
Category
Score
Focal Range
8
F-Stop Range
7.0
Lens Motor Noise
8.5
Size/Weight
7
Build Quality
9.5
Optical Stabilization
8.0
Cost
7.0
Image Quality
8
Have you shot with this lens? Share your own thoughts in the comments or with me via email. Likewise, if you have a lens you would be interested in having me review, feel free to drop me a line or share your requests through the comment area as well. Special thanks to Sigma for giving me such an extended testing period to review the lens, and we’ll see you here again soon! Happy shooting!
A great question came up in my Twitter feed a while back, and felt it was worthy of putting together a short post to help explain the whole concept of zoom on cameras. The original tweet asked:
“What’s the best focal length on a lens to reach 400 yards so I can see a 1 inch square at that distance?”
We started talking about different long length lenses, such as the 400mm, 800mm, and 1200mm lens options from Canon. All were (are) very pricey and beyond the budget for my friend. he then started asking why a 35x zoom point and shoot wouldn’t be an option. So, the discussion turned to a teachable moment! How exciting for a teacher! The recap is two simple points:
Point #1 When manufacturers refer to the zoom of a lens, whether it’s a P&S camera, binoculars, or digiscopes, they are referring to how much of a magnification one can get over “normal viewing conditions”. Notice how I put the last part in quotes. What are normal conditions anyway? What kind of vision is normal? 20/20 vision? And what are we looking at? Something 10 yards away or 400 yards away. The point here is that there are so many subjective factors, the “zoom” isn’t really has hard and fast a number as one would think. We can approximate sure, but it’s not set in stone, and certainly a measurable distance is nothing more than a rough guess.
Point #2 The zoom of an SLR lens isn’t at all on par with the zoom of other equipment – it actually is a hard and fast number. Simply put, the zoom of a lens is the ratio of it’s longest reach to it’s shortest reach. A 70-200mm lens starts with a focal length of 70mm and ends with a focal length of 200mm. This is the distance from the focusing point to the sensor. So, a 70-200 lens has a “zoom” of 200/70 or almost 3x. A 100-400 lens would have a zoom factor of 4. it’s simple math for SLR lenses.
This is a classic example of where the same term can mean different things to different people.
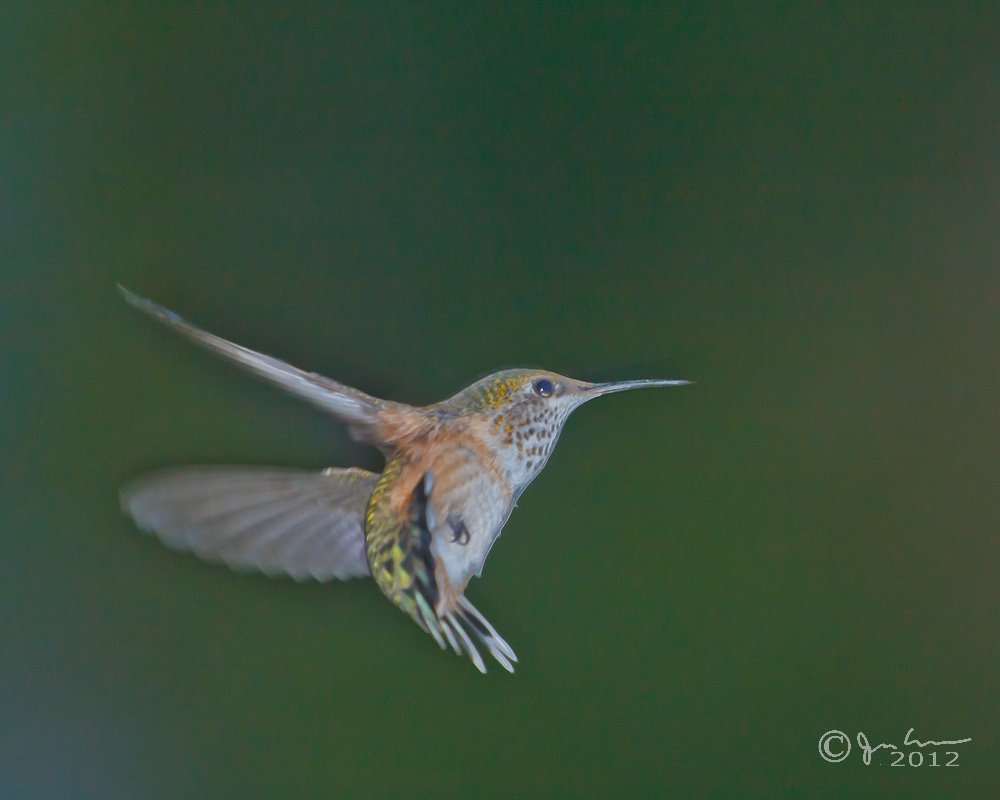
So, my answer to him? Well, to see something at 400 yards large enough to take a decent picture you would likely need an 800mm lens or 1200mm lens. You also probably need a 1x or 2x TC to really get far enough. The problem with taking a picture at this distance is that heat, atmospheric conditions, and just the physical limitations of optics would not make for appropriate conditions to capture decent images. Most wildlife photographers I know of like to get closer than 400 yards from a subject to take their picture, and for good reason. The distance to subject is of prime importance in capturing wildlife photos. Zoom or no zoom (prime lenses), there’s no substitute for proximity! Photography all too often comes down to something along the lines of real estate mentalities…location, location, location!
My best example? A hummingbird I shot from a mere 15 feet away!
As you may or may not have noticed, the blogging schedule has sort of gotten re-aligned again. I had slipped from the 5-day schedule down to a 2-day schedule, but during a recent getaway, I was able to get things back on track. Hopefully there won’t be any more changes to what is now a Mon-Wed-Fri setup, but news-breaking or other earth shattering info may trump the normal order of the universe! In any case, during the break, I happened across a few really good photo ops. Some gorgeous vistas and scenery, plus an occasional animal sighting from the trip to Puerto Angel Mexico (you’ll get more info if you subscribe to the free PhotographyBB magazine as a full-length article with many more photos is due out next month).
Nevertheless, since photos have not been at the forefront, I wanted to dedicate an entire post to sharing some photos from the trip here with you. So, without further ado, some selects from the trip!
When we approach the topic of depth of field, most people nod along about how the composition can change pretty dramatically when moving between various apertures – but have you ever really studied the differences? Take some time and do an exercise. It’s not that difficult, and really seeing the differences in photos can totally lift the roof on your approach to composition. For this exercise, I took a scrap piece of lumber, and nailed 6 framing nails into it about two inches apart from each other.
Step two was to set up the lighting, the tripod, and the “wood art” in a scene where i could adjust the aperture and keep everything else constant. With my own little studio set here in the house, that was accomplished easily enough. I set the focal point on the nearest nail, and dialed in the exposure I wanted. Then, I switched to manual focus so as to not bump or have the camera try to shift it for me and dialed through the various f-stops.
Step three – simple post production: camera calibration, white balance, and lens correction. I also applied a 75 value to the sharpening slider from the detail panel, but did so universally. So, with everything but aperture constant, here’s the results:
So, at this point you should have enlarged the photos above, and scrolled through the entire gallery so you can see exactly what is sharp at f2.8 all the way through f16. By the time you get to the end, so much has changed and often gradually, it’s hard to see the difference. But if you look at the f2.8 and f16 shots side-by-side – they are worlds apart compositionally speaking. Now I grant you, nails hammered into a 2×4 piece of lumber 2″ apart is not the most artistic piece ever shot, but it hopefully illustrates what can happen to a photo simply by changing the aperture and keeping everything else constant!
WHere do you think creatively adjusting your depth of field would work? Try to think outside the box here too. A few ideas for starters:
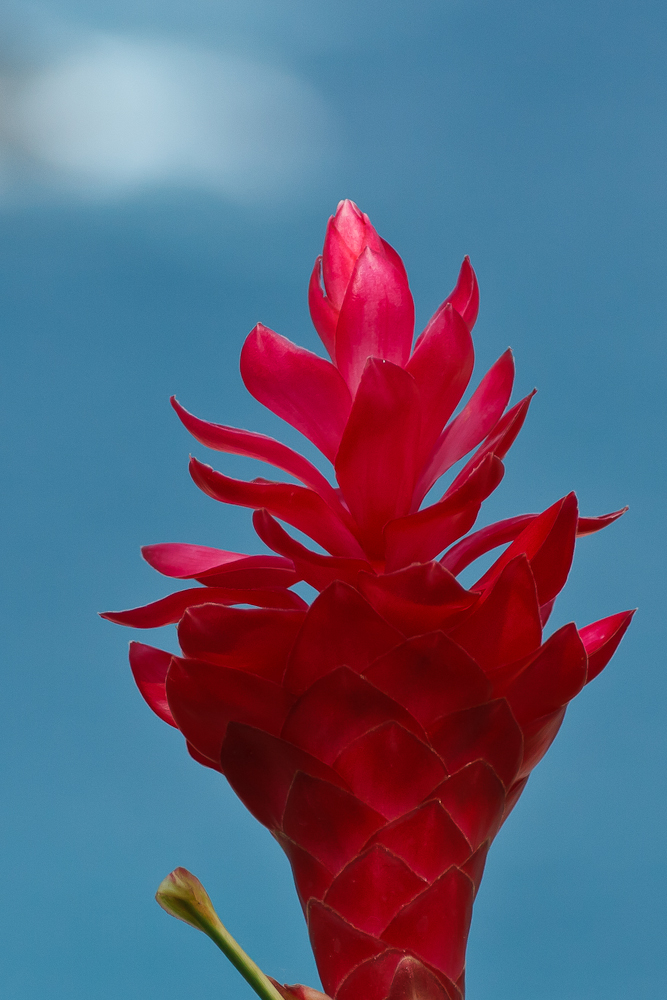
A flower from close up…
A portrait shot, with background blurred
Macro photography – bugs and insects, computer chips and parts
There’s a whole world out there with plenty of opportunities to create gorgeous photos with only your creativity to limit you. Where do you want to go today?
A couple fun news items to share today…including some prize additions, a webinar announcement, and more!
Comment Contest
I just got word last night from Nicole that a copy of both her 60D and 7D books will be donated to the comment contest – so there’s gonna be two winners! All you have do to is comment on the podcast post from Monday! Yup, that’s it – no fuss, no muss – just comment and win! Pretty generous of her and Peachpit to donate like that! Oh yeah, and be sure to listen to the podcast, we have a great conversation about how to strike a balance in your photographic life! All that’s available from here.
Photoshop Cs5 Webinar
The folks over at Nations Photo Lab just keep on giving! In addition to the monthly Flickr contest (where you get $50 certificates just for playing), they’re also the sponsors of the Live Learning Lab – a free live webinar served up on the 2nd Wednesday of every month, hosted by myself and Kerry Garrison of Camera Dojo. We just had the February one last night, and it was quite the hit! You can watch the archived shows for free too if you can’t be in attendance – just can’t ask questions in real time. Anyway, the archive is here
If you’d like to participate in the March webinar – be sure to sign up in advance as we can only take 100 people. More details are forthcoming on that shortly.
And more…
Okay, there really isn’t much in the way of “more”, but since I like to have images for every post, here’s a quickie from my own archives just for a dose of inspiration (in hopes of a Spring thaw soon!). Happy Shooting!
One of my annual clean-up sprees happened over the weekend and ran a little long into the week…this was not a task for the light of heart because it requires seriously chimping your own work – and even admitting that some you’ve kept just aren’t worth keeping anymore because you’ve never touched them ever since capture. I cleaned quite a bit, and although tedious, the task really is for the birds because you should be doing this all the time, not just annually. Sometimes a diamond in the rough can squeak through though…and here’s two that might be a exception…what do you think?
I wish the birds eyes were more viewable, and the ISO was pretty high so took some serious slider dragging in LR to make presentable here. Not sure the second is close enough to be worth it, but then again there is something to be said for negative space! Consider it a photo critique day – so do thy worst fair readers, critique the author! 🙂
Happy shooting and we’ll see you back here again soon!
Journal Entry #1 – 2011 – Snowmobiling in Copper Mountain
Date: January 1st, 2011
Location: Copper Mountain Colorado
Temp: -20 Fahrenheit
Wind: 10-20mph
Wind Chill: -41 to -45 F!
What is this a great day for? You guessed it – a snowmobile ride! Seriously, I went on just such an excursion the morning of the 1st! I layered up in my best winter gear:
Layer 1 – Thermals (long underwear)
Layer 2 – Lounge pants
Layer 3 – Blue Jeans
Layer 4 – Snow suit
It worked quite well as I never really got all that cold! I took off from the house in Keystone CO where we gathered for the holidays with family, and drove the 45 minutes from 9900 feet to the 11,000 foot mark. Nearly two miles above sea level now where the air is downright thin!
Snow and Ice in the Air
It was a nice tour, led by the well-regarded folks of Summit Conciergeand their services across the Colorado Rockies. The tour guides were friendly, we got some handling time in a track loop to familiarize ourselves with the equipment, then they split us into two groups of six for some pretty exciting scenic views. One group was a family or two, then the other was mostly adults (myself included, although I felt like a kid – adrenaline surging as we whipped around at about 30-45mph on our Polaris snowmobiles!).
The Whole Gang!
As we crossed the mountains, with snow-covered pines, and gorgeous mountain-scapes. Of course once we rode above the timber line, the scenery was just the white snow against the slightly paler misty sky. It wasn’t snowing as at that temp, it’s just too cold. Instead tiny bits of ice dusted the sky with hints of bluer skies behind the flakes of snow and ice.
At the summit!
I did imagine that we would get a bit cold in our extremities, as we whipped along. After all, with a -20 gauge on the thermometer, 20mph winds and us tooling around with another 30mph of wind, it was likely very nearly around 50 below zero!But the handles of the Polaris were heated! As you moved, the heat increased to snuff out the effects of the wind. When we stopped I even took my gloves off to pull out the camera for some photography! No gloves! in 40 below temps!
Heated Handlebars Below...
The camera though, did not have the pleasure of heat, so it didn’t last too long, even inside my external snowsuit to shield it from the bitter cold. I got perhaps 45 minutes of shoot time from the two batteries I packed. The point and shoot fared better as it was inside my own snow jacket pocket, closer to the warmth of my own core heat.But it even capitulated to the cold after being taken out for a mere 20 minutes! I found this out at one of the rally points…
Rally Point Break
Regardless, it was a great ride, with half pipes, remarkable scenery and even a stop for hot chocolate halfway through (the tour guide started the heaters as we began the trek)!For the adventurous – this is definitely one to consider when you go to book your next adrenaline tour! It was a great way to usher in the New Year! How did you celebrate the start of 2011? Share your thoughts, shots, and feedback in the comments below or via email. Don’t forget to share socially too!
And finally, for those that read all the way through the journal article, here’s a short video I took from my Flip HD Video (Christmas Present):