Hardware Review: Hoodman Loupe

As mentioned previously in the monthly contest series post, this month the featured vendor is none other than Hoodman.  Their patented and widely recognized CF cards and loupes are proudly made in the U.S.A. (the only ones I know of that can make this claim), and are virtually indestructible.  They have generously donated one of their Loupes for the contest winner, and allowed me a chance to review it as well.  So, without further ado – here is the latest in the hardware review category for the blog:

Hoodman Loupe


The whole purpose of the Hoodman Loupe is to block stray light from hitting your LCD.  In sunlight or hazy scenarios, it can often be challenging to view your screen, and even change settings if you own a newer camera.  Given it’s simple function, the review aspect of this really is a simple matter to determine, does it do the job it claims to do or not.

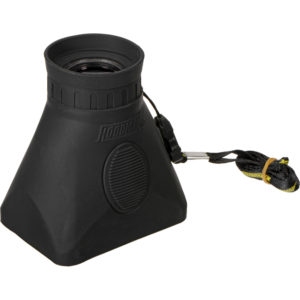
Not only did it completely block all ambient light with ease, the Hoodman Loupe also seemed to make the on-screen photo much more brilliant and crisp than I had remembered before using it.  That surprise was further mitigated by seeing how compact the Hoodman Loupe actually is – at roughly 2 inches long and an inch deep.  Not only did it perform adequately, but at this compact size, the Hoodman Loupe is an easy addition to your camera bag with the minimal footprint it takes up in space.

Most rubber or manufactured products attempt to make things slick of shiny and in so doing, the product becomes quite slippery and difficult to hold.  Not so with the Hoodman Loupe, as the rugged rubberized exterior was nicely made, and I was pleased to get an easy grip on it.  Although easy to hold when in use, I was not as thrilled with the ease of porting.  The short trap that they provide to carry it around your neck is much too short for me.  Now granted, I am 6’1”, but certainly no giant, and the size was just awkward for me.  While the quick release snap does attenuate it to a certain degree, the idea of keeping it tethered somehow is a little more reassuring (I have a penchant for losing small items when taken away from my body…LOL)  The accompanying carrying case was a nice addition, but did serve to really make it easier to carry…this seems to only serve as a storage container for when not in use so you can differentiate it from other gear in your bag.

I did recall after using this that a DIY solution was suggested by Larry Becker, of NAPP notoriety (he does the weekly NAPP News segments and writes his own blog at Larry’s Cheap Shots), and think his belt clip idea is both innovative and and highly functional.  If the folks at Hoodman made this accessory and slapped their brand on it, I’d be half inclined to purchase the entire kit from them directly.

It’s a fairly simple idea in total, and not much else to say other than – it works!  The sturdy construction, and compact nature of it is perfect for any photographer who wants to utilize their LCD.  For those of us with older cameras where shutter, aperture, ISO, and all other settings done via dials and the top viewer, it may not be as relevant, but for shooters using more recent gear like the Canon 50D, 60D, and 7D, the back screen is used much more to make these adjustments, so a device like the Hoodman Loupe could be a huge aid in making sure you’ve got your settings where you want them.  For $80, you almost can’t go wrong!  This is definitely the accessory you never thought you needed, but you really did!

Remember, this very Loupe is being given away at the end of the month, so for your chance to win this cool accessory, don’t forget to submit your BLOCK themed photo in the Flickr thread here.  Good luck to those who enter, and thanks again to the folks at Hoodman for their sponsorship and contribution!

The Permanent Portfolio Photo?

One of the cardinal rules I’ve always heard in the field of photography is to update your portfolio often – show fresh work to show you haven’t stagnated, and that your creativity is always expanding and changing with the styles and facets of the times.  On the flip side, I know of many photographers who quietly admit that they have a stable of “permanent portfolio shots” that they fall back on to use in promotion and marketing mechanisms if they haven’t had new projects that they want to promote.

Leave it to the Libra, but for me, I can see both perspectives and understand the pros and cons of each.  To those ends, I’ve not really made up my mind.  Sometimes I waffle one way, other times I go in the opposite direction.  It’s never good to stagnate, but I do think that some photography is timeless, and to that end, some photos are worth keeping in your portfolio.  I’ve got a few that I know will always be in mine, but others I rotate periodically.  Here’s one of my all-time favorites:


What do you do with your own portfolio?

A Few From the Fire House

Nothing tip-related, tutorial-esque, or educational today, just thought I’d share some photos from one of the local photo clubs I participate in regularly.  One of our members is the on-staff photographer, and was able to get us permission to take photos for an entire session.  We even got one of the guys to get in his gear and do some shots with us.  Devin is the guys name and he totally was cool with our posing instructions and everything – this guy even kept this super heavy fire hose on his shoulder for like 30 minutes while we had him stand and pose, looking in various directions and holding his head a certain way.

So, without further ado – here’s a few samples/selects from what I am affectionately calling:

The Fire House Shoot

Fire House 1

Fire House 2

Fire House 3

Fire House 4

Fire House 5


And to close out the series, one that struck me while there was a scene that reminded me of why we have these courageous men to serve and protect us…

Fire House 6


The poses that Devin struck were directed courtesy of yours truly (stop back in later this week for more details on the posing techniques I used), and all post processing was done using your favorite photo editor (and mine):  Adobe Lightroom!


Adobe Lightroom 3

Thanks to Tim Tonge for organizing the event, and to the brave men of Castle Rock Firehouse for tolerating our presence for an afternoon!

Spring Photo Projects

With Spring in the air (if not already sprung), many of us are out and about brimming with photo ideas after being couped up for a chilly winter.  What’s that you say?  No photo projects brimming yet?  No problem – here’s a few to get you started:

1.  The Call of the Birds: Avian photography has always been something of an art form, with many of the hard core, die hard types venturing way out into the boonies of mountains, hills, lakes, and other far-reaching places.  For the rest of us though, it’s tough to find the resources (time and money) to go to the birds, so another option is to bring the birds to you!  Buy some bird feeders and see what comes!  My folks have several bird feeders in upstate New York, and every time I visit, there are birds flying everywhere.  Pine cones with peanut butter, humming bird feeders with sugar water, and even just a plain old bird bath with feed from your local DIY store can bring a bounty of birds to your doorstep!

Avian Photography 1

Avian Photography 2

2.  Join a photo group: We’re everywhere!  From ASMP groups to NAPP groups, Meetup groups, and WPPI, you can find groups for pretty much anything ranging from professional development, to studio lighting, and just groups of photographers that like to get out and shoot together for the love of the craft and the camraderie of it all!  I’m a member of several local groups, all via the site Meetup.com, and I don’t have to pay a cent to participate!  (I do contribute though, just because I like supporting such efforts…)

3.  Shooting in a park:  Get some photographer-friends, family-friends, or just some friends to join you in a park.  Set up a blanket, a few light stands, and have some park-type food available:  (crackers, cheese, water, whatever).  Add an ipod with some speakers for a little music.  Offer gag prizes for people who dance, act silly, or pose for the camera.  Process the photos and post online so they can share, download, add to Facebook, Twitter, or print!  Low cost, fun, and helps to build your portfolio!

The ideas are only limited by your creativity!  Got your own ideas for photographic opportunities this Spring?  Sound off in the comments to share, encourage, and inspire others!  Happy shooting, and we’ll see you back here next time!

P.S.  Don’t forget the April photo contest on Flickr – win a BacklitBox of your favorite photo!  Flickr Contest Thread


8 Megapixels…

When I first transitioned to digital photography seriously, my camera of choice was the Canon Rebel XT. In that camera I found a whopping 3 frames per second, 8 megapixels, and a host of other features and benefits that go with SLR photography. The times, how they change…

My Droid2 smart phone bit the bullet (this was the third one of these to die prematurely), and Verizon in its wisdom decided I needed to go to a different model phone.  After several logistical problems with getting the correct battery shipped for the correct model to the correct address, I finally got a battery for the new phone, powered it up and activated my number on the new line.  Imagine my surprise when I found out that this new phone has…yup:

8 Megapixels!

It staggers my mind that they can fit the same number of pixels on this teensy sensor that used to fill a sensor for an SLR.  My hesitancy at embracing this MP count is that there will be excess noise, and pixelation on the images.  While the smart phone features (phone, email, Facebook, Twitter, etc.) look to perform adequately, the camera is always a point of contention for me as I wish these phones could adapt somewhat and figure out a way to have an adjustable aperture.  If you can fit that many pixels onto that teensy a sensor, surely the aperture could be adjustable!

This could just be me ranting on quixotically though – so, here’s a sample image at full resolution (click it to see full size).  Does this seem decent enough for a camera phone?  Sound off in the comments with your own thoughts on cell phone cameras – what features are good, what should be thrown out, and what should be improved?  (No carrier bashing please – try thinking of this as carrier agnostically as possible! 🙂

Droix X Test Shot

That Face!

Last week I wrapped things up with three tips for posing your subjects better, and boy did that launch a flurry of questions…so many that I think the next podcast will be dedicated to tips on posing your subjects.  There’s so much to take into account, it really shouldn’t be that much of a surprise.

However, until then a few nuggets here and there will have to do.  (I am trying to coordinate with friend-of-the-blog Kevin Mullins to have a go at a podcast and this would be a great subject for him as he’s an accomplished wedding, event, and photographer from across the pond.  Kevin, I promise we’ll find a date here soon!)

So, the nuggets for this week are facial features – because at the heart of the portrait photographer is bringing out the beauty in your subjects’ face!  Here’s a great set of tips for bringing out the best in your subjects!  When shooting subjects it helps to keep in mind the three basic facial positions:  full front, 3/4 pose, and profile positions:

Three-Fourths view

Three Fourths View


Profile View


For subjects with round or wide faces, it helps to raise the camera angle slightly so as to look down to them just a little bit.  This elongates things a little more and minimizes the width perception.  It also helps to approach them with a pose that has a 3/4 look rather than a full frontal look.

For subjects with a thin face, just the opposite holds true – have their full face looking toward you with the camera and try to keep the camera at eye level with your subject.  Going up or down below their eye level will only serve to elongate a thin face even more.

For subjects with a large nose, it can often help to have them also face the camera directly.  By doing this, their nose will point straight into the camera to help minimize its size, and lets viewers see the rest of their pretty face!

For subjects with a smaller nose, it’s time to shift back to the 3/4 look…this will bring more depth to their face and “enhance” things a little…

Other tips I’ve picked up that are not specifically related to facial positioning include things like:

  • People Deep-Set Eyes – Point light into their eyes. Light coming too far from the sides will accentuate the depth.
  • Glasses – Bounce the light off the ceiling where possible. If not, position the subject so that glasses are pointed away from the lights.
  • Dark Hair – Make sure that the background provides enough contrast so hair doesn’t just blend into it. Hair lights or a light on the backdrop are extremely helpful. Also make sure the background doesn’t show through hair.
  • Double Chin – A slightly higher camera angle will be more flattering than straight on. It also helps to have the subject leaning forward.
  • Large ears – Use a ¾ face pose or a profile.

There you have it!  Great ways to capture portraiture, specifically when working with facial angles.  Special thanks go out to my good friend Evan Ashenhurst for sharing some of his portfolio for this article.  You can see more of his work on his website at:  Ashenhurst Photography

A final footnote – since I will undoubtedly get a few questions about which lenses are best to shoot portraiture with, my favorite is the nifty fifty actually.  Amazingly sharp and the 1.8 depth of field is to be envied among all glass.  If you’re in the market for a portrait lens, you’ll definitely want to check this bad boy out.  Here’s the Canon-mount, a steal for less than $150 retail!

Canon Mount 50mm 1.4

Focus Stacking: A Primer

With all the talk and hooplah over things like dynamic range, HDR, Megapixels, and the latest and greatest bells and whistles in photography, some of the staples in composition are often over-looked.  Focus stacking is one such area.  Most folks kind of look at me quizzically when I bring this topic up, primarily because it is rather niche and unique, but it does rely on principles of composition that have been around for a while.

First off, focus stacking is used mostly in genres like macro photography, where intricate detail is needed across a range wider than what the aperture will allow for during composition.  The principle is much like the layered approach to HDR imagery – where you stack layers of images with different compositions on top of each other and blend the right portions through the entire image.

Where focus stacking differs from HDR is the types of images that you are layering.  In HDR images, you are compositing images with different exposure values over one another.  In focus stacking, you are not changing the exposure values, rather just the point of focus.  As depth of field drops off both in front of and behind your focusing point, the subject will blur.  While this may be an appreciated blurring technique in some cases, in other cases, getting different depths of field from different focusing points can make for a tack sharp macro throughout the range of the subject.

As is most often the case, explaining a photography concept is best done with images, so let’s take a look at an example.  For easy demonstration, I took a white cordless phone and placed it on a black background.  This way color issues are kept to a minimum…

First Focus Point

Notice on the first focusing point, the sharpest point is right near the front?  It also quickly drops off into the background as I was shooting at f2.8  The low aperture number means I will have a very shallow depth of field, which is what is causing the blurred background.  To bring the rest of it into focus, I need to “stack” more shots that have a different point of focus.  So, let’s add another few to the composite:

Second Focus Point

Third Focus Point

Fourth Focus Point

Fifth Focus Point

The end result from stacking all these together can be accomplished by any one of a number of methods ranging from the most time-consuming of doing it manually inside Lightroom or Photoshop, and the most efficient one of using 3rd party software.  While several options do exist, the one that has become pretty much the industry standard is that of Helicon Focus!  Their quality of processing is, bar none, among the best I’ve seen.  More on that likely later this week.

In the meantime, here’s the result of an image that has been focus-stacked:

The Final Result

It’s a quick edit, and done with only having focus-stacked 5 images.  If I wanted a really detailed depth of field on something more important than a cordless phone from circa 1990’s, I’d likely have taken at least 10-15 images and massaged them through Helicon Focus more carefully.  More details on this entire process are coming up later this week, including reviews of the Tether Table (which will be given away this weekend as the March contest comes to an end), Helicon Focus, and the light triggers from Blackbelt Lighting.

For a behind-the-scenes footage video, stop over to the Facebook page!  (Be sure to “like” it and share a comment while you are there…)

Turning Tasks into Photos

I had to bake bread for a work potluck today.  That’s ok, I like cooking, and it seems others do too, because most of the time the dishes I serve are some of the first things to disappear.  I decided last night to do something simple, but often popular:  banana bread!

When it was done, the house sure did smell good from the caramelized sugar, bananas toasting, and who doesn’t like bread?  (I know, I know – lots of carbs aren’t good for you…)  But, every once in a while it’s fun to indulge.  As luck would have it, this particular loaf of bread had some nice colors and tones to it, so naturally, I started thinking about my other hobby – photography!

With bread there’s so much you can do from capturing details, to using a shallow depth of field, to creative lighting and shadows, everything becomes a cornucopia of possibilities.  Here’s a few of my selects from just ten minutes of prep, 60 minutes of cook, and ten minutes of shoot time!

Banana Bread 1

Banana Bread 2

Banana Bread 3

Banana Bread 4

Banana Bread 5

Want a slice?  What tasks have you taken and turned them into photo opportunities?  The lesson learned here today (hopefully anyway) is to take something you have to do and make it something you want to do!  In this case, it was a win-win scenario for me, but what about you?  Sound off with your own fun-filled (or food-filling) photo projects!

Podcast #56: Is Blogging Dead?

Twitter, Facebook, microblogging, blogging, Audioboo, websites, statistics, logos, graphics, web design and more!  It’s a lot to take in and more often than not photographers who are just getting started ask me “Which ones should I choose?”  It’s a tough question because there’s no unilateral catch-all answer that will fit everyone.  As always, the answer starts with “It depends…”

So, to better address the question I decided to bring in a pro who deals with this stuff all the time.  That’s right ladies and gentlemen, we have another podcast! This is episode #56 of the LDP show, and I shared about an hour or so with Kirsten Wright talking about social strategies and best approaches and practices.  It’s an entire industry, and there are some who claim to know and then those who really do know their stuff.  Kirsten comes with some impressive credentials and a fresh outlook/perspective that many of us need.  It’s a good kick in the…well, a good way to get motivated to get going in the right direction!

Make sure you check out her site over at Wright Creativity and make sure to add her on your Twitter, Facebook, LinkedIn feeds, and everything in between.  She’s got gems and nuggets of brilliance galore to share.  I’m booking her soon here to help me get things streamlined (in case you haven’t noticed, my schedule has not been as consistent lately as I’d like it to be – Kirsten is my kick in the #$%^!)

If you need some focus, direction, and a good reality check, Kirsten is the one to give t to you.  Get it for free here in the latest episode of Learning Digital Photography:  Is Blogging Dead? with our guest of the hour – Kirsten Wright!

[display_podcast]

Planning a Photo Walk?

Getting together with fellow photographers is always fun – lots of other like-minded people, plenty to talk about, and great for networking, right?  But, at some point you’re gonna have to start walking around and taking pictures.  I’ve found with most photo walks that I’ve attended it helps to have a game plan.  Whether you are the organizer or an attendee really doesn’t matter too much because these tips are intended for both.  Here’s what I mean:

1.  Check the weather – It’s always important to dress the part, and the last thing you want is to be under-dressed (cold) or over-dressed (too hot).  It’s a good idea to check the forecast and to dress in layers.  Allow yourself a layer of removal or addition if needed.  I have several apps built into my Android phone, as that makes it quick and easy to check both the night before and the day of…here’s the four I’ve heard the most about (I use #1)

  1. Accuweather
  2. Weather Channel
  3. Weatherbug
  4. iMap

2.  Check the map – With the abundance of online mapping utilities like Google Maps, Yahoo Maps, and Mapquest, it’s easier than ever to see where you will need to be and plan your travel time to the starting point accordingly.  I always allow about 15 extra minutes in case of traffic, Starbucks stops, or other time killers… (if you’re the organizer, publish or share your route with the group so people know where to meet and where the anticipated walk will take everyone…)

Google Map of USA

3.  Check your gear – I’m guilty of forgetting things myself on outings, but it helps if you have a checklist to reference the night before when packing (batteries, memory cards, business cards, cell phone, camera, lenses, etc.)

Gear Check

4.  Pick a theme – Whether you are the organizer or an attendee, it helps to at least have a starting point or an idea of what the goal is of the walk.  For instance, on a trip to the Columbia zoo a few years back, one attendee picked a theme of “faces” and came back with some incredible portraiture of the animals in their various habitats.  Often photo walk leaders or organizers may start with something general like “architecture” in an urban location, but it can help to narrow that for your own creative vision to get more detailed.  Narrowing the theme of architecture to something like vertical lines, arches, or even something as simple as windows can help spark that creativity needed to make photo walks productive.  Don’t forget to check with other photogs on their creative path and help and encourage them too (which could be a tip in and of itself!)

Signs of Encouragement

5.  Be ready to adapt – Circumstances change, weather can change, and even the scenery can change.  I was on an outing just last week to capture the moon at its perigree and the skyline was pretty blatantly thrown off by the recent addition of a crane to the area. If you aren’t able to adapt to changing environments, outings can be less than satisfying, so be open to change at a moments notice!

Bad Skyline Shot

That’s just five of many tips and ideas on how to make photo walks successful, enjoyable, and productive.  As always though, there’s plenty more where that came from!  What about you?  Have you been on any recent photo walks?  What’s worked or works for you when you go on outings with fellow photographers? Sound off in the comments with your own ideas!