Galleries Addendum

Yesterdays post on how to get into galleries generated some great questions and comments both via email and on the blog, so in the interests of keeping that interest and momentum going, here’s a few more tips on Getting Into Galleries, courtesy of Dave Warner from LensFlare 35 and Rich Charpentier (who I’ve interviewed here on the podcast).  Thanks guys for chiming in and offering your assistance!  Onto the 5 additional tips:

  1. Make sure the gallery shows photography – if gallery owners deal primarily with paintings, sculptures, metal work, and such, the odds of being accepted are much less.  This involves actually doing a little research into the gallery.  Perhaps a visit or two during different showings could help determine whether the venue is appropriate for your work.
  2. Make sure the gallery shows your type of work – if you are primarily a landscape artist and the gallery primarily shows urban gritty work, portraiture, or architectural types f work, then again, reconsider the venue.
  3. Contact the gallery – let them know you are interested in being considered, and give a few small samples via email.  Ask if you can schedule a time to visit with them.  Like Dave and Rich said, nothing can be a bigger turnoff than showing up unannounced and possibly interfering with a scheduled appointment or client sale.
  4. Be professional – treat a prospective gallery showing like a job interview.  Just like you wouldn’t want to show up with 4×6 photos in a binder album, also don’t show up on site wearing cut-off shorts or be un-groomed.  It’s not just your work that is being considered, it’s YOU.  If you are accepted into the gallery, in all likelihood, they will want you there for the opening day, so people can meet you, learn about you and interact with you.  If you don’t present yourself with your best foot forward, then clients and gallery owners will probably be less interested.  Once you are big and famous, sure, being unkempt can be part of your “flair” or quirks, but until then, you are just messy!
  5. Be prepared to be told no.  It’s tough to hear, but don’t take it personally if at all possible.  Running galleries is a business, and when it comes to running a business, it’s not personal – it’s just a business decision.  Consider also that gallery owners get many many requests from aspiring artists, and simply do not have room or space all the time.  In the most recent podcast, Matt Timmons mentioned this briefly.  Just because someone says no, doesn’t mean a lifetime of “no”.  It just means “No” today.  Ask again in a few months.  Sometimes people like to see persistence, especially if your craft is getting better.

So, there you go, two days of tips on getting into galleries!  Ten tips total, so go forth and good luck!

Speaking of luck, best of luck to everyone who has been submitting their “Numbers” themed photo contest running right now over in the Flickr forums.  I took a quick glance this morning, and there are just shy of 50 entries.  Amazing given that only one entry is allowed per person!  And there’s still time – you have until midnight tonight to get your picture in.  The winner will walk away with a free copy of the OnOne software Plugin Suite (valued at over $500 retail)!  If you are thinking of getting in the game, now’s the do-or-die moment.  Like they say in lotteries – you can’t win if you don’t play!  Here’s the link to get in the game:  Numbers Contest

Have a great weekend everyone – Happy shooting and we’l see you back here next week for the latest and greatest in photography news, nuggets, interviews, reviews, and all that goes into Canon Blogger.  We’re closing in on some pretty fun dates, including the 500th post, the 2 year anniversary of CB, 1000 Twitter followers, and much more, so be sure to pick up the feed.  I know I had mentioned the next contest on the podcast as well, so be sure to stop back in Monday for the news on what the theme is, and to pick up the tag on Flickr for the thread.

Grab the Feed

Mask Pro 4.1

Okay, I know the folks from onOne have been very generous with their contribution of a copy of the OnOne Plugin Suite for the latest giveaway here at Canon Blogger/Learning Digital Photography, but I have to say that I am literally blown away by this offer even more.  As I delve into each tool more and more, I am totally amazed at the functionality and how easily it really makes things.  For those of you that watch Photoshop User TV, you’ve seen what I’ve seen – ads from OnOne claiming that masking is made so super easy that you can swap backgrounds and composite images together in a snap – it’s a breeze, right?

Well, we all know that ads only show you the quick and flashy parts of things, not the nitty gritty.  Let me tell you here and now – the Mask Pro really has no nitty gritty – it really is that easy.  Take a look at these sequences:

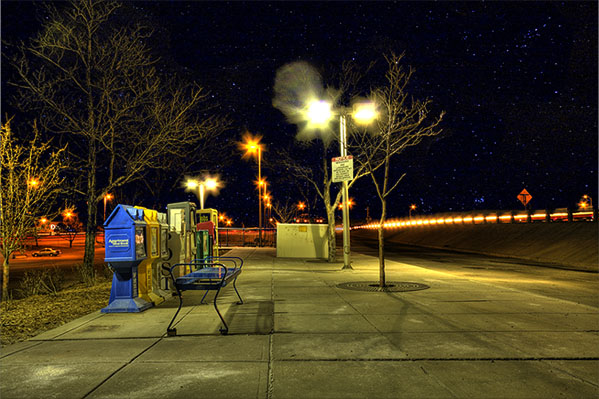
First off, an image I merged together during a trip to SC last summer.  It looked like it could make for a nice HDR, so I did some tone mapping and got this result:

originalhdr

Needless to say, it didn’t really have the “wow” factor I was looking for.  (I should also throw a mention in for the folks at HDRsoft that produce Photomatix, the HDR software utility that I was testing at the time I originally put this HDR together – still working on a review of that – I lost the trial version after re-installing XP, but will get that back shortly.)  Anyway,  given the success I’d had with some other images in HDR and the background I tried, figured it was worth the effort to blend in a different background.  Here’s the results.

hackjob

Keep in mind, this was after literally hours and hours of painstakingly selecting branches, twigs, and  what not literally zoomed in to almost the pixel level.  Still, not that flattering a result and clearly a less than “stellar” job.  I relegated that to the “learn from your mistakes” folder and had not really touched it since.

So, this was my test for the Mask pro – could it do what I couldn’t after at least ten hours of agonizing masking selections and duping to repeated layers to start up the following day?  Well, let’s see, here’s what happened.

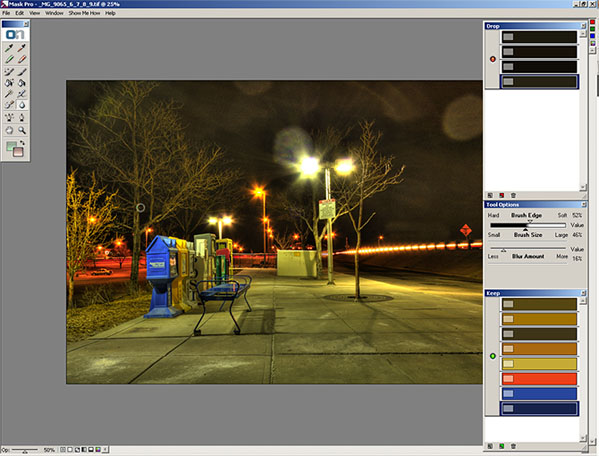
After installing Mask Pro, I loaded the tone-mapped HDR image into Photoshop.  Then, rather than taking any time to tweak, I went straight to Mask Pro (after all, it should do the work for me, right?).  After a short 7-slide presentation on the tools, my first screen looked like this:

maskpro1a

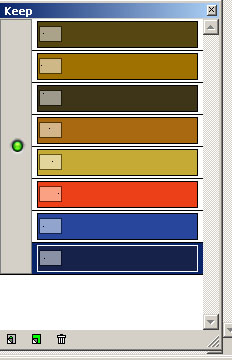
Before I go on, let me explain how the tools on the right ended up how they were.  You see, Mask pro gives you eye dropper tools to select the colors you want to keep and the ones you want to subtract.    So, I went and selected the green eye dropper to define the colors to keep.  I clicked a few parts of the branches and signage, which took the better part of 5 seconds.  The end result was this color set:

keep

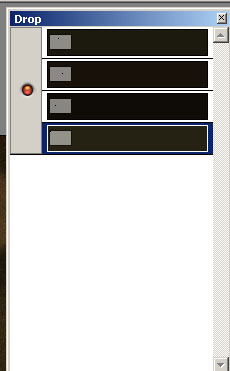
Then I switched to the red eye dropper to define the colors to drop.  I clicked a few parts of the sky.  This took another 5 seconds or so.    The end result was this color set:

drop Lastly, I clicked the Magic Brush tool, from the Mask Pro tool panel maskpro_palette

and just started painting around the sky.  I certainly did not take my time, as I was running on my Windows desktop which has a single core 2.3 Ghz celeron processor (it chugs when I load my browser fer Pete’s sake).  So, I dealt with about 5 minutes of a magic brush tool as it calculated the mask to apply as I painted impatiently across the image.  (After all, I wrote these blog posts after dinner, so time = sleep here.)

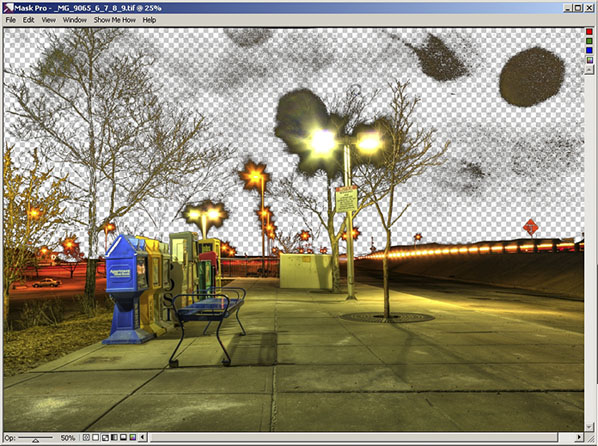
So, after about 5 minutes and 10 seconds, I have a mask that looks like this:

maskpro2

Yes, that was after 5 minutes!  I could already tell this was a wickedly intuitive and powerful tool (and I mean that in the best of ways), so I just stopped there and decided to take it back to PS for final cleanup and adding the new background.  To do that, I simply clicked the File menu, then “Save/apply” (another 2 seconds)…

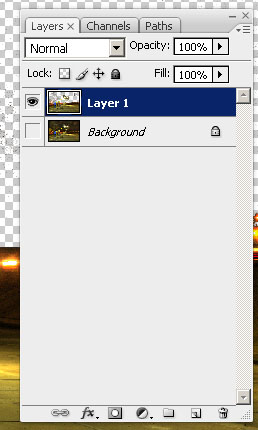
Now back in Photoshop with the original image.  It looks the same, but take a look at the layers palette:

layers2

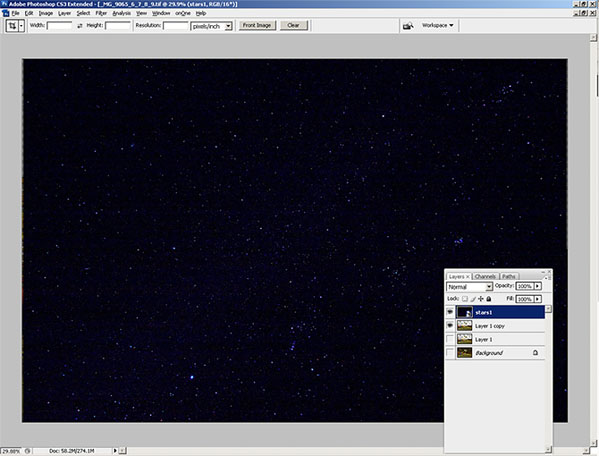
I know the low-res and smallness of captures for the blog make this hard to tell, but at this point I am pretty much ready to bring in the new background.  My only last step in PS is to duplicate the layer I just created from mask Pro to clean up the big blotch in the upper right, and a few specks in the rest of the sky on the third layer.   So, now I am ready to bring in my starry background again.  I place the object in the PS document to get this (for the record, I went with a different starry background to go for a more realistic effect rather than the Harry potter look of my swimming pool shots):

layers3

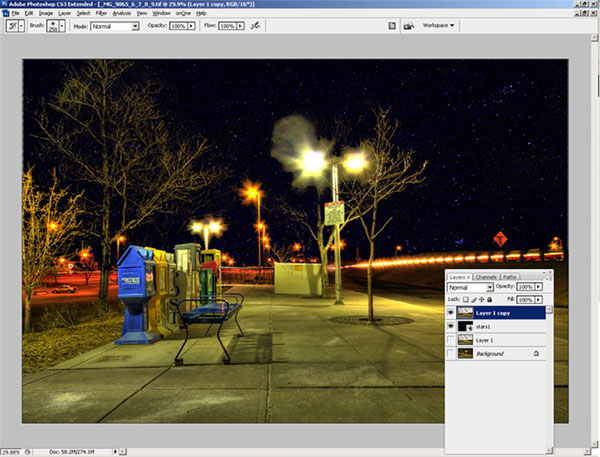
Finally, I just pulled the stars layer to sit below the Mask Pro layer and here’s the resulting layout in Photoshop:

layers4

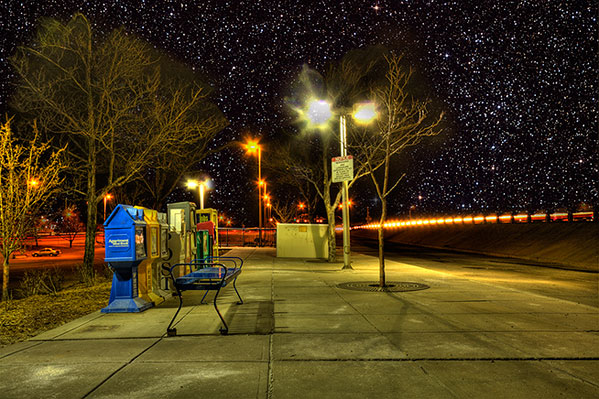
The last bit took all of another minute, tops (remember, I am working off a slow processor.  The final result, which took literally less than 10 minutes (the first took over 10 hours):

finalhdr

Such is the power of the OnOne mask Pro – just one of the multiple plugins that are available in this Suite.  If you want this kind of power and malleability in minutes, then enter the giveaway today.  it can literally save you hours, if not days, of post processing!  Here’s the Flickr page for photo entries and here’s the link to the rules.

What can I say – OnOne rocks!  Just to give you a true frame of reference – it took me about an hour and a half to write this post – and that includes getting the screen captures, then sizing them for the blog.  I also interspersed some Twitter time and surf time as well, so it’s not like I was really in any kind of “zone” or anything.  It was just another task in an evening of multi-tasking.  The original one took me over ten hours of processing and that was with no other apps running, seriously.  I was restarting the computer just to free up the RAM for usage only by PS every evening.

This feature alone can save you days of time in the digital darkroom.  Don’t delay and enter to win today! Happy shooting and we’ll see you back here again tomorrow.

Grab the Feed

Let me count the ways…

The age old phrase of “let me count the ways” seemed like as good a theme as any to announce the newest contest from the blog here for the Learning Digital Photography podcast.  I just got word from the folks at OnOne software that they really liked the post on Genuine Fractals – so much that they would like to participate in a giveaway!  Can you guess the prize?  Yup, that’s right, the entire OnOne Plug-in Suite:  4.5!   This is an amazing offer, as the package normally retails for $500!  That’s five hundred big ones!  I don’t know about you, but if I had an opportunity to win a software package worth $500, I’d certainly stand up and listen…so, since we’ve got this contest announcement for the month of July that involves software, there will be no software review today.

Oh yeah, so anyway, that’s the prize package.  How do you enter?  Easy – just like the last couple of contests – it just requires a little participation.  A new thread will be set up on Flickr for people to contribute photos.  (It’s already live but entries will not be accepted until midnight Mountain time tonight.)  Here’s the rules:

  1. Since the contest sponsor is onOne – then the theme shall be Numbers.  I am not going to interpret or give any ideas here, but if your photo incorporates something to do with numbers (any number, multiple numbers, use of numbers, whatever), then it will be accepted.
  2. Join the Learning Digital Photography Flickr Group – the images will be shared in there anyway, and this is a great way to see other inspirational images from people that are regularly contributing to the common pool…just make sure you post your images in the thread titled Numbers Contest (easily linked for you right here)
  3. Photos will only be accepted for the month of July (and that are uploaded during that month, so no archived images will be accepted)  Only 31 days to enter so get clicking! 🙂
  4. One photo limit per participant.  Sorry all, but with a prize package this huge, I know there’s going to be a lot of entries, so in order to make judging easier one entry per person.
  5. Photo manipulation is acceptable – after all, it’s for a prize that encourages massaging those pixels, so edit away!  However, you just be the original copyright owner of the photo used – no “borrowing” the work of others.  People found using others images will be removed from consideration.
  6. Images should be no larger than 800 pixels on their longest side, and no shorter than 600 pixels on the longest side.  If you need to upsize a photo, use the onOne Genuine Fractals trial!  🙂  On that note, please also refrain from using digital frames to increase image dimensions – images with frames that advance will be cropped.
  7. By submitting images, you agree to allow your photos to be featured in the web gallery and here on the blog without expectation of compensation.  The three finalists will have an opportunity to have their photos link back to their Flickr Stream, website, or blog if they like as the finalists will be notified of their advancement one day in advance of being featured on the blog.
  8. The product is being offered by the folks from onOne on the basis that it is NFR – not for resale.  The prize cannot be re-sold to someone else.
  9. Judging will be done by myself and I have one representative from onOne who will also assist with making the determination.  Decisions of the judges are final.
  10. There will be three rounds of judging:
    1. As in the past, the initial pool will be whittled down to ten and the images collated into a web gallery for display here on the blog.
    2. Three finalists will then be pulled and featured here on the blog for a final day or two of consideration.
    3. Last, the grand prize winner will be declared after even more careful determination from all participating judges.  OnOne has generously donated their time for judging as well, so we’ll compare notes and come to a mutual consensus to determine the winner.

Good luck to everyone and have a Happy month of Shooting!  Thanks especially go out to the good folks at OnOne for their generous contribution of the Plugin Suite 4.5 Software for some lucky reader/listener/participant.  Happy shooting and we’ll see you back here tomorrow!

Grab the Blog Feed

Rate the Podcast on iTunes

Digg the Podcast on PLM