Is HDR really cheating?

HDR, or High Dynamic Range, imagery refers to the process of representing a wider range of colors and light in a photo than what can be traditionally captured in a single image with a camera.  There are several ways to produce this HDR-effect.  The most common way to produce HDR imagery is to take several exposures, by both under and over-exposing the same scene by several stops, and then combining them in post-production.  This process brings out details that would traditionally be lost in both highlights and shadows from normal photography.  There are two schools of thought here really on HDR:

1.  The first school of thought is that we should adhere to the accuracy of what it is the sensor is capturing.  By allowing for interpretation and manipulation of the pixels, photography is no longer the means of reporting things – life, as we know it!

2.  The other school of thought is that pixels and cameras are simply a means of capturing a limited portion of the world around them, and that even the human eye is capturing more in a single instant than any single still image could ever hope to capture.  With that in mind, it is the job of the photographer to bring to life what it is they see, and use the tools available to them to bring that image to life, whether it means performing HDR, sharpening, white balance corrections, or anything!

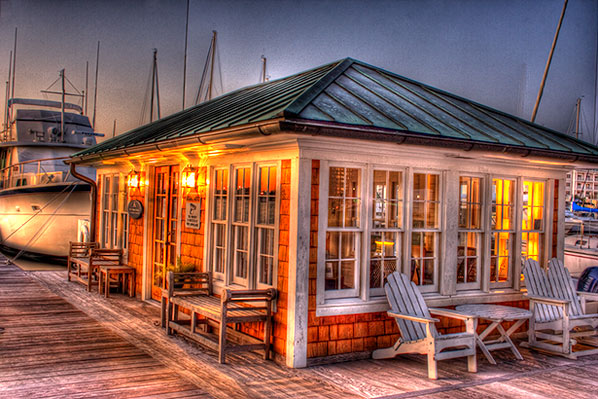
Now, keep in mind that there are always exceptions to the above two schools of thought.  Journalism for instance, requires accuracy and not making adjustments as it really is meant as a reporting mechanism not an interpretation or individual perception of what is scene.  While I am not sure where my own line of thinking really ends up on this very polarizing issue, it does seem that perhaps there is a time and place for it.  Again, with all subjective work, there is a certain degree of personal preference and bias – and this also speaks to the second point, because some HDR can be really really good, while others can be really really bad.  Nevertheless, for my two cents, it does seem that occasionally, there is both a time and a place for HDR.  During such times,  I’ve tried a variety of approaches to utilize HDR while also keeping some measure of reality in my photos.  Take for example, the three images below taken at different shutter speeds, while keeping ISO and aperture constant – thus creating several different exposures of the same scene:

HDR base Images
HDR base Images

By combining and basically “stacking” each of these images inside our post production work flow, we can bring out the details in the shadows from the first image (down in the golf course area), bring out the details from the highlights (the clouds), while maintaining the clarity of the neutrally lit areas in the middle of the photos (the rocks and pool).  While there are several ways to do this, including Photomatix, HDR Pro (the one native to CS5) and several other Photoshop and Lightroom plugins like what Topaz Labs, Lucis, and OnOne’s plugin Suite), here I am using the HDR Pro function inside of Photoshop CS5.

HDR Pro Sample
HDR Pro Sample

I did choose the option inside the HDR Pro menu to select a more saturated image than what was originally created in camera, and it is more reminiscient of what I actually saw.  So, am I cheating at what I created?  Is this a “real” photo?  What if I were to take another approach, and simply make some adjustments on a single image?  Back to the digital work flow I go…and here is a single shot edited in Lightroom:

Lightroom HDR
Lightroom HDR

Now, while there are clearly some slight differences in tonal range, saturation, and such, there are two things to keep in mind:  1 – I was making these edits pretty quick, and 2 – this is the Internet, which makes color accuracy a difficult thing to achieve.  It does serve to illustrate that you don’t necessarily have to stack images in Photoshop to achieve the HDR look.  Simple slider adjustments in Lightroom can approximate the same thing.  As mentioned above, there are also a number of third-party plugins and add-ons that can bring this effect to life.  Regardless of what the consensus is, HDR is likely a technique that is here to stay, and it’s simply a matter of experimenting and finding a technique that works for you, and that your clients, or colleagues, or friends and family, will find appealing.

This is, of course, just my personal take on HDR.  What about the rest of the readership?  Any thoughts on the legitimacy or validity of HDR?  Does it work?  Can it work?  Or should we stick to trying to capture it all in-camera – on a single frame?  Sound off in the comments or via email!  Thanks for sharing your own thoughts, and we’ll see you back here tomorrow!

ETA:  Don’t forget – a couple contests are going on through November and the rest of the year:

1.  Monthly LDP Giveaway – Share your own “POP” themed photos for a chance to win a pack of pearl metallic paper from the folks at Red River – this paper is awesome for HDR-styles of work!

2.  The Nations Photo Lab Family Photo Day – Upload your images to their Flickr Page for a chance to win a pretty impressive set of prizes including autographed books, free printing certificates, and much more!

Does Fall Foliage Make for Good HDR?

One of the best tips I’ve ever received is to look all around for photos – even in your own back yard.  Over the weekend, while on the daily dog walk, a few scenes happened to catch my eye.  Not satisfied with what the camera phone could do, I quickly came back to the house and got the SLR out.  A few minutes later, started capturing some of the scenery that remained of the fall foliage that is still present at the lower elevations.  The next thing I knew, I was looking up, looking down, looking behind me, and poof – I had a whole new set of images for a “fall foliage” collection!  These are the types of images that definitely benefit from some subtle HDR processing both to enhance the colors, as well as bring some light to shadowed areas while allowing for the lighter whites of the clouds.  Here’s some of the scenes I captured from just this one outing:

Yellow and Blue
Yellow and Blue

Iydillic Scene
Iydillic Scene
Orange, Red, and Blue

Yellow, Green, and Blue

Colors Colliding
Colors Colliding
Going Low
Going Low

As you can see, the subtle HDR processing really added something to the photos.  Is it good?  Is it bad?  As in most things artistic, there is something of a judgment call involved.  Perhaps an important side note here in learning more about composition is to realize that something came out of an otherwise normal exercise (taking the dog for a walk), and in looking all around yourself, images are available everywhere.  Where should you look for your next photo?  Right there!  You just have to know to look for it!

Happy shooting and we’ll see you back here again tomorrow!

Creating HDR Panos with PTGui

A while back I had approached a few companies about putting together an article on how to create panoramas.  One of those companies was PTGui – and I’ve finally had a chance to put together a few images through their software to take a look at the processing and stitching quality.  First impressions are good…what I especially liked is that the software has the ability to render both panoramas as well as HDR processing algorithms.  While a dedicated work flow that addresses panoramas and then a separate work flow to address HDR work may yield better results, I’ve gotta say that PTGui does an impressive job for a multi-function program: Continue reading “Creating HDR Panos with PTGui”

Accidentally interesting

Last night I was working on a deadline for the PhotographyBB March Magazine issue (check for that to come out shortly – another couple weeks), and found myself trolling through my archives of images searching for examples to help illustrate my point.  I came across a shoot I did solo a while back where I was down in South Carolina.  I was on a dock trying to catch the fading sun to the west, and catching your stereotypical sunsets in SC isn’t easy because there’s too much LAND in the way…not enough water!

This was actually where I first learned the value of checking your entire surroundings because sometimes the best shot may be behind you.  I turned around and caught this image:

Plain Boathouse

Nice enough, but not really something I wanted to include in a portfolio of sorts to include in the now well-known PhotographyBB Magazine!  Then I noticed something…apparently I had tried multiple exposure settings while on a tripod…I was bracketing!  I had the same f-stop, same ISO, but the shutter speed was changing.  Back then I was shooting with my venerable XT (now sold), and the whole idea of bracketing and even HDR was just not even close to being on my radar.  Yet here I am now years later, trolling through archives with an opportunity to go back in time.

So, I pulled the 4 or 5 images together, cobbled them over to Photomatix and ran some tone mapping (didn’t even look at the settings, just was testing a whim to see if it would produce anything).  Well, let’s just say it was…interesting.  It clearly showed my sensor was absolutely filthy (sky splotches everywhere), and I clearly hadn’t learned the fine tuning of checking the edges or even cutting off important lines (like ship masts) from the composition.  Nevertheless, the result was…accidentally interesting.  I’ll leave it to you to judge:

SC Boathouse

RMNP – The Outtakes

As you may recall, the photo walk group for Denver made another sunrise attempt at RMNP at Bear and Sprauge lake last weekend.  Since the sunrise wasn’t what we’d hoped (the weather doesn’t always cooperate in landscape photography), we journeyed on, and stopped at a really nice place for panos.  While we were milling around, I did capture a few of the crew and some actually held some promise.  Here are a few of the “RMNP Outtakes”:

Outtake1

OUttake 2

Outtake 3

Outtake 4

Call me crazy, but I thought the outtakes were rather fun, and the last one for some reason is very compelling for me….what about everyone else?  What are your thoughts?  These photo walks sure are a great way to inspire the creative gene if you have the right mindset, and we have another one going on tomorrow back in our familiar haunt of downtown Denver, under the guidelines of “Embracing the Constraints” where all we get to shoot with are P&S and phone cameras.  Yours truly is leading it, so if you have an inkling and are in the area, check out the site here:  Denver Photowalk Group

If not, have a great weekend, happy shooting, and don’t forget to stop back in on Monday for yet more photography goodness.

I’m dreaming of an HDR Christmas

Last night I got the bug to try something I’d seen before – the classic Christmas-y look with a score of music and a shallow depth of field.  It was straightforward enough and after putting a piece of sheet music on the piano, and trying it that way, wasn’t getting the drop off in depth-of -field as I had hoped for.  So, I took a different approach and put the music sheet flat on a table, knowing the dof would drop off that way, with the foreground out of focus and receding off in the background too.

So, the second one came out okay, but the plain background of the table didn’t really work all that well…it needed something else – Christmas lights!  So, I got an extra garland that wasn’t used in the house and threw that down, encircling the paper.  But something was still missing…a little color.  What goes with green and white?  Red!  Enter a blanket strategically placed underneath it all to add a touch of color.  So, took a few shots, and liked it, but the shadows seemed kind of muted, and the lights were getting a little blown out.  Hmmm…could I be dreaming of an HDR Christmas?

An HDR Christmas
An HDR Christmas

The fact that the little star burst off the one light happened was purely incidental, but I think helped the overall composition.  How about the reading audience?  What are your thoughts?  Does it work?  Need something else?  What about your own holiday-themed work?  Feel free to share thoughts, feedback, samples and such in the comments!

In other Friday news, CB now has a Facebook fan page, so if you get a minute – stop by the Facebook page and sign up.  I’ll be sharing more photos, tips, tricks, and such there in the weeks to come as well, and you won’t know unless you’re a “fan”!  For those of you getting your news from the feed, the direct link to the Facebook page is here.

Don’t forget, the December Giveaway is also still underway – over $400 of super cool prizes including software, books, prints, and papers!  Just a cornucopia of prizes, all waiting to be given away for free! Just enter your photo at the Flickr thread:  December Giveaway. The theme this month is GIVING. Interpret however you like and good luck to all.  The rest of the contest details are here.

That’s about it for this Friday – have a great weekend everyone! Going on a sunrise shoot in the mountains tomorrow wit the Meetup group here in Denver, so it is going to be an early riser for me tomorrow.  Start time of 4am!  More on that next week!  Happy shooting and we’ll see you back here on Monday!

How I shot Lightning!

Today the post is going to revolve more around a set of photos I took the other day – you see while en route back to the house, I noticed that the clouds were passing over the mountains and the sun was starting to set.  It had the makings for a really nice sunset.  Never one to turn away the opportunity to capture a sunset, I hurried home and gathered my gear, and took off to my favorite spot near the house for landscape work.

Well, the clouds and the sun didn’t really cooperate so I gave up on that and starting fiddling around with some HDR kinds of things.  I saw a traffic light nearby and there wasn’t much traffic so tried to time some bracketed exposures (my shutter speed was getting near 30 seconds on the top end of the bracket).  Some possibilities developed, but nothing too earth shattering, and I was starting to feel a few drops of rain, so I packed up to head back over to the house – about 2 miles away.

As I was coming back to the house, the clouds that evaded me on the mountainous horizon were ominously hanging over the cityline of Denver (another scene I’d been meaning to shoot) and flashes of lightning were coursing through the clouds, with some pretty regular spikes coming down.  All of this was about 30 miles away, and heading away from me so i was feeling pretty safe except for the possibility of some raindrops now and then.

So, I found a nook by the open range, set up the camera on my trusty tripod, and tried to recall things I’d read about how to shoot lightning.  Apparently some of it stuck, because I came away with this:

lightning_blog
Lightning over Denver

So, how did I do this?  I kept four key things in mind:

  1. I used my tripod!  Stability was key because every single exposure was no less than 15 seconds!  When shooting lightning, you want to open the shutter for a longer time to increase your odds of catching it.  Because it was flashing so regularly I eventually dropped my shutter to 15 seconds and still managed 6 or 7 really good captures.
  2. Keep the noise Down – I dropped my ISO to 100 for all shots and made sure long exposure noise reduction was turned on in camera.  Sure it took twice as long to capture each image, but in the long run it was worth it because there was much less noise to process on the back end.
  3. Don’t touch the camera!  I set the camera to bracket exposures and put it on a two-second delay.  So, by the time the camera shutter opened I was no longer touching it, and then the second and third shots fired automatically.
  4. I made sure I was in a sweet spot of my lens.  Part of this is knowing your gear – I was shooting the 10-22mm (wide angle) from Canon, and know that when it goes below f4 it can get fuzzy.  So, I was at f11 for most of my shots.  Great depth of field and everything is sharp!

Well, a fifth one was post-processing.  After a few rather unpleasant attempts to process as HDR images, I enlisted the aide of friend-of-the-blog Terry Reinert, who you know from our podcast talk a short time ago.  Terry is wicked smart (he’s an engineer) and knows the heck out of HDR.  I asked him what I was doing wrong (because the clouds were getting blotches scattered through them and generally looking poorly).  He gave some insights, what he was finding yielded better results and sent me a low res sample via email.  I liked the path he took, but the colors were not quite where I remembered them from Sunday, so dove in again with the new-found knowledge.  I tried a few quick variations on his technique, but in the interests of time, just did a short version to post here.  Once I get my final edit done (probably this weekend, I will likely be adding the image to my portfolio, so will also post that here as well.  For now though, I wanted to share the back story and a quick version of one processed version that I found appealing.  I am not crazy about the black across the bottom, but since my time was limited here, I’ll likely be addressing that this weekend when I have more time.  For now though, the quick version and a panorama crop looked kinda cool!

Thanks go out to Terry for giving a hand.   In our discussion he also mentioned possibly doing a tutorial on blending using the images, so keep your eyes on Terry’s blog (Where Art and Engineering Collide) as I may be a featured artist!  (How cool would that be?) ETA:  On posting the link to his blog, I see he’s already put his tutorial together – thanks Terry! 🙂

In other blog/photo news, as you all know from yesterday, the OnOne Giveaway concluded with Pete Petersheim being the big winner.  The new contest is underway though, with a new thread up at the Learning Digital Photography group on Flickr, so be sure to stop in there and share your images in the new thread (the theme this go around is “Fun” since the price is a Wacom Bamboo Fun!)  Good luck to everyone and don’t forget to have some fun!

Happy shooting and we’ll see you back here again tomorrow!

Grab the Feed

A video short on HDR and bracketing

One of the more popular posts here on the blog has been two that consisted of explanations on how to bracket multiple exposures in camera in order to capture a wider range of exposure values than is typically permitted in a single frame.  Typically, these various exposures are then seamed together in some editor like Photoshop, Photomatix or other that is available to produce an effect called HDR – high dynamic range.  You can get some impressive results with various techniques that appeal to different subjective perspectives.

Here at the blog though, rather than take sides on such post processing methods, it’s more fun to show people how to do things, and then let you all take your own liberties either with the approach or with your processing afterward, or both to get results that appeal to you!  With that in mind, the feedback I’ve received from the previous discussions included a large number of people that asked for visuals of the process (I guess they are all visual learners).

Well, rather than take several dozens of images showing all the various settings and then explaining how I got toeach, a video seemed a more appropriate approach.  So, here’s the video short for those of you that requested visual aids.  It’s not the most professional but you should be able to get the gist.

This would also be a good time to remind everyone that we are in the dwindling days of the Adobe Lightroom contest.  You can win your own free copy of Adobe Photoshop Lightroom, courtesy of the folks at Adobe, simply by entering images you’ve taken in May over at the LDP Flickr thread.  Limit two images per person, but there’s still room for many more entries (no limit on the number of PEOPLE that can participate!)  just join the group for free and post your images.  Good luck to all and may the best photo win!  (Final results will be posted in June – I’l send my top ten picks back to Tom Hogarty for final judging when he’ll pick the winner!)

That’s it for today – I should have the podcast up tomorrow, but as always, no promises as my schedule has been fluctuating at work lately.  Happy shooting, and I will be back with more news, information, insights, tips and tricks tomorrow, whether in written or audio form.  Thanks for tuning in and we’ll see you back here again tomorrow!

Grab the Feed

Experimenting with Photomatix and HDR

For a while now I’ve been meaning to devote some time to experimenting with HDR – specifically comparing Photomatix and Photoshop in their production of HDR photographs.  The industry preference toward the former is there for a very good reason.  Photomatix produces much better results.  Just look at this final shot (be sure to click the image for a larger view – the blog restrictions on size really don’t do it justice):

final_hdr_blog

Now, in the interests of full disclosure, I did do some additional post processing work even after the HDR processing to get the above results.  But Photomatix was superior for a number of reasons.    For starters – Photomatix gives you options in what type of output you want.  Here are the two results, side-by-side, that I got from Photomatix:

sidebyside

The first was the result of  processing from the Tone Compressor tab and the latter of Details Enhancer tab processing.  As you can see, the first produced a smoother sky, but left the foreground a little flat, while the latter had more texture and, well… dynamic range to it.  So, I decided to go with the latter in my post processing.  The Photoshop alternative, however, produced something even less desirable than either of the above.  Take a look:

ps_hdr

Not only are the luminosity levels less interesting, but there’s literally no tone curve application.  No color, no tone curve mapping, and decidedly no interest when you consider the options from Photomatix.  I am in the process of putting together a tutorial of how I got the final result, so be on the lookout for that in the next few days.  In the meantime though, I’d like to take a moment to say “Thanks” to fellow NAPP member,  Elizabeth Gast (a.k.a. Firgs,) for the kind thoughts she has over on her blog – Design by Firgs – where she talks up a shot I took a while ago that is premiering on hew new series “Accidentally Awesome” today, so be sure to stop over there and give her a shout-out!  Until tomorrow – Happy Shooting!

Setting bracketing exposures – shutter priority

As promised yesterday, today I will be talking about bracketing your exposures based on shutter priority.  After a couple comments yesterday that it seemed unusual to bracket on aperture rather than shutter speed, I felt that in this companion post I should acknowledge that, it is.  The reason for the post?  One of the downsides I mentioned is that your depth of field will change considerably from a wide open setting to that of, say, f22.  That can also be an upside though because as you merge bracketed exposures into an HDR image, you can also add depth of field if you make the adjustments in aperture priority over shutter priority.

Additionally, I led off with aperture priority because it’s not the norm, and as most readers will know – I try to approach things from a new perspective when possible.  Finally, as I followed up with in the comments section, the simple fact of the matter was that I could not remember whether 250 or 200 was the absolute middle point for shutter speeds (this is the risk of adding gray above the brain, rather than to the brain! *grin*).  So, I led off with the post where I knew the numbers rote! 🙂

So, in the interests of full disclosure, shutter speed is a more common way to go when making bracketed exposures.  After verifying my numbers in camera, here’s how it breaks down using shutter speed to bracket multiple times:

fstopshutter

I also realized that I did not give the step-by-step yesterday, so here’s the process I would follow:

  1. First, meter the scene, set your camera to ISO 100 and exposure priority and adjust to 1/250th of a second.  Check where your f-stop is.
  2. Second, switch to manual, and adjust all settings to match that metering.
  3. Third, adjust the shutter speed down to 1/30th of a second, and fire off 3 exposures and the camera will bracket over and under one stop.
  4. Fourth, adjust the shutter speed up to 1/250th of a second, and fire off a second set of three exposures (the camera will bracket over and under one stop).
  5. Finally, adjust the shutter speed up to 1/2000th of a second and fire off your last set of three exposures.

Voila!  You now have 9 exposures to merge together for a bracketed workup to take advantage of a high dynamic range, or for exposure blending, as desired.  Of course the same rules from yesterday also apply:

  • Be shooting on a tripod
  • Be using a remote release (or timer)
  • Be using mirror lockup
  • All other settings remain constant
  • and that lighting conditions aren’t changing appreciably
  • You are set to manual focus
  • Your lens is set to its hyperfocal distance

Any final thoughts to share on how to bracket exposures?  Anything I missed or additional tips to share?  Feel free to sound off in the comments section!  In the meantime, Happy Shooting and we’ll see you back here again tomorrow!