Migrating Photoshop to a New Computer

Over the past three years or so, I’ve had several people ask me about what’s involved in migrating from one installation of Photoshop to another, or what’s involved in moving from an old system to a new system.  With Photoshop, it’s just not as easy as it is with other applications for a number of reasons:

1.  Dependencies – While Photoshop is insanely popular, this popularity has spawned an entire industry of third party applications called plug-ins that get installed into Photoshop.  If you simply remove Photoshop without considering these 3rd party “apps”, you could lose their functionality.  There are also other things that become part of your work flow in Photoshop that you may want to save too, including actions, scripts, font folders, brushes, and much more.

2.  Licensing – Because it’s not a cheap application, Adobe has to carefully manage licensing, which means that any serial number can only be activated twice before it gets “locked”.  This allows you to have an installation on a desktop and a laptop, or a work computer and a home computer.  Well, if you go an just un-install or delete the files for Photoshop, you may find yourself unable to activate again should you re-install on a new computer.  The way to avoid this is to ensure you de-authorize (or deactivate) before uninstalling.  This will free up the license for use again.

3.  Other add-ons – Photoshop also has other add-in elements like automation tasks you may have added over time.  I have a few from On One, Topaz Labs, and a few others that I’ve gathered over time.  Make sure you check to make sure these don’t have installers with licensing too, because that can also be problematic for a software migration.

4.  System settings – Unlike e-mail, some settings and preferences don’t stay with you during the course of a migration.  So, it’s often helpful to grab screen captures of various setup windows so that you can get things configured just right once you get in your new digs!  Here are the 11 screens you may want to capture before un-installing off any computer:

PS Preferences

PS Preferences

PS Preferences

PS Preferences

PS Preferences

PS Preferences

PS Preferences

PS Preferences

PS Preferences

PS Preferences

PS Preferences

PS Preferences

As you can tell, there’s a lot to consider.  And, given the length of this post already with the included screen captures, to make things easier in terms of reference information, I’ve put together a step-by-step procedure to migrate Photoshop from one computer to another that you can download for free!  Enjoy!

Migrating Photoshop

Happy shooting and we’ll see you back here again tomorrow!

Ammo in the armaments

Last night the DALPUG (Denver Area Lightroom Users Group) had their bi-monthly meeting and host Brian Reyman walked us through some of the features of the Lightroom 3 Beta.  It was a gret seminar and offered an opportunity for many to get an idea of what to expect.  I had not realized that there are many work flow options out there because when queried, the audience responded with quite the variety of software approaches.  We didn’t officially count votes, but it seemed roughly along these lines:

40% Lightroom 2

40% Photoshop CS (no query here on version #)

10% Aperture

10% Elements or some other platform, including GIMP, Corel, and others…

If you think about it – the first software platform you learn for editing photos is usually the one where you really cut your teeth, grind your fingers to the bones, and once you know it, you just know it.  So, for a new software application to come out and challenge the fact that you have this established work flow, suggesting that there is a better way can often be both disheartening and somewhat defeating.  After all, some of us can even remember dodging and burning negatives in a dark room not too long ago.

It was quite an epiphany though to see people from such a wide variety of backgrounds – some younger than me (in their 20’s), many in my age range (30’s – 40’s), and others even senior to me (50’s and up) coming out to learn about this new-fangled technology of Lightroom 3.

What it brought to mind for me was a fundamental dichotomy in the way photography has transformed us.  We have learned so much and in such a little time frame, yet there are always barriers to learning more, not the least of which is our own prejudices.  We learn something, we know something inside and out, and then something new comes along that changes the paradigm.  It’s no wonder there is still so much confusion over what “the best” way to work through images is.

One the one hand, if you have a flow, and it works – why change something that does what you want it to do, and it’s something you not only know, but are reasonably good at?  Meanwhile, on the other – what if you are spending countless hours doing something much slower than you wish it could be and this new carrot is being dangled?  Do you stick to your guns or do you lay that gun down and find a new one that fires better?

It’s a struggle to be sure, and while sticking to your guns can be a good thing in the face of a changing technology, for those of us that stick too long, we can ultimately find ourselves actually staring down the barrel of a gun.  It’s all ammo in the armaments and the important lesson I learned is that while the principles may not change the tools to flex those principles are always changing.

So, the answer for me is to stick to my guns in principle, but be ready for a new rifle and prepare to adapt to meet the needs of that new tool, because odds are, the new one will ultimately do it better, faster, and cleaner than anything that came before it….eventually!

Sort of a philosophical musing for today, but nonetheless one I wanted to share, and hopefully get some feedback on.  Are you an early adopter?  Do you come out guns blazing with new technology whenever it becomes available, or do you stick with the rounds that you know how to fire until the proven replacement has been demonstrated and taught?  Sound off in the comments, and come on back tomorrow for yet another round! 🙂

Adobe’s DNG Converter

For many of us, an upgrade of one element in our tool kit comes with many unforeseen consequences and additional expenditures.  Just as a new camera body can necesitate the need for larger memory cards, hardware upgrades can also come with software upgrades.  The reason?  Camera file formats!  As camera vendors develop new proprietary formats for their raw file formats (CR2 for Canon and NEF for Nikon as the two predominant players in the game), the need has always existed to update your software to accommodate the new formats for body upgrades.

The best example of this was when I did my upgrade of the Canon XT to the Canon 40D just last year (or was it two years ago now?)…at the time I was using Adobe Photoshop CS2 to process my files.  Well CS2 development stopped as CS3 development started.  My Canon 40D was stuck in between application life cycles, and as a result, I was no longer able to process my CR2 files from the 40D natively in CS2.  Granted, I did upgrade to CS3 because of my interest in the field, but for those that either may not be interested in the software upgrade, or cannot afford to upgrade, there is a free alternative from Adobe – the Adobe DNG converter.

This is a really cool utility and it gets updated on the same schedule as the Adobe Camera Raw utility that is unique to the image-editing applications of all Photoshop applications (CS4, LR, etc.).  The Adobe DNG stands for a Digital NeGative so it may help to think of this as a way of preserving your original data, yet still making it accessible, regardless of what other developments happen in the software world down the road.  I know, we all think that Adobe will be around forever, but the same was also thought of Kodak 20 years ago – and now those Kodak CD’s are becoming difficult to manage.  With that little nugget, it may be useful to consider the Adobe DNG option.  Additionally, the Adobe DNG negative has been submitted to the ISO standards setting organization for acceptance as a universal conversion utility, and are releasing it under the GNU licensing, so it will hopefully always be available for anyone.

With the stage set then,  for those who are not able to or not interested in upgrading, here is a brief tutorial of the Adobe DNG converter (in it’s current iteration as of 4/27/09), with screenshots.  If your folders of images look like this:

dng6

Then the Adobe DNG Conversion Utility may be for you.  It starts pretty easily…you can download the Windows or Mac versions of it from here:

Windows DNG Converter

Mac DNG Converter

Once you download and install this utility (did I mention it’s free?), start the application to get this screen:

dng1

First off, specify the path where the images are that you want to encapsulate into the DNG format.  You can specify one folder, or you can specifiy a folder and all its sub-folders (in case you want to convert an entire library or set of images at once).  Then specify the output folder and naming convention you want to use.  Once that’s been decided, it’s time to select your preferences for how you convert your images.

dng2

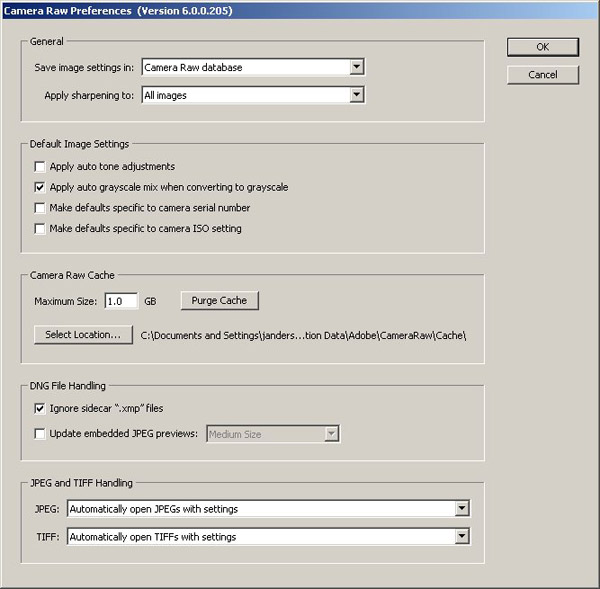
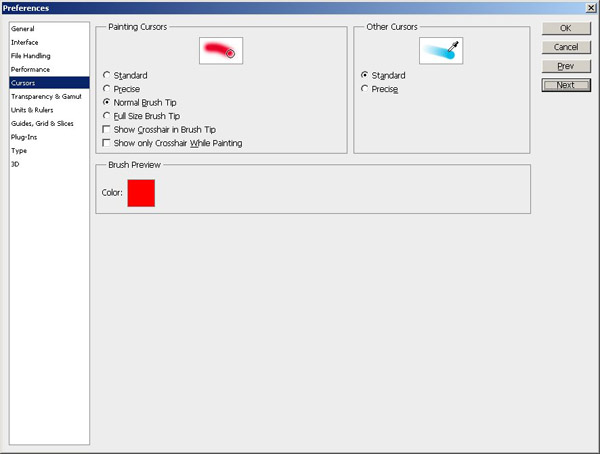
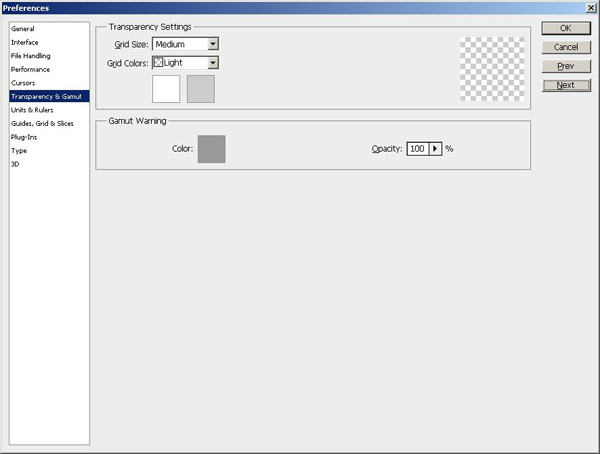
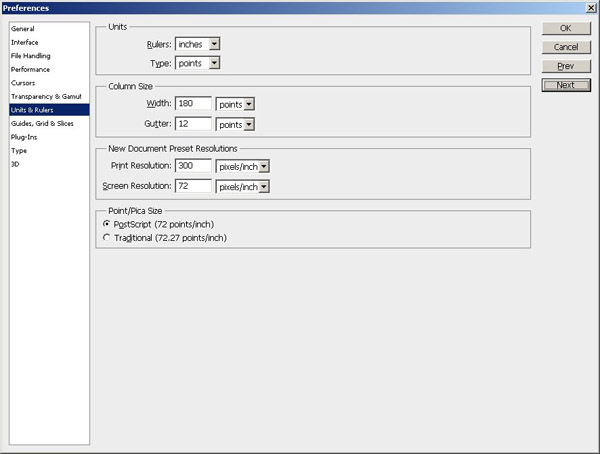
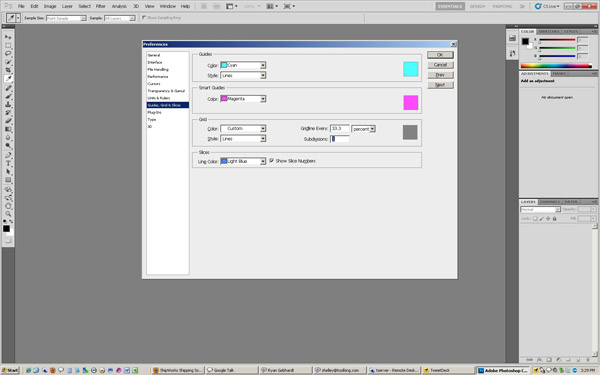
Click on the “Preferences button” to specify how you want to conversion to occur:  Do you want full size conversions or do you want to reduce the image resolution sizes for smaller storage requirements?  (I always choose full size for maximum flexibility.)  What about compression?  Adding compression can further reduce the footprint that each DNG file has on your hard drive.  (It’s a judgement call, but I choose not to compress, again to maximize flexibility down the road.)  What about conversion methods?  You can convert to a linear format, but I don’t like this option because it’s a one-way street (you can’t go back).  Last but not least, what about inclusion of the original raw file?  In most cases I would actually recommend that.  It may increase file size, but this way you have access to the original raw date if your software needs ever change and you have access to software that can better handle the raw data you currently may not be able to manage.  All these are things to consider.  Hopefully, this short explanation of your options and the pros/cons will help in deciding how to proceed.

From here it’s pretty straightforward – you’ve specified everything from your input folder to your output folder, naming conventions, and conversion preferences, so now, simply click the button on the lower right to start the conversion process.  You will get a dialog window showing you the progress:

dng3

If you like, you can always click the button in the lower left to stop or abort the conversion process in case you specify the wrong folder or for some other reason.  Once the process is complete, the window will show all converted images.  Simply click “OK” to close the DNG converter utility from that window, as shown below:

dng4

Finally, open the destination folder, and voila!  Your image files will now have thumbnail previews again:

dng5

There you have it, your files are now prepped for one of the easiest, simplest, and most cost effective ways (did I mention this is free?) for both management, archiving, and accessibility – 3 very important things to consider in your image management workflow.

Granted, as with anything else, the Adobe DNG converter utility is not for everyone, as we all have work flows that call for different approaches.  So, what approaches do you use?  Feel free to share your own thoughts, processes, and suc in the comments or via email.  Happy shooting and we’ll see you back here tomorrow!

License Lockout

First off, a bit of quick news about the blog in general:  the layout has changed.  Can anyone tell the difference?  It’s a rather significant one, so hopefully it won’t go unnoticed! 🙂  Chime in and that’s your chance at winning the Think Tank Photo Streetwalker bag I reviewed a few weeks ago right here on the blog!

So, back on today’s post topic, as part of my maintenance routine that I recently posted, last evening I was doing some of my extended “IT” maintenance on my Windows computer.  As a part of that maintenance, I was trying to optimize my hard drive performance, and thus resorted to cleaning out temp files, cache files, history files, restore points, and other sundry stuff.  A defrag procedure on the hard drive, and I was back up to some pretty screaming speeds again.  Puffing out the chest at getting a 5 year old Dell running a 2.4 Ghz Celeron processor, Windows XP, and 2 GB of RAM to move that fast without over-clocking, I checked off on what I thought was a job well done.

Then I opened Photoshop:

CS3 Error

Uh oh – it seems I cleaned things out a little too much.  Well, since I have diligently kept all my media, documentation, license#’s and other information in multiple places, I was easily able to find the needed materials to re-install.  But, here’s the thing – that would require importing all my actions again, re-installing other elements like Noise Ninja, and then also go in and customize all the features I like (scrolling with my mouse to zoom in and out of the image, curves menu with more lines, etc.)  Who wants to do all that?  Well, not me!  So, off to Google I went.

That five minutes on Google doing some research saved me probably two hours of software maintenance time.  Adobe has a neat little utility that can be downloaded and run when things like this happen to restore your licensing info without having to go through the entire re-installation.  Not sure what it does or how it does it, but the utility is very handy, so I thought to share it with the reading audience today.  Here’s the download link, and supporting reading materials.

Licensing Service Update

The underlying point here though, is that even the extensive maintenance I itemized the other day does not cover everything.  Go into Photoshop, copy your preferences down via image pastes into a Word doc or other such format.  Make a copy of your plugins folder external to PS – the same goes for Actions, noise removal, automation tasks, brushes, etc., etc., etc.!  With as advanced and complex has an application like Photoshop has become – you can save a ton of time if you take some proactive measures.

What do you save from your Photoshop configuration settings?  Share your ideas in the comments!  As always, thanks for tuning in, keep on shooting, and we’ll see you back here tomorrow – Thursday Thoughts returns again with Chris Breedlove!

Camera Profiles

So, today I had the day off work, and was catching up on a few things.  I read through most of my piled up photo magazines, caught up on some NAPP tutorials, and some overdue email replies to various asundry things.  One of the tutorials I watched was from Matt Kloskowski on installing camera profiles for ACR in both LR and CS3/CS4.  It’s pretty cool stuff.

Basically, Adobe has worked with various camera vendors to get the ACR to approximate the same colors that are shown in the vendor proprietary software (Digital Photo Professional for Canon and Capture NX for Nikon, and a whole host of others.)  Matt did a great job of showing how close it gets while even still in beta.  I was convinced enough to go ahead and download the plugin to use in CS3.  Fair warning though, you do need at least ACR version 4.5 or higher to use these profiles (I have 4.6 installed).  Since my bodies are Canon-specific my interface may look a little different, but thought I’d share the screenshot of what it looks like for me:

My thoughts are that the Camera Landscape beta is the closest to what DPP shows.  Since it’s all happening in camera raw, as Matt stated, it just gives you a better starting point with less editing to get to your final results.  I really can’t wait to see how this develops and moves out of beta.  Just hope that Adobe sees fit to release the final shipping version for CS3 owners as well as CS4.  What about others – has anyone else installed this?  How do your pictures look?  Are they close to your vendor software?  Feel free to jump in with the comments!

In other news for Friday, this is the last day to participate in the economy-photography poll from the sidebar.  You RSS readers – stop in and vote, we’re trying to break 30, and only have until midnight!  Other than that, it’s been a great day – I even got some cool shots of the dog after our walk with the sunlight glistening in her eyes.

I’ll leave with my favorite What the Duck of the Week.  Happy shooting and we’ll see you back here again on Monday – have a great weekend!

The Weekender – Web stuff and some thoughts on CS4

The last few days have been insanely busy with work and home obligations, so out of necessity I have not had time to devote to content for the blog.  My apologies for abandoning the readership temporarily, and without warning.  I’ll endeavor to give advance notice before that happens again.  So, with that out of the way, I thought today it might be useful to get a wrap-up of what I have been seeing and reading around the forums, blogs, and internet that’s photography-related.

  • Jeff Revell, who has become quite well-known for his photowalking blog made a few interesting posts recently.  In one of them, he did a reminder on updating your firmware.  Great idea Jeff – if you’re interested, I actually put together a post with all the Canon firmware updates as of a few weeks ago.  The other one was ab out the Epson Print Academy season for 2009 has been published.  I had been meaning to go to one of these for a while, and for a mere $150 think it is definitely worth the cost.  They’re coming to Denver and it’s a mere block or two from where I work so I will most assuredly be in attendance this go around.
  • Scott Kelby, master instructor of Photoshop, Lightroom and author of more books than I can count, is also bringing his tour through Denver some time in December.  Check out the schedule here if you want to see him live and in action at what he does best!
  • David Ziser has offered up a Digital Wakeup Call DVD worht $75 to some lucky participant if he gets 20 ideas on how to incorporate video into your selling packages for photography businesses.  Not a bad deal for 5 minutes of your time!
  • Don’t forget, I’ve expanded the poll here at CanonBlogger to go longer than the 1 week, so the numbers are a more accurate representation.  What features do you like about the curreng generation of camera bodies on the market?  What motivates you to buy?  Share your thoughts on the poll to the right.

Last, but not least, the hubub on most forums lately has been surrounding the release of CS4 and LR2’s latest updates.  The reason for all the hoopla comes every time there is a new release to the software, and it’s a cycle that likely will not end.  Rather than just pile on and vent, I thought for the second half of this double-feature wrap-up, I’d share some thoughts on why people are frustrated rather than just saying “people are frustrated”.  So, here’s a different perspective.

Software is not a tangible asset

Software is not like a camera body, or a car, or a television, it’s something that lives on your computer.  Thus, the value of it is not as easy to see.  We are very much a society that thrives on all our toys, and software just isn’t the same as having the latest body, or flash or television or car.  It’s not something we can touch and feel and show off to our friends.  It’s only on our computer.

Necessity

With software, we are sometimes obligated to upgrade.  I personally had to upgrade because CS2 did not offer a raw converter for the Canon 40D.  Sure, there’s the Adobe DNG converter for free, and I actually have incorporated that into my work flow for the Mac where I don’t have CS3, but that does present another step in the process of a work flow that I was previously happy to not have to deal with.  Anyway, the point here is that if you don’t upgrade your software, you will find yourself unable to maintain a stable and consistent work flow (since you re upgrading other gear all the time too).

Competitive Pricing

With other technologies, competition keeps prices under control.  Camera vendors like Canon, Nikon, Sony, and the rest all have to compete with one another for your business.  Adobe really has no competition in the market place.  Okay, sure, there’s Corel, and the GIMP, but come on, who are we kidding?  Adobe is the market when it comes to photo editing software.  All the others are simply “alternative programs”.  Without a competitor, Adobe can price things however they want, knowing that those of us who have already invested are pretty much committed to maintaining our work flow by keeping the software interface as consistent as we can.  To their credit, upgrades are cheaper than the full blown versions of the software, and there are often promotions and suc (educational pricing is the best way to go imho – take a community college class once every two years and you will save anywhere fro $300 to $700 on pricing for the CS products).

Release Schedule

Do we really need to upgrade our software and work flow every 18 months?  With cameras, (which are released on the same schedules for most SLRs), most people I know wait at least 2 generations before upgrading.  Another analogy that has been made here is to cars – anyone upgrade their car every two years?  What about televisions?  Do we really upgrade our televisions every 18 months?  Unlikely…and even if we do, is the old television still usable?  Often times, the older version is relegated to the basement or a childs bedroom, or even sold second hand.  Who buys outdated software?  No one that I know of…

So, there’s the second half of the weekend post.  What do you think?  Am I off base?  Is the software market competitive?  Do you think the pricing is fair and equitable?  What about the upgrade schedule?  Does 18 months sound about right?  Sound off in the comments!

Again, sorry for the lack of material over the last two days.  Hopefully this will make up for the lack of content on Thursday and Friday.  Now, since you’ve finished this, take that last sip of coffee, pack up your gear and go have fun shooting!  (In other words, Happy Shooting!)  We’ll see you back here again on Monday.

A few of the Creative Suite 4 Features!

Before the release of CS4 in Adobe’s announcement this morning, I happened to see a post in the NAPP member forums of someone thanking the Photoshop Guys for their top ten of the new features for the latest edition of Photoshop Creative Suite 4!

So, for those who want the early bird news, here’s a hint of what Adobe will be talking about later this morning:

  1. Better scrolling with less jaggies as you zoom in and out of images.
  2. The Adjusment Panel – Adobe has added a dedicated panel for your layers adjustments
  3. On-screen image adjustments – you can now control hue/saturation, Curves and Black and White adjustments directly on your image
  4. Camera Raw saw some significant upgrades because now you can apparently do post-crop vignettes, apply gradient filters, and yes, that’s right, also the very-Lightroom like adjustment brush!
  5. Addition of the vibrance slider to CS4 – this previously was in LR and camera raw, but not as a layer adjustment in CS3 – they’ve ported that element over to the inside of CS4! Yay!
  6. Tools improvements for the eyedropper, dodging, burning, the brush engine is more responsive, and the clone and heal now allow for vanishing points
  7. Customizable GUI – that’s right, you can now customize your own panels in CS4! The Configurator 1.0 feature (flash-based) allows you to create and use your own customized panels! Truly amazing.

Kudos to the NAPP staff for taking the time to put all this together – 17 video tutorials in all – (and this is just proof positive that membership has its privileges…because by learning from those on the cutting edge means you are getting cutting edge technology too! I am not sure if it’s publicly viewable, or if it’s a members-only thing, so will refrain from providing the links to the CS4 features they talk about, but I must admit, this does have me more buzzed about the announcement than I was before. Make sure you stop in to Adobe to watch it as I am sure there will be much excitement across the blogosphere about this!

Anyway, back to the regular blogging – I’ve got some announcements of my own to share, but they kinda pale in comparison…

In the News – Doo Wah!

Bop bop doo bop doo bop do wow!  Okay, sorry, that’s a bad skit for the great jazz tune from the ’50’s, but nevertheless, whenever I hear the phrase “in the news” I feel compelled to sing that line.  Now, for your real news from CB today:  I’ve got two stories for you, some news from Adobe on the next iteration of Photoshop and some Canon news on the Canon Hacking Development Kit (aka CHDK) that is now maing waves.  Read on for all the details!

Adobe Photoshop News

Well, the big news I read today during lunch was that the folks at Adobe will be incorporating some sort of GPU support for its next iteration of Photoshop.  Tapping into the GPU (graphics processing unit) means that larger images can be rendered on your display faster.   Another added benefit will be an increase in processing speeds for filters and other intensive activities. Nothing too earth-shattering, except they did report that at the Nvidia show, they watched the presenter zoom and rotate the canvas on a 2 GB image as though it were a 5 MB image.


Canon CHDK News

In more Canon-specific news, I have now read at least 10 articles from a number of resources talking about the Canon Hacking Development Kit (CHDK), which is a free firmware hack that can be applied to P&S grade cameras to allow them to do a number of things that SLR’s do, and even a few that your average SLR can’t do!


  1. The CHDK allows Point-n-Shooters to shoot in raw mode.  The caveat is that since it’s not a standard raw format, you can’t open this in Photoshop or Lightroom directly.  Instead, there is a third party software kit out there (also for free) called dng4ps2 that can convert the image to the more common DNG, which is Adobe’s Digital Negative format.  The DNG file can then be opened in Photoshop or Lightroom.
  2. The CHDK kit enhances the P&S feature set by adding a battery status indicator so you can see how much of a charge you have left on your battery.  I know this feature is already there in SLR cameras, so I guess the P&S’er didn’t have this feature regularly – news to me.
  3. The CHDK kit also adds what they’re calling a zebra mode which will show you whether a picture is under- or over-exposed.  Basically, it sounds like it’s adding a histogram feature.  Again, this feature is standard on most SLR’s, but not on most P&S cameras.  I just think that even a lot of SLR shooters don’t use the histogram (although I would personally encourage more use of it), so adding the feature on P&S cameras may be a little overkill.
  4. Finally, the CHDK kit allows P&S’ers to extend their range of shutter speeds.  The most reliable info I saw for the CHDK claimed the range went from a standard of 1/3200-15 seconds all the way up to a range of 1/33,333 to 65 seconds!  You read that right, that’s one-thirty-three-thousandsth of a second (and change).  Kind of makes the 1/8000ths shutter speed on the 40D look pathetic, eh?  Granted, this was specific to the S5 IS, but the standard change is to 1/64000ths of a second, which is still earth-shatteringly fast! 

Now, the caveats:


  1. Write time slows down considerably when shooting in raw (to about 2-4 seconds – yikes!).
  2. The raw file format is not recognized by mainstream applications like Photoshop and Lightroom.  In other words, file accessibility is likely not reliable.
  3. The software that you have to use to access the raw image data is freeware.  While some software from the open-sourced community is excellent (case in point GIMP, OpenOffice, and many others) and perfectly safe, the fact that this software comes from Russia and is (to my knowledge) untested, sets off red flags all over the place for me.  Of course I work in IT, so it’s in my nature to be suspicious of third party software from third world countries…
  4. As with any firmware hack, this is likely going to void any manufacturer warranty or vendor support for the camera if you install the software.

So, having shown the pros and cons, I’ll leave it to the community – install at your own discretion.  For those that do decide to install, feel free to share your thoughts here in the comments, or with me via email – I’d like to hear feedback on the reliability of the kit.  The CHDK can be downloaded direct from the link here:  http://chdk.wikia.com/wiki/S5IS, and the raw converter from here:  http://dng4ps2.chat.ru/index_en.html  Until next time, happy shooting and watch those apertures (or should I say shutters?)!


Adobe Creative Suite 4?

There have been a couple of references in the past few weeks to the next iteration of the Creative Suite for Adobe. Now in its third edition, recent web searches have seen a few alleged leaks of a beta called Stonehenge on various torrent sites. Since no public beta has been released by Adobe thus far – the recommendation is to stay clear of these “leaked” versions. With the extensive proliferation of spyware, malicious viruses, rootkits and all other sorts of destructive code commonly referred to as “malware”, this practice does make sense.

However, rest assured, a CS4 is going to happen eventually. Some are obviously in the know already as they work hand-in-hand with Adobe in beta testing software even before it gets to public release beta versions. (Case in point, a coy reference from Dave Cross on a video blog entry a week or two ago.) It’s no secret that the industry leaders like Dave and others are definitely insiders as well, and get to sneak a peak at upcoming software before it ever gets to anyone else. How else could these guys get up to speed on it so quickly? Sure, they’re quite adept at their craft, and are obviously not mental slouches by any means, but knowing everything they know as soon as betas hit the web simply means they are privileged individuals, whether they care to publicize it or not.

There is other evidence though as some of the screenshots posted in various web forums and blogs seem to indicate that the next version of CS4 should be forthcoming (at least in beta) before the end of the year. While the veracity of these resources is unknown to me, there does seem to be some credence to the legitimacy of a beta already in the works, both by the historical time line Adobe takes with new product releases, as well as similarities in the names to boot! (Adobe has a product out that uses a Stonehenge theme already, called Atmosphere and you can download an EPS version of the graphic here: Stonehenge EPS File) While it’s not really all that similar to the graphic found for the “beta screen shot” seen on CybernetNews, the mere fact that the naming scheme is repeating itself suggests that something is definitely in the works.

So, does anyone else have any thoughts on the CS4 time frame, and when it might be released. Thus far, the only news I’ve seen is what you see posted above. Feel free to share your thoughts and predictions in the comments section! Tomorrow is likely a “no blog Thursday” for me as I am having my first even root canal done. Not looking forward to that! Until Friday then, happy shooting, watch those apertures!