The Basics Behind Posing Your Subjects

After a while, landscapes are really just a matter of metering your light, exposing correctly, and composing to position lines in appealing perspectives.  The same goes for many other types of photography too.  Whether you are talking about candid street photography, event photography, and even architecture – it’s all about timing, composition, and exposing for the light.

Portraiture though, brings a unique set of circumstances to the table though.  The timing is much more controlled, lighting is managed more strictly, and little is left to chance.  Yet, even in these controlled environments, many photographers have trouble because of the fears associated with guiding and instructing people on how to pose.  It’s understandable, considering all that goes into posing your subjects, as well as the fact that some subjects aren’t the best at being guided.

To those ends – here’s some basics to start with in posing your subjects.  For starters, focus on the face – it’s what we all gravitate toward anyway, and body posing can be very complex depending on a persons body style.  By focusing on the face, you can really highlight that which we all look at anyway.  Here’s the simple secrets to posing a persons’ face: Continue reading “The Basics Behind Posing Your Subjects”

Shooting Shadows

Most of the time the subject of the a photo is easy to see – whether it’s a portrait, landscape, travel, or architecture. While these subjects are easy to identify, the use of shadows in these topics is not discussed as often as it should be.  We spend so much time trying to get the lit portion of our images in focus, composed to our satisfaction, making sure things are sharp, and all the rest, we sometimes miss the value of shadows in our imagery.

Boat Mast in Shadows

The shadows of an image can be just as important to the composition as the lit parts are.  When talking about how to light images with strobes and studio lights, the use of shadows to give definition is often discussed, but the same discussions can be germane to naturally lit photos too.  Remember, the word photography means to paint with light (photo and graphos), so even the absence of light can be significant in defining our images.

Subtle Portrait Shadows

Whether you shoot portraiture, architecture, landscapes, or even abstracts, shadows can and do play a role in how you compose your images.  Do you look at the shadows in your images?  What story do shadows tell in your work?

Abstract Shadows

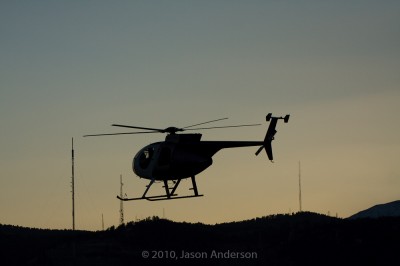
Shadowed Helicopter

Share your own thoughts on how to accomplish a story by shooting with shadows below in the comments – would love to hear others feedback. In the meantime, keep on shooting.

That Face!

Last week I wrapped things up with three tips for posing your subjects better, and boy did that launch a flurry of questions…so many that I think the next podcast will be dedicated to tips on posing your subjects.  There’s so much to take into account, it really shouldn’t be that much of a surprise.

However, until then a few nuggets here and there will have to do.  (I am trying to coordinate with friend-of-the-blog Kevin Mullins to have a go at a podcast and this would be a great subject for him as he’s an accomplished wedding, event, and photographer from across the pond.  Kevin, I promise we’ll find a date here soon!)

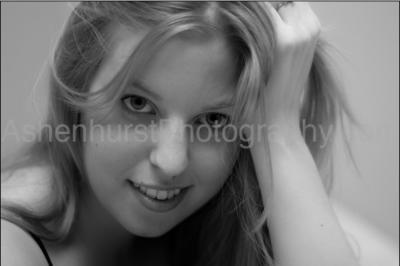
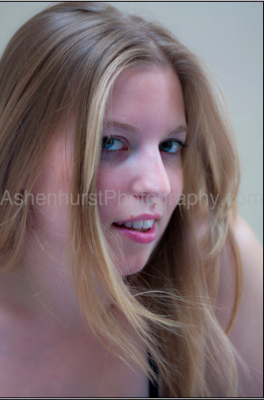
So, the nuggets for this week are facial features – because at the heart of the portrait photographer is bringing out the beauty in your subjects’ face!  Here’s a great set of tips for bringing out the best in your subjects!  When shooting subjects it helps to keep in mind the three basic facial positions:  full front, 3/4 pose, and profile positions:

Three-Fourths view

Three Fourths View


Profile View


For subjects with round or wide faces, it helps to raise the camera angle slightly so as to look down to them just a little bit.  This elongates things a little more and minimizes the width perception.  It also helps to approach them with a pose that has a 3/4 look rather than a full frontal look.

For subjects with a thin face, just the opposite holds true – have their full face looking toward you with the camera and try to keep the camera at eye level with your subject.  Going up or down below their eye level will only serve to elongate a thin face even more.

For subjects with a large nose, it can often help to have them also face the camera directly.  By doing this, their nose will point straight into the camera to help minimize its size, and lets viewers see the rest of their pretty face!

For subjects with a smaller nose, it’s time to shift back to the 3/4 look…this will bring more depth to their face and “enhance” things a little…

Other tips I’ve picked up that are not specifically related to facial positioning include things like:

  • People Deep-Set Eyes – Point light into their eyes. Light coming too far from the sides will accentuate the depth.
  • Glasses – Bounce the light off the ceiling where possible. If not, position the subject so that glasses are pointed away from the lights.
  • Dark Hair – Make sure that the background provides enough contrast so hair doesn’t just blend into it. Hair lights or a light on the backdrop are extremely helpful. Also make sure the background doesn’t show through hair.
  • Double Chin – A slightly higher camera angle will be more flattering than straight on. It also helps to have the subject leaning forward.
  • Large ears – Use a ¾ face pose or a profile.

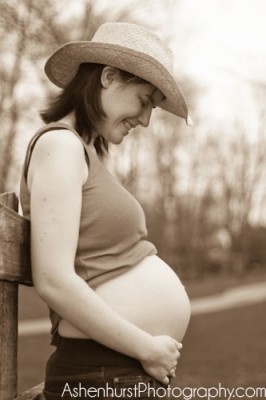
There you have it!  Great ways to capture portraiture, specifically when working with facial angles.  Special thanks go out to my good friend Evan Ashenhurst for sharing some of his portfolio for this article.  You can see more of his work on his website at:  Ashenhurst Photography

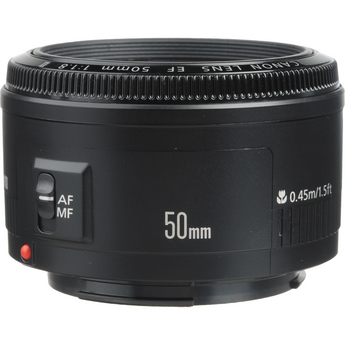
A final footnote – since I will undoubtedly get a few questions about which lenses are best to shoot portraiture with, my favorite is the nifty fifty actually.  Amazingly sharp and the 1.8 depth of field is to be envied among all glass.  If you’re in the market for a portrait lens, you’ll definitely want to check this bad boy out.  Here’s the Canon-mount, a steal for less than $150 retail!

Canon Mount 50mm 1.4

Focus Stacking: A Primer

With all the talk and hooplah over things like dynamic range, HDR, Megapixels, and the latest and greatest bells and whistles in photography, some of the staples in composition are often over-looked.  Focus stacking is one such area.  Most folks kind of look at me quizzically when I bring this topic up, primarily because it is rather niche and unique, but it does rely on principles of composition that have been around for a while.

First off, focus stacking is used mostly in genres like macro photography, where intricate detail is needed across a range wider than what the aperture will allow for during composition.  The principle is much like the layered approach to HDR imagery – where you stack layers of images with different compositions on top of each other and blend the right portions through the entire image.

Where focus stacking differs from HDR is the types of images that you are layering.  In HDR images, you are compositing images with different exposure values over one another.  In focus stacking, you are not changing the exposure values, rather just the point of focus.  As depth of field drops off both in front of and behind your focusing point, the subject will blur.  While this may be an appreciated blurring technique in some cases, in other cases, getting different depths of field from different focusing points can make for a tack sharp macro throughout the range of the subject.

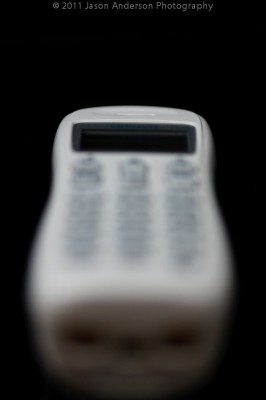
As is most often the case, explaining a photography concept is best done with images, so let’s take a look at an example.  For easy demonstration, I took a white cordless phone and placed it on a black background.  This way color issues are kept to a minimum…

First Focus Point

Notice on the first focusing point, the sharpest point is right near the front?  It also quickly drops off into the background as I was shooting at f2.8  The low aperture number means I will have a very shallow depth of field, which is what is causing the blurred background.  To bring the rest of it into focus, I need to “stack” more shots that have a different point of focus.  So, let’s add another few to the composite:

Second Focus Point

Third Focus Point

Fourth Focus Point

Fifth Focus Point

The end result from stacking all these together can be accomplished by any one of a number of methods ranging from the most time-consuming of doing it manually inside Lightroom or Photoshop, and the most efficient one of using 3rd party software.  While several options do exist, the one that has become pretty much the industry standard is that of Helicon Focus!  Their quality of processing is, bar none, among the best I’ve seen.  More on that likely later this week.

In the meantime, here’s the result of an image that has been focus-stacked:

The Final Result

It’s a quick edit, and done with only having focus-stacked 5 images.  If I wanted a really detailed depth of field on something more important than a cordless phone from circa 1990’s, I’d likely have taken at least 10-15 images and massaged them through Helicon Focus more carefully.  More details on this entire process are coming up later this week, including reviews of the Tether Table (which will be given away this weekend as the March contest comes to an end), Helicon Focus, and the light triggers from Blackbelt Lighting.

For a behind-the-scenes footage video, stop over to the Facebook page!  (Be sure to “like” it and share a comment while you are there…)

Turning Tasks into Photos

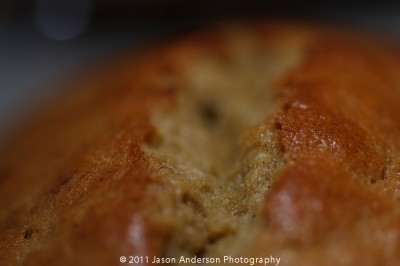
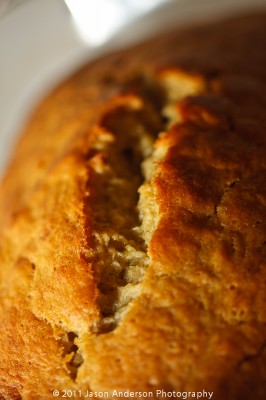
I had to bake bread for a work potluck today.  That’s ok, I like cooking, and it seems others do too, because most of the time the dishes I serve are some of the first things to disappear.  I decided last night to do something simple, but often popular:  banana bread!

When it was done, the house sure did smell good from the caramelized sugar, bananas toasting, and who doesn’t like bread?  (I know, I know – lots of carbs aren’t good for you…)  But, every once in a while it’s fun to indulge.  As luck would have it, this particular loaf of bread had some nice colors and tones to it, so naturally, I started thinking about my other hobby – photography!

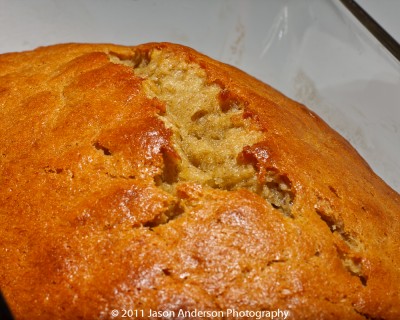
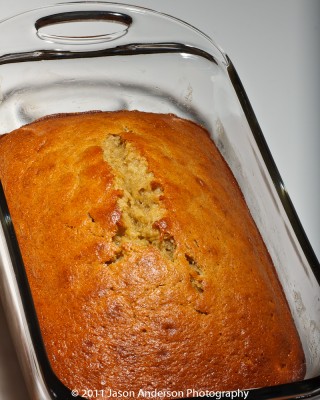
With bread there’s so much you can do from capturing details, to using a shallow depth of field, to creative lighting and shadows, everything becomes a cornucopia of possibilities.  Here’s a few of my selects from just ten minutes of prep, 60 minutes of cook, and ten minutes of shoot time!

Banana Bread 1

Banana Bread 2

Banana Bread 3

Banana Bread 4

Banana Bread 5

Want a slice?  What tasks have you taken and turned them into photo opportunities?  The lesson learned here today (hopefully anyway) is to take something you have to do and make it something you want to do!  In this case, it was a win-win scenario for me, but what about you?  Sound off with your own fun-filled (or food-filling) photo projects!

Three Tips to Shooting Better Macros

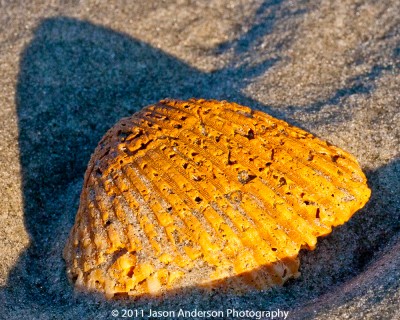
At some point, the allure of macro photography in all its intricate detail entices us all to either buy or rent some glass that has the power to take us to the enchanting 1:1 ratio where we can see things full size!  When you do take the plunge though, there’s a couple things to keep in mind when capturing macro-scale photographs:

Shell in the Sun

#1 – Stay sharp or stay home – Nothing loses the appeal of macro enthusiasts more than an image that is out of focus, at the macro level.  There are notable exceptions of course, but we are zooming in close to see the details, so unless they are sharp, we just aren’t interested!

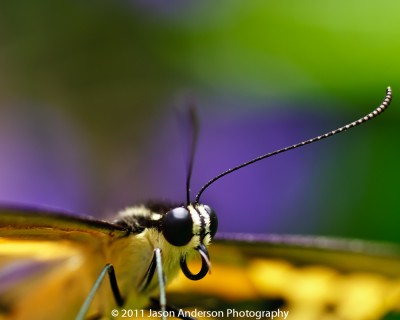
Antennae

#2 – Keep it simple – Too often, people will jump in and try to capture something highly detailed in a macro shot.  The problem is that often times you are dealing with a very shallow depth of field (low apertures in the 2.8 – 1.4 range), which means detail is lost either in the foreground or the background, or both!  This can be appealing in some cases, to have the fade from sharpness to blur, but in others, it’s not as effective, which means you’ll have to deal with focus-stacking.  It’s kind of tricky, so when starting out, stick to simple compositions like flower buds, water drops, and other such objects of interest (even a quarter’s edge can be appealing).

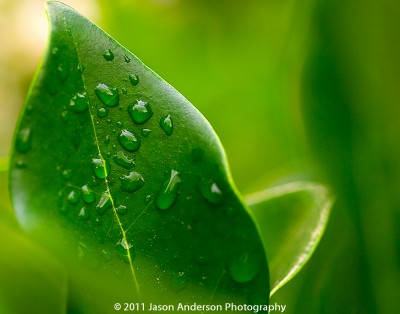
Leaf and Water

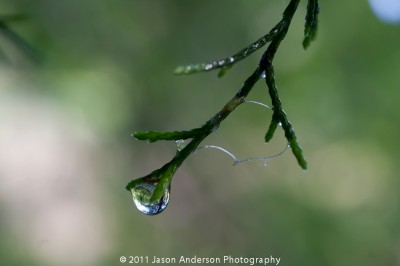
#3 Be aware of your background – Even though the background is often way out of focus, the color or tone of that background can make or break your photo.  Make sure it’s either a complementary color, or sufficiently blurred as to be indecipherable.  This shot I took on our street, with the road and vehicles beyond the branches.  They are so out of focus though, it’s literally impossible to tell the difference.

Raindrops on the Street

So, what types of scenes sound appealing to your macro instincts?  Consider buying a macro lens (or renting) and taking one out for a test spin.  With these three tips (and others) you will be well on your way to taking and making phenomenal images!

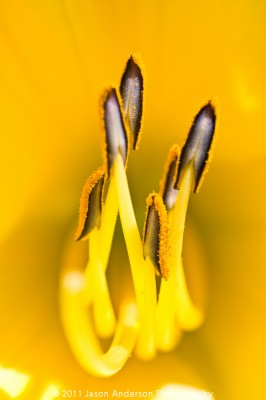
Yellow on Yellow

Don’t forget to sound off in the comments with your own tips, tricks, thoughts, and shots on macro photography!  Happy shooting and we’ll see you back here gain for another round of photo goodness!


Enter your email address: 

Delivered by FeedBurner 

Black and White Adjustments in Lightroom 3

As a regular contributor to the PhotographyBB magazine (which you can download for free simply bu subscribing here), I enjoy putting together articles to both educate and inspire.  In this upcoming month’s issue, I am guest-writing a tutorial on Black and White editing with Lightroom 3.  As a sneak-peak of sorts to the readership here, I’d like to share the first portion of that article…enjoy!

***

The power of Lightroom has been so well documented from various outlets across the internet and magazines, I often find it surprising that such a small amount of space is dedicated to black and white photography.  This month, I’d like to take an opportunity to delve more into the creative adjustments you can make in Lightroom to bring out more in an image than just shades of gray!

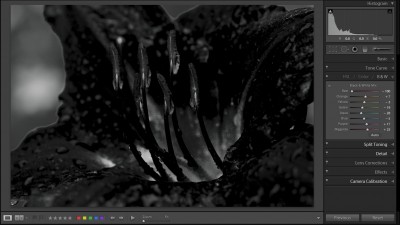
There are two areas in Lightroom where you can make creative adjustments to the color to make things pop.  The first two HSL (for Hue, Saturation, and Luminance) and Color are great resources to use when you want to massage the color palette of your image.  The Black and White “tab” though, is where it’s really at.  When you click this tab, the image will be converted to an automated black and white adjustment, where the colors are converted to shades of gray – with no color tones at all.  This is where I’d like to begin the exploration:

While this can be a powerful way to present an image, the automated method of conversion is not going to work all the time (and for my tastes rarely does the default conversion work).  So, you have to dive in and really get comfortable with adjusting color tones.  To start off, I am using a pretty basic image – a red flower, and you can see that there is absolutely nothing wrong with the colored version of the image.
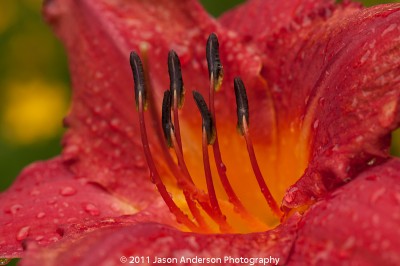
Red Flower

It’s got some great black and white potential though, so let’s go ahead and take it into the BW adjustment panel tab.  When I do that, the automated adjustments will kick in:
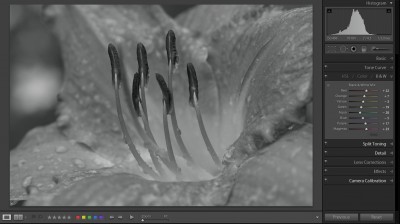
Default Black and White Adjustments

It looks interesting, but let’s see what massaging the colors just in the panel can do.  To start, since the flower was red and made up nearly 95% of the composition, I started with the red slider to see what the extremes would do on each end.  Here’s the image with the red slider taken up to +100 and then to the opposite extreme of -100…
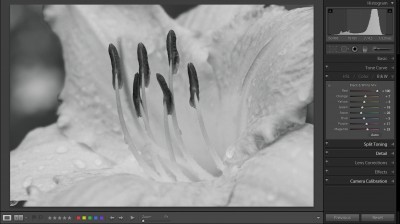
Red Flower +100

Red Flower -100

In both cases, for me it’s an absolutely hideous image.  Clearly, there is a balance that must be struck somewhere in the middle – the question is where?  Well, now it comes down to subjective tastes.  For me, the default adjustment had the red a bit too strong – which kind of hid the morning dew of the flower, so I dialed things back a bit, taking the red slider from +22 to -20.  The droplets are now much more visible as they are standing out from the petals!
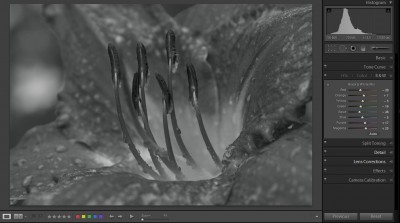
Red Flower Conversion Progress

So, now we are getting somewhere fun!  I tested a few more sliders, and ended up with the yellows and oranges slightly higher than the default settings, just to give a bit more contrast.  Here’s what it looks like after the black and white adjustments are made:
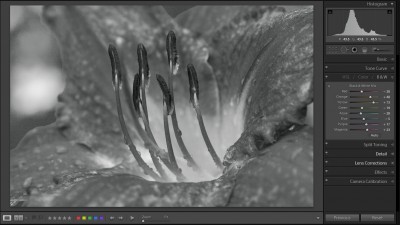
Red Flower w/ all slider adjustments

Of course there is always a bit of sharpening and noise reduction to make in post production, as well as lens correction, and even a little bit of vignette from time to time to help draw the viewer in.  Once these are done, the final image definitely has a creative look and feel to it:
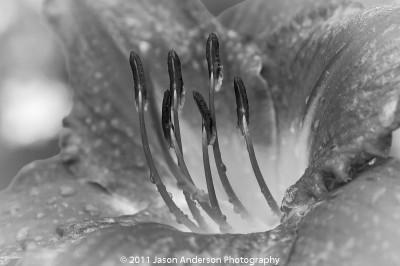
The Final Edit

It’s clearly not easy to decide both when, to make a black and white conversion, as well as how much to massage or tweak it to your tastes.  The ultimate decision is, of course, up to you as an artist and photographer, but you can’t get there by avoiding the Black-and-White panel!  Take some time to explore it!

***

There’s more to the article than that, and it has been modified somewhat to make for a better blog post, so be sure you subscribe to the PhotographyBB newsletter when you have a minute.  It is free, after all, and probably one of the best sources of a diverse set of reading material you can find.  Dave Seeram, the editor, has been quite generous with his kindness and patience in my contributions!  Please stop over and give him your thanks as well…nothing but learning and knowledge to gain!

As always though, I end up being more curious than informative!  What types of black and white adjustments do you make?  Do you prefer the neutral grays, or do you like to add a hint of color to your b/w images too?  What methods have you found useful versus not so much?  Sound off in the comments as I love to hear how others are working through their own images!  Happy shooting and we’ll see you next time right here!

Like this post?  Subscribe to the email version of the RSS:

Enter your email address:
Delivered by FeedBurner

Book review: Photo Trade Secrets

Zeke Kamm puts together an interesting set of books in Vols 1 and 2 of “Photo Trade Secrets”  This is not your typical book though, so I’m not really sure that a normal review is warranted.  It’s a pretty simple concept though:

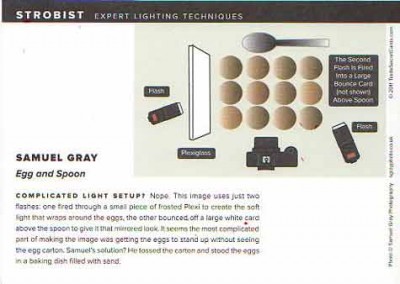
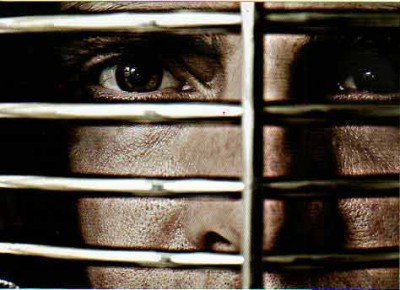
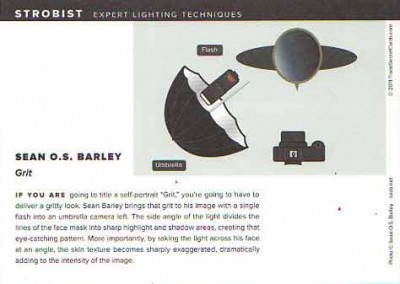
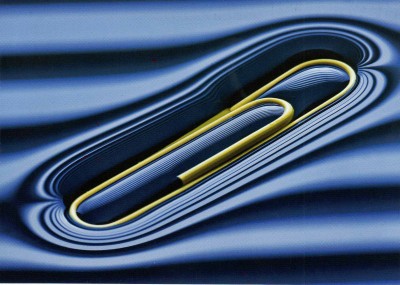
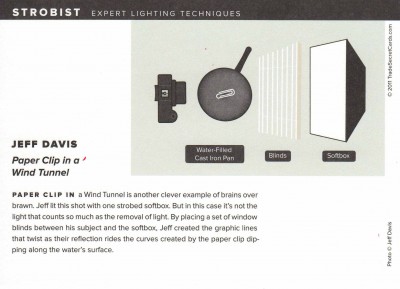
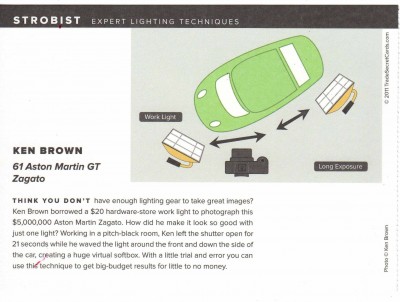
Each book is a series of “hero shots” – just some really cool photography, ranging from studio work, to portrait, landscape, and everything in between.  The concept behind the series is that each page can be torn out (they’re perforated) so you can go and try to duplicate the effect in your own images.  I tore a few pages out of the books to show you the idea in practice.  Keep in mind that it seems my scanner is having some issues, so the image quality here is not very consistent nor is it necessarily accurate – the end result in the book look much better!

Sample 1 (back)

You can see the front image (left) shows the end result, and the rear of the page (right) shows the setup with how and where things are positioned.  I do wish he would have included the technical data such as aperture, shutter, ISO, light settings (1/4 power, manual, TTL, etc.), but it’s a neat idea regardless.

Here’s the rest of the sample images…

With 25 pages per volume, it’s nothing too meaty that will leave your head swirling with technical minutia and yet it’s got enough creative directions from all the contributing photographers to give you plenty of ideas for inspiration.   It’s all a lot like “lighting recipies” with a boiler plate template, from which the author (and contributing photographers) expect you to springboard from.  They give you enough to get up and running, but not enough to completely duplicate w/out a little of your own flavor and tastes in to season appropriately…

Depending on where you are and what you are looking for – this could be a two thumbs up or one to skip.  For me personally – I love getting creative and inspirational ideas from other photographers, so this medley gets two thumbs up!  Cool idea, well implemented, and lots of inspiration going forward!

Using On-Camera Flash?

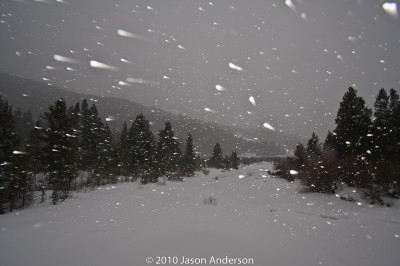
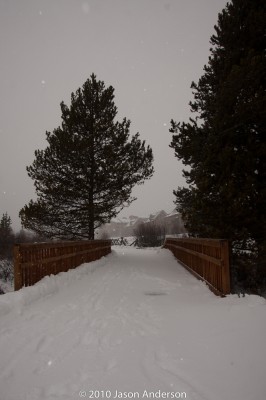
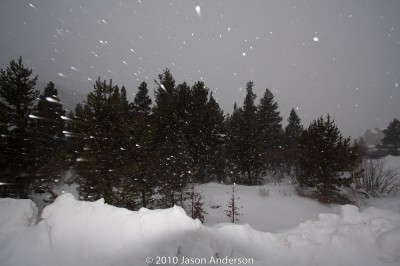
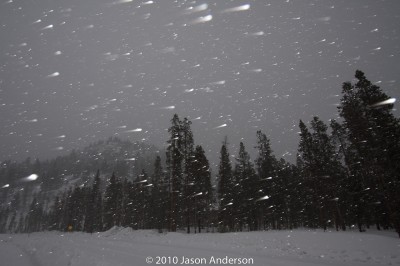
As much as we like to promote moving your flash off-camera, there are times when using that little pop-up flash can be really fun!  One such time can be when it’s snowing outside!  A little wind to help kick things up also helps.  Here’s a few shots I took earlier today on an outing to Keystone, CO when the weather conditions were just about perfect for these fun effects!

Using Flash in the Snow - #1

Using Flash in the Snow - #2

Using Flash in the Snow - #3

Using Flash in the Snow - #4

Now granted, these are nothing that would ever been usable for fine art or stock type work, but it’s always fun to experiment, and this is one such case where on-camera flash works particularly well.  There’s other times when using on-camera built-in flash can also be useful though, so don’t be afraid to experiment.  Where have you had success with on-camera flash?  Share your own thoughts, perspectives and shots in the insight