What Is Zoom?

A great question came up in my Twitter feed a while back, and felt it was worthy of putting together a short post to help explain the whole concept of zoom on cameras.  The original tweet asked:

“What’s the best focal length on a lens to reach 400 yards so I can see a 1 inch square at that distance?”

We started talking about different long length lenses, such as the 400mm, 800mm, and 1200mm lens options from Canon.  All were (are) very pricey and beyond the budget for my friend.  he then started asking why a 35x zoom point and shoot wouldn’t be an option.  So, the discussion turned to a teachable moment!  How exciting for a teacher!  The recap is two simple points:

Point #1  When manufacturers refer to the zoom of a lens, whether it’s a P&S camera, binoculars, or digiscopes, they are referring to how much of a magnification one can get over “normal viewing conditions”.  Notice how I put the last part in quotes.  What are normal conditions anyway?  What kind of vision is normal?  20/20 vision?  And what are we looking at?  Something 10 yards away or 400 yards away.  The point here is that there are so many subjective factors, the “zoom” isn’t really has hard and fast a number as one would think.  We can approximate sure, but it’s not set in stone, and certainly a measurable distance is nothing more than a rough guess.

Point #2  The zoom of an SLR lens isn’t at all on par with the zoom of other equipment – it actually is a hard and fast number.  Simply put, the zoom of a lens is the ratio of it’s longest reach to it’s shortest reach.  A 70-200mm lens starts with a focal length of 70mm and ends with a focal length of 200mm.  This is the distance from the focusing point to the sensor.  So, a 70-200 lens has a “zoom” of 200/70 or almost 3x.  A 100-400 lens would have a zoom factor of 4.  it’s simple math for SLR lenses.

This is a classic example of where the same term can mean different things to different people.

So, my answer to him?  Well, to see something at 400 yards large enough to take a decent picture you would likely need an 800mm lens or 1200mm lens.  You also probably need a 1x or 2x TC to really get far enough.  The problem with taking a picture at this distance is that heat, atmospheric conditions, and just the physical limitations of optics would not make for appropriate conditions to capture decent images.  Most wildlife photographers I know of like to get closer than 400 yards from a subject to take their picture, and for good reason.  The distance to subject is of prime importance in capturing wildlife photos.  Zoom or no zoom (prime lenses), there’s no substitute for proximity!  Photography all too often comes down to something along the lines of real estate mentalities…location, location, location!

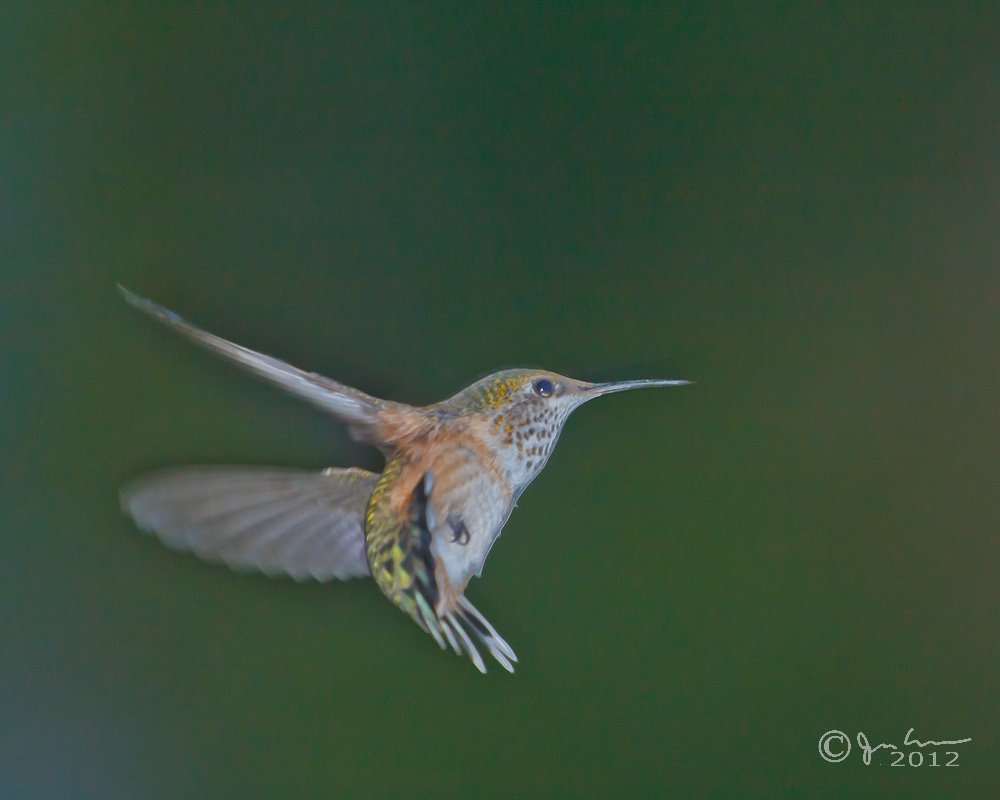
My best example?  A hummingbird I shot from a mere 15 feet away!

Hummingbird in Flight

That Face!

Last week I wrapped things up with three tips for posing your subjects better, and boy did that launch a flurry of questions…so many that I think the next podcast will be dedicated to tips on posing your subjects.  There’s so much to take into account, it really shouldn’t be that much of a surprise.

However, until then a few nuggets here and there will have to do.  (I am trying to coordinate with friend-of-the-blog Kevin Mullins to have a go at a podcast and this would be a great subject for him as he’s an accomplished wedding, event, and photographer from across the pond.  Kevin, I promise we’ll find a date here soon!)

So, the nuggets for this week are facial features – because at the heart of the portrait photographer is bringing out the beauty in your subjects’ face!  Here’s a great set of tips for bringing out the best in your subjects!  When shooting subjects it helps to keep in mind the three basic facial positions:  full front, 3/4 pose, and profile positions:

Three-Fourths view

Three Fourths View


Profile View


For subjects with round or wide faces, it helps to raise the camera angle slightly so as to look down to them just a little bit.  This elongates things a little more and minimizes the width perception.  It also helps to approach them with a pose that has a 3/4 look rather than a full frontal look.

For subjects with a thin face, just the opposite holds true – have their full face looking toward you with the camera and try to keep the camera at eye level with your subject.  Going up or down below their eye level will only serve to elongate a thin face even more.

For subjects with a large nose, it can often help to have them also face the camera directly.  By doing this, their nose will point straight into the camera to help minimize its size, and lets viewers see the rest of their pretty face!

For subjects with a smaller nose, it’s time to shift back to the 3/4 look…this will bring more depth to their face and “enhance” things a little…

Other tips I’ve picked up that are not specifically related to facial positioning include things like:

  • People Deep-Set Eyes – Point light into their eyes. Light coming too far from the sides will accentuate the depth.
  • Glasses – Bounce the light off the ceiling where possible. If not, position the subject so that glasses are pointed away from the lights.
  • Dark Hair – Make sure that the background provides enough contrast so hair doesn’t just blend into it. Hair lights or a light on the backdrop are extremely helpful. Also make sure the background doesn’t show through hair.
  • Double Chin – A slightly higher camera angle will be more flattering than straight on. It also helps to have the subject leaning forward.
  • Large ears – Use a ¾ face pose or a profile.

There you have it!  Great ways to capture portraiture, specifically when working with facial angles.  Special thanks go out to my good friend Evan Ashenhurst for sharing some of his portfolio for this article.  You can see more of his work on his website at:  Ashenhurst Photography

A final footnote – since I will undoubtedly get a few questions about which lenses are best to shoot portraiture with, my favorite is the nifty fifty actually.  Amazingly sharp and the 1.8 depth of field is to be envied among all glass.  If you’re in the market for a portrait lens, you’ll definitely want to check this bad boy out.  Here’s the Canon-mount, a steal for less than $150 retail!

Canon Mount 50mm 1.4

Did You Know…

This last week has been kind of rough – after teaching in Minnesota on Sat., my whole time schedule was thrown off and I never really have been able to get my body clock back in sync.  (I don’t know how traveling types do that…)  That, combined with a little out-patient surgical procedure on Friday made for a lot of distractions.  So, apologies in advance for being a little hit and miss with the blog posting.

Today though, I thought I’d share a little-known (or at least not-often-discussed) tip about the Canon EOS camera line.  Did you know that there is a silent shooting mode?  To enable this mode of shooting, simply switch your camera to the live shooting mode (where you compose your image using the LCD instead of the viewfinder), and when pressing the shutter, it’s much quieter than when normally pressed!  I knew about this, but honestly had not used it in quite a while.  It’s one of those “Oh yeah…..!” moments and when reviewing some material, I came across this from the owner’s manual.  Here’s the page directly from the 40D guide:

Silent

This is a very handy feature to have if you don’t want to interrupt an emotional moment during an event (say a bride and groom kissing, a baby sleeping, or some other such occasion).Got your own unknown or not-often-mentioned feature to share about your own gear?  Sound off in the comments!  Have a great weekend all and we’ll see you back here next week!

Subscribe to CanonBlogger by Email

I Am a Teapot!

Nothing too fancy, just a short post today to share a particular “vision” I had.  Hopefully it helps to illustrate that even the mundane can be interesting if you think outside the box!

Teapot

For the inquisitive, this was shot with off-camera flash, using Radiopoppers.  The EXIF data:

Shutter Speed = 1/250th
Aperture = f/18
Focal Length = 70mm
ISO = 100
Flash = 580 EX II

Since EXIF data doesn’t record flash settings, I want to say that this was at 1/4 power, bare bulb (no diffuser, umbrella, bounce or anything like that).  The hint of yellow reflection off the background of the stove is likely due to bounce off the yellow color of the teapot itself onto the black metal on the stove.  It was an unintentional but cool side effect, so I left it in!

As the old saying goes: “Keep on shooting!”

It’s high time…

Over the holidays, the SLR was in great demand for the family portrait work, and I pulled it out periodically for some “street-style” photography.  I found myself instead getting out my 4 year old P&S camera, which is very long in the tooth to say the least.  So, I’ve decided that it’s time to retire the one and venture into new territory.  I am currently waffling between three cameras:

Decisions, Decisions, Decisions

The G12 is a compelling camera.  The features I am liking are the LCD resolution, the f2.8 on the lens, and the manual controls over the exposure triangle (shutter, aperture and ISO).  It helps that I can also shoot in RAW which would fit my existing work flow.  The biggest cons for me are the proprietary battery, the MP count (I’d rather have 8 than 10 for this size sensor – makes for better noise handling in my opinion), and the price tag.  (Really?  $500 for a P&S Canon?  I can get an entry level SLR for that price…take it down $100 and you’d have a lot more buyers!)

The Powershot SX130 IS  is equally compelling.  With the larger 3″  LCD, acceptance of regular AA batteries, and manual controls, it’s tempting to go with this option.  The problem is that the Megapixel count is so high.  I wasn’t thrilled with the 10MP count above, so 12 here makes me very nervous.  After all, let’s face it that Canon’s handling of noise is not at the standard of the Nikonian crowd.  Here it’s also not the budget-buster that the G12 is either – a very enticing element to consider.

The Powershot SX 120 IS is no slouch either.  Saving a little more coin is always a good thing (it retails $20 cheaper), and is back down to 10MP for the sensor.  The problem here?  Saving $20 also compromises the ability to control things manually.  Frame rate is also noticeably slower too.  That’s a lot to lose to save a few pennies.  I likely will not go this route as it’s just too much being sacrificed for a minimal short term savings.

So, it’s really between the G12 and the PowerShot SX130 IS.  I think I am leaning toward the latter simply because I am not going to sacrifice as much in functionality.  Still have to check out some reviews and DXOMark ratings though.  A final answer should be forthcoming soon, but that is the upshot of where the Christmas Cash is gonna ching!  Of course, new gear is always coming out and Spring time is no exception.  That will lower the cost of entry on these current generations considerably, so I might hold off for a month – see what happens in the market to these three!

Some, of course, will ask why I didn’t consider the new SX30 or the A12000.  Truth be told, in Canon’s line-up, the A series is a notch below the SX series for a reason…it’s just as beefy!  As for the SX30, I read several reviews on it and the noise level at even ISO 400 seems high to what people were expecting.  I’m just not willing to throw money at a P&S for no reason other than “because it’s new”.

Let’s turn the perspective outward…anyone out there get any Yuletide Yen they’ll be using for new gear items?  What are you getting and why?


It's not the body, it's the glass! (New Canon gear…)

Okay, while everyone is salivating (or slamming) on the new 60D Canon just announced, let’s not forget that it’s not really about the body upgrades – it’s the glass we want to invest in.  And, true to form, there are also a significant number of additions and upgrades to the Canon lens line-up that bear some discussion, so here we go:

Canon EF 8-15mm f/4L Fisheye USM lens – Touted as the worlds widest fisheye zoom, it’s an impressive feat, but not many shooters really need such a lens.  At $1400 price point, the price point will likely be too high for many to justify.  Cool factor – high, Use factor –  low.

Canon EF 70-300mm f/4-5.6L IS USM lens – I believe this is the first L lens in this zoom range, and for that reason, the optical quality will likely see a market improvement.  At a price point of $1500, the reach will appeal to many, but the price compared to the 70-200L f2.8 IS will deter more.  You may lose a little reach, but you gain a stop of light.  Not a lot of reach loss for IS gain!

Canon EF 300mm f/2.8L IS II USM lens – The 6th in the continuing series indicates that this is the go-to lens for the serious shooters…i.e. the pros of the sports circuit. The appeal? Drop in overall weight will reduce arm fatigue. The burden? $7 large! (Call your boss to see if accounting will approve it and best of luck!)

Canon EF 400mm f/2.8L IS II USM lensThe best of the best – a fixed focal length prime and the bees knees of the profession, SI shooters, NFL, MBL, NHL, etc – if you are looking here for advice on whether to drop the $11,000 on this lens, I want to know why! Buyers of this grade of optics are the companies with budgets larger than my annual salary my many multipliers!

Canon Extender EF 1.4x III & Canon Extender EF 2x III At $500 a piece it’s really just improved optics. For each it also represents light loss – one stop versus two. if optics are important and light isn’t, the 2X is your choice. Add reach and minimize light loss – the 1.4X. A more cost effective approach – neither at this price!

*****

One last thing before you go though, I know you want to subscribe to the newsletter, so hit the sidebar and let me know you want a monthly dosage of free premium content including early bird announcements, discounts on workshops, webinars, and ebooks, with user featured photos and much more!  (It’s only available via subscription to sign up today before the Sept one goes out!)

An interva-what?

A friend of mine asked me if I had any recommendations the other day about time lapse…specifically software for post production.  It’s a great question and brings up a subject that I am actually quite interested in, although I have no hands-on experience with as of yet.   He’s got a Nikon D300, which apparently has the feature built in, so lucky him, because I need to go find an intervalometer now! 

An interva-what?  You heard me – an intervalometer!  It’s just a fancy name for a remote  control timer.  I like the former though as it’s cool sounding word!  Sounds kind of like the little ray gun that the martian was going to use to destroy planet earth in the classic Bugs Bunny Cartoon.  Or was that a modulator?  Well, anyway, much closer to reality, I have found myself recently considering adding another gadget to my toolkit!  Regardless of what you call it, these devices are considered  the tool to have when creating time lapse videos!  Some vendors include a timer setting on certain models, so be sure you check your owners manual before running out and buying one.  (More point-and-shoots have them than SLR’s – go figure!)  Nevertheless, it’s something I am looking at.  Here’s a few models that I am thinking about:

The Canon Specific Branded TC-80N3 (at B&H)

Opteka Timer Remote Control (on Amazon)

If anyone has other suggestions for remote timers, I am all ears! Of course with the time lapse, there is also the post production concern – although I am using Camtasia for video on my Windows box and iMovie or Quicktime on my Macbook Pro, so am pretty sure one if not more can handle time lapse.  Nevertheless, that is always a concern too, so feel free t sound off in the comments with your suggestions there too.   Interested in seeing time lapse photography in action?  Check out these cool links I’ve found:

  • http://www.youtube.com/watch?v=GDfqCFFvfag
  • http://www.youtube.com/watch?v=-ifTCa97G6Q
  • http://www.youtube.com/watch?v=pxCUlvEkQDg

Audio aside, there are some really creative approaches out there to time lapse.  Most I’ve seen are sunrise/sunset, moonrise, etc.  But the above three really captured my eye.  So, there you have it, something to inspire some creative juices going into the weekend!  Got your own ideas or links to time lapse?  Sound off in the comments!  Happy shooting and we’ll see you back here on Monday!