What’s a Perigee?

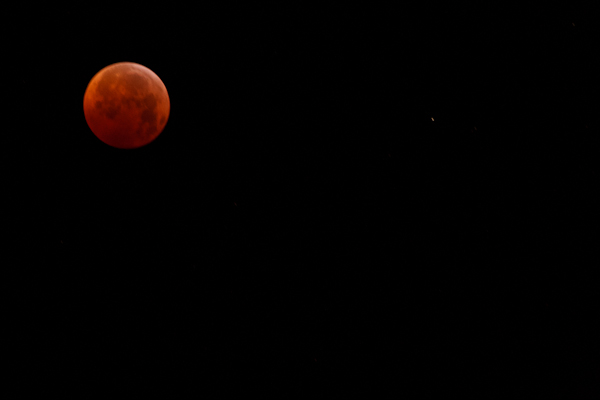
Without getting too scientific on everyone, an exciting moment is going to happen this weekend – it’s the perigee!  What is the perigee?  It’s the point when the moon and the earth reach their closest point between each other.  The moon is going to look super huge this coming weekend, and this will be a great opportunity to really get some stellar shots of the moon through even the more common focal lengths we all have in our gear bags.  Even with a 70-200 lens and a 1.4 TC, you should be able to get some pretty awesome full frame shots of the moon, with some pretty good detail!

Here’s a couple tips to scheduling a good moon shoot:

1.  Check the weather in your area – It goes without saying that you don’t want a lot of cloud cover, but at the same time, clear skies mean no heat is staying in the atmosphere.  Since it’s still relatively early in the year, standing around at midnight could be a tad chilly.  Plan ahead, dress warmly, and you’ll be able to stay out longer to get the shots you really want without being cold or uncomfortable.

South Carolina Sky

#2.  Location, location, location – In photography, as in real estate, location can mean everything, and a lunar shoot is no exception, even though it’s in the sky.  Depending on the type of view you are looking for, you may want to find some place that gives you a completely unobstructed view of the horizon.  Alternately, you may want to include something “human sized” to give a sense of comparison.

Denver Skyline

#3.  Pick your gear – In astro-photography, you will most likely be shooting at the longest end of your reach, so don’t bother taking the whole kit-n-kaboodle.  Maybe take a variable zoom to stuff in a cargo pocket in case you want a “behind the scenes” kind of shot if going with others, but no more than two lenses are needed.  Don’t forget your tripod and extra batteries, as well as a flashlight.  Other essentials I have on my checklist include my wallet and cell phone.

What stakeouts have you planned in your area?  Taking any friends?  What about your own suggestions and tips for lunar photography?  Sound off in the comments!

The 2010 Winter Solstice Eclipse

As you may recall from yesterday’s post, I did not get the entire solstice eclipse from beginning to end due to cloud cover.  But, from the halfway point forward, the clouds cleared and I was able to get some adequate coverage.  After wrestling both mentally and processor-ily with the amount of images (98) and trying to figure out a good way to present the series, I decided on the spiral approach…

2010 Winter Solar Eclipse

What kinds of shots did you get?  How are you presenting them?  I debated on a video showing the movement across the sky, but that was very labor intensive, so decided on the above.  Thoughts, comments, feedback?  Share your shots too!

About Last Night…

The first lunar eclipse to occur on the winter solstice occurred.  It’s the first time it’s happened in 600 years…and apparently won’t happen again for another 400 years.  I had two strokes of luck with this amazing astronomical event:

#1 – the path of the moon tracked almost directly over my house!  Literally!  I took maybe ten steps out my front door, and there it was, beautifully tracking across the sky.

#2 – Let me re-phrase that…beautifully tracking across the cloudy sky. 

At first it was just a few wisps…I started to capture a few shots at 10.  You know, to sort of document the before, during, and after.  But, by 10:30 the wisps were sticky patches of cloud cover.  By 11, even my naked eye could not discern any detail anymore.  It was very disappointing…

So, I put the camera away, began this post and went back out to glance at the sky for a bit before bed.  And as the first yawn escaped my tired body, sure enough, the clouds began to peel away.  At the halfway point, I finally grumbingly ran inside, bundled up, and grabbed the camera/tripod set which were already in place.  I’ve not done much post production on these, but here’s a select few:

I am sure others will get wonderful views, and the folks at NASA, Roswell, SETI, and all the others will document it quite nicely for the rest of us. But…it’s just not the same as viewing it in real time.  When all was said and done, I was glad I stayed up to watch it.  Not only did I end up getting some nice shots, but I got to see almost the whole thing before heading off to bed.

What about others?  Did anyone else stay up to watch it?  I’ll bet some pretty cool time lapse productions come out of this!  Share your own thoughts and perspectives in the comments.  Would love to hear from you!  Happy shooting, and I’ll likely have a full set posted tomorrow.

Dealing with bad pictures

There’s no denying it – we’ve all deleted countless shots both off our camera and off our computers because they were just even to horrible to admit to publicly.  And while filtering out the chaffe from the wheat is a good thing, if we don’t learn from our mistakes, we’ll continue to get chaff and never be able to make bread (take great pictures)!  So, don’t just look at blurred photos and toss them instantly without thinking.  Don’t immediately delete out of focus subject matter, and most importantly don’t blindly drag your less than stellar work to the trash bin.

So wait – does this mean to keep our bad pictures?  For a short while – yes it does.  You certainly are not going to go back and create photo galleries for clients with their mouth firmly clamped onto a forkful of food, but in seeing bad pictures and recognizing what makes them bad, helps you to avoid errors in the future.  And to help illustrate what I am talking about, you’re going to see something here today that is a cardinal sin in photography – I am going to show you a terrible shot!  Take a look at this:

The Virgin Star Tracker Voyage

So, why is this terrible?  Well, it was taken from my recently built star tracker.  As you may recall from the DIY video on YouTube, the whole purpose of a star tracker is to minimize star trails…to keep the stars bright and in one location as your camera moves relative to their position in the night sky.  So, when I saw the above image, needless to say I was disappointed.  But in seeing not only the blurred star, I also noticed that the star was much more blurred than it would have been from even being on a stationary tripod.  This told me that the problem could be one of several things:

  1. There is a flaw in the design of my tracker, or…
  2. There is a flaw in the execution of the shot, or…
  3. There is a flaw in the design of the camera, or…
  4. There is a flaw in the design of the photographer!

So, back to the drawing board I went, hoping it wasn’t #4!  What did I do wrong?  Off to the web I went – first stop:  Wikipedia on Barn Doors.  As it turns out, I learned that while the barn door I built was the simplest in design, referred to more scientifically as a Haig Mount (characterized by a bolt or screw that rotates vertically as it pushes the one door up.  Advances in the mathematics show that if you tilt the screw and have it push the door up at an angle, you are using the Isocoles method, which translates to less shift as your exposures get longer.  Finally, the curved bolt mount minimizes shift even further.  As the details explain at Wikipedia though, the shift only occurs in exposures as your shutter length increases past the 5 minute mark.  Since I was doing a 30 second exposure, the design should not have been a factor.  Other links off of Wikipeda pointed me to a several sites on how to build better barn doors, using a different method, but one note struck a chord with me:

“The double arm mount shown in the photograph uses a 6mm (M6) threaded rod to drive it.”

The more I thought about it, the threads on the bolt I used were awfully thick, so one revolution in a minute likely pushed the top door more than it should have gone, thus causing the significant star trail.  The little jig in the line also told me I was not moving the screw smoothly and that I should probably motorize this if possible.  Clearly the project is growing more detail-oriented, and mistakes have been made.  But, as I (we) learn from mistakes, our chances of capturing better images only increases with time.  As I make the modifications, I’ll report back with more details, but some additional points to consider that I learned through all my additional reading if you’re interested:

  • Polar alignment is critical – this means you have to have some understanding of the stars and where they are in the sky (time to brush up on the astronomy class I took in college…)
  • If you want to build a DIY kit – an average to intermediate grasp of math and formulas helps because your dimensions are dependent on one another for proper configuration (I am going back to check my cuts and drilling points on the first kit, but I am happy to know I have some spare parts in reserve…)
  • Wider lenses are more forgiving on trails, and longer zooms are less forgiving – if you are just a hair off, that movement will be even more pronounced on a field of view that is narrow… (I was shooting on my crop sensor, with a t.4 TC and my 70-200 zoomed all the way in (448mm) – a pretty narrow field of view).

For today though, (and this holds true whether you are into astro photography, landscape, wildlife, portrait, event, or any genre of photography) the instructive point is to learn from your mistakes. As the old saying goes – those that don’t learn from the mistakes from history are doomed to repeat them.  I had an economics professor in college say something very similar to the class once too:  “I don’t care how many mistakes you make in this class – just don’t make the same one twice!”

So, look at your bad photos – find out why they did not come out well. Was it the camera?  Was it the subject?  Or was it the photographer?  Learn from your mistakes so you don’t repeat them!  Kind of an odd post for today, and for those that are not into astrophotography, I promise to return to  some content tomorrow that has a wider interest base.  But I figured that when I learn something, the whole point is to share that newfound knowledge with the reading and listening audience.  On that note, how about the rest of the CB faithful?  Anyone out there have any mistakes or goofs they learned from?  Share your mistakes if you dare in the comments!  (Or with me privately if you’d like to contribute, but remain anonymous – jason <AT> canonblogger <DOT> com.)  Thanks for stopping in all – keep on shooting and we’ll see you back here again tomorrow!  Happy shooting!

Grab the Feed

How to build a star tracker!

Rather than go through another hardware review today, I thought I would share a different kind of hardware with you – the DIY kind!  Over the weekend I embarked on a little project on building a device to track stars as they move across the sky (even though it’s really the earth that’s moving and not the sky).  Now granted, there are better ways to build star trackers, but many involve electronic motors, are more complex (in my mind anyway), and can get kind of costly (at least from what I’ve read).  So, I figured I’d start simple, and go from there.  Join me in this adventure in building my first star tracker for under $20!

It was a lot of fun and I learned a lot in doing it, both about other methods, some of the short comings of this approach, but for the cost, figured it’d be a good entry into doing these kinds of things for comparison sake.  Check out the main YouTube video that gives a narrative on the process and my finished result:

The reference material I used for building this leaf-style star tracker came from a professor at the Rochester Institute of Technology (sounds impressive enough to me!), so figured I should give credit here as well:  http://people.rit.edu/andpph/text-star-tracker.html

If you have thoughts, comments, feedback, or suggestions to either improve this one, on how you’ve made your own (or plan on making one), and even if you have shots to share made from DIY star tracker kits, please feel free to et me know via either the comments or email!  I will start a photo gallery for all shots shared and plan on updating that monthly with all the photos received, either via links in the comments or via email!

Happy (star) shooting, and we’ll see you back here again tomorrow!

P.S.  Don’t forget, we’ve still got the Wacom Bamboo Fun Giveaway going on all this month!  Share your shots in the Flickr thread and you’re entered to win this prize worth $100 retail!  Thanks go out to the folks at Wacom for contributing this awesome tool for blog readers and podcast listeners!

Grab the Feed

The Power of Action

Until this last weekend, I had very limited experience with astrophotography.  The concepts and techniques of the field are well documented, and I have read several articles on the subject.  What this last weekend demonstrated to me, (and what I often tell everyone who reads this blog), is that there is no better way to learn something than to just get out and do it!  This is the power of action!

Over the course of a pleasantly long weekend with my wife, we had an opportunity to view an absolutely breath-taking night sky, without the pollution of light interference.  The pure darkness of the mountains, coupled with the lack of urban and suburban sprawl, revealed the brilliance of the night skies to me.  As I shared the moment with Tracy, a part of me finally caved and said “Sorry, but I’ve got to take a picture of this!”  Admitting defeat as a camera widow, she went inside, and I tried to recall the articles with their knowledge:

  • Tripod (critical for stability!)
  • Shoot wide (calls for fewer adjustments during long exposures which also means longer shutter speed allowances)
  • Shutter release (never release the shutter manually on such scenes – increases too much vibration)
  • In camera noise reduction…(long exposures tend to create noise as a consequence)
  • Higher aperture (for greater depth of field)
  • And then there was something about the shutter speed…no more than…what?  I could not for the life of me remember!

So, with the digital mantra in place, I tried many different exposures.  My first attempt was a 30 second exposure at f8.0 and ISO 100.  The on-screen results were not that great.  So, I took things to the extremeon my next shot, 30 second exposure, f8.0 and ISO 3200.  The result:  I saw stars on screen!  Excited at the prospect ofcapturing the scene, I promptly returned to the secluded getaway mentality, forgetting the cardinal rule of digital:  to shoot many, many shots, and at many, many settings.

What I also forgot is that in astrophotography there are more than the above considerations to take into account.  After getting home and realizing my blunder, I re-read the articles and remembered that as a general rule, ISO should never go above 800, and because the earth is always moving, you should never shoot an exposure longer than 5-10 seconds, because stars will blur by then.  (As was evidenced during post processing…)

So, the result was nothing too rewarding.  Certainly nothing that will get me fame in fortune in National Geographic or anything like that.  I did manage to massage something close to what we saw with some post work (including some serious Noise Ninja assistance, drastic curves adjustments, the glowing edges filter, and a little black and white conversion, just for starters…

Night Skies

While the end result is “not too shabby”, it certainly is nothing like these stellar (literally and figuratively) shots from Astropix.com I must admit that I am now considering adding to my gear collection, and that I need to refresh on the techniques of astro-photography, the best method for learning is to simply get out and shoot.  Want to capture the light?  Then here’s teh call to action, because it is, after all, the only way to capture the world around you in images!

For those interested in learning more about astro-photography, here’s a couple resources I’ve got in my bookmarks (how I wish I had my computer with me at the time!):

If anyone has their own links, resources, tips, tricks, suggestions, and ideas for astrophotography, feel free to share them in the comments.  In the meantime, thanks for stopping in and we’ll see you back here again tomorrow.