Now the flip side

Earlier this week I talked about various ways to decrease noise in your images.  While preventing and removing noise is something we typically do like to address in our work flow – there is also the flip side where noise or grain can enhance the quality of a print.  All one has to look at for examples where noise can have an impact is in black and white photography.  Grain gives an added sense of detail to black and white photos.  The same can also be said for sepia-toned photos, those with a slightly yellowish, an “old-fashioned”, or “antique” look to them.

To give you an idea of how images can benefit from noise, take a look at the following two shots.  First the color:

Noise in Color

And how the black and white:

Noise in Black and White

See how the grain from the image really accentuates his facial features?  That’s one way in which noise/grain can enhance an image.

So, what about noise in your images?  Do you like it or not?  Got ideas for how noise can enhance your creativity?  Sound off in the comments!  Until tomorrow, happy shooting, and as always, keep watching those apertures!

What’s This?

What's This? - Week 10

Nothing fancy today – just something to whet your creativity – can you guess what this is?  It took me a while to dig through my archive of images to find one that I could crop this way and effectively not give it away.  The winner….well, wins!  Good luck to all, happy shooting, and we’ll see you back here tomorrow!

Oh yeah, don’t forget to vote in the poll – how much time do you spend shooting for your own projects each month?

Just under the wire…

enver did mighty fine yesterday in their handling of the Raiders, so hats off to them for getting the season started on the right note. Go Broncos!

As you may have guessed from yesterday’s post, today is Tutorial Tuesday, and since time is ticking away from me here, I’ll get right to it. The tutorial today does a comparison of reducing noise from the built in settings inside Photoshop versus a third party plugin. Granted, I went through it pretty quick and didn’t go into a lot of detail on the various settings, but I did want to give you the upshot of applying the different types of nosie reduction, so you can see how superior a 3rd party plugin is to pretty much any native reduction method.

The plugin I am using is for Noise Ninja, but I am sure that the others mentioned in yesterdays comments (thanks go out to Michael Palmer, Jen Rinaldi, and Brian Reyman for their contributions) perform equally well. So…without further ado:

Noise Reduction Tutorial (Web based)

Noise Reduction Tutorial (Quicktime)

So, that’s it for today. Tune in tomorrow for the latest edition of What’s This? Until then, happy shooting and watch those apertures!

Oh yeah, one final thing – for those picking up the blog in their feed readers: Is this podcasting plugin that I am using working? (I am trying a switch from Podpress to Podcasting on the blog, and am curious how the feed crawlers and readers will pick this up). Don’t forget too, the poll on the right hand panel has another few days left, so be sure to chime in and share your thoughts on casual shooting trends.

PlayPlay

Monday Musings – Reducing Noise in your photos

Before I even start on anything photographic today, this is a great day to be alive.  Not only is it the first installment of MNF (Monday Night Football), but it is my own beloved Denver Broncos!  Having been a fan since the age of 8, and cried through the first 4 Super Bowls in sadness, and then in exhilaration for the next 2 in happiness, let’s just say GAME ON as the season gets underway with us revving up against the Raiders (yes, I’m a Raider hater like nobody’s business!) tonight at 8pm!

Okay, now having set the stage for tonight, let’s shift back to the photography theme of the day – reducing noise in your images.  Let’s start with a little background:

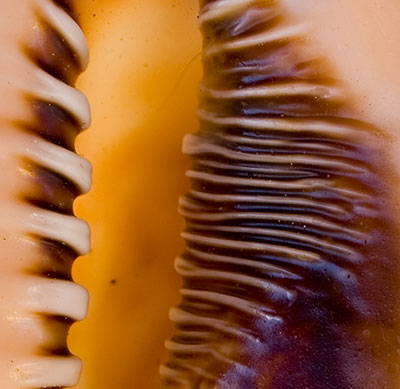
From even the early days of film, photography as a medium has always had noise as a factor.  Before digital came of age, this was actually referred to as grain rather than noise, and the speed of the film was directly proportional to the amount of noise that you would get.  Higher ASA values meant you could capture images in lower light, but at the expense of grain.

As most major forms of photographic expression have moved to digital, we now are looking at this issue using more current semantics, that being noise rather than grain.  Digital noise is introduced as we increase the ISO levels within our digital cameras.  This has been a major advantage to digital photography, because you can change the noise/grain tolerance from one frame to the next, whereas with film, you had to choose your tolerance level when you put the film in.  If you put in too high a film speed, and you wound up with a lot of noise in images that otherwise did not need it.  Alternatively, if you put in too low a speed film, none of your pictures would turn out.

Some of us try to introduce grain/noise for artistic effect, while others try to minimize it to achieve clean smooth color transitions without any granularity.   Each of these could merit its own discussion, so today I am going to look at 3 of the ways that you can reduce noise in your photography:

  1. During capture – if you want to minimize noise, one of the best ways to do that is to ensure you are shootig with the lowest noise tolerance in your camera.  This means ensuring that your ISO is set to its lowest possible levels.  Most point-and-shoot cameras allow for this type of adjustment these days, as do practically all SLR cameras.  As a general rule of thumb, the better the camera, the lower the ISO.  Most consumer grade SLR’s will allow you to adjust ISO settings down to 100.  As you price into higher quality SLR’s, some can drop this value further to 50 or even 25.  At that level, expect to pay about $2000 or more for the SLR body that can accommodate this.
  2. In your photo editor – There are many options here for reducing noise if your in camera settings did not minimize noise enough for your tastes.  Everything from Photoshop Elements, to Lightroom, iPhoto, Corel, and of course Photoshop CS3 have internal controls that allow you to make adjustments to compensate for noise in images.   Some methods perform noise reduction better than others and even some programs excel at this better than others, but by and large, variances in the quality of noise reduction will be a function of the cost of the software itself – iPhoto is free, so the noise adjustments will not offer much in the way of malleable controls.  Elements, at about $75 is a little better at handling noise, while Lightroom and Photoshop round out the higher end of photo software programs both in their price and in their handling of noise.
  3. Specific Noise Reduction programs – Because there is such an interest in managing noise, a growing body of software caters specifically to this function, and this function only.  Software developers have seen a need for this and specially designed programs are now made to handle just the management of noise in images.  Most offer as a part of their programs, a way to incorporate their algorithms into larger photo editing software by means of plugins.  Some of the most common and well-known noise editing programs include Noise Ninja, Noiseware, NeatImage, and Dfine.

As you can see, there are many ways to manage noise, including in camera options, within your photo editor, and with free standing noise reduction software.  I have found that the best results lie in a combination of all of the above.  I try to remember to make necessary adjustments in camera for the type of images I am capturing.  From there, as I move into my photo editor, if noise is present but not excessive, I will use the built-in noise reduction measures.  For images where the noise levels are high, I use Noise Ninja and have been happy with the results.

But, just like haircuts, there are more opinions out there on what constitutes effective management of noise in photos.  So, let’s hear it!  What methods do you use to manage noise in your photos?  Feedback, thoughts, and discussions are always welcome in the Comments section.   Well, I guess that means tomorrow I will probably have to do a tutorial on noise management in images.  So, until then, happy shooting and watch those apertures!

A change of plans

This week I am adding a new feature to the blog, in hopes of making things more interactive, and as a means of contributing market research for the field of photography as a whole. In all the blog posts I’ve done over the past year (we’re getting close too…), the content has really been focused on information I’ve put together that I thought could be helpful to others. Well, no man is an island, so I am going to start incorporating weekly polls for people to participate in. These polls are created by a company called VIzu that does market research for a wide variety of industries. They are free to create, and can offer an opportunity for us to help shape future research and development in the field of photography, and beyond! So, in the interests of giving back, the first poll will hopefully help to show how often we go out and make photos as personal projects. Thanks for taking part, and feel free to share ideas for future polls in the comments.  Don’t forget to pass it on to your friends, so they can help shape our future too!

As always, happy shooting, have a great weekend and keep watching those apertures! 🙂

Photography for Fun?

As I started a new job here in Colorado, I was actually quite excited to do so, because a fair portion of it includes some photography portrait work, event photography, and a lot of publishing in catalogs, brochures, and marketing materials.

As a hobbyist photographer for going on 4 years now, I would guess that I am similar to many other hobbyists – I enjoy learning more about the field, and at some point, there has always been an interest in “taking things to the next level.”  Today, my Thursday Thoughts revolve around that premise, and the age old adage that one should be careful what one wishes for.

Taking pictures for ones own pleasure and self expression is always gratifying, but when taking on photography as a profession, your own creative vision can very quickly become muffled, if not lost on the creative vision of others.  In the past month of working at my new position, I am already noticing that photography at work has become very much that – work.  What it has also done though, is what I was most fearful of – I am taking my camera gear out less and less for my own creative expression and enjoyment.  I guess the silver lining is the awareness came rather quickly.

Now, I am making sure I take some time regularly to get out and just take pictures for the sake of taking pictures – doing it for fun and my own learning and advancement.  So, for my Thursday Thoughts, I figured it might be useful to share my own mission with the rest of the listening audience:  whatever your goals or dreams are with photography, make sure you save some time for yourself and your own creative vision and self expression.  After all, isn’t that what drew you to photography in the first place?

Happy shooting!

What’s This Returns again…

Last week, I missed the 9th edition of “What’s This?”.  On Wednesday the rather long previous day left me without the time to prepare for it, and on Thursday I was wrapped up in the Firmware Upgrade posting, that the weekly “What’s This?” just plain slipped my mind – like Denny Crane from Boston Legal, I must have Mad Cow Disease! 🙂

Rest assured, fellow bloggers, photogs, and CB readers all, I have remembered this week to make such a post.  Since there is nothing to reveal from last week, I’ll just get right to it – here’s this week’s mystery shot.  If you can identify it, then answer in the comments for:

What’s This? – Week 9

What's This? - Week 9

The first to get it right is the winner! Until tomorrow, fellow photogs, happy shooting and watch those apertures!

ETA:  I listened to the latest episode of TWIP (over at www.twipphoto.com) and realized the Aperture  Nature Workshop Contest is almost over.  I hastily added my latest landscape image to the contest, and have virtually no hope of winning, but in case anyone else has time to upload a quality photo (or wants to stop in and vote for mine), the contest link to sign up for free and submit images (also free) is here:  http://www.photrade.com/contest/aperturenatureworkshops

Updating Your Firmware

A few days ago I shared the story of how an IS lens on my beloved 40D was producing some odd noises and the resulting diagnosis was to update my firmware. Rather than do so immediately (as is usually the case for me), I decided to hold off and share it as a video tutorial of sorts on what the process is like. I share a few tips on things to do before hand and what to look for. Then, you see in real time, unrehearsed and unscripted, my firmware update.

As the video shows, it’s a pretty painless process as long as you follow instructions. Unfortunately, because I had to use Quicktime to record it, there is no flash version available. Podpress has not been updated to co-exist with WordPress, so I am continuing to have to post videos and multimedia via link rather than by an available feeder, so apologies there as well.

But anyway, enough falderal, here’s the video:

[display_podcast]

I should have some more pics, a Wednesday “What’s This?” and fun stuff again tomorrow.  Thanks for stopping in, and until then, happy shooting and watch those apertures!

Just a quickie…

Went out this evening and caught a few nice ones.  I’ll upload to the Flickr photo stream tomorrow evening with the weekly tutorial (upgrading your firmware – make sure you tune in for that – raw recording, no re-takes allowed!).  But, in the mean time, here’s a teaser pic (probably the best one from the outing):

Lean on Me

Happy Labor Day

For all those in the U.S.A., especially those who have the day off:

Happy Labor Day!  Go out and shoot!

For everyone else:

Go out and shoot anyway! 🙂

Today was a family day and I did take an hour towards sunset to go out and see what I could see through the lens.  Got a few but not sure if I had all the dials and exposure settings right, so look for them in the post tomorrow!