Is 12 enough?

An interesting news story came my way today over on CNet where Akira Watanabe, manager of Olympus Imaging’s SLR planning department said that most needs of most people can be met with a 12MP camera.  The full story is here, but does bring what has been an ongoing discussion into a more defined state.  As we’ve seen megapixel counts increase from counts lower than 3 MP less than a decade ago to counts that now are at 12 MP or higher, discussions have arisen throughout the industry on “How much is enough?”

From my perspective, I would agree that 12 is probably close.  Yes, processing capabilities are increasing and hard drive storage space costs continue to decrease at almost ridiculous rates (you can get a 1TB hard drive for around $100 these days!), but these are mitigated by need.  When you look at the true and honest need for most folks (myself included), we do not regularly print much larger than 8×10, or 12×16.  I would venture to guess that even artist gallery prints and portfolios do not exceed 16×20″ dimensions that often.

Yes, more megapixels means you can crop smaller and retain print quality, but at what price?  More grain or noise?  Yep.  Reduced dynamic range?  Yep.  More processing demands?  Yep.  More storage needed?  Yep.  While all of these can be addressed by buying software to handle noise, bracketing exposures to increase dynamic range, and buying more storage to meet the increased demand, there does come a point of diminishing returns on the investment, and Olympus seems to have set that mark at 12 MP.

But, will the market agree?  I think so.  It’s no secret that the economy is not doing so well.  People are likely going to be more frugal in their purchases, and getting that full-sized wall print may not be as high a priority as, perhaps, bread on the table is anymore.  Do we need to re-assess our priorities?  Some say yes, that it’s not all about the megapixels.  Some say we should be asking for things like low light responsiveness, better auto-focusing, faster auto-focusing, better in camera noise handling.  I don’t think any of us would complain either if we saw a decrease in the costs of fast glass.

But who knows – maybe the masses will continue to push for more megapixels.  Now that Olympus has drawn a proverbial line in the sane, will other vendors see the logic and start to taper things off?  Or will the megapixels wars continue indefinitely?  Sure, we can’t predict the future, but guessing and talking about it can be a good source of discussion too because it can get us thinking about what is important in our pictures.  So, what do you think?  Where will things go from here?  Sound off in the comments, and watch for the podcast coming up on Monday where you’ll get an extended version of my thoughts on where things may go from here.

In the meantime, have a great weekend, and go out and getcha some (pictures)!  We’ll see you back here on Monday!

Go soak your gear!

It pays to review your web traffic periodically because I just learned a way that your bathtub can be used for photography!  Not only is it a good place to mellow out after a stressful shoot, but it also makes a heckuva softbox!  I was on a forum that had referenced the blog and a guy had some product that he placed in his tub.  I thought it was an interesting idea, and decided to give it a try.  As it turns out, the tub is a great place to put your gear!  Granted, not to soak it (sorry, but I had to tease the title that way), but to act as a great background and softbox combined in one.

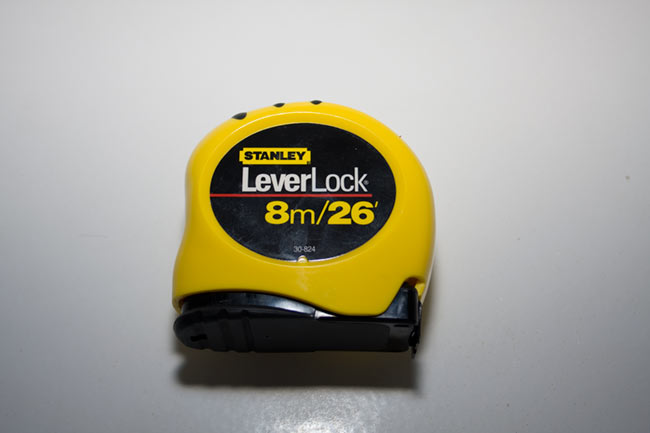
Here’s a few sample shots.  For all the tech-types, these are pretty much straight out of camera (or sooc) – all I did was adjust the WB for Flash and adjust the ACR sharpening from 25 to 75.  All are resized to 650px wide for the blog.  Here’s the setup:  I took the Canon kit lens (18-55) on my 40D, threw on the 550EX, and set everything to default values.  Shutter at standard sync speed of 250, aperture at f8 and ISO at 100.  I powered the 550EX at it’s standard setting, on camera (relax strobists – I can hear you shuddering from here),  and started firing a few shots.  I pointed the flash to camera right and got this:

ruler1

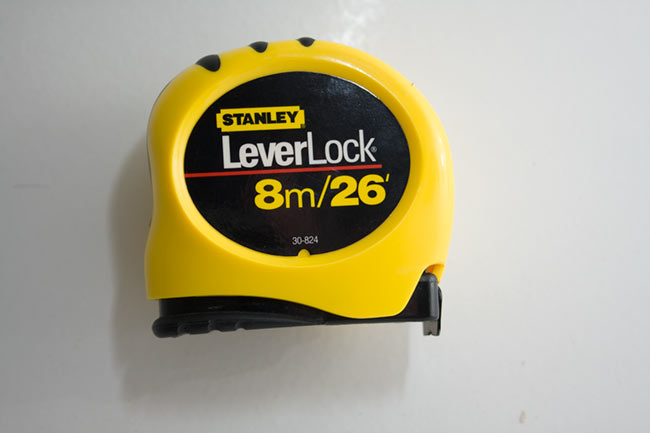
Yup, that’s a God-awful shot, with a nasty shadow.  Perhaps I could ditch the shadow.  Since we’re not exactly using conventional wisdom here, let’s try it with the flash pointed straight at the subject:

ruler2

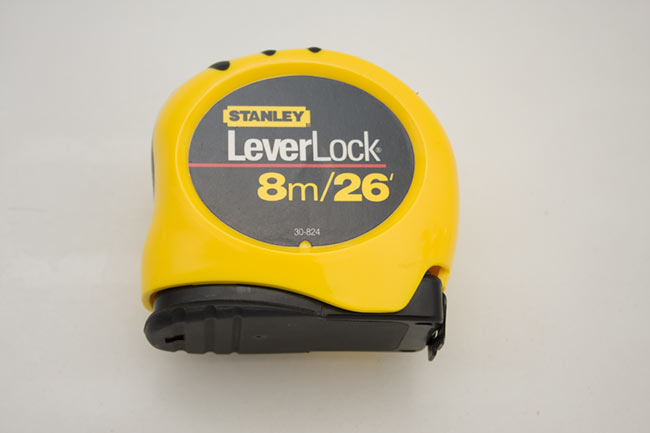
Hey!  That’s actually not too bad.  It’s not that great, and still definitely a “Meh” kind of shot as it’s still got something of a shadow.  So, I spun the flash to fire above me and bounce off the ceiling:

ruler3

Voila!  You know what?  For being a spur of the moment thing, and without a lot of pre-planning or preparation, that’s not bad at all.  And, it was shot in a bathtub!  Anyone else out there have a bathtub?  Try some shots in it for different items.  I used a tape measure, but what about a pen, or a microphone, or a printer, or even a lens?  I bet you could get some pretty cool results with very little setup!  Anyone else have some odd or unusual ways to get clean backgrounds and even lighting on the cheap?  Feel free to share your thoughts, ideas, and feedback in the comments.  Feel free to link your own efforts there too!  Happy shooting all and we’ll see you back here again tomorrow!

Setting bracketing exposures – shutter priority

As promised yesterday, today I will be talking about bracketing your exposures based on shutter priority.  After a couple comments yesterday that it seemed unusual to bracket on aperture rather than shutter speed, I felt that in this companion post I should acknowledge that, it is.  The reason for the post?  One of the downsides I mentioned is that your depth of field will change considerably from a wide open setting to that of, say, f22.  That can also be an upside though because as you merge bracketed exposures into an HDR image, you can also add depth of field if you make the adjustments in aperture priority over shutter priority.

Additionally, I led off with aperture priority because it’s not the norm, and as most readers will know – I try to approach things from a new perspective when possible.  Finally, as I followed up with in the comments section, the simple fact of the matter was that I could not remember whether 250 or 200 was the absolute middle point for shutter speeds (this is the risk of adding gray above the brain, rather than to the brain! *grin*).  So, I led off with the post where I knew the numbers rote! 🙂

So, in the interests of full disclosure, shutter speed is a more common way to go when making bracketed exposures.  After verifying my numbers in camera, here’s how it breaks down using shutter speed to bracket multiple times:

fstopshutter

I also realized that I did not give the step-by-step yesterday, so here’s the process I would follow:

  1. First, meter the scene, set your camera to ISO 100 and exposure priority and adjust to 1/250th of a second.  Check where your f-stop is.
  2. Second, switch to manual, and adjust all settings to match that metering.
  3. Third, adjust the shutter speed down to 1/30th of a second, and fire off 3 exposures and the camera will bracket over and under one stop.
  4. Fourth, adjust the shutter speed up to 1/250th of a second, and fire off a second set of three exposures (the camera will bracket over and under one stop).
  5. Finally, adjust the shutter speed up to 1/2000th of a second and fire off your last set of three exposures.

Voila!  You now have 9 exposures to merge together for a bracketed workup to take advantage of a high dynamic range, or for exposure blending, as desired.  Of course the same rules from yesterday also apply:

  • Be shooting on a tripod
  • Be using a remote release (or timer)
  • Be using mirror lockup
  • All other settings remain constant
  • and that lighting conditions aren’t changing appreciably
  • You are set to manual focus
  • Your lens is set to its hyperfocal distance

Any final thoughts to share on how to bracket exposures?  Anything I missed or additional tips to share?  Feel free to sound off in the comments section!  In the meantime, Happy Shooting and we’ll see you back here again tomorrow!

Setting bracketing exposures – aperture priority

Over the past few years, I’ve had several people ask me how to set bracketing exposures on camera bodies for multiple exposures.  When I say multiple exposures here, I am talking in excess of 3 shots.  The reason for this is because by default, most Canon cameras (at least all the ones I’ve put my hands on) only have a single over and underexposure allotment on each side of the initial exposure settings.

Let’s take a look at the numbers…say we meter a scene and it says that according to the center point, we should be at f8, with an ISO of 100 and a shutter speed of 250.  So, if we want to expose this multiple times over and under that initial group of settings, since Canon only allows 1 over and 1 under, we will need to make additional adjustments if we want more than the 3 exposure set.

Here’s the entire f-stop range (well, not all of it, but enough for our purposes):

fstop

So, in order to get the full range of exposure, our aperture would need to manually be set to f2.8, f8.0, and then f22 and then let the camera capture the over/under.

For ease of manipulation I always start at the lowest end and work my way up, so in this scenario, I’d start with f2.8, press the shutter 3x, then move up to f8, repeat the shutter press 3x, then finally to f22 and press the shutter 3x.  That would give me a nine stop range of the same image at different exposure settings.  It goes without saying here that in such scenarios, you would want to:

  • Be shooting on a tripod
  • Be using a remote release (or timer)
  • Be using mirror lockup
  • All other settings remain constant
  • and that lighting conditions aren’t changing appreciably
  • You are set to manual focus
  • Your lens is set to its hyperfocal distance

Things that are problematic with bracketing in aperture priority are:

  1. Your depth of field is changing considerably as you move from f2.0 to f32.o so much of what is out of focus at f2 will be considerably sharper at f32 even though you are set at your hyperfocal distance.
  2. Lighting conditions will change.  Unless you are in a studio environment and flash is the only light source, ambient light is constantly changing,and this will have an impact on your exposure values.  Granted if you move quickly and methodically, this can be minimized, but due to the ever-changing values of light, this is something to consider!
  3. Weather conditions will change.  The scene that was perfectly still 30 seconds ago while you did the first bracket may not have perfect stillness for the second bracket set.  Changes in wind speed, direction, and intensity can blur things like flowers, branches, grass, and even some objects that you otherwise would consider fixed.  (Ever see a lamp post in a strong gusty wind?  Or a street traffic signal?)

Any other mechanics, pros and cons or points of discussion I missed here?  Feel free to chime in with your thoughts on bracketing exposures based on apertures.  Don’t forget to tune in tomorrow too for the backeting exposures on shutter speed, along with its pros and cons.  Happy shooting and don’t forget the Twitter v bloging poll from yesterday!  If you’ve already voted, tell a friend!

Monthly Poll – Twitter and Blogging

I was talking with a friend on Twitter last night, and despite the etiquette against chatting back and forth repeatedly, we had quite a lively discussion on the subject of using Twitter to promote/market/advertise your blog. Rather than regale the readership with the discussion, I’ll simply leave the voting unhindered by personal bias, save for one link – a post one of us read on Twitter etiquette a while back: http://tinyurl.com/5lcrqr

With that pretext set, we’d all be interested in hearing the blogosphere thoughts on this subject. So, vote in the poll, then chime in with the comments – the fate of the universe rests in your hands (not really, but join in anyway, it’s fun! 🙂 )

I promise tomorrow I will return to photography topics.  In the meantime, Happy Shooting!

Facelift Friday

With February now in the archives, I figured this may be as good a time as any to get a head start on some Spring Cleaning with the blog.  The theme I had been using for the last year or two had been getting a little dated, and the designer has not issued any updates since 2007.  Additionally, some portions of the blog just were taking more muscling to conform to the evolving standards of CSS, XHTML, plugins, and even WordPress itself.  So, consider this a Facelift Friday!

Those of you on the blog, you can see what I am talking about – this new theme is much more photo friendly – the header image is more standardized, so I can start putting more of my images into the rotation for everyone to enjoy.  Plugins also enjoy more support, as does the RSS, calendar, and other sidebar features.  For those of you picking this up via the feeds, please take some time to stop over and enjoy the new layout.  This is, of course, the “first look”, and I will likely be making some adjustments as things settle in, including widening the body width for the main posting area, and dressing up the edges a little.  Any ideas for what to consider?  More pics?  Perhaps some page links?  (I noticed the pages area is now not visible from the main one…)  Feel free to chime in now while I am still in “clean-up” mode!

Okay, so the Spring Cleaning is a little premature, but felt it was needed due not only to update some features, but also due to some coding deficiencies were brought to my attention (thanks, and shout outs to Kerry of Camera Dojo!).  Anyway, on a happy note, I’ll leave you with a little WTD humor since it’s been a while for a comic post:

What the Duck
What the Duck

Have a great weekend, and don’t forget to share your thoughts on the new theme/layout in the comments – it’s now or never to see your feedback implemented!  Happy shooting and we’ll see you back here Monday morning!

Great Green Gobs of Grapes!

This week has been a particularly creatively filled one here on the blog:

  • Monday I shared the HDR image workup from last weekend and published the weekly podcast
  • Tuesday had another shot showcasing the benefits of looking all around for ideas (including behind you!)
  • Wednesday was the more detailed explanation of the Lensbaby Composer and selective focus

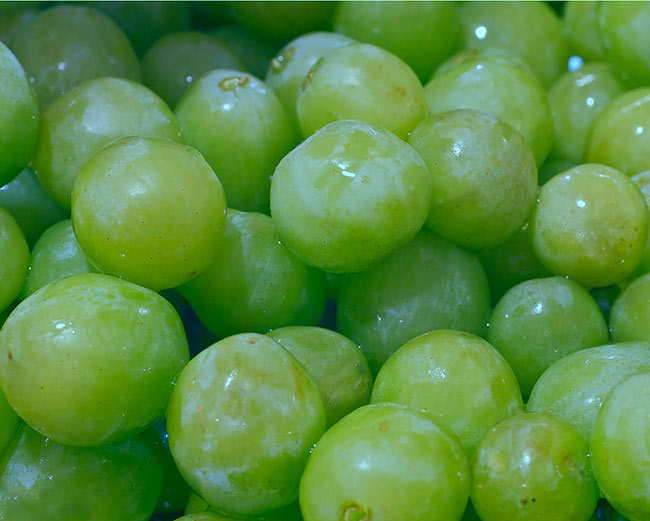
And now today, another source of inspiration from the kitchen!  I was cleaning some grapes for lunches and was struck not only by their size (these things were huge!), but also by the cool way the light in the kitchen was bouncing off each grape in the colander.  It helped that the colander is stainless steel and reflected some nice green tones back onto the grapes themselves, making them look even greener.  On instinct, I took a few, and here’s the best of it (and although it was taken with a 70mm Macro, this was not taken from macro range – that should tell you the size of these guys):

Grapes Galore!

Not too shabby for a “spur of the moment” capture.  Nothing like what you’ll see over at Mike Palmer’s blog (he does a lot of cool shallow dof work with food photography, and is a friend-of-the-blog), but a step in the direction of creativity anyway!  Catch an cool colors in your kitchen lately?  Share your thoughts, perspectives, links to other images, ideas and feedback in the comments section!  Keep on shootin’ and we’ll see you back here for the Friday post!

The Lensbaby Composer

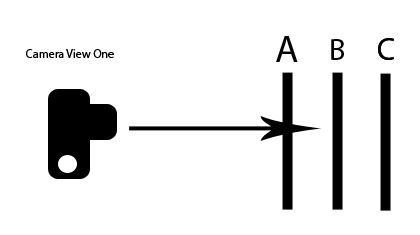
For those of you that are regular podcast listeners, you know I talked recently about the Lensbaby Composer and what it can do for your photos.  In the podcast you heard the terms “selective focus” but the term is kind of hard to explain without a visual, so I thought I might be able to do it better justice with a visual here today.  Take a look at this setup:

lensbaby1

So, if you are looking at a scene from camera view 1, and you want the sharpness of your image (your viewers attention) to focus on something at point B, it’s easy to do this.  Simply drop your aperture wide open and the depth of field will throw points A and C out of focus naturally.  Pretty easy, no photo editing, no trickery or anything involved – the mechanics of apertures and depth of field handle this for you.

Well, take a moment to consider things from the viewpoint of Camera Two.

lensbaby2

You still want the focus to be at point B, but because both A and C are also positioned relative to the camera at the same place (they are not in front of or behind the point of focus, they are merely off to the sides of the point of focus), dropping your aperture wide open will not throw A and B out of focus – they still there, just as sharp as point B.  Well, up until now, you’ve always had to take images taken under situation 2 and bring them into image editing software to blur, dodge, burn, and otherwise minimize the attention that points A and C got from the viewer eye.

Well, what the Lensbaby does, through it’s unique combination of lens elements that include an actual curved optic and a curved field of focus, giving you a round spot of focus, so that it allows you to set point B as a single point of focus, so that A and C will fall off in sharpness, bringing the viewer back to your desired point of what to look at.  (The eye will almost always naturally look for sharpness and light in images…)

So now, dodging, burning, blurring and other darkroom and software techniques are no longer needed!  The Lensbaby allows you to create these visions in camera, not afterward in post processing.  What does this mean for you?  More time shooting, and less time photo editing!  Who doesn’t want that?

The coolest part of the new partnership with Lensbaby is that they’re also offering anyone reading the blog or listening to the show an opportunity to get a 0.6x wide-angle/macro conversion lens for the Composer lens totally free! Imagine taking your creative visions to a whole new level with the Composer lens from Lensbaby – and then add the macro capabilities, and literally, the sky is the limit!  Your creativity knows no boundaries with lens-work like this!  So, if you are looking at adding the Composer lens to your gear bag (and you can purchase it from any retailer), then look no further, because from here you can get a free 0.6x wide-angle/macro-conversion lens from Lensbaby as a way of saying thanks.

Expanded creativity + Free gear = lots of fun

Sounds like a perfect equation for me!  So, stop on over to the partner website they made just for Canon Blogger listeners and readers to get your free lens today.  This is a limited time offer, and I am not sure when it will end, but the Composer and the companion 0.6x wide-angle/macro conversion lens (which you can get for free) would have been very useful this last weekend on the Eldorado shoot.  Remember the rock fissure?  Imagine if I had a chance to fade the DOF out away from the rock completely?  What about the rear window reflection?  Imagine if I could have faded the front window part out of focus completely?  Both of these shots might have ended up in my portfolio!  As they are, I’ve got two snaps that while interesting, will likely never get added to the print portfolio…

Does this help clarify how the Lensbaby works and what it does?  I know it’s a very simplified version, and the folks at Lensbaby have a lot more resources to help explain it than I do so be sure to visit their partner landing page here to learn more about it!  If you’d like to see some samples of the lens at work, (my lens hasn’t arrived yet) make sure to stop over to the gallery page here too!  Got some pics you’d like to share?   Link them here in the comments section (or even share then with the good folks at Lensbaby – they like to hear feedback from the field so share your thoughts and shots with them too!)  Finally, to learn all the details about this promotional offer, stop over to the page the folks at Personal Life Media have set up here.

If you do have pics and thoughts to share here, feel free as always to drop me an email, and you could be on the show!    For those interested in buying the composer, make sure to visit this link here to get the free macro conversion lens!  Questions, comments, feedback and ideas are welcome at my email address (as always) is jason <at> canonblogger <dot> com!

Check them out today – then get back out and keep on shooting!  Hope all your shots are good ones and we’ll see you back here tomorrow!

Look out behind you!

We’re always looking forward, upward and downward to find a unique perspective or angle on things – to create something unique and interesting.  Well, today, I’ve got an example of how sometimes the interesting shots are behind you!  In this particular case, it’s doubly true.

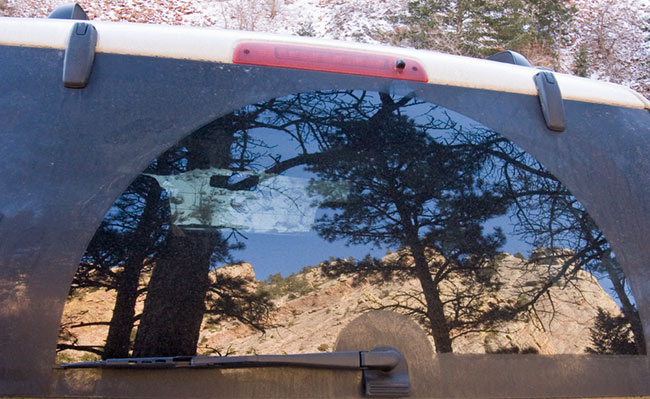
This is also from the photo walk out in El Dorado from last weekend, and what makes it doubly true is because we were out looking to capture the beuaty of the mountains, the trees, and the amazing Colorado skies.  At one waypoint between hiking trails, we took a rest stop and used some of the provided *ahem* facilities.  On returning to the vehicle, I saw this reflection in the rear window of the Expedition:

Rear View

So, the view was created from the back window reflection, and I only caught it by turning my eyes away from the mountains, landscapes, and opportunities in front of me!  When’s the last time you turned 180 degrees to get a shot?  Got any fun stories of when it did?  Share them in the comments!

Don’t forget to stop over and pick up the new feed in iTunes for the podcast and share your thoughts about the new show format!  Here’s the link:  iTunes feed Happy shooting all and we’ll see you back here tomorrow!

HDR, Web links, and a podcast!

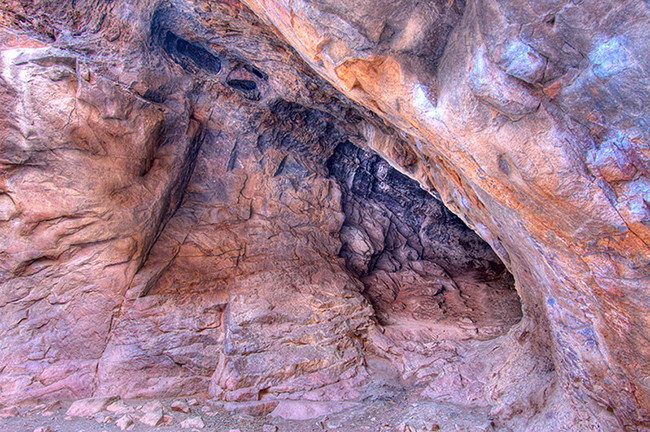
fissure2

So, this last weekend I went on the photo meetup group outing for the month of February into Eldorado State Park, south of Boulder, and had many an opportunity to capture some landscape and macro work. Some great views were had and I only hope that they all come out as well as this one did. While hiking up a trail of slippery snow and ice (it was cold out Saturday morning), I saw this fissure that was pretty intense looking because it was only partially lit. I thought about it for a second and decided to bracket some exposures to see if it would turn out with some HDR massaging. Not only did it turn out better than I would have thought, I was also very pleased with how Photomatix did with this. I would highly recommend this software to anyone interested in HDR work. Not only is it more intuitive than Photoshop, the results were much more gratifying! You can buy Photomatix for PS, Lightroom and for either Windows or a Mac over at www.HDRsoft.com.

Some other web links I learned about recently also include www.fotoblur.com and www.usefilm.com Both are much more cognizant and respective of photography copyright than other social and photo networking sites like Flickr and Facebook (we all know about the Facebook Terms of Service fiasco, right?). One thing I like about both Fotoblur and Flickr is that you are limited in how many images you can upload daily. This requires you to be more careful about what you publish, and as a result, you are more thoughtful and objective of what work is worth posting and sharing online.

Last but not least, the podcast that I had intended to put out last week was delayed for a few days as I put the finishing touches up on a home improvement project. (We finished out one of the basement rooms – expect to see some photos on that makeover forthcoming!) The good news is that not only is the basement room on the verge of completion, but that the podcast is up for this week. Naturally, the title of the podcast will match the blog post title, as the show notes follow closely to todays content. Stop on over to Personal Life Media for the show, or pick it up in iTunes! (Don’t forget to leave your thoughts in the review section of iTunes too…the more the merrier!)

Until tomorrow, when I’ll have some more HDR shots to share, keep on shooting – hope all your shots are good ones!