Learning Digital Photography: Episode #57

You heard it right, the latest and greatest episode of the LDP Podcast is now live and downloadable from your favorite outlet.  Six long weeks in the making and with the patience of my special guest, Kevin Mullins, this is Episode #57!

For those of you that may not have heard of him, Kevin Mullins hails from across the pond to get together on a podcast and talk shop on photography. A well-established wedding photographer in the UK, Kevin is probably one of the most talented wedding photographers I know. He joins me in the latest episode of the Learning Digital Photography Podcast to talk about the documentary style of photography and the impact that has on how you both shoot and manage your business. You can download it from iTunes or directly from the website via the following links. Below the links are the show notes…enjoy!

Talking Points

  • Approaching group shots versus cookie-cutter portrait poses
  • Work flow of the wedding day – how things start, where to budget time, & how things end.
  • Gear preferences
  • Pre-planning the event in Documentary Photography
  • Still and video convergence

Links Mentioned:

[display_podcast]

Puerto Angel Vacation Photos

As you may or may not have noticed, the blogging schedule has sort of gotten re-aligned again.  I had slipped from the 5-day schedule down to a 2-day schedule, but during a recent getaway, I was able to get things back on track.  Hopefully there won’t be any more changes to what is now a Mon-Wed-Fri setup, but news-breaking or other earth shattering info may trump the normal order of the universe!  In any case, during the break, I happened across a few really good photo ops.  Some gorgeous vistas and scenery, plus an occasional animal sighting from the trip to Puerto Angel Mexico (you’ll get more info if you subscribe to the free PhotographyBB magazine as a full-length article with many more photos is due out next month).

Nevertheless, since photos have not been at the forefront, I wanted to dedicate an entire post to sharing some photos from the trip here with you.  So, without further ado, some selects from the trip!

Hardware Review: Hoodman Loupe

As mentioned previously in the monthly contest series post, this month the featured vendor is none other than Hoodman.  Their patented and widely recognized CF cards and loupes are proudly made in the U.S.A. (the only ones I know of that can make this claim), and are virtually indestructible.  They have generously donated one of their Loupes for the contest winner, and allowed me a chance to review it as well.  So, without further ado – here is the latest in the hardware review category for the blog:

Hoodman Loupe


The whole purpose of the Hoodman Loupe is to block stray light from hitting your LCD.  In sunlight or hazy scenarios, it can often be challenging to view your screen, and even change settings if you own a newer camera.  Given it’s simple function, the review aspect of this really is a simple matter to determine, does it do the job it claims to do or not.

Not only did it completely block all ambient light with ease, the Hoodman Loupe also seemed to make the on-screen photo much more brilliant and crisp than I had remembered before using it.  That surprise was further mitigated by seeing how compact the Hoodman Loupe actually is – at roughly 2 inches long and an inch deep.  Not only did it perform adequately, but at this compact size, the Hoodman Loupe is an easy addition to your camera bag with the minimal footprint it takes up in space.

Most rubber or manufactured products attempt to make things slick of shiny and in so doing, the product becomes quite slippery and difficult to hold.  Not so with the Hoodman Loupe, as the rugged rubberized exterior was nicely made, and I was pleased to get an easy grip on it.  Although easy to hold when in use, I was not as thrilled with the ease of porting.  The short trap that they provide to carry it around your neck is much too short for me.  Now granted, I am 6’1”, but certainly no giant, and the size was just awkward for me.  While the quick release snap does attenuate it to a certain degree, the idea of keeping it tethered somehow is a little more reassuring (I have a penchant for losing small items when taken away from my body…LOL)  The accompanying carrying case was a nice addition, but did serve to really make it easier to carry…this seems to only serve as a storage container for when not in use so you can differentiate it from other gear in your bag.

I did recall after using this that a DIY solution was suggested by Larry Becker, of NAPP notoriety (he does the weekly NAPP News segments and writes his own blog at Larry’s Cheap Shots), and think his belt clip idea is both innovative and and highly functional.  If the folks at Hoodman made this accessory and slapped their brand on it, I’d be half inclined to purchase the entire kit from them directly.

It’s a fairly simple idea in total, and not much else to say other than – it works!  The sturdy construction, and compact nature of it is perfect for any photographer who wants to utilize their LCD.  For those of us with older cameras where shutter, aperture, ISO, and all other settings done via dials and the top viewer, it may not be as relevant, but for shooters using more recent gear like the Canon 50D, 60D, and 7D, the back screen is used much more to make these adjustments, so a device like the Hoodman Loupe could be a huge aid in making sure you’ve got your settings where you want them.  For $80, you almost can’t go wrong!  This is definitely the accessory you never thought you needed, but you really did!

Remember, this very Loupe is being given away at the end of the month, so for your chance to win this cool accessory, don’t forget to submit your BLOCK themed photo in the Flickr thread here.  Good luck to those who enter, and thanks again to the folks at Hoodman for their sponsorship and contribution!

Product Review: Backlit Box

When the folks over at www.backlitbox.com approached me about reviewing the product and participating in the initial research and design of their new product, I was happy to oblige as new products that come into the marketplace are always engaging to participate in during development. So, I submitted one print for work-up, considering the line of products (images back-lit by laser lights). I chose a shot of the moon hanging beautifully over the harbor of South Carolina. When I got the product, I was skeptical at first because there was hardly any color to the image. However, when I plugged it in, the color became quite brilliant, and lit things amazingly well – better than I would have anticipated.

I did have some notes to go back to Faxon (the owner): the back of the box had no hanging wire mechanism, which put me in an awkward position of having to nail a picture hanger into the box myself, and without knowing how it was wired up for electrical, made for a potentially damaging situation. The other thing I noticed is that a thin line of light was evident around the perimeter of the box on all four sides. As we discussed at length later, this was an unfortunate side effect of the production line, with no real professional way to mask this light spill (we both agreed that gaffers tape or electrical tape would just look rather amateurish).

Not long after that, I had an idea when noticing a piece of trim molding in my office was peeling…what if there was a thin piece of trim molding that surrounded the print…this could effectively black out the border thereby avoiding the light spillage. I relayed the thoughts to Faxon, and shortly before I left for my trip, he informed me that the 2nd generation product was ready to ship and to send another photo in for production.

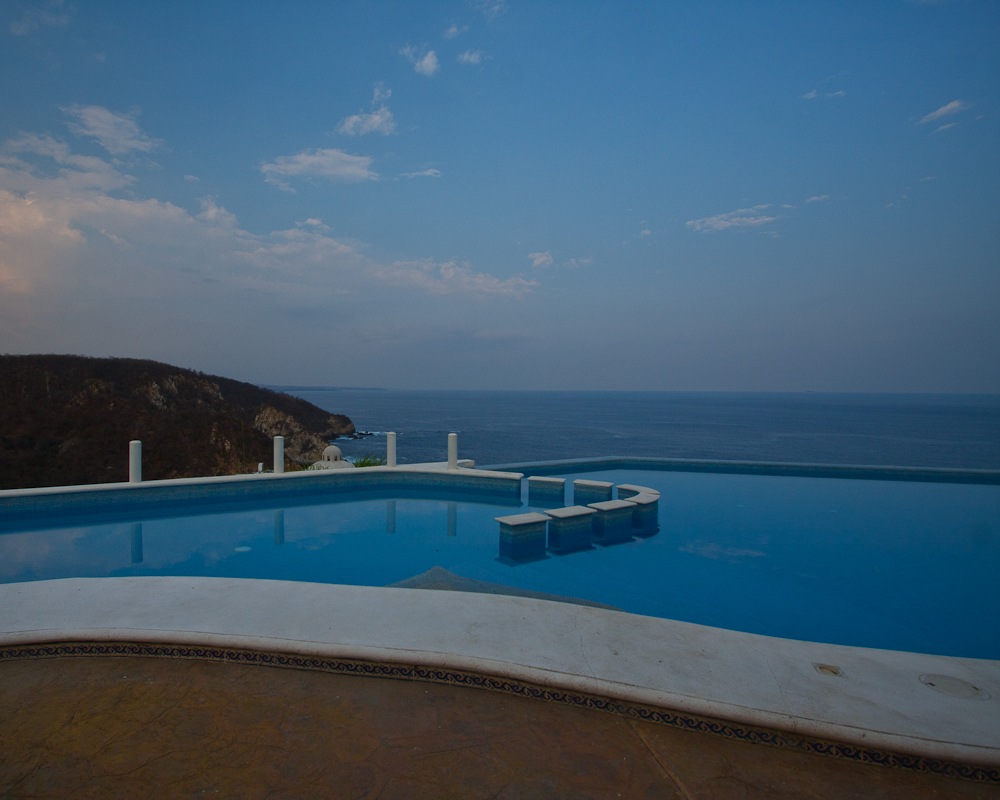
After sending in another image (a sunset over Folly Beach), I got the updated product literally 24 hours before my departure on vacation, and the end of the April contest series…so the review had to wait until now.

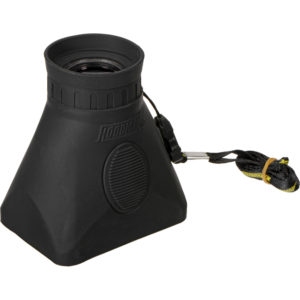
First off, let me say that I was (and am) very impressed with the professionalism that Faxon exhibited during the entire research and development process. Not only did he take constructive criticism well, but he also was quick to implement changes where improvements were desired, including not only a photo hanger on the back now, but also the trim molding to effectively eliminate the the white line of light around the border.  Take a look:

The image looks amazing and I was surprised even that it was one from my own portfolio! Give the image quality, back-lit intensity, and visual appeal from this product, I must heartily give it a two-thumbs up rating, even though it is likely still in development. While most products usually are, this one even more so as he continues to improve upon the original design to deliver a better quality product to his client base. For the cost of printing, it almost is a no-brainer to consider these as part of your portfolio of products to offer clients. I’ve seen two different landscapes, and Faxon has shown me displays of portrait work and architecture work as well that have really rocked my socks off!

It’s a great product that will only improve with time, and is something every photographer should have both in their own portfolio, and as a product offering to their clients. For more information, and to upload/order your own images for production, please visit www.backlitbox.com

For those interested in having product reviews done on your own product line, please feel free to email me, as always. I do also appreciate the many requests for reviews of various products from the readership here, and all it takes is a request to me for a review to begin the process of communication with respective vendors for review copies, so keep chiming in with these ideas – it’s your suggestions that keep the product reviews coming, so sound off in the comments with what you’d like me to review next! Until then, happy shooting!

The Permanent Portfolio Photo?

One of the cardinal rules I’ve always heard in the field of photography is to update your portfolio often – show fresh work to show you haven’t stagnated, and that your creativity is always expanding and changing with the styles and facets of the times.  On the flip side, I know of many photographers who quietly admit that they have a stable of “permanent portfolio shots” that they fall back on to use in promotion and marketing mechanisms if they haven’t had new projects that they want to promote.

Leave it to the Libra, but for me, I can see both perspectives and understand the pros and cons of each.  To those ends, I’ve not really made up my mind.  Sometimes I waffle one way, other times I go in the opposite direction.  It’s never good to stagnate, but I do think that some photography is timeless, and to that end, some photos are worth keeping in your portfolio.  I’ve got a few that I know will always be in mine, but others I rotate periodically.  Here’s one of my all-time favorites:


What do you do with your own portfolio?

Improve your photo workflow!

Lightroom Logo

Keyboard shortcuts are great ways to improve your efficiency when working on post production.  Here’s a couple that I use in Lightroom to help improve things so I can get my processing done, and get out and back to shooting that much quicker!

CMD/CONTROL+8

This takes me all the way down the Develop Module to Camera Calibration.  If I ever want to make adjustments to which profile to use (typically I use Camera Standard, but it’s always fun to experiment), this gets me there a lot quicker than scrolling with my mouse or tablet!

R

Yup, that’s it – just the letter R.  From the Library Module, this will take you to the Develop Module, turn on the crop tool and show you how you currently have your image cropped for composition.  That’s it – one letter, no fuss no muss!

Module Switching

A super slick way to move between modules is to use your Command key (CTRL Key on Windows) and the ALT key along with the number for each module.  It’s super easy to remember too:

Library = CMD/CTRL+ALT+1

Develop = CMD/CTRL+ALT+2

Slideshow = CMD/CTRL+ALT+3

Print = CMD/CTRL+ALT+4

Web = CMD/CTRL+ALT+5

That’s it – 3 easy ways to improve your work flow with Lightroom shortcuts!  Wawnt some more?  Check out the full detailed reference guide straight from Adobe here.  What ways have you found to improve your own work flow?  There’s tons out there, so share your own in the comments!  Thanks for stopping in and we’ll see you here again next time!

A Few From the Fire House

Nothing tip-related, tutorial-esque, or educational today, just thought I’d share some photos from one of the local photo clubs I participate in regularly.  One of our members is the on-staff photographer, and was able to get us permission to take photos for an entire session.  We even got one of the guys to get in his gear and do some shots with us.  Devin is the guys name and he totally was cool with our posing instructions and everything – this guy even kept this super heavy fire hose on his shoulder for like 30 minutes while we had him stand and pose, looking in various directions and holding his head a certain way.

So, without further ado – here’s a few samples/selects from what I am affectionately calling:

The Fire House Shoot

Fire House 1

Fire House 2

Fire House 3

Fire House 4

Fire House 5


And to close out the series, one that struck me while there was a scene that reminded me of why we have these courageous men to serve and protect us…

Fire House 6


The poses that Devin struck were directed courtesy of yours truly (stop back in later this week for more details on the posing techniques I used), and all post processing was done using your favorite photo editor (and mine):  Adobe Lightroom!


Adobe Lightroom 3

Thanks to Tim Tonge for organizing the event, and to the brave men of Castle Rock Firehouse for tolerating our presence for an afternoon!

Spring Photo Projects

With Spring in the air (if not already sprung), many of us are out and about brimming with photo ideas after being couped up for a chilly winter.  What’s that you say?  No photo projects brimming yet?  No problem – here’s a few to get you started:

1.  The Call of the Birds: Avian photography has always been something of an art form, with many of the hard core, die hard types venturing way out into the boonies of mountains, hills, lakes, and other far-reaching places.  For the rest of us though, it’s tough to find the resources (time and money) to go to the birds, so another option is to bring the birds to you!  Buy some bird feeders and see what comes!  My folks have several bird feeders in upstate New York, and every time I visit, there are birds flying everywhere.  Pine cones with peanut butter, humming bird feeders with sugar water, and even just a plain old bird bath with feed from your local DIY store can bring a bounty of birds to your doorstep!

Avian Photography 1

Avian Photography 2

2.  Join a photo group: We’re everywhere!  From ASMP groups to NAPP groups, Meetup groups, and WPPI, you can find groups for pretty much anything ranging from professional development, to studio lighting, and just groups of photographers that like to get out and shoot together for the love of the craft and the camraderie of it all!  I’m a member of several local groups, all via the site Meetup.com, and I don’t have to pay a cent to participate!  (I do contribute though, just because I like supporting such efforts…)

3.  Shooting in a park:  Get some photographer-friends, family-friends, or just some friends to join you in a park.  Set up a blanket, a few light stands, and have some park-type food available:  (crackers, cheese, water, whatever).  Add an ipod with some speakers for a little music.  Offer gag prizes for people who dance, act silly, or pose for the camera.  Process the photos and post online so they can share, download, add to Facebook, Twitter, or print!  Low cost, fun, and helps to build your portfolio!

The ideas are only limited by your creativity!  Got your own ideas for photographic opportunities this Spring?  Sound off in the comments to share, encourage, and inspire others!  Happy shooting, and we’ll see you back here next time!

P.S.  Don’t forget the April photo contest on Flickr – win a BacklitBox of your favorite photo!  Flickr Contest Thread


8 Megapixels…

When I first transitioned to digital photography seriously, my camera of choice was the Canon Rebel XT. In that camera I found a whopping 3 frames per second, 8 megapixels, and a host of other features and benefits that go with SLR photography. The times, how they change…

My Droid2 smart phone bit the bullet (this was the third one of these to die prematurely), and Verizon in its wisdom decided I needed to go to a different model phone.  After several logistical problems with getting the correct battery shipped for the correct model to the correct address, I finally got a battery for the new phone, powered it up and activated my number on the new line.  Imagine my surprise when I found out that this new phone has…yup:

8 Megapixels!

It staggers my mind that they can fit the same number of pixels on this teensy sensor that used to fill a sensor for an SLR.  My hesitancy at embracing this MP count is that there will be excess noise, and pixelation on the images.  While the smart phone features (phone, email, Facebook, Twitter, etc.) look to perform adequately, the camera is always a point of contention for me as I wish these phones could adapt somewhat and figure out a way to have an adjustable aperture.  If you can fit that many pixels onto that teensy a sensor, surely the aperture could be adjustable!

This could just be me ranting on quixotically though – so, here’s a sample image at full resolution (click it to see full size).  Does this seem decent enough for a camera phone?  Sound off in the comments with your own thoughts on cell phone cameras – what features are good, what should be thrown out, and what should be improved?  (No carrier bashing please – try thinking of this as carrier agnostically as possible! 🙂

Droix X Test Shot

Everything Old is New Again

Let’s face it.  The economy is still not the powerhouse it was five years ago.  We’re all still reeling a little bit and saving money is at a premium, while spending excessively is a luxury only for those with deep pockets!  Count me in the former group too, so when someone asked me recently if it’s worth saving the coin to buy used I answered…“It depends”! I know, you thought I’d say yes, but it really does depend.  Here’s where and when it can be a good idea when upgrading your camera!

Buying used cameras versus new cameras

It’s no secret by now that the best place to invest the bulk of your money is in your lenses.  However, you still gotta have a camera, right?  So, should you opt for using last years model and risk having a client show up with better gear than you?  Or, should you just step up, spend the bigger dollars and always be on the leading edge?  If it’s a matter of economics, and there’s no gear limitations that stand in your way (slow shutter speed/clicks per second, etc), my answer is to always go used.  There are some of the perils and pitfalls of buying used gear though, so here’s a few tips to keep in mind when shopping around for used gear:

1. Shutter count – the shutter has an expected lifecycle of clicks it is built for. If you can get the shutter count (lots of software programs to do this) make sure you have at least 50% of them left.

2. Overall camera condition – check the camera for nicks scratches, scuff marks, and the like. If it’s all beat up, that cold be indicative of interior problems.

3. Sensor and other internals – Some problems aren’t as easily determined on a visual inspection, and it’s always best to take a few shots with the camera. Check to see if the sensor is scratched, nicked, has dust spots, etc. If it’s dust, that can be easily cleaned, but nicks and/or scratches can be a deal-breaker.

There’s obviously more to it than that, but those are the basics in looking at used camera bodies. In general, my rule of thumb when buying/selling used gear is to start at retail minus 10-15%. If the price is in that ballpark, it’s likely well cared for. I also look at seller ratings whenever possible. Fred Miranda is one of the better places to buy and sell, but Craigslist can be good since they are most often local and you can go do a visual inspection before throwing money out the window… If you’d like my take on buying and selling through FM – I’ve touched on this before here

What experiences have others had with buying and selling new gear?  Any places that are preferred?  Places to avoid?  Sound off in the comments with your own thoughts and experiences!  In the meantime, remember, it’s really not about the gear – it’s who’s behind it, so keep on shooting!

One last thing to mention today – the April contest is live (I announced it over the weekend in the free newsletter blast), and the winner will get an 8×10 image of their choice printed and mounted in a pretty cool Backlitbox!  Very cool prize and thanks to the folks at Backlitbox for sponsoring the April giveaway!  I promise more details are forthcoming here soon in the form of a product review, but time’s a-wastin’, so be sure to get your entries in soon!  Congrats also to Evelyn for her win of the March giveaway!  She’s getting a very cool Tether Table from the folks over at Tether Tools – just drop me an email to claim your prize!  Here’s her winning image up in lights!

Flat Tire