Classic Questions on Photography: Which Lens?

Every photographer, whenever they start or dip their toes in the proverbial waters, starts wondering about their gear, their work, and how to do things.  And, in search of answers to questions – we start asking them.  One of the classic questions is “What camera should I buy?”  Another similar one is “What lens to get?”  There are more (of course), but these are two of the most commonly asked questions I’ve had proposed to me (and that I’ve proposed myself in the past.  The answer though, is a bit more problematic, because there are qualifiers to everything.  More often than not, the answers start with the inevitable “It depends…”  The reason is – it does!

For lenses, the “depends” factor relates to what you want to shoot because your subject matter will define the focal range that is best suited to your purposes.  Here are some general rules of thumb to follow:

  • Wide Angle Lenses

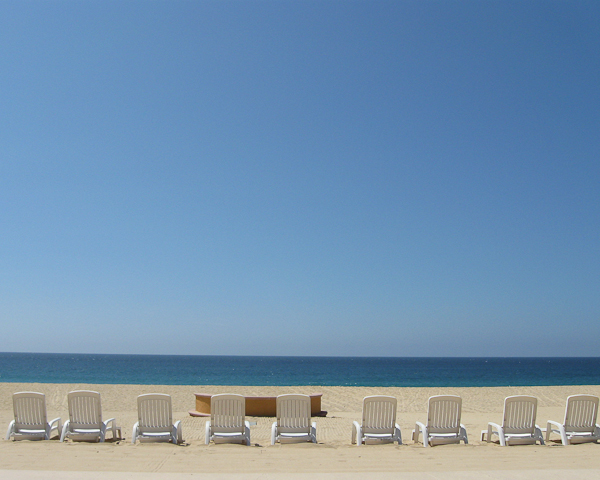
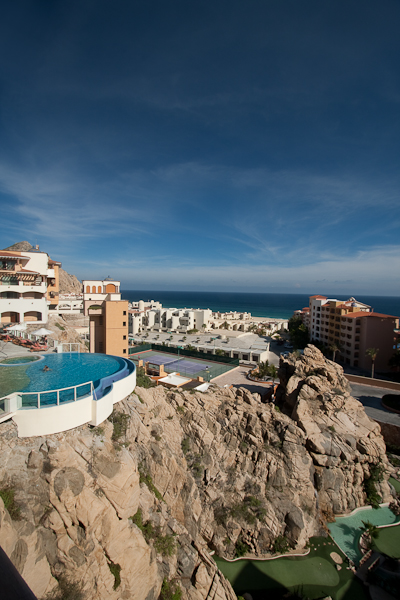
Wide angle lenses (in my opinion), are best suited to a few specific styles and subject matter.  I’ve found that the wide angle of view is best suited to subjects like landscapes and architecture.  Wide angles allow you to capture a greater sense of scale, where clouds, skylines, building lines, and other scenes like this.  In general, the focal lengths that I would put in this category range from the low end of 10mm up to around 35mm.

  • Portrait Lenses

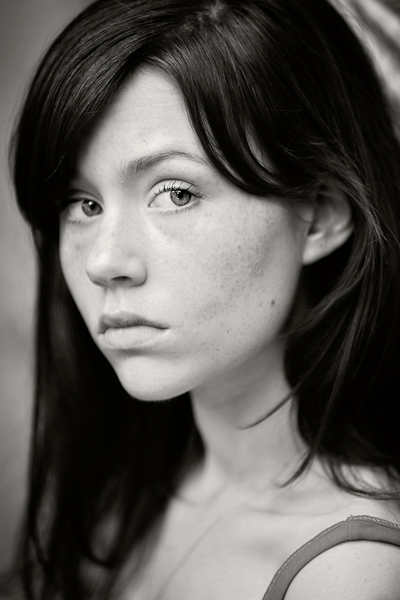
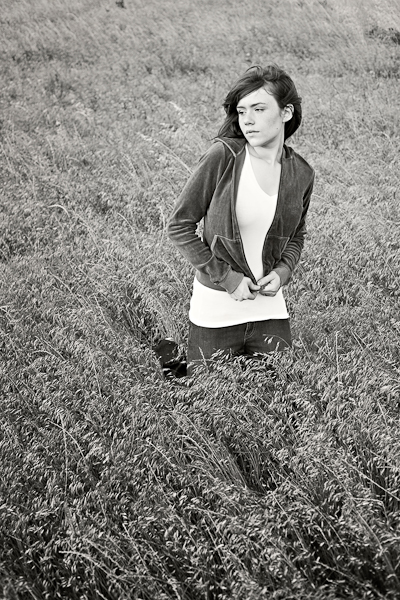
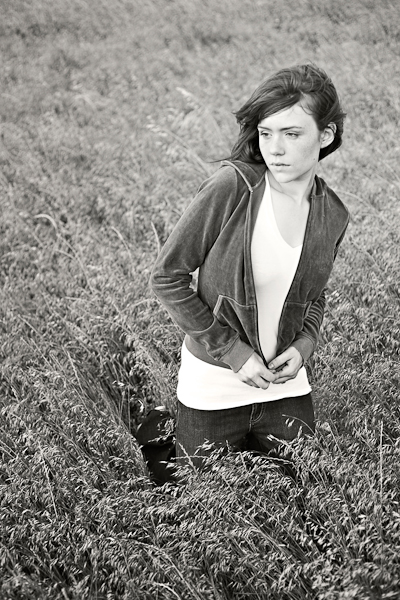
These are the lenses that are really best suited for portrait work.  Take someone’s picture with a wide angle lens, and the proportions can be very unflattering.  Alternatively, taking portrait pictures with a zoom lens requires to to be pretty far away, which makes for less interaction.  I like to really catch the details of people’s eyes, and be able to interact, so certain lenses work better for this.  The ones that I like for portrait work range in focal length anywhere from 50-200mm.  The 50mm (or nifty fifty) is the classic portrait lens, and when you shoot portraiture with one of these on a low aperture (f2.8 or lower), the results can be very appealing with some nice bokeh yet your subject is tack sharp.  You can probably go up to about a 200mm lens, before you are just too far away (for my taste).  Ironically, as you go up to the higher range of zooms, the higher focal range will compress things which can be more flattering, but you do so at the expense of being able to interact

  • Zoom Lenses

The zoom lens is probably the most obvious lens type and function.  Zooms are intended to take photos from further away than you normally would be able.  This makes them ideal for things like wildlife, sporting events, and things of that nature.  While preferences may vary, for me I would define zooms as anything above the 300mm level.

So, those are my general categories for lenses.  So, when you ask me what lens you should buy, I’ll ask what you want to shoot.  From that, these guidelines can help answer the lens question in better detail.  So, there’s my answer to the question of “Which Lens?”…what do you think?  Like it?  Make sense?  What are your categories?  Got any favorites?  Sound off in the comments, and share your own thoughts on the question of “Which lens”.  Until tomorrow, keep those lenses open and Happy Shooting!

***********

P.S.  Tomorrow, the Guest Blogger series is back and we’re going across the pond – literally!  So, be sure to tune in to Kevin Mullins, a wedding photographer from the UK.  He’s got some great stuff to share so be sure to tune in then.

Tuesday Top Five Nuggets

In lieu of a software review, today instead just a couple news nuggets for you.

  • First up, the finalists of the $500 giveaway have been determined.  These six finalists are being considered to win a pretty impressive package of stuff including a Thinktank Photo Multimedia Bag System and a complete set of the Topaz Labs Photoshop Bundle.  View the finalists gallery here.
  • Next up, a recommendation:  Even if you aren’t a subscriber to the Rangefinder Magazine (although you should be), you can read the current issue online here, (it’s a PDF download) which includes in the most recent issue an interview of none other than David Hobby, founder and author of the world-famous Strobist blog.
  • From Scott over at one of my favorite daily reads (Weekly Photo TIps), there is a new PBS series starting this week on National Parks.  I am definitely setting the DVR for this series!
  • As a longtime fan of DIY-projects, this one on making a tripod for your P&S (or iPhone) out of a paperclip was just too cool to leave out of the list.
  • And finally, for those that just insist on getting a photo fix regularly, visit former contest winner John Dunne’s blog, My Chi to see a great dilemma as he is torn between a color and a black and white version of a sunrise scene on the Promenade (psst….I like the black and white version!)…

Well, that’s it for today, be sure to stop back tomorrow for another dose of inspiration as we hit the midway point of the week (a.k.a. hump day)!  Happy shooting and we’ll see you then…

Hardware Review: XRite Colorimeter

Eventually you knew it was coming – the subject of color management.  Now before you mosey along, or your eyes glaze over, rest assured, this is not going to be the typical discussion of color management.  I am not going to talk about LAB color vs CMYK, vs RGB, or anything like that.  And even though the term “colorimeter” may sound like something Marvin the Martian was going to use to destroy Earth in the classic Bugs Bunny cartoon (that was the Illudium Q-36 Explosive Space Modulator), there is nothing overly scientific in today’s post.

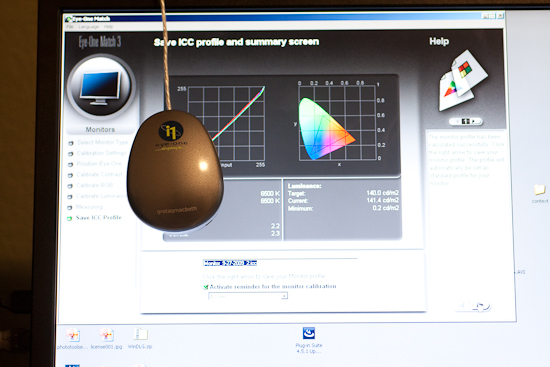
Well, that’s not entirely true – it is scientific, but I certainly will not portray to understand any of that.  Instead, I am going to show you how easy it is to calibrate your monitor using this device.  Now I am looking specifically at the one from X-Rite (I own the Gretag Macbeth version from before X-Rite bought them), but color management has become as easy as a couple of mouse-clicks these days.  So, you don’t have to know anything about color gamuts, RGB, CMYK, LAB, or anything like that to know you are getting color accurate images.  Check it out…

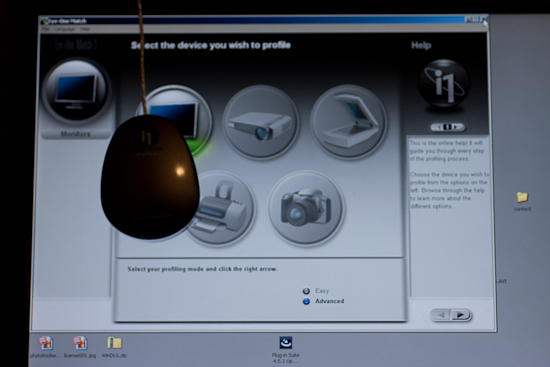
After installing the software from the CD, simply connect the device and start the software.  The device is the colorimeter (also known as a calibrator in some circles), and it is shaped like a computer mouse or a hockey puck.  It has a cable that connects it to your computer via USB, and is good for either CRT, LCD, or laptop displays.  Additional software components also enable you to calibrate things like projectors, scanners, and much more.  Here though, I’ll be showing you how it works with a computer monitor.

Once the puck is connected and placed on the monitor, simply go through the wizard to calibrate everything from Contrast, to Brightness, and your RGB colors.  It’s pretty straightforward…just open the display settings for your particular monitor type, and increase or decrease the values until the indicator is as close to center as you can get it.  You’ll notice that I am calibrating a Dell computer monitor, and it is a Windows-based computer, but the process is just as simple on a Mac.  (I just got my Windows notification though, so figured it’d be easier to kill 2 birds with one stone there.)

Here’s a couple of screen shots to give you an idea of the process.  The first step when launching the software is to specify your white point and monitor type (if you are calibrating a laptop, pick the LCD).  Next up, decide whether you want to go the easy route or the advanced route.  I would recommend the advanced route, as even that is very easily accomplished, and these are the screen captures I am using here:

CRT or LCD
CRT or LCD

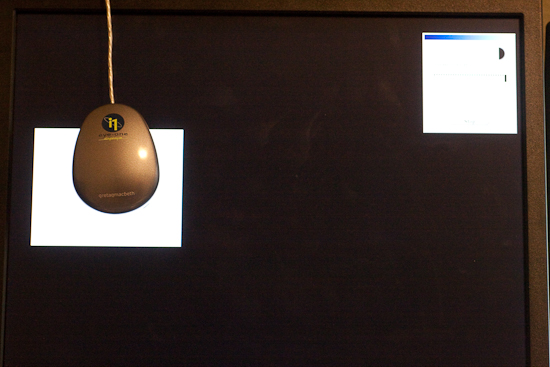
Next up is the screen capture of the contrast display.  In the upper left, the software shows the current contrast setting compared to the desired setting.  On the left is the colorimeter.  The Brightness (or Luminance) window is pretty much the same layout, so I am not going to repeat the screen capture here.

Calibrating the Contrast

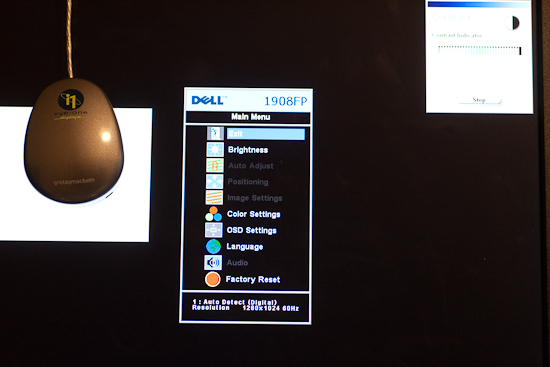
Here’s a screen capture of the first stage in setting the color values for my Dell 19″ LCD.  The software readout is on the upper right, the colorimeter is on the left, and dead center is the display menu for the Dell monitor.

Calibrating the Color

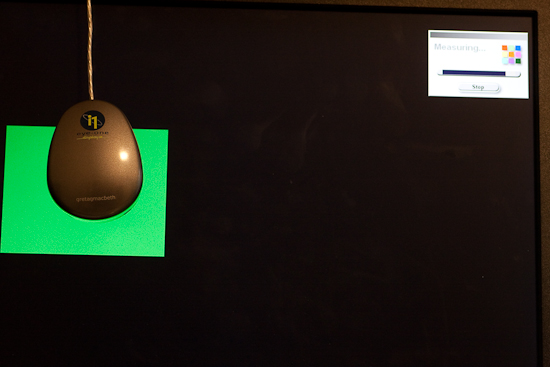
Once your contrast, brightness, and color settings are defined for the monitor you are using, the software will run through and configure the graphics card, monitor, and display output settings.

Calibrating the Color 2

Once all the settings are complete, a profile is creating in your system folder.  For Windows, that is in the system32 folder.  You can give it a specific name, and set the schedule on which you will be reminded for a new profile to be built anywhere between 1-4 weeks…more on this in a minute.

Setting the Monitor Profile

As you can see, it is as straightforward and simple as can be – even on the advanced settings where I defined the color (RGB) settings.  So, why doesn’t everyone do this?  Good question!  This device cost me roughly $200, which is likely not cheap by average standards for equipment (especially that which cannot be attached to your camera!), but if you really want to get quality results, the price is minimal.  I have mine set to update every 2 weeks (my LCD display has a tendency to shift colors easily, and LCD’s in general are known for color shift especially as they get warm and cool down when turned on and off.)  The benefits are huge though as your prints will be more accurate whether you print at a lab or print at home.  In the case of the former, no color correction is needed (and if you use MPIX Pro, there is no color correction done), and in the case of the latter, you will use less ink and paper in test runs before getting the results you want.

Keep in mind that this is just the procedure using the X-Rite, and I am sure others could just as easily recommend the Spyder Pro series, or some other colorimeter.  With that in mind, if you have an inkling one way or another, feel free to share your own experiences in the comments.  Which colorimeter do you use?  Do you like it?  Not so much?  What do you like/dislike about the process?

Whether you like the X-Rite method though, or some other model – calibrating your monitor is an important part of working with a color managed work flow if you want to produce accurate and quality prints.  After all, it is still about the print.  Don’t forget to share your thoughts in the comments!  Until tomorrow, happy shooting and we’ll see you then!

Peruse your archives

First off, I’d like to extend a big time “Thanks” to Andie Smith for bravely stepping up to the plate and delivering a home run of a first Guest Blogger post.  With 17 responses to her post, it is already ranked among the top five posts ever!  Make sure you stop over and check out her blog and portfolio.

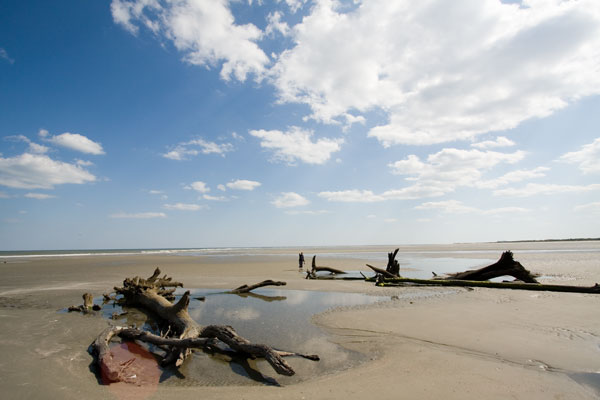
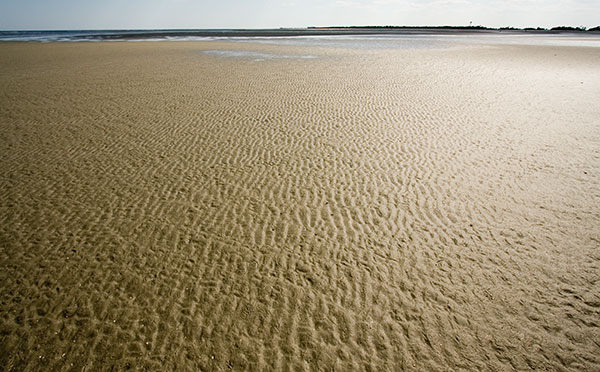
For this Friday, I’ve got a fun little photo tip for you and that is to peruse your archives occasionally.  You may find something of interest where previously you didn’t.  Since inspiration and creativity can strike at any time and anywhere for a different number of reasons, if you don’t like an image immediately, consider just archiving it for a while.  I do…and every month or so I peruse my own archives to see if some gem escaped my first glance.  Here’s a few that initially didn’t strike my fancy where now I am thinking “Hey, there might be some potential there!”  What do you think?

SC Beaches
SC Beaches

SC Beaches
SC Beaches

Last but not least, don’t forget, the $500 Giveaway for a Topaz Photoshop Plugin Bundle and and Thinktank Multimedia Photo bag system will close for entries tomorrow at midnight!  (I had thought it was tonight earlier, but in referencing the Flickr thread, realized it’s tomorrow, so you got a 24 hour window to get your own photo creations in.  One person did ask if “Topaz” had to be in the picture and the clarification was made that ANY color is fair game (or even the lack of color if that’s how you interpret it…)  The Flickr thread to enter your photos is here:  $500 Giveaway

That’s it for this week, have a great weekend, happy shooting and we’ll see you Monday!

For the Love of Gravy Focus on the Eyes …. Please

I hear a lot of chatter out there about how many photographers are in the market, and how soccer moms with a camera are taking your clients. Are you sure they are taking your clients, or are you losing them because you are not trying to be the best photographer you can be? (sounds like the army!) Just because Digital SLR cameras are affordable doesn’t mean everyone can be an amazing photographer.  Your job is to be the best photographer you can be, and stand out among the others.  How, you ask?  Well, start with the basics as it builds a solid foundation:

1.  Focus on the eyes…please!

I see so many portraits where the focus is on someone’s arm, knee, elbow. Until the elbow is the window into the soul let’s try focusing on the eyes (yes there are exceptions… but the elbow usually isn’t it). By learning how to control your focus on your camera you can stop your camera from focusing on the closest thing to it (like the nose not the eyes)

2.  You look like your brother Yoda

Skin tones are usually not green, or orange. Proper white balance and exposure will fix this issue most of the time. I personally use a target to calibrate my white balance card (it has black/white/18% grey on it).  If you are still catching a color reflection from a nearby object or clothing, you can fix this in post processing. Some of the ways I suggest are MCP actions or PictoColor iCorrect Portrait

3.  Reach out and touch your neighbor

We have heard it over and over and over again: get closer to your subject. Unless you are photographing a wild animal, chances are they won’t bite. If you are capturing a family, they want to see their faces, not everything around them.  Same goes for product, the client is trying to sell the product, so show it off!

4.  Target called…they want their sign back

A.K.A. bulls-eye syndrome. Your image will be more interesting if the subject is not smack dab in the middle of the image. Play with the rule of thirds (hint, the focus points in your camera are conveniently placed in one of the thirds). What is the rule of thirds, you ask? Divide the area into thirds from side to side and top to bottom.  Place the subject on an intersection of the lines at one side or the other. Go try it!

5.  Get it right in camera

There is this cute little book that came in the same box as your camera. Read it. Learn it. Live it!  Knowing how your gear works will not only help you become a better photographer, but it will also benefit you in that you will spend less time working on post-production!  The less time you spend in post, the more you can spend shooting. The more you spend shooting, the better you get…  Alternatively, you could think of this in terms of music: “Just because you can buy piano, doesn’t mean you don’t still have to learn to play it!”   A lot of what you do in Photoshop can be done in camera.  After realizing I did the same thing over and over in Photoshop, I set my user-defined picture style. The contrast is bumped up and the saturation bumped up. That is 2 less steps I have to do in post which in turn lets me spend more time in the field and actually doing what I enjoy – taking pictures!

6.  Part of being a good photographer, is being a good editor

Here, I don’t mean post processing editing, I mean what are you going to even pull into post, and then what will you show your client and the world. I was recently teaching a private lesson, and my student said “I bet you never take a bad picture”. Well she was in for a surprise when I handed over my Compact Flash card to see the images I took that day. There were bad ones on there, but she will be the only person who sees them besides me.  Show only your best, and you will look like the best photographer you can be!

Andie Smith Photography

Andie Smith Photography

Andie Smith Photography

Andie Smith Photography

Andie Smith Photography

Andie Smith Photography

Andie Smith Photography

Thanks go out to Andie Smith for delivering such an amazing and well-received first “Guest Blogger” post!  More Guest Bloggers should be forthcoming.  If you are interested in becoming a Guest Blogger, please feel free to email me at: jason <AT> canonblogger <DOT> com!

The First Guest Blogger is…

Andie Smith!

biopic1_1252575355

She is taking the reins tomorrow on the blog, and after uploading the content and photos, I am pretty stoked.  She has a naturalness to her writing, and her portrait work really is amazing.  Make sure you stop in and give it a read as well as the samples of her work she shares.  Then, visit her larger portfolio and enjoy the feast for your eyes- some pretty inspiring work there!

Here’s Andie’s particulars:

Website: http://www.andiesmithdesigns.com/

Blog: http://andiesmithphotography.net/blog/

Twitter:  http://twitter.com/andiesmith

And of course, be sure to tag tomorrow’s post for a very special read!  Until then, Happy Shooting!

The Scenes and Sounds of the Surf

Well, the video I had planned for today fell through, and since everyone seemed to enjoy the stills from yesterday, I thought it might be kind of fun to share some scenes and sounds of the surf down in Cabo San Lucas.  It really was breathtaking, and the little shaky (hand held) point and shoot video really doesn’t do it justice…but you can get the general idea!  Anyway, here’s the “Abbreviated Post Tuesday”…enjoy!

Only four days left to win the $500 package of a Thinktank Photo Multimedia Bag System and the Topaz Labs Photoshop Plugin Bundle over at the Learning Digital Photography Flickr Thread.  Get your photos in soon!  Happy shooting all and we’ll see you back here again tomorrow!

Cabo Creativity

Last week’s first ever 5-day series of written work “The Five Elements of Control” featured 5 distinct ways in which you can control and increase the impact of your work.  Those elements were through controlling for luminance, color, geometry, context, and composition. Hopefully, the perspective can be one many will find useful in elevating their own work.  In taking the task to heart, today (my first day back after a week-long break in beautiful Cabo San Lucas), I am sharing a slideshow of some of my favorite recent shots.  So, rather than suggesting others incorporate these techniques, I am trying to apply them to my own efforts as well. Here is where you get the chance to be the critic for my work, so by all means, share your thoughts, comments, feedback, and perspectives below.

In other blog and podcast notes, don’t forget, the $500 giveaway for the Thinktank Photo Multimedia Bag and Topaz Labs plugin bundle is still going on over on the Flickr site.  We’re in the last week for submissions so we can wrap things up by the end of September, so time is drawing nigh!  The thread to share your pictures (and the guidelines) is here for those interested.  It’s a great opportunity to take advantage of some great products from Topaz Labs and Thinktank Photo (and thanks go out to the sponsors for their generous contributions)!

In case you haven’t noticed the sidebar, there are now short little audio tips being offered up courtesy of the folks over at Audioboo.  The latest comes  the shores of Cabo San Lucas with the peaceful waves of the Pacific crashing in the background!  So, for the feed readers out there, stop on over to the blog and check out the audio tips – some hopefully good stuff there too.

Thanks also to the recording capabilities of my wife’s point-and-shoot camera, you are in for a special treat tomorrow in the form of a Quicktime video!  Until then, here’s the promised stills from the trip.  Happy shooting everyone and we’ll see you back here again tomorrow.  (Don’t forget to let me know your thoughts and feedback in the comments!)

Mexican Harbor
Mexican Harbor
Negative Space
Negative Space
The Power of the Waves
Umbrella Dots
Umbrella Dots
In Honor of Escher
In Honor of Escher
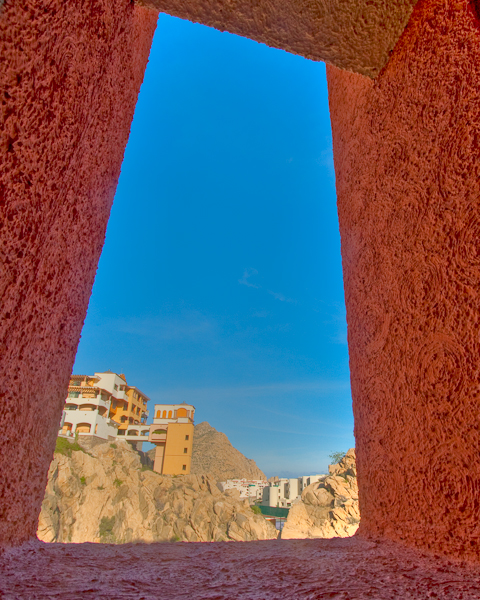
Through a Window
Through a Window

As a little postscript, since many will ask, I did my post processing in Lightroom and Photomatix (yes, some of these are HDR images).  One image did reveal a pretty heavy dust spot on my sensor, so that one did see a round-robin through Photoshop for that one speck.

Five Elements of Control: #5 Composition

You knew it had to come back to this, right?  I know, everyone is screaming by now “But Jason, you’ve talked about the Rule of Thirds until the cows literally came home!”  Truth be told though, most people think about compositional positioning with their subject matter.  While it’s true that subjects are ideally placed on a hot spot or along one of the gridlines in the ROT grid, but you can break the rules too, ya know!  I say, put anything you want on a grid spot.  Or don’t have a specific point of interest!  Make the subject of your photo the space – negative space, as previously mentioned, can be a powerful thing!

You can also think of the ROT grid for any point of interest, not just subject points of interest.  And, since we know that light (luminance, contrast, whatever your semantics prefer), geometry, color, and context can all be points of interest, then you can put any of these there and create visually grabbing photographs.

The greatest part of this exercise though, is that now we are looking at everything in a lot of new and creative ways.  I bet you are asking yourselves lots of questions now:  Does that light look good?  DO those colors complement each other?  What about that round  wheel in a square table – that could be interesting, right?  Keep on thinking and looking at the world around you from different angles and perspectives.  Sooner than you realize it (if not already), your eyes will dart all over the place looking at things and you might not even be conscious that you are doing it.

When we migrate these exercises from the front of our brain to the back of our brains, making them automatic to the point where we no longer need to even think about looking for things – we just do it, then believe it or not, the compositional perspective also becomes second nature.  You are already looking at how the light and colors on this corner of the room are really awesome contrasts to the darker shadows on the other side – and how cool is it that the funnel of light literally cuts through the darkness on that gridline?!

Some days you’ll have epiphanies, realizations, and great moments to capture, while others you may not see as many.  Rest assured though, once your brain and eyes are trained to look for it – you’ll see it everywhere you go.  So, take a look at the world around you – see what catches your eye – ask why if you like, but enjoy your moments, because these are the ones where you can really get creative with composition and take your photography to the next level!  Just remember the Five Elements of Control:

Luminance
Color
Geometry
Context
Composition

Have a great weekend everyone – this officially wraps up my first week-long thematic series of blog posts.  Hopefully you’ve found each one rewarding individually, and I would welcome any feedback, thoughts critiques, and comments, because this will likely become an eBook download.  I’ll expand on each element some more, and include even more photos as examples of each, along with detailed critiques and highlights to help show readers why certain ones work, and others don’t.

So please let me know your thought!   Who knows, feedback may get you a free copy of the eBook and a mention in the credits if you do!  Thanks too, for all the comments already throughout this week, with your comments and insights on both the written word and photographs.  We’ll be back to regular posting starting Monday!  Until then, Happy Shooting!

Grab the Feed

Five Elements of Control: #4 Context

Have you ever seen something that looks so out of place that it catches your eye?  Well catch it with your lens too, because contextual positioning of subjects in interesting or unusual/unexpected areas creates visual interest.  This is what I refer to as controlling the context of your subject.  So many times I’ve heard people tell me “but how can I change the surroundings?”  The answer lies not in changing the surroundings of subjects you want to shoot, butin reversing that idea:  find unusual subjects in your given surroundings.  Say you are on a photo walk and in a city area.  Well, try and find subject matter that contradicts the sense of city.

Additionally, you can also create contextual appeal by the use of negative space too.  See something standing all by itsef, or away from other things?  That’s a picture possibility!  Conversely, something that is amidst other things could be a cue for creative expression.  What if you saw a plastic water bottle among some glass beer bottles?  That could be cool…or what if you had a computer mouse sitting in a mousetrap?  You can create subject and background contextual associations in your own environment too ya know.  Photographers that make good money do it all the time.  (Hint:  that’s called stock photography! 🙂 )

Here’s a few examples to give you a springboard for creativity.  Find something you like?  Tell me below!  (I love to get feedback on photos just like everyone else…)  Got your own ideas?  Share those below too!  Sound off in the comments, and don’t forget to keep on shooting!  (That Flickr Contest thread is still alive and kicking you know – great chance to win $500 of gear, including a Thinktank bag System and a copy of the Topaz Labs PS Plugin Bundle!)

Trapped Bicycle
Trapped Bicycle

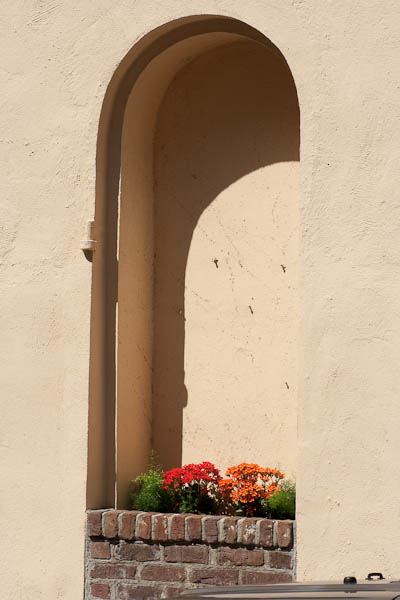
Hidden Planter
Hidden Planter

Hidden Planter
Hidden Planter
Alcohol Plumbing
Alcohol Plumbing

Grab the feed