Wednesday Walk around the Web returns

Surprise!

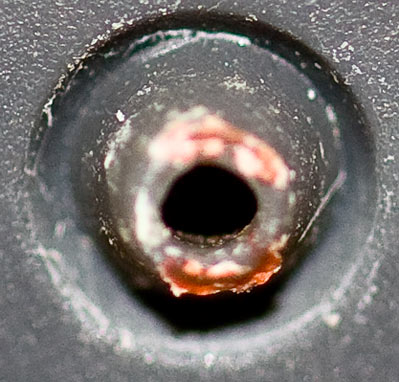
As the final hours approach me here on Tuesday, I still find myself struggling to capture something of interest that would be a fun topic for the “What’s This?”, so, a rather easy one is up for your guessing pleasure. Truth be told though, this is kind of lame, and as such, I would like more of the focus for today’s post to be the traditional “walk around the web” Here’s what’s going on this week in photo land:

  1. First, stop over to Scott Kelby’s blog – guest writer John Nack from a little company called Adobe will be filling in, and if you don’t already know who he is, and why we listen, stop over at his blog to catch up…
  2. Next, some shout outs to…well, myself sort of, but also to Scott Eggleston, over at Weekly Photo Tips. He chose an image I shared with him over on his blog as a monthly winner in his photo contest! While I am flattered to have won the prize, it’s just more germane to say that as I was packing things up the other day, I was talking to my wife about how I wished I had some convenient way to pack my AA batteries! Hello Alanis Morrisette, isn’t that ironic? He also had a post on late last week on how to shoot reflective surfaces with a YouTube video too – very informative!
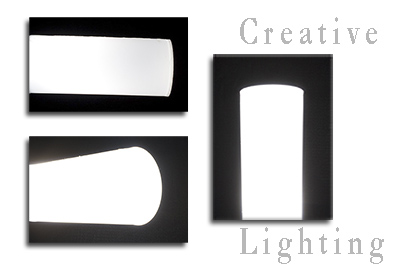
  3. Next, Brian Reyman over at Professional Snapshots has his third in a series of lighting tutorials he’s posting on. Very useful and a great presentation of the info there. I’ve been reading Brian’s blog for a while now and he has a truly innovative way of thinking. Shout outs to Brian! 🙂
  4. Visual Realia continues to keep my creative juices flowing, even though I did not come up with a very good image for today./ Look at Andy’s blog any time you need a kick start for your creative voice. His last three images of normal playing cards, show how anything can be beautiful if well visioned and composed!
  5. Finally, stop over to Hyperphocal for some great reading material if you have some time. It’s becoming quite the repository of excellent photo-related articles. A couple recent articles include the subject of Getting your photos into gallery shows, and Reasons to watermark your imagery. Like I said, great reading all around!

Since others have discussed it, particularly today, it bears mentioning (at least acknowledging anyway) that Nikon has released to new bits of gear – the D700 body and the SB-900 flash. Rather than regale you with tons of links on both of these, let’s just say that since reading quite a few posts from some respected photog-types, it seems people are curious about teh new body, but almost to the tune of 75%, they are expressing more excitement over the flash. Even Michael Johnston from The Online Photographer
picks up on the news, and throws in an off-handed remark about the new flash (and two new PC lenses that I’d not even read about until hitting his blog). Just goes to show you, the bells and whistles are there to generate new interest, and in many cases, it works! Having said that, it seems more and more that the tried and true utilitarian upgrades and additions to a camera line are what pulls repeat buyers back for more.

Until tomorrow, happy shooting and watch those apertures!

As a shameless self-promotion slug, as we move toward the holiday weekend, it’s time too brush up on your night photography. Remember what apertures and shutters are and how they relate? Refresh over at The Online Photography Test , hosted right here at CB! So, stop over there to test your A&S awareness (among other things) before heading out to shoot for the day! Don’t forget to pick up the feed for CB if you haven’t already.

Backpacks, and Belts and Bags: Oh My!

For this week (and the foreseeable future), I am continuing the “live video talks” where I share a little insight into things I use and do to with photography, and the gear that’s involved.  This week, I recall that some others have done a “What’s in Your Bag?” type of theme, and rather than just show you my gear (which is what the question basically is a lead-in for), I also share some different bags and bag systems I have used, and that I continue to use.  Bag types range from small shoulder bags, to belt systems, backpacks, and equipment bags.  One bag I did not include is one for your tripod and/or light stand.


Anyway, it’s kind of a bandwidth intensive episode this week at over 100 MB of download in Quicktime ® format.  Sorry, again, no flash-based version.  Until Camtasia can import .mov files and render as Flash, when I record in QT, the .mov format is all I can do.


With that in mind, I’d like to also open it up to the readers/viewers out there.  What kinds of bags or bag systems do you use?  Backpacks?  Belts?  Shoulder bags?  What works best for you?  Sound off in the comments!


Friday Feel-goods

Canon 40D

Found a couple neat resources around the web over the last few days. But, I am not gonna share them today. That’s right, the old bait-and-switch! I say something then switch gears once you’re hooked and talk about something else entirely. But, rest assured weary reader, I am not selling anything…yet! Quite simply – I got my 40D!!! That’s right, pulled the trigger, but the bullet, took the plunge, and every other metaphor you can think of. So, now with not one but 2 SLR’s in hand, I feel a little better knowing I have a backup.

That means my trusty Canon XT is now a backup camera! The funniest thing about it is that when I got my XT about 3 years ago, I paid more for that than I just paid for the Canon 40D (body only)! Back in 2005, the XT was hot off the presses and I was chomping at the bit to get it. The market started with it around $1000, and when I found one at Beach Camera for $850, I thought – “This is a good deal!” So I took the plunge.

Fast forward to 2007, the Canon 40D debuts for $1140 retail for the body. Within a year, rebates start kicking in – the struggling economy starts impacting camera manufacturers, so the rebates are big. The Canon 40D now has a $200 rebate, and it’s not the mail in kind! That’s right, an instant in-store rebate knocks the 40D down to $940 bones. This is a pretty darn good deal considering where the 40D stands in the Canon lineup. (3rd in line as I see it: 1D Mark II, 5D, and then the 40D)

But wait, hold the phones, that deal gets sweeter! If you are a current XT, XTi, or XSi owner, an additional $50 mail in rebate is offered too. So, now after all rebates, you can get the pristine new 40D for under $900…a mere $890! What a steal! But, here’s the thing – that means the aftermarket is starting to feel a pinch. This means the 40D that many bought a mere 6 months ago for $1200 could concievably drop to half that in the aftermarket since the XS is coming out, and a likely successor to the 5D which will push it down further. No one wants to see their gear depreciate to the tune of 50% in a mere 12 months. Heck, the XT new was around $100, and it still can be found for $450-$500 after being in the market place for about 4 years! (Although I suspect not for much longer – it’s not even in the current lineup anymore…)

So, anyway, the aftermarket starts picking up. By keeping up with the market via 1001 Noisy Cameras I can see that Canon is taking the majority of the top ten deals for a good 3 months. Now, with the standard for after market stuff typically running around 10-15% less than retail, 40D owners start pushing their bodies for $900, then $875, and most recently I saw one for $850. Well, last week I posted in the Buy/Sell forums of one particular community that I wanted to buy (WTB) a 40D at the 10% off retail rate…after rebates! That meant $800. Within an hour I had a taker, so – for less than the price of my XT, I upgraded to the 40D a year after its release.

Ironic, because it was about a year after the XT was released that I got it for about just as the retail price dropped 10%. In the aftermath, I learned a valuable lesson about camera gear: bodies depreciate, lenses retain value. If you want to spend money wisely, don’t upgrade your body every year, upgrade your glass. Hopefully this upgrade will have been worthwhile – 3 years in the making, and for $100 less than my previous body – I think it was probably a good investment. The only reason I did it was because I really did feel as though I was starting to bump up against the limitations of the XT body. Frame rate was not where I wanted it, the image counter was becoming more of a hindrance as I take more, the images were harder to see, and it was just starting to show signs of wear and tear. A bit of the plastic casing had peeled off in my sweaty mitts. It was just time to upgrade. To the forum guy (you know who you are) that hooked me up…thanks so much!

In looking at the counter, it seems the actuations are even lower than I thought with the count in the 500’s! I simply just re-set it back to 0 and I am rockin’ and rollin’! So, in case you hadn’t guessed it – this is just a “Feel Good” post today – nothing insightful, informational, or even useful – just a gleeful post of what was formerly an adult and what is now a 5-year old kid at Christmas! Have fun all, go out and shoot some (I know I will be…)

Oh yeah, here’s your WTD for the week:

What the Duck - June 26th 2008

Browser Bewilderment

I normally don’t post twice on the same date, but something came up yesterday over at Scott Kelby’s blog that I felt compelled to let people know about it (in case you for some reason stopped here <strong>before</strong> stopping over there…).  So, read this about FF3, but keep going down as there’s some buzz going on about his guest author yesterday – none other than Matt kloskowski.  Enough of a buzz to even get lazy ole me off my arse!  🙂  Anyway, two posts for the price of one today.  First off, some browser bewilderment over Firefox3:

Well,it’s not really bewilderment over which browsers to use, because I use browsers for a number of reasons. Yes, a good portion of it is spent solely for surfing different websites. I do occasionally spend some time on web design. While I know that the latest release from Firefox is going to be a boon for photographers due to its support for color profiles – I can’t help but wonder about designing with FF3 in mind. How does one incorporate this into their array of considerations?

Clearly, you have to design for whoever your audience is, and for me, that means FF2, IE, and then Safari are where I devote my time. But, it would be nice to move toward a browser base that is W3C compliant. However, FF3 makes no impressive strides toward those ends anyway. I did some testing of the three main browsers (IE, FF, and Safari) against the Acid3 test, and found that while none of them pass, most certainly IE performed the worst, and the FF update is no great leap forward. See the screenshots below of each browser and it’s performance on Windows and Mac (Tiger). First, here’s the reference image that each browser rendering effort should result in:

Reference Image

And here’s the actual results for each browser/OS setup:

WINDOWS

Internet Explorer 7 on Windows XP

Firefox 2 on Windows XP

Firefox 3 on Windows XP

Macintosh

Firefox 2 on Mac

Safari 3 on Mac

Safari 3 on Mac

Does anyone have any thoughts on what the probable trends would be? I’ve heard lots of glowing things about Safari, and lately it has been growing in percentage of people that visit either CB or my photo site, so I’ll have to take that into more consideration. What about others out there? What browsers do you use? Are you a “surfer” or a “designer”, or both? Some feedback ehre would be very instructive.

For those that don’t know what I am talking about, feel free to skip to Friday for your next read. In the meantime, for those that do know, or are interested in learning more, here’s the resources I’ve read thus far:

Rob Galbraith’s page: http://www.robgalbraith.com/bins/content_page.asp?cid=7-9311-9478

ICC Test Page: http://www.color.org/version4html.xalter

Mostly Lisa: http://www.mostlylisa.com/2008/06/20/convince-me-to-use-firefox-i-dare-you/#comments

Write your own PS panels!

You know the Photoshop Guys are pretty well regarded by Adobe. When they stop to say something or make suggestions for future product features, the folks at Adobe do stop and listen. Scott K. did a few blog posts about this, and there is ample evidence that Adobe does in fact consider their suggestions in product design, development, and testing.

Well, today, as a guest blogger for Scott…Matt Kloskowski brought some Super Genius ideas out, and had some “skeleton” drawings for possible consideration. The beauty of this was that not only did he give his thoughts, but he gave US a voice!

He started a Flickr thread, and gave us a PSD to work with in designing our own suggested PS panels! I actually took a few minutes to put a small idea together. It doesn’t have the same polish that Matt’s work does, and I blame Matt for being the consummate professional and devoting as much time and energy as I am sure he did in producing all these other wonderful ideas and such.

Anyway, go download the PSD from Scott’s blog here, then tweak it to your idea, and upload to the Flickr thread here. Take some time to look at the other ideas out there – lots of creativity abounds! Such dynamism and synergism and a bunch of other -isms! This is what totally rocks about photography, being able to contribute ideas in such a positive and forward-thinking manner. Oh, and here’s my idea: a Compositional Grid Panel where you can choose a grid pattern to overlay (or create a custom one…). Thoughts on this?

Compositional Grid

Thoughts on others? Share them over in the Flickr group! (or here if you prefer, but this idea is really Matt’s brainchild, so give the group [or his blog] some love!)  Until tomorrow – happy shooting and watch those apertures! 🙂

Tuesday Tech Talk: Canon ST-E2

This week, the Tuesday Tip is more of a Tech Talk. I got an email from someone inquiring about the Canon ST-E2 asking about how to use it, and what it is compatible with. Taking a cue from this, I decided to make it a video tip from the MacbookPro,and set things up to give a basic primer on what the ST-E2 looks like, how it mounts to your camera, and how it triggers off-camera flashes electronically. Hopefully this will help demonstrate the purpose of the ST-E2 in a better light (bad pun, sorry)! Because it was recorded from the Mac this go around, there will not be a Flash-based version of the Tip this week.Sorry in advance for any that might prefer the Flash version.

One note on the video content: I said in the video that the ST-E2 supports the entire Speedlight flash family.While that is true, I did get the nomenclature wrong.As it turns out, the 400 series Speedlights are the 420 EX and the 430 EX, with the 500 series ones numbering at 550 EX and 580 EX.The ST-E2 will work with them all, albeit with some limitations on the earlier versions.For detailed specs, there is good information at Canon and the product sheet maintained by BH Photo.Those direct links are provided here for anyone who is interested.

So, that is the tip for this Tuesday: an ST-E2 Tech Talk.If anyone would like to see more gear in action, or has a question about how to use gear, feel free to email me or post in the comments section.Happy shooting, watch those apertures, and we will see you tomorrow!

Canon Product Sheet for the ST-E2

B and H Photo Product Sheet for the ST-E2

PlayPlay

Pics, Trips, and Tips

What's This? - Week3

Welcome to week 3 of the “What’s This?” series! Last week I had a close-up shot with some great guesses including carpet, a towel, and a toothbrush – but the answer, as it turns out, is a candle wick!

What's This? - Week 2

I had cropped out a portion of it, to give kind of a different twist! Thanks to all for participating! So, as we move into week3, here is another everyday object that I’ve zoomed in on, and taken a cropped portion to share. Can you guess what this is?

In other news, it seems I will be somewhat busy over the next few weeks with several trips on the horizon. Late June, a friend is getting married, and that will require a trip to NC. Then, shortly after that, I will be traveling (driving) to New York for the 4th of July festivities. Very shortly after I get back, I will likely be accompanying my wife out to Colorado as we transition to that area from SC. She’ll move on ahead to start her job, while I stay behind to close up shop and sell the house. Oh yeah, did I mention? We’re moving to Colorado!!!

So, for the last tidbit of news, I did actually knock out the tip for the week as previously mentioned: displacement maps! I read about this technique in my most recent issue of NAPP and had a few images that I thought it may work for, so thought to give it a whirl! Pretty neat effect, so feel free to try it out yourself!

CB Episode #44: Displacement Maps

Week 2: What’s This?

307

For Week 2 of “What’s This?” – the image is another typical household object, so, take a gander at the image above, then take a guess in the comments or via email…This is a _____(fill in the blank)!

After a week of various responses both via email and in the comments, there was one correct guess via email, and the answer is – wait for it – a microphone! That’s right, my Sampson CO2 Condensor Mic that I record the podcast with almost every week. I zoomed in real close and didn’t even crop to produce the photo – so congrats to Thomas for guessing the right answer!

Week 1 WInner - Thomas w/ Microphone

Things are picking up for me for the remainder of the week, so a shorter post today. One thing I will suggest as a Wednesday Web Gem is to stop over at the new CB Flickr Group! I’m posting the full size pics from what’s this (the following week) and sharing photos in there as I get a chance. Stop in, register with the FLickr foolks, and share images of your own, discuss things from the blog, offer ideas, other tips and tricks, or whatever the theme for the day is! The link to the CB Flickr Group is here: CB on Flickr

Until tomorrow, happy shooting and watch those apertures!

Usual becomes unusual

Lighting Objects

The tutorial for this Tuesday, you may notice is not your typical Photoshop tip, trick, or tutorial. I took things outside of the desktop and into the real world to show you examples of thinking outside the box when it comes to lighting. By now we are all familiar with Strobist, and the methods he uses to encourage people to think about lighting and how to do things in an economically friendly way.

Today, I wanted to take a moment to share with you a few lighting ideas I’ve had and some of the effects they’ve produced. None of these home-made products cost me more than 15 cents! Anyway, I’ll let the tutorial stand alone, but did want to include the show notes:

Tune in to Strobist for anything and everything lighting you ever wanted to read – David Hobby is the lighting guru of the blog world!

David was interviewed recently on Studio Lighting, so now I’ve listened to their podcast, and it’s definitely one to return to. These guys just sound like they’re a lot of fun.

And the shots… you saw the montage up top, but here’s the individual shots from my diffused snoot:

Horizontal View

Vertical View

Angled View

So, there’s just a few examples of how to generate creative lighting by looking at usual objects in unusual ways. Tune in to the podcast to see what other stuff I’ve come up with. Because it was recorded outside of the computer though, I only have the Quicktime version. I am still looking into a decent Flash converter so I can put that together with the “intro” and “out-tro” clips, so if anyone has suggestions for that, I am all ears there too. Anyway, to close out, I’d like to pose another question: What have you come up with in the way of uses? Any everyday objects become part of your photo gear? Share ’em in the comments section!

Custom Brushes

Custom Brush

For this weeks tutorial, I thought to take a look at custom brushes and brush sets. It can be a pretty handy thing to have some custom brushes of things you do often, or looks and styles that you apply often to your photos (such as a signature, copyright, or some other such logo). The idea came from someone in one of the photo forums (NAPP forums if I recall correctly), asking if there was a brush set out there that had a set of hash marks (like for the days of the week). We talked back and forth on a few alternatives when it dawned on me – we could make a brush to do that! You really can make brushes to do whatever you want, it’s just a matter of doing it once and then saving it, much like an action.

So, here’s a tutorial that examines how to create, save, and load custom brushes inside of Photoshop. We’ll see you back here tomorrow! Until then, Happy Shooting and watch those apertures!

Creating Custom Brushes