Rituals – Cleaning your Gear

Checklist

Rituals are an important part of many cultures and belief systems. Yet rituals can also be patterns of behavior. We drive the same way to work every day, we tend to eat similar meals from one week to the next, and we do certain things each and every day, like brushing our teeth, taking a shower (hopefully anyway!), and a host of others. Well, just like other rituals, many of us become very fastidious about our work flow. We color manage things, we duplicate images, back them up, and save in multiple locations. Yet I’ve not seen anyone really talk about establishing rituals over cleaning their gear. In that area, I feel that I am something of a loner, because I do clean my gear in a very ritualistic pattern. It may be overkill to some, while to others it may not be enough. Nevertheless, cleaning our gear is something we should all consider making a part of our recurring activities.

Tomorrow is the second Friday of the month, and since I’ve set that date (just an arbitrary date, no specific logic behind the date other than I didn’t have anything else “scheduled” for that date at the time I came up with this) as my monthly camera cleaning date. I clean every piece of equipment I own. It takes a few hours, but that way I do maintain a regular schedule of maintenance for all this gear. So, today I am sharing my cleaning schedule with you.

My Gear Cleaning Ritual

  1. Part One – Wipe Down This can take anywhere from 10 minutes to 2 hours depending on amount of crap in my bag! I first take the battery out of camera and insert in charger. While camera battery is charging to full capacity I use lint free lens clothes (you can get a 12-pack from WalMart for $1) to wipe down the camera body, the lens casings, my CF cards, my flash cards, everything! Then I take out all the velcro dividers from my camera bag. With the bag empty I use canned air and spray out my camera bag. Then I wipe everything down with a only slightly damp paper towel. I’ll also pick any fuzzies I can see off my velcro tabs.
  2. Part 2 – Glass cleaning This takes about 20 minutes, depending on whether certain lenses need multiple swipes. I Use the Eclipse/PecPad/Sensor Swab kit for all my detailed cleaning. First I remove the lens caps (front and rear, and dust them off with my canned air. Setting these aside I take a PecPad out and dab a few drops of the Eclipse solution on it. In a light circular motion I wipe from the center of the lens to the edge and swoop it away in a fluid motion. I then return the caps to the glass.
  3. Part 3 – Card clearing and formatting I lightly tap the CF cards with the holes facing down and stack them label side up by my card reader. After each is tapped, I run them through my computer, copying any images off into a folder titled “Unsorted”. Once the content is safely moved, I then format the cards from the OS command prompt (for me it,s format E: /FAT32)
  4. Part 4 – Air cleaner I take my Giottos Rocket Blower and with battery compartment open I pump twice into chamber, and then close. I then turn the camera sensor side down, uncap and repeat in that chamber with the blower. I recap the body then and lay it sensor side down on a pre-placed static bag.
  5. Part 5 – Sensor Cleaning I prep the sensor swab according to instructions with firm tight folds. I take the now fully charged batter, insert in the chamber, turn the camera on and move the menu to sensor cleaning mode, flip the camera over and lay it down on the bag. Then I dab two drops of Eclipse onto the edge, uncap the body and angle the wand to 45 degrees, placing the edge against the sensor. and in one motion move it from the first edge to the far edge. Without lifting the wand, I then shift the wand to the opposite 45 degree angle, slide it up and align the top edge of the PecPad to the top edge of the lens and in a single light motion, slide it back across the top of the sensor mirror. Using the same fluid motion I then lift the swab off the sensor, replace the body cap with my other hand and set the swab down on the static bag. I then turn the camera back over, and power down.
  6. Part 6 – Accessories check I take the now mostly de-charged camera/battery combo and insert my CF cards back into the camera. All cards are formatted in camera. Once the formats are complete, I then insert back into computer one last time and copy the low res contact info image back onto all CF cards. The battery is then taken back out and recharged again. (I do have spares too that get charged, and I take this opportunity to also charge all AA’s and stuff back in my camera bag. I’ll check my notebook for enough paper, my pen for ink, flashlight for batteries, business cards in front pocket of bag, ensure I have at least 5 model release forms, and I’ll wipe down my Krages card and cheat sheet (two laminated sheets of info I keep in my bag).
  7. Part 7 – Repack Reassemble Velcro dividers and insert everything back into my bag
  8. Part 8 – Tripod Maintenance Take legs off tripod and wipe everything down there. Remove all quick release plates and do the same. I then re-assemble the tripod and tighten down all the legs again.
  9. Part 9 – Inventory List Print out checklist inventory and insert in camera bag (when travelling).
  10. Part 10 – Relax Drink an ice cold beverage!

So, which of these rituals do you include in your gear maintenance schedule? Did I miss anything? Does anything I am doing sound weird or wrong? What do you think? Share your cleaning schedule in the comments or via email: jason <AT> canonblogger <DOT> com In the meantime:

  • Happy Friday 13th
  • Happy Fathers Day Weekend
  • and Happy Shooting (watch those apertures!)

Usual becomes unusual

Lighting Objects

The tutorial for this Tuesday, you may notice is not your typical Photoshop tip, trick, or tutorial. I took things outside of the desktop and into the real world to show you examples of thinking outside the box when it comes to lighting. By now we are all familiar with Strobist, and the methods he uses to encourage people to think about lighting and how to do things in an economically friendly way.

Today, I wanted to take a moment to share with you a few lighting ideas I’ve had and some of the effects they’ve produced. None of these home-made products cost me more than 15 cents! Anyway, I’ll let the tutorial stand alone, but did want to include the show notes:

Tune in to Strobist for anything and everything lighting you ever wanted to read – David Hobby is the lighting guru of the blog world!

David was interviewed recently on Studio Lighting, so now I’ve listened to their podcast, and it’s definitely one to return to. These guys just sound like they’re a lot of fun.

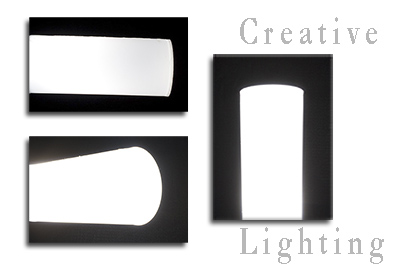
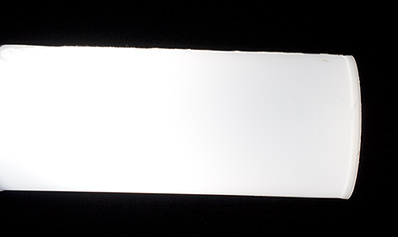
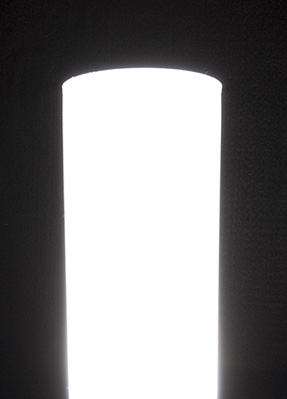
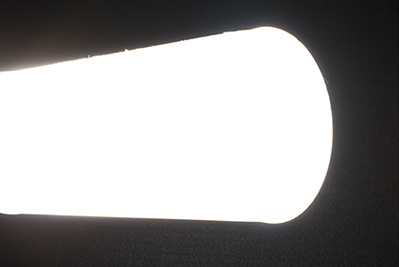
And the shots… you saw the montage up top, but here’s the individual shots from my diffused snoot:

Horizontal View

Vertical View

Angled View

So, there’s just a few examples of how to generate creative lighting by looking at usual objects in unusual ways. Tune in to the podcast to see what other stuff I’ve come up with. Because it was recorded outside of the computer though, I only have the Quicktime version. I am still looking into a decent Flash converter so I can put that together with the “intro” and “out-tro” clips, so if anyone has suggestions for that, I am all ears there too. Anyway, to close out, I’d like to pose another question: What have you come up with in the way of uses? Any everyday objects become part of your photo gear? Share ’em in the comments section!

Custom Brushes

Custom Brush

For this weeks tutorial, I thought to take a look at custom brushes and brush sets. It can be a pretty handy thing to have some custom brushes of things you do often, or looks and styles that you apply often to your photos (such as a signature, copyright, or some other such logo). The idea came from someone in one of the photo forums (NAPP forums if I recall correctly), asking if there was a brush set out there that had a set of hash marks (like for the days of the week). We talked back and forth on a few alternatives when it dawned on me – we could make a brush to do that! You really can make brushes to do whatever you want, it’s just a matter of doing it once and then saving it, much like an action.

So, here’s a tutorial that examines how to create, save, and load custom brushes inside of Photoshop. We’ll see you back here tomorrow! Until then, Happy Shooting and watch those apertures!

Creating Custom Brushes

Back to Basics – Rule of Thirds Grid

After I recorded and started production on this tutorial my mind began to remember that perhaps I had covered this subject before. I reviewed the subjects I have posted over at the Tutorial Resource Center and did not see it covered there, so figure I am not repeating some tutorial I have already done. Having said that, this is kind of a return to the basics. Continue reading “Back to Basics – Rule of Thirds Grid”

PlayPlay

Tuesday Trip around the Web

There’s been a slight change of plans on the weekly schedule this week. Friend and fellow-blogger Jason Moore is out on “assignment” again (partying things up in France actually!), and a couple of us are filling in for his weekly P&P blogroll post where he summarizes the imagery activities of fellow Photoshop and Photography bloggers as they share them with the world. Three of us share the duties this week, so be sure to visit Andrew’s blog (Visual Realia) and Michael Palmer’s site for the other portions of the P&P. So…without further ado:

  • PhotowalkPro – Jeff Revell had a couple interesting things this week, but the most recurring theme is the upcoming photo walk for the Georgetown area. Make sure you get the dates when you visit his blog.
  • Samuel Barr is out traveling (great travel shots too), but congrats go out to him for being selected for the “Photo of the Week” over at Calumet Photo.
  • Sean Duffy is traveling to, and has some pretty incredible shots of the Eiffel Tower.
  • Strobist – It seems everyone is traveling as David had a few posts left from his trip to Dubai, and as recently as yesterday was sharing shots from Joe McNally’s trip. Pretty incredible stuff, and you can always get your fill of lighting gear, including beauty lights and trash bags for the really hard core.
  • Terry White’s Tech Blog – Read about Snowballs, Snowflakes, and Screenflow, but don’t get him started on DirectTV (I feel ya Terry – had a few experiences myself with large conglomerates).
  • The C Spot – Clayton talks about his visit to Michael Switzer’s open house for Design Works Studio.
  • The Digital Story – Derrick’s podcast talks about the merits and downsides of keywording your photos. Worth a listen, and it seems the best time to do that is on import – *phew! Got one right*
  • travel+ photography – Michael appeases the readership with a weather shot from Arkansas, but has had his hands full with buying a house – stop over to congratulate him on the new digs!
  • Visual Realia – Andrew demonstrates again his creative talents with some great photography and poetic verse. I don’t know how he finds verses that fit the imagery so well. Check out Old Friend, Bloom, and Josh McElwee for some truly inspirational captures!
  • watchThisspace – Steve takes a break but leaves us with a really cool apple abstract – come back soon Steve – your vision and creative talents will be missed!
  • What The Duck – Cartoon + photography + humor = Aaron Johnson – a new chuckle every day!
  • Weekly Photo Tips – Scott is taking his blog down for Memorial day to commemorate the occasion and is asking for readers to contribute imagery for his slideshow. A truly awesome gesture and I would encourage everyone to join in the effort.
  • What The Heck Journal – Martin has some great shots here, but without dates it’s hard to tell what’s recent and what’s been up a while. Lost in the Woods is kind of spooky, but an amazing shot nonetheless. Corridors is also an amazingly unique perspective and presentation of B/W photography.
  • Where is Ben – This week, Ben is teaching a fine art class on nudes at the LEPP Institute (Los Osos, CA). His blog photo is pretty abstract, but just indicative of the breadth of his vision and skills.

Depth perception…

Depth of field, or DOF, seems to be a common area for discussion in photography, primarily because it is often subjective. What you choose for your depth of field in any particular image will have an impact not only on what is in focus and out of focus, but also on the impact the image has on the viewer. If your DOF is too shallow, a viewer may find the lack of a strong area of focus a turn off. Meanwhile, others may find the abstract nature of soft DOF appealing. Surely, DOF discussions are very much like opinions – we all have our own.

Having said that, there are some times when you would want a wider or a more narrow DOF depending on your subject matter. So, on that basis, it helps to understand how we can control our DOF. As I thought about this post, I came up with a total of:

Seven Tips to Control Depth of Field

  1. Aperture adjustments – the most obvious way, increasing aperture (decreasing the f-number or widening the opening) reduces your DOF, while decreasing the aperture (increasing the f-number or narrowing the opening) increases your DOF.
  2. Focus into the scene – by positioning the main point of focus into the scene, you can enjoy an increased range of focus for your DOF as a certain portion in front of, as well as behind your fosucing point will also be as sharp as your specific point.
  3. Parallel Planes – another one that is rather unique to macro photography, but when working with extremely shallow DOF values, it can help to keep your subject in focus if you position your camera back on the same plane as your subject. If you are not on the same plane, your subject will fall out of focus as it recedes toward the background and/or as it gets closer to the foreground.
  4. Use a tripod – especially useful in macro photography when you have a very shallow DOF – even the slightest of movements will result in a blur even within your specified DOF area, so stabilize the camera with a tripod when opening up the aperture
  5. Hyperfocal Distance – Jeff Revell dedicated an entire post to this the other day, so go to PhotowalkPro to read more about it. I kind of alluded to it in #2, but the more detailed answer will give you a better grasp of where to focus and how to achieve HFD
  6. DOF Preview Button – all shots in an SLR camera are viewed at the widest aperture opening so we can compose our focus point where we want it. However, the DOF preview button will stop down the aperture blades to out final aperture setting for us to give a preview of the range of sharpness through our image. Probably one of the least used tools on your camera (don’t worry, I forget to use it all the time too!)
  7. Change the focal length – your depth of field is also a function of the focal length of your lens. Longer focal lengths will be less able to produce a wider DOF (image is sharper throughout), while wider angle lenses typically can produce a wider range of sharpness to extend your DOF. This is partly why a wide angle lens is recommended for landscape photography.

Digital Frames

Too often we take our work and share it out on the web in galleries, on blogs, and at various community forums to see the background colors don’t really do our shots much justice. I’ve seen forums with blue background colors, others with yellow, and much much more. This has the net effect of casting a hue across every image in that space. Your images take on that hue to a certain degree, and it can often negate an image more than many realize.

Forum administrators and bloggers are starting to realize that neutrals are the best way to go, but there are still some web outlets that hang on to some rather outlandish color schemes. To accommodate the creative (and sometimes sensitive) differences that exist, it can often help to present your images with some digital framing. That is the focus of this weeks’ tutorial, and I share a rather simple but effective technique to create a digital frame to enhance or accentuate and draw attention to your imagery.

As I mention at the end of the post, there are some automated ways to create digital frames via plugins and actions. The one I reference can be found at www.atncentral.com People labor often in anonymity and share their work with the world and give it freely for others to use. Enjoy the benefits of generous folks and for those occasional ones that ask for donations, kick in a buck or two – it always helps to keep the creative spirit alive. In the meantime, keep on shooting (happily), and watch those apertures (carefully)!

Flash Version: Digital Framing

PlayPlay

PlayPlay

Calendar Templates, Part II

This week I wrap up the tutorial started last week on creating a Calendar Template using Photoshop. One of the things I found most useful was performing the screen captures of each month prior to beginning the place functions inside Photoshop. As you can see in the tutorial, the results came out really nicely.

This whole project started from wanting to make a single-page calendar and in looking at the design offerings on Mpix, thought “Hey! I could make that!” The second half of the genesis came courtesy of Matt Kloskowski over fro the Photoshop Guys where he did a tutorial a while back on making a desktop calendar for a single month. So…I put the two ideas together and this is the end result of that effort. I figured it may also have some interest for other photographers in making calendars incorporating either their own prints or those of their clients. Clearly, this is a “down and dirty” version, but if anyone is interested, I do have a pretty high resolution sized template that I would be willing to share on request.

In other news, I’d like to give some shout outs to Brian over at Professional Snapshots, who just last Friday celebrated the birth of his new daughter Isabelle! Congrats to Brian, even though this means he has pretty much lost the ability to sleep through a night for at least the next 18-24 months! Yeah, this may be your fourth, but I’ve heard the stories from siblings and neighbors! Enjoy!

Also, don’t forget to stop over at Jason D. Moore’s weekly summary of all things photography! I always head there to make sure I’m not missing anything interesting.

Last, but not least, the tutorial links: Flash first and QT second…

Calendar Templates, Part II

PlayPlay

PlayPlay

Creating templates

Hey all, today is tutorial Tuesday, and I share a technique I used recently in creating a calendar template to import client photos in. I could only get about half way through the tutorial before I had to stop (I am trying to keep video tutorials at or under 5 minutes), so this will be part 1 of a two part series. Today I show you how I created the graphics with some guides, and keeping things all manageable on just a couple levels. As usual, the tutorial is linked in both Flash (web based) and QuickTime (iPod/iTunes friendly) formats at the end of the post.

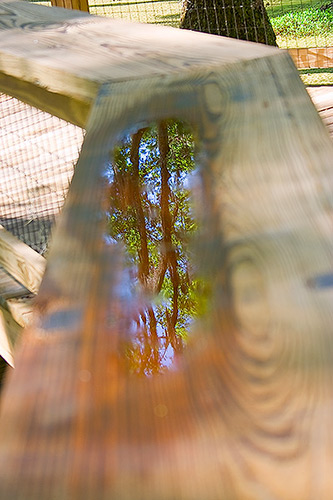
Additionally, I’ve got a few rather unique shots (I think anyway) from my outing to Magnolia Gardens this weekend. There was a heavy thunderstorm the previous day, so lots of opportunities for some macro and water works. Here’s two I thought that the viewing audience might enjoy:

dewdrops21.jpg

reflectoin.jpg
That’s about it for today…a few photos and a tutorial for your viewing pleasure. A multimedia blowout this week thus far, with an article yesterday, photos and videos today, and who knows what tomorrow has in store…more articles, and maybe….an audio podcast *gasp!* (Likely not with the latter though – so no promises!) Until then, happy shooting and watch those apertures! 🙂

CB Episode 038: Calendar Template

PlayPlay

PlayPlay

Wednesday’s Webinar

Okay, it’s not really a webinar, it’s a tutorial, but since I usually publish the tuts on Tuesdays, I had to come up with a clever name for the post title, and webinar was the best I could think of…it’s corny, but what the heck.

This week, the final installment of creating web galleries using different applications. Previously, I had looked at how to create web galleries using both Photoshop and Lightroom, and discussed some of the basics involved there, as well as some of the pros and cons of each. In this third and final segment, I look at an open-sourced option called Jalbum. This actually turned out to be a really cool application with some features built in that just made me say “Now hey, that’s cool!” For starters, you can add a comments section for your photos – great if you want to get a dialog going. You can also include a shopping cart and a link to a paypal site for people to not only check off what they want to purchase, but also complete the transaction. Very slick and clever implementation here. I wish the folks at Adobe had thought to incorporate this sort of feature in Lightroom – I can’t imagine a professional photographer not wanting to sell their work, so am wondering why Adobe seems to have missed the boat on this one. Perhaps when LR 2.0 comes out of beta, this will be an incorporated feature. (Is anyone at Adobe watching?)

After watching the video, you should bounce back here to the blog, so please feel free to share your comments on the video. Did you like it? Was there anything I missed that you would like to see? Too much material, not enough? Did I talk too fast? Let me know if you have software or applications you would like to see featured as I can usually find a trial version or something to go over some of the basics. Comments section or email, as always are encouraged. We’ve also only got two weeks left in the camera quantity poll, so don’t forget to vote!

Anyway, enough teasing and hinting of what’s to come…I bid you adieu and happy shooting until next week as I give you the full tutorial on creating web galleries with JAlbum! (don’t forget to watch those apertures…)

View Jalbum tutorial online (flash-based)