Updating Your Firmware

A few days ago I shared the story of how an IS lens on my beloved 40D was producing some odd noises and the resulting diagnosis was to update my firmware. Rather than do so immediately (as is usually the case for me), I decided to hold off and share it as a video tutorial of sorts on what the process is like. I share a few tips on things to do before hand and what to look for. Then, you see in real time, unrehearsed and unscripted, my firmware update.

As the video shows, it’s a pretty painless process as long as you follow instructions. Unfortunately, because I had to use Quicktime to record it, there is no flash version available. Podpress has not been updated to co-exist with WordPress, so I am continuing to have to post videos and multimedia via link rather than by an available feeder, so apologies there as well.

But anyway, enough falderal, here’s the video:

[display_podcast]

I should have some more pics, a Wednesday “What’s This?” and fun stuff again tomorrow.  Thanks for stopping in, and until then, happy shooting and watch those apertures!

Some Friday Photos

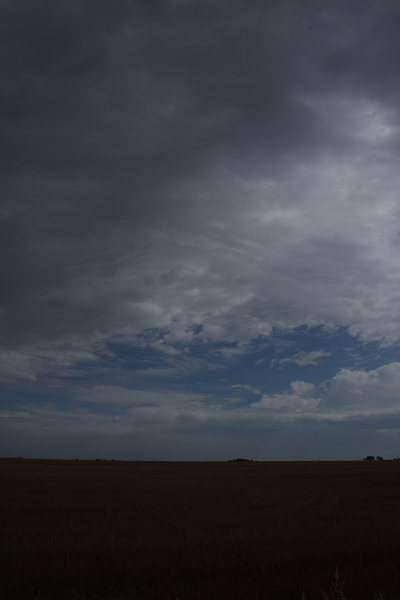
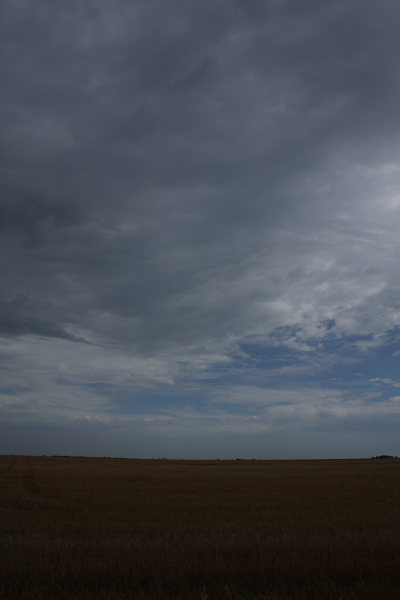
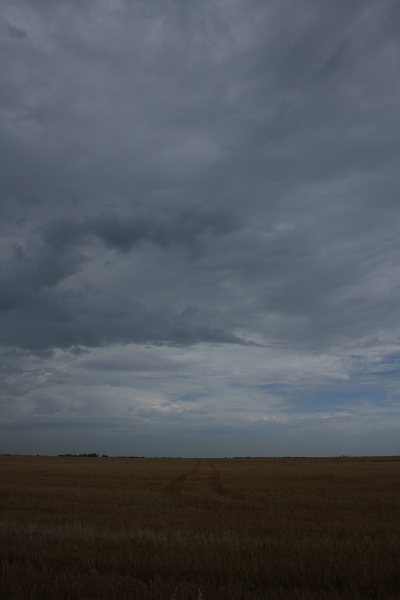
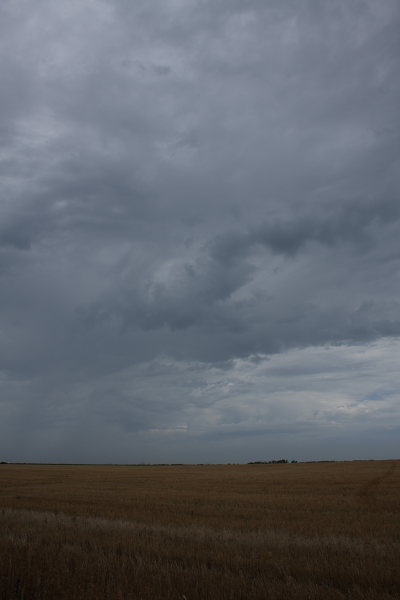
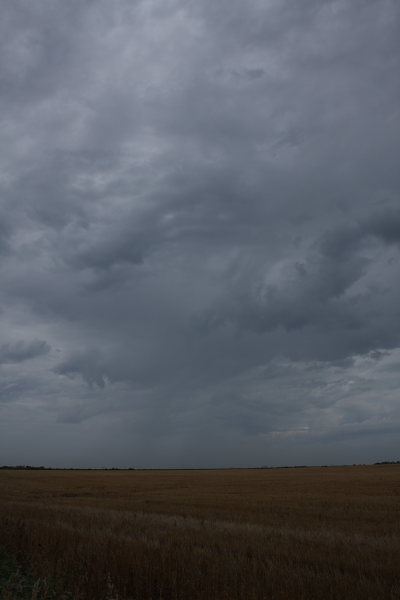
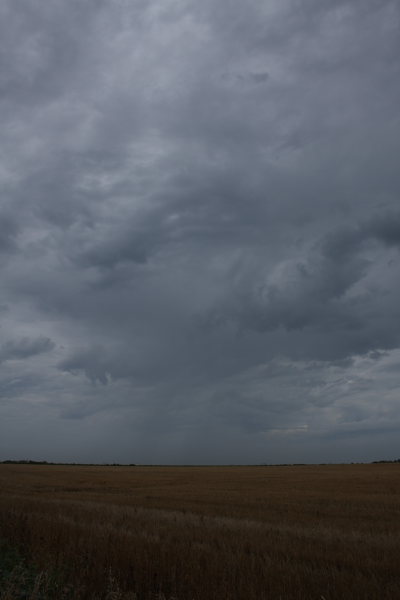
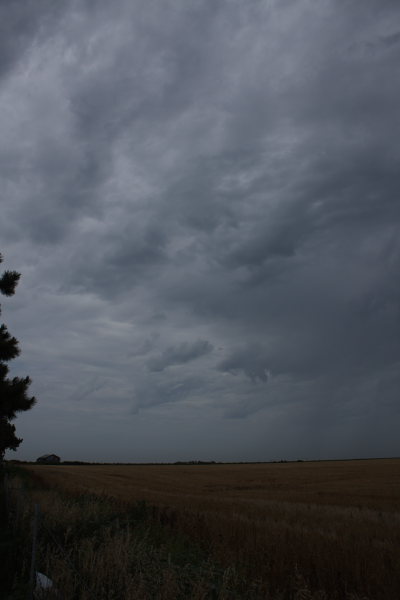
As promised earlier this week, I finally have some photos to share. In the middle of the drive across country from SC to CO, I stopped a few times and saw some possibilities for panorama shots. Keeping in mind a couple tips, I switched my camera from landscape mode to vertical (a.k.a. portrait) mode, and captured several scenes on my 40D. Here is the first installment of my attempts at panoramas:

So, you’ll notice that the color on these is a little off, and the exposure is a little dark. I realized that I would have issues though, if I tried to expose for such a wide scene and range of colors across the entire panorama, most especially when trying to use the Photomerge function of Photoshop. So I set my White Balance to cloudy, my exposure to one frame, and just snapped across the image.

Here’s where it gets fun…I am running CS2 on my Mac laptop which cannot read my 40D files. My CS3 was set up on my Windows desktop. The Dell only has a 2.3 Ghz Celeron processor with 1.5 GB of RAM (I never got around to adding that last 512 before the move…). Needless to say, without being set up right, I really couldn’t process 8 shots each at 10MP (that’s a grand total of 80 MP in the final pano)! Even now with the portable AC on the Dell, it was screaming along as I ran the Photomerge utility through Bridge. Once I got the photomerge done, I stamped the layers (CTRL+ALT+SHIFT+E) and converted to a smart object.

I then double-clicked the smart object to edit in it’s own window. This image file was now at 480 MB! Needless to say, I did some layer adjustments for exposure, and curves, then saved the file. I was now back in the full pano composite. I saved the full pano as a PSD file, then flattened before making some downsizing. For the curious, the full size pano is over 8000px on the long side. For the purposes of the web, I did have to downsize it a little. Clearly downsizing to allow the blog to show it would be out of the question, so here’s links to a large sized version (1600px long side), and a xl sized (3200px long side).

Large Pano

Extra-Large Pano

So, here’s the question: was it worth it? 🙂

Tuesday Two Minute Tip

Clouds Filter
That’s right, I’ve finally gotten back in the saddle for some good old fashioned Photoshop fun. Today, it’s a quickie, but then again, that’s how we like our information on the web: short, sweet, and to the point. Today I give a little tip on how you can use the Clouds filter in Photoshop. This technique works in pretty much any of the last 3 iterations of the software (I am assuming it works in CS – I got into the game in CS2 worlds…).

Anyway, take a gander on the download feed listed at the end of the post. The result of the tip is actually at the top of the post so you kind of get a little teaser there! (Yes, I am a tease!) Not much else today, as I am still swimming in a sea of boxes. I’m hopefully a little ahead of the game now for video tips and tricks, as next weeks is set to auto publish Tuesday morning.

I do have my “Shoot the Day” pics for Photoshelter, and will hopefully have those processed (at least a quick process in DPP) and ready to share tomorrow, so stop on back to check those out. In the final news tidbit – don’t forget the Photo Contest here at CB. Stop over and share some pics along the lines of a “Freedom” theme, and you could win a $25 gift card to B&H! 2nd place and 3rd place prizes will be awarded too!

So, until next time, happy shooting and we’ll see you back here tomorrow!

Wed Edit: The linked video is not displaying for some reason so for the time being, it can be downloaded directly here

CB Episode #48: Clouds Filter

[display_podcast]

PlayPlay

Slideshow Secrets

As I thought about the tutorial for today, I pondered doing a quick set of tips for Photoshop, like CTRL+J for a duplicate late, CTRL=ALT+SHift+E to stamp all visible layers on to a new layer, and other such trinkets.  While debating which ones to include I was continuing the process of winnowing down the last of my photo magazines to just the articles I wanted to keep.   I was also thinking that perhaps a subject would come to me that could add a new dimension to the blog, when as luck would have it – the subject came to me.

From back in October of 2006 – nearly two years ago, I saw an article in PCPhoto that took a look at tips for making great slideshows.  Written by Chuck Summers, it reminded me of the days of yore when my dad would crank up a slide projector to have us watch slideshows of ourselves in Florida, the Grand Canyon, and other family adventures.  Well, the digital age is most definitely upon us, and one area I’ve not gotten into much is that of slideshows.

Chuck did a great job with this article, and I’ve condensed it down here to the nuts and bolts of each tip (twelve total, which makes for great alliteration – it pains me to dodge the obvious usage!)  Anyway, here’s his 12 Slideshow Tips:

  1. Determine the Theme and Purpose of Your Show
  2. Set a length
  3. Methodically edit your images
  4. Maximize image effectiveness
  5. Prep images
  6. Set Image Order
  7. Determine transitions
  8. Title Slides
  9. Choose music to set the mood
  10. Time the Presentation
  11. Preview, Evaluate and Revise
  12. Test Projection Needs

While very informative, and logical in layout (I like logic!), what the article did not present is software recommendations.  I’ve read various bits and pieces around but have not had reason to delve into it thus far.  However, with a cross country move coming up, I thought it might be fun to take images that capture the trek from the East Coast to the Rocky Mountains and compile them into a slideshow when done.

To do that though, I need some software that is designed for slideshows.  I know Photoshop and LR can do these functions, but as an old hat, I like a specially designed piece of software for each function.  Thus, I can’t help but wonder what would be the best software to accomplish these ends.  I recall Proshow Gold as a name, but forget who produces it.  In the interests of full disclosure, I feel that I should also state that I actually have not really tried the slieshow functions in either PS or LR, so am appropriately ignorant on both counts.

So, what should it be?  Should I use Proshow Gold, Photoshop, Lightroom (I am using the Beta 2 via invite), or is there some other software out there that is better purposed to these ends?  Any slideshow superstars care to share their own secrets on software and other tips for making great shows?  Feel free to educate me in the comments.

Meanwhile, happy shooting, watch those apertures, and see you here again tomorrow.  (Perhaps a video tutorial is in the air for then…ya never know! 🙂 )

Back to Basics

Today as I am getting back into the swing of things after a day or so of downtime, I have a couple miscellaneous items that may be of use…  A lot of it is basic stuff, but there is a common thread to it as they all involve some concept of “back”.  So, here is a Friday Foursome of tips to improve your photos.  The theme:  Back to Basics


  1. Back story – provide some background on how you got the shot.  Give it a personal meaning or significance for the viewer.  Often times connections with imagery are because of a personal tie to it – and if you give people a hint of the “who, what, where, when why, how” element of your photos that you share, it can increase the impact.  Just remember, keep back stories short – if it takes two pages to set the stage, the show will almost always disappoint.
  2. Backgrounds – speaking of backgrounds, take a look at the backgrounds in your photos.  Are there any elements there that draw your eye?  If so, that is likely a detractor.  Keep backgrounds simple.  If shooting a lot of family members at a dinner, keep the lower edge of your camera above the table line to avoid the distraction of glasses, plates, food, centerpieces, etc.  Likewise, look where people are.  Is it a crowded subway or is it a meadow of daisies?  Either can serve to enhance or detract from your image because the background can take emphasis away from the subject or it can help focus on your subject.  Generally speaking, the simpler the background, the better the picture!
  3. Backsides – in family or group shot settings, can you see anyone’s backside?  If so, then their face is not likely facing the camera.  We tend to prefer shots of people where we can see their faces, so if you see someone’s backside, hold off on taking that shot – get them to turn around a little.
  4. Backups – It’s been said before, but the importance of backing up your files can never be understated.  When do you backup?  I do it three times – on first import to the computer, after I sort through and delete out unwanted images, and then after I process for print and web.  Typically the latter two will be purged after a month or so of inactivity.  By purge, I mean relegated to the RAID side of the house, rather than the active folder I keep on my desktop.


So, that’s the Back to Basics for Friday.  Any other tips out there I missed where you can incorporate the term “back” into the subject?  I had four, but surely there’s more!  (Heh, if it’s not alliterative, at least it rhymes, right?)  Happy shooting, everyone!  Watch those apertures and we’ll see you back here Monday!


P.S.  Don’t forget about the Photographing Freedom contest now underway here at CB – day 7 of 30!

Tuesday Tech Talk: Canon ST-E2

This week, the Tuesday Tip is more of a Tech Talk. I got an email from someone inquiring about the Canon ST-E2 asking about how to use it, and what it is compatible with. Taking a cue from this, I decided to make it a video tip from the MacbookPro,and set things up to give a basic primer on what the ST-E2 looks like, how it mounts to your camera, and how it triggers off-camera flashes electronically. Hopefully this will help demonstrate the purpose of the ST-E2 in a better light (bad pun, sorry)! Because it was recorded from the Mac this go around, there will not be a Flash-based version of the Tip this week.Sorry in advance for any that might prefer the Flash version.

One note on the video content: I said in the video that the ST-E2 supports the entire Speedlight flash family.While that is true, I did get the nomenclature wrong.As it turns out, the 400 series Speedlights are the 420 EX and the 430 EX, with the 500 series ones numbering at 550 EX and 580 EX.The ST-E2 will work with them all, albeit with some limitations on the earlier versions.For detailed specs, there is good information at Canon and the product sheet maintained by BH Photo.Those direct links are provided here for anyone who is interested.

So, that is the tip for this Tuesday: an ST-E2 Tech Talk.If anyone would like to see more gear in action, or has a question about how to use gear, feel free to email me or post in the comments section.Happy shooting, watch those apertures, and we will see you tomorrow!

Canon Product Sheet for the ST-E2

B and H Photo Product Sheet for the ST-E2

PlayPlay

Monday Minutia: Memory Management

CF Cards

A post over on This Week in Photography got me thinking about my memory cards and the rituals or practices I take to conserve my image data. As they suggested over at TWIP, I do format my cards in camera prior to using. This in-camera formatting optimizes the data sectors and creates folders to organize image data. However, I also occasionally format my cards on the computer for that exact reason. Since the XT only has an image counter that goes to 100, whenever I pass that 100 mark, it creates a new folder.  If I were to never format the card outside of the camera, those folders would always remain there – and I would wonder if there were images in there not being copied out to my hard drive for backup.

So, I do format my memory cards in the computer. About once a month I’ll insert my cards into the card reader, plug ‘er up, and format away. On the PC, that would be: format E: /fat32 (With “E” being whatever drive letter is assigned to media once you connect it. Having said that though, once the PC format is complete, I will do another format in camera to optimize sectors for the camera prior to shooting.

The last step I take in the format process is to take a picture. My very first picture on each card is a screen shot picture from my monitor. On my monitor, I put together a Word document that gives my contact information (Name, mailing address, phone, and email address), along with a request to return the card to me (see above – naturally, the info there is more accurate, but you get the idea). That way, if I ever lose the card, hopefully some benevolent person will find it and put it in their computer or camera and find that content there. I took the shot with PrintKey (Windows only- if you are on a Mac, use CTRL+SHIFT+4 to grab the area manually yourself), and then opened in PS and saved for web settings to minimize the space it takes up on the CF card (32K). This may seem rather a p.i.t.a., but the step for me is worthwhile just as a safeguard against the possible loss of my CF cards.

One final note, in case anyone is interested, I do have a few suggestions for vendors to use: I like Sandisk and Ridata. Both have been very good to me, and with three 2 Gig cards, I am probably safe with those. Although, I do know of others (like Scott Kelby) that recommend Hoodman. For those of you that are technically inclined, and want to know all the nitty gritty details of write speeds, failure rates, etc., Rob Galbraith also has an excellent page on all that stuff if it is up your alley.

This may be a rather unique approach to memory card maintenance, but it works for me. Maybe this will give others ideas for procedures to use in their own approach to memory card management. What about everyone else though? Any other tips or tricks to suggest for managing your media? Feel free to share those in the comments.

The week in review

globe

I know web links are typically done on Wednesdays, but a little schedule change was in order given the recent news from this corner of the internet.  So, for this Friday, here’s some stuff I read around the web recently:

Brian Reyman of Professional Snapshots has released a beta version of a neat Flash program for schematics of lighting setups.  It’s a very helpful in documenting studio work and other such photo utilities.  Best of all, it’s Flash-based so it will work on Mac and PC!  Many thanks to Brian for all the time and energy he’s put into this program.

Being very much a fan of DIY photography, I have to give shout outs to the guys over at This Week in Photography for their post on making your own reflectors from cardboard, styrofoam, or plywood and either paiting white or covering with aluminum foil.  Very clever, and a great tip!  Thanks to Scott Bourne for this…oh yeah, check out their weekly podcast too.  Lots of info and always fun to listen to!

Scott Kelby needs no introduction, as he’s pretty well recognized throughout the industry.  He also most certainly needs no help from me for publicity, but his post this week about the “School of Hard Knocks” really hit home as I forgot a CF card for my camera just the other day.  So, sometimes I really am just like Scott Kelby!

David Hobby also gave a little nod to this over on Strobist, and while it’s a little late to be saying it here, there was a Shoot! the Day scheduled for today – photogs the world over will be sharing their shots taken from today over at Photoshelter in the coming week or so.  I signed up, but because I forgot my CF card, was not able to participate.  Still, stop over there to see a day in the life of photographers the world over!

Michael Johnston of The Online Photographer anounced his newist list of Top Ten Cameras, and Canon gear made it in twice (three times if you count them in with the “any entry-level DSLR” listing.)  The top Canon recommendations are the 5D and the SD870 IS.

Finally, in Canon-specific news, we’ all have likely heard about the upcoming release of the Canon XS.  Scheduled for release in July, it’s gotten a few reviews trickling out from various resources.  The best review I’ve read is over at the Photokina site.

Last, but not least, don’t forget to take a break, and laugh a little over at What the Duck!  My favorite one from this week:

What the Duck

Pics, Trips, and Tips

What's This? - Week3

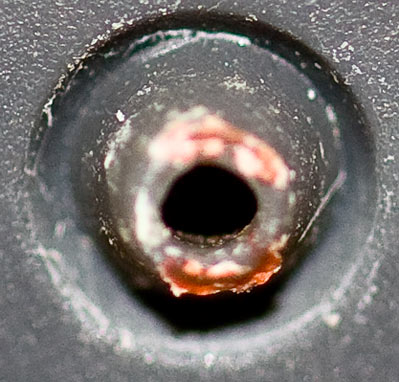
Welcome to week 3 of the “What’s This?” series! Last week I had a close-up shot with some great guesses including carpet, a towel, and a toothbrush – but the answer, as it turns out, is a candle wick!

What's This? - Week 2

I had cropped out a portion of it, to give kind of a different twist! Thanks to all for participating! So, as we move into week3, here is another everyday object that I’ve zoomed in on, and taken a cropped portion to share. Can you guess what this is?

In other news, it seems I will be somewhat busy over the next few weeks with several trips on the horizon. Late June, a friend is getting married, and that will require a trip to NC. Then, shortly after that, I will be traveling (driving) to New York for the 4th of July festivities. Very shortly after I get back, I will likely be accompanying my wife out to Colorado as we transition to that area from SC. She’ll move on ahead to start her job, while I stay behind to close up shop and sell the house. Oh yeah, did I mention? We’re moving to Colorado!!!

So, for the last tidbit of news, I did actually knock out the tip for the week as previously mentioned: displacement maps! I read about this technique in my most recent issue of NAPP and had a few images that I thought it may work for, so thought to give it a whirl! Pretty neat effect, so feel free to try it out yourself!

CB Episode #44: Displacement Maps

Tip Teaser

Due to birthday circumstances, spousal attention requirements, and other frvolities of life, the tip for Tuesday has not been recorded yet.  I will try to get that recorded, produced, and published today.  In case it doesn’t make it out though, the teaser for it is that it covers displacement mapping with some pretty neat effects as a result.  So, check back in later tonight (I am guessing around 10pm EST) to see if I was able to crunch things together in time.   If not, it will likely be published tomorrow with the latest edition of “What’s this?”.  So, in the meantime, keep those cameras clicking.  Happy shooting and watch your apertures out there!