Raquette Lake Rendezvous

Every year, the men in the family (cue Tim Allen-esque Home Improvement style grunts) depart from their women and the rigmarole of daily lives to embark on a quest to re-connect with nature.  We build fire, we eat man food, we emit bodily sounds not allowed in most social circles, tell jokes that are decidedly not PC or appropriate for most audiences and all sorts of other debauchery.

This year I had the chance to attend (I missed a few years due to work), and with a new generation of men-in-training to initiate, it was quite the sojurn!  We also dealt with survival skills in the wild – land navigation/compass courses, intentionally over-turning canoes and kayaks to recover, and all sorts of hair-raising experiences for the single-digit aged crowd.  They learned quite a bit!

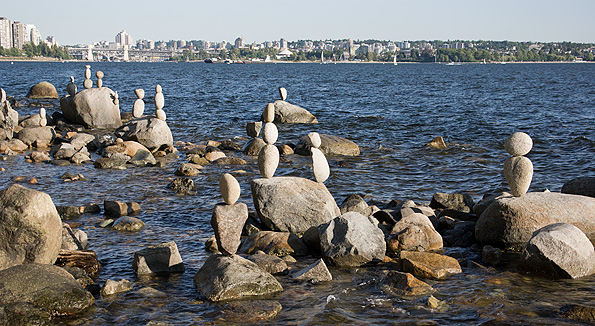
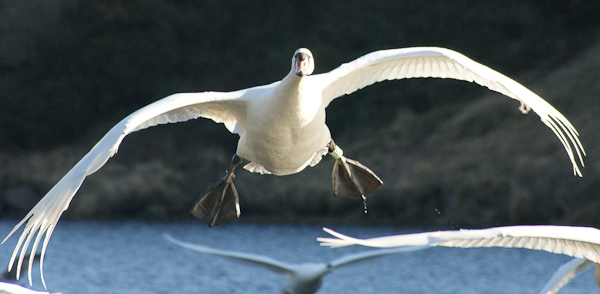
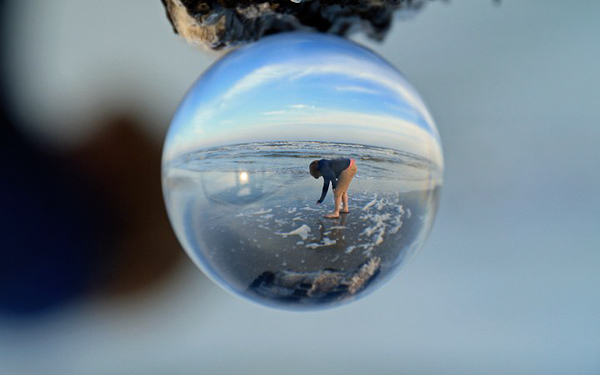
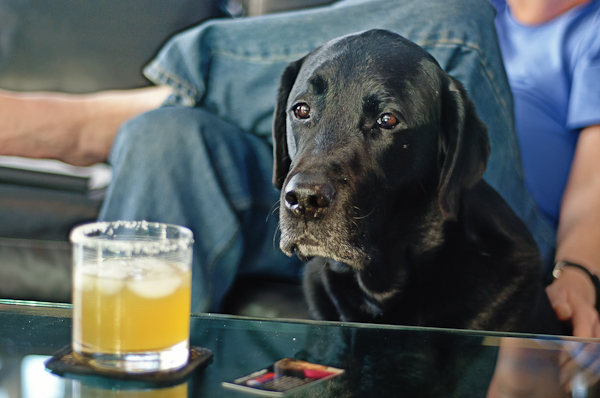
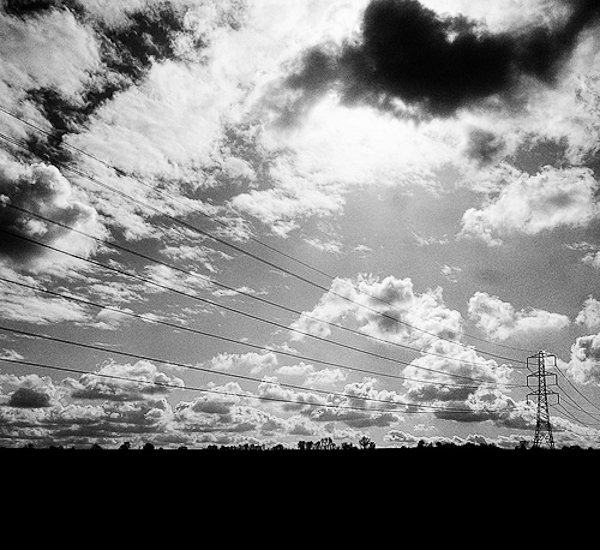
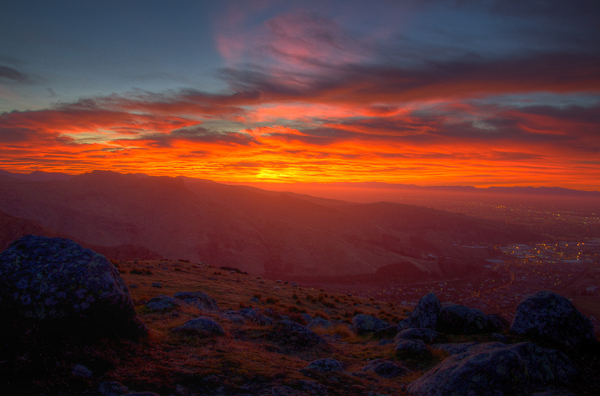
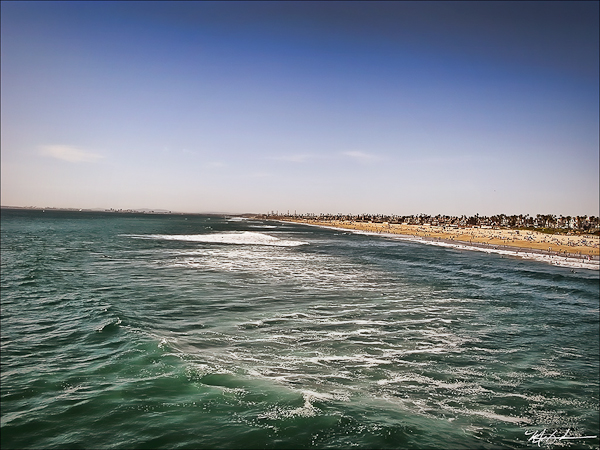
In all the ruckus, I did manage to sneak my SLR into the forest for what I anticipated to be some possible chances at some nice scenery.  I was not disappointed…here’s a few sample shots from said trip:

In addition to spending some good quality time with family, some “man-bonding” and such, a few decent shots came out of the trip too!  Plus, with my packing list, and preparations for keeping everything dry, as well as some other trip-specific details, a few posts worth of content will likely be coming down the road later this week too!

In the meantime, don’t forget to set your alerts for the first free webinar that Kerry Garrison and I are hosting tomorrow night from our joint venture with Lightroom Dudes.  That starts tomorrow at 6:30pm Pacific, 7:30pm Mountain, and 9:30pm Eastern(More are coming after that for only $20 a session…)  The Denver workshop is also fast approaching , and there are still seats available.  You can register for only $79 here:  Add to Cart

Hope you enjoy the pics, and we’ll see you back here again tomorrow!

A bit of Tea, Chap?

A recent visit to the parental units in upstate New York was long overdue for a number of reasons.  First off, I’d not been back in nearly 4 years!  Second, they had done some pretty extensive renovations and were clamoring for family to come see all the newness of their kitchen (and for the record, it was pretty fabulous), but third, and perhaps most importantly – the maternal unit is quite the avid gardener, and she prides herself on the beauty of her English-style gardens. Continue reading “A bit of Tea, Chap?”

Inner Reflection: The What vs The Why

Hello CanonBloggers! First off, I’d like to thank Jason for the flattering acceptance of my offer to guest blog this post. I’ll be the first to admit that I’m not the most eloquent when it comes to introductions, so for those of you who aren’t familiar with myself or PhotographyBB, I’m Dave Seeram, Editor of the PhotographyBB Online Magazine. As I am sure most of you are aware, Jason has been a contributing author for the PhotographyBB Online Magazine since our first year (now into our third). I thought that after all the hard work Jason has done for us and the entire photo-community, this would be a small opportunity to give back to Jason what he has done for us. Continue reading “Inner Reflection: The What vs The Why”

Nothing But the Tail Lights

In the course of pursuing creative inspiration, I’ve often found that just picking a subject and sticking with it can be a good exercise in creativity.  Taking something and focusing (no pun intended) on that subject and only that subject can help you see things differently.  The exercise is good whether your subject is flowers, thumb drives, coffee mugs (which I’ve done in the past), or in this case – tail lights!

[cincopa 10624678]

As you can tell, some of the shots are pretty cool, others – well, not so much.  Some are out of focus, some are boring, but a few just pop and stand out.  Also note that I’ve not done any post processing of these.  I just imported into Lightroom 3, re-sized for export uniformity, and boom! – done.  While I grant you it’s not always showcasing the “best of the best” of your work, it’s is important though not to eliminate shots from the project, at least initially…because these “throwaways” can help you identify what works and what doesn’t work.  What makes certain shots stand out and why?  These are all things to look at when doing little mini projects like this.  So, pick a subject and fire away!  Feel free to share your own thoughts on what works and what doesn’t in the comments, and hopefully this will help kick-start some other projects!  Happy shooting all and we’ll see you back here again tomorrow!

May We Salute You

The May pool of photos that everyone contributed to was quite stunning – the listening and reading audience is quite a talented group and some of the images on here were really incredible.  Full of vibrance, vision, color and passion – it was really hard to narrow things down – but I give you here just a few from the wonderful month of May.  There really is no better way to say it than: Continue reading “May We Salute You”

Can you trust your meta data?

We all talk about tags, and flags and meta data whenever we are importing our photos into Photoshop, Lightroom, Aperture, or whatever program you use.  While there are discussions ad infinitum about the value of adding extra tags to your photos like “2010” or “Canon” or “family vacation” or whatever labels you like, there is an underlying set of “fixed” data that contains HUGE amounts of information about your picture, and that is the EXIF data. Continue reading “Can you trust your meta data?”

Creating a Monthly Desktop Calendar

I alluded to it yesterday, and have already had several people inquire about the procedure to create this desktop calendar.  It’s really quite clever, and kudos go out to Jeffrey Friedl over on his site for the script:  http://regex.info/blog/photo-tech/calendar He does a decent job at the basic explanation, but since we are a visual world, here are some step-by-step instructions on how to run things from beginning to end!  Fair warning – this does require Photoshop as the script (I don’t believe anyway) will run in Lightroom because it uses layers…

1.  Download the script from the link above (I downloaded to my desktop on Windows XP)

Step 1 - Download the script

2.  Copy the script from your desktop (or whatever download location you configured for your browser) to your Photoshop folder, as indicated in the screen shot.

Step 02 - Copy script to Photoshop Folder

3.  Open Photoshop (if it was already open, you should probably close PS and restart it)

Step 03 - Open Photoshop

4.  Open the picture you want to apply the script to (I started with the largest size desktop I wanted to configure it for, in this case 1600 x 1200.

Step 04 - Open the image to apply the calendar

5.  Navigate to the Presets option in Photoshop and open the script

Step 05 - Locate the Script from Photoshop Menu

6.  The interface lets you select certain information such as the month it will run for, when the week starts, etc.

Step 06 - Configure Calendar Options

7.  Special mention here to include certain holidays – if you have custom days (say birthdays, anniversaries, etc) to add, create a text file for reference and point the script to that txt file location.  If you don’t want certain days highlighted,you can leave this option un-checked and proceed with the script.

07 - Specify dates to highlight if desired

8.  It may take the script some time to run (it took me about 58-61 seconds to run it on my computer, but I was multitasking with other things at the time…).  When it’d done, you’ll get a stack of a lot of layers that looks like this, with the default layer selected of “Picture Mask”.  Note:  I’d also recommend checking the option to rasterize most text layers otherwise you’ll have up to 30 additional layers of text (one for each day of the month)! The layers underneath this are where all the really cool stuff is, and the other layers are dates and effects that you can change to suit your own tastes.

Step 08 - Customize Layers to taste

9.  Once you have tailored the layers to suit your needs, simply flatten, save as a jpg and configure your desktop to use that image!  Since I typically will save to multiple desktop dimensions, I start with the original and re-size to each output, from largest to smallest saving each as a jpg then letting the script use that to create the desktop calendar.

Step 09 - Save and distribute your new desktop calendar!

There you have it!  The nitty gritty details on how to create a really slick looking desktop calendar for you and your clients.  Simply print as pictures through your favorite venue if you like and watch the sales come in!

One final little news note that is time sensitive – DIY Photography has a very creative approach to contests and the prize package is worthy of a nod (don’t know how he/she/they managed to come up with this big bag of goodies!), so stop over here and throw your hats in the ring:  http://bit.ly/aRQa9l

See you back here tomorrow for the latest in photo goodness!  I’ll also bring up a couple tips on how to tweak the layers to your own ends, but feel free to begin exploring your own creative approaches! 🙂

The Ides of April

Well, it’s not really the ides of April, more the Ides of Closing.  Yup, us nomads are at it again – we just can’t seem to settle down.  Our cross-country move into an apartment for 6 months, then another move into our current house for two years was not enough.  Nope, we got the itch again.  Funny how the moving itch is coincidentally happening within a week of our seven year anniversary.  Isn’t that supposed to be the itch?  Oh well, I’ll take this itch over the alternative.  So, with this being closing date and all, I’ve clearly got a lot on the plate today and throughout the remainder of the week.

Believe it or not though, I’ve got a couple really good posts lined up over the next few days (amazing what happens to your content when you plan ahead, eh? 🙂 )  For today, I am bringing back the “Shout outs” theme from the previous months Flickr Group contributions.  These are just a sampling from the entire month of March to the group pool, and have nothing to do with the contests.  Just some images that I thought deserved a little recognition…so, without further ado, here’s that random sampling.  Thanks to all who have so generously shared their images and who continue to do so – it’s awesome to enjoy all the talent that is out there!

Flickr March

Flickr March

Flickr March

Flickr March

Flickr March

Flickr March

Flickr March

Flickr March

I think I got the order right, but if I cross-referenced these wrong after download, please let me know.  Honors this month go respectively to the following people:

  • Grey Hamster
  • Josh Cohen
  • KaleidoscopePhotos
  • karensk7
  • KBTImages
  • NZSnapper
  • Sue90ca
  • and whalenmdw

Thanks to them especially for their creative, inspiring and thoughtful contributions!  Everyone’s were really great so it was even hard to narrow it down to a select few here too.  Keep on sharing and next month, we’ll see which ones end up on the blog.  Stop over to their respective Flickr threads and give them some praise for their excellent work!

Speaking of months – don’t forget there’s not much time left in April to enter the Balance themed contest to win an Expo Disc from the generous folks over at Expo Imaging!  Entries are taken until midnight April 30th, MDT (GMT-7).  Good luck and don’t forget to enter your images in the thread here.

Happy shooting and we’ll see you back here tomorrow for more news and updates from the LDP/CB corner of the photo world! 🙂

*****

News Flash:  There’s something new abuzz in the iTunes store!

The Perils of Polarizers

Happy Monday all!  My apologies at the absence on Friday – it seems some gremlins absconded with all my time on Thursday, so in the absence of any halfway decent content, decided to make it a legitimate “no blog” day heading into the weekend.  But, a new week is here, and I’ve got a cool topic to cover briefly with you…that being:

Polarizing Filters

Polarizing filters can be a godsend – they can really bring out blues in a sky, or minimize reflections in windows, and can really help to improve the quality of your work.  At the same time, polarizers can also be very tricky to use.  On my recent trip to Arizona (I shot a weekend with Rich Charpentier of The Airstream Chronicles), there were many opportunities to bring out the gorgeous blue sky, and contrast it with the amazing colors in the orange rocks that the American Southwest is known for.

The problem with polarizers is that the blue that is brought out is not a consistent blue – it usually gets stronger as you move toward the light source.  So, when you go to stitch things together, the results can be less than satisfactory with evident banding and shifts on hue of the blue skies.  Take a look at the example below to see what I am talking about regarding the banding…

Pano

See how the sky has blues that aren’t consistent?  It’s because I did not rotate the filter to accommodate the shift in blues as I shot across the scene.

Another problem is kind of hinted at above – what if you have a sky where you want the blue to pop, but the foreground includes a water reflection that is an integral part of your composition?  The answer here is to expose both with, and without the polarizing effect, and then blend together the two shots later in post production.  Masking off parts of images is much easier to deal with than the polarizing effect in the sky, but it’s a pitfall of panorama photography to be aware of.

As it happened, later on that day I was capturing another scene where there was no sky, so it was a non-issue.  Here, the key is to remember to spin your filter so that the reflection does reveal itself, otherwise you will think you are doing something severely wrong when you can see the reflection with your eye, but not through the lens.  I probably spent a good five minutes trying to change the angle of view before I realized it was just a quick spin of the filter to reveal the reflection below me…

Reflections in White Pocket

As, as you can see, there are benefits to polarizers and there are also downsides to consider as well.  When used correctly, they can really add to the character of an image.  For those looking at specific recommendations, here are the ones in my gear bag:

But enough about my thoughts on polarizing filters – what about you?  Do you think they are legitimate tools to alter a scene?  What about reproducing the effect in post production?  Which ones do you use?  Do you have a favorite or do you prefer all photography “au naturale”?  Sound off in the comments or via email!

Happy shooting and we’ll see you back here again tomorrow for more photography goodness!