Usual becomes unusual

Lighting Objects

The tutorial for this Tuesday, you may notice is not your typical Photoshop tip, trick, or tutorial. I took things outside of the desktop and into the real world to show you examples of thinking outside the box when it comes to lighting. By now we are all familiar with Strobist, and the methods he uses to encourage people to think about lighting and how to do things in an economically friendly way.

Today, I wanted to take a moment to share with you a few lighting ideas I’ve had and some of the effects they’ve produced. None of these home-made products cost me more than 15 cents! Anyway, I’ll let the tutorial stand alone, but did want to include the show notes:

Tune in to Strobist for anything and everything lighting you ever wanted to read – David Hobby is the lighting guru of the blog world!

David was interviewed recently on Studio Lighting, so now I’ve listened to their podcast, and it’s definitely one to return to. These guys just sound like they’re a lot of fun.

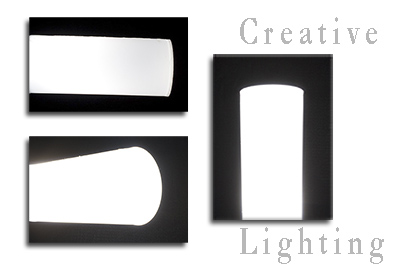
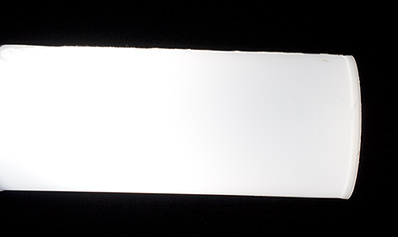
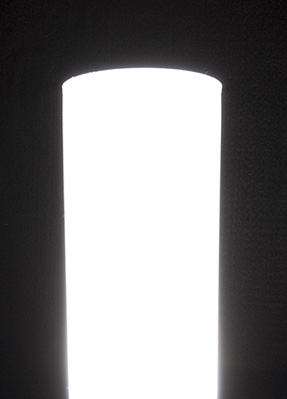
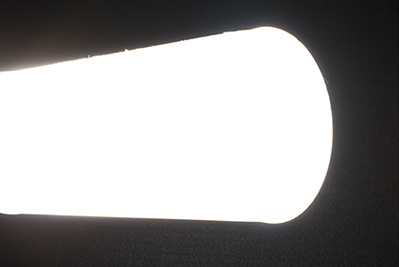
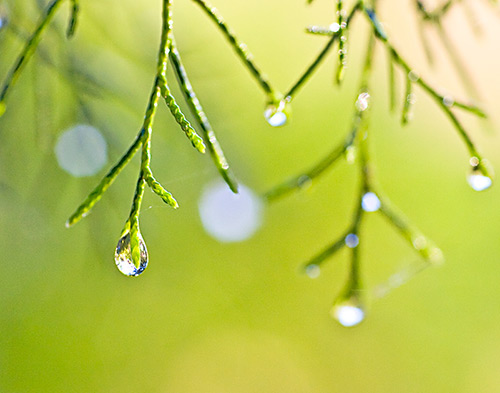
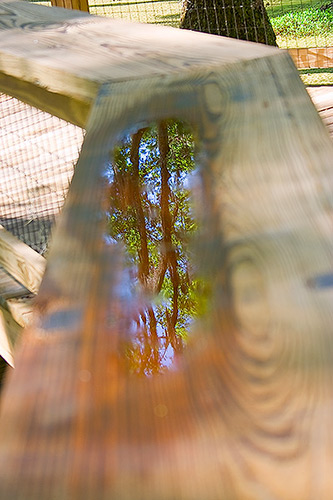
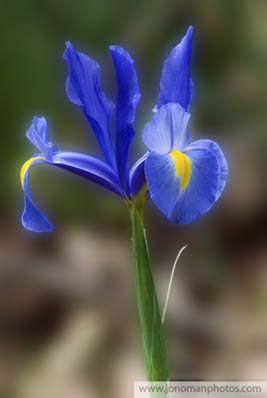
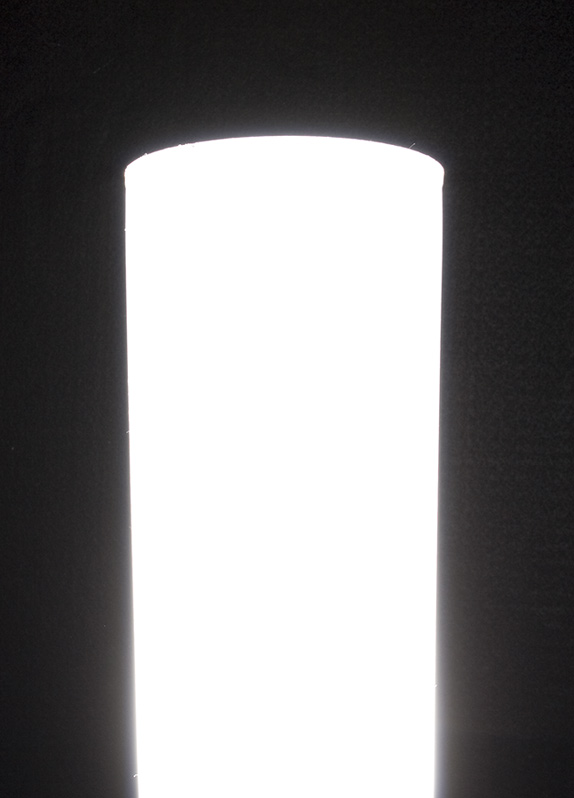
And the shots… you saw the montage up top, but here’s the individual shots from my diffused snoot:

Horizontal View

Vertical View

Angled View

So, there’s just a few examples of how to generate creative lighting by looking at usual objects in unusual ways. Tune in to the podcast to see what other stuff I’ve come up with. Because it was recorded outside of the computer though, I only have the Quicktime version. I am still looking into a decent Flash converter so I can put that together with the “intro” and “out-tro” clips, so if anyone has suggestions for that, I am all ears there too. Anyway, to close out, I’d like to pose another question: What have you come up with in the way of uses? Any everyday objects become part of your photo gear? Share ’em in the comments section!

Back to Basics – Rule of Thirds Grid

After I recorded and started production on this tutorial my mind began to remember that perhaps I had covered this subject before. I reviewed the subjects I have posted over at the Tutorial Resource Center and did not see it covered there, so figure I am not repeating some tutorial I have already done. Having said that, this is kind of a return to the basics. Continue reading “Back to Basics – Rule of Thirds Grid”

PlayPlay

Calendar Templates, Part II

This week I wrap up the tutorial started last week on creating a Calendar Template using Photoshop. One of the things I found most useful was performing the screen captures of each month prior to beginning the place functions inside Photoshop. As you can see in the tutorial, the results came out really nicely.

This whole project started from wanting to make a single-page calendar and in looking at the design offerings on Mpix, thought “Hey! I could make that!” The second half of the genesis came courtesy of Matt Kloskowski over fro the Photoshop Guys where he did a tutorial a while back on making a desktop calendar for a single month. So…I put the two ideas together and this is the end result of that effort. I figured it may also have some interest for other photographers in making calendars incorporating either their own prints or those of their clients. Clearly, this is a “down and dirty” version, but if anyone is interested, I do have a pretty high resolution sized template that I would be willing to share on request.

In other news, I’d like to give some shout outs to Brian over at Professional Snapshots, who just last Friday celebrated the birth of his new daughter Isabelle! Congrats to Brian, even though this means he has pretty much lost the ability to sleep through a night for at least the next 18-24 months! Yeah, this may be your fourth, but I’ve heard the stories from siblings and neighbors! Enjoy!

Also, don’t forget to stop over at Jason D. Moore’s weekly summary of all things photography! I always head there to make sure I’m not missing anything interesting.

Last, but not least, the tutorial links: Flash first and QT second…

Calendar Templates, Part II

PlayPlay

PlayPlay

Creating templates

Hey all, today is tutorial Tuesday, and I share a technique I used recently in creating a calendar template to import client photos in. I could only get about half way through the tutorial before I had to stop (I am trying to keep video tutorials at or under 5 minutes), so this will be part 1 of a two part series. Today I show you how I created the graphics with some guides, and keeping things all manageable on just a couple levels. As usual, the tutorial is linked in both Flash (web based) and QuickTime (iPod/iTunes friendly) formats at the end of the post.

Additionally, I’ve got a few rather unique shots (I think anyway) from my outing to Magnolia Gardens this weekend. There was a heavy thunderstorm the previous day, so lots of opportunities for some macro and water works. Here’s two I thought that the viewing audience might enjoy:

dewdrops21.jpg

reflectoin.jpg
That’s about it for today…a few photos and a tutorial for your viewing pleasure. A multimedia blowout this week thus far, with an article yesterday, photos and videos today, and who knows what tomorrow has in store…more articles, and maybe….an audio podcast *gasp!* (Likely not with the latter though – so no promises!) Until then, happy shooting and watch those apertures! 🙂

CB Episode 038: Calendar Template

PlayPlay

PlayPlay

Adding Blur – and some more Photo Walk News

Sometimes, no matter how careful you are with your setup, the in-camera limitations simply cannot compensate for a vision you have, whether it be the color range of an image, its tonal range, or even the depth of field you want to achieve. A perfect example of this was posted in our regional clubs photo site www.scphotogs.com last week. I shared a technique for adding blur to an image. While normally you wouldn’t think blur is something you want to add, as intuitively we are trained to think of images as sharp and crisp subject matter that is in focus. blur is something that can really enhance an image. I shared a technique I learned with the photog-friend, and in light of the tip, decided it would make a good tutorial as well. Check out the link for it at the end of this post. Here’s the web-version of the finished product, and a link to Jon’s photo site if you’d like to see more of his work.

jobblog.jpg

Don’t forget to vote on the poll to the right, asking how many cameras are in your house? We’re still a long way from the 100 mark, so it’ll be staying up for a while…unless we start “rocking the [proverbial] boat”. Another thing I always like to remind people about is that I am offering up some of my own imagery for sale on the artist site, Redbubble. Click the link to visit my profile and see the images I have for sale (at a steal too – just wanted to share a few with the community!) Lest we not forget, B&H is also the place where pretty much everyone gets everything photography-related, so if you visit their site, use one of the banners here. It’s the same price to you on all gear but B&H does help off-set the hosting expenses with each purchase made through these links, so help a fellow photog out! 🙂 Continue reading “Adding Blur – and some more Photo Walk News”

Thursday Throwbacks

Okay…let’s throw things back two days and pretend it’s Tuesday again. Why, you ask? Because I finished the tutorial I had started. It’s just a quickie, but does explore some often missed elements from the Tools Palette – particularly with the Options bar for each tool. While there clearly wasn’t enough time to go into great detail on all tools – I did give the crop tool and the Lasso tool a run for their money. Watch me screw up too and blithely ignore it while powering through! Rather funny stuff – but hey, if we take ourselves too seriously, then we’ve stopped having fun, right?

Anyway , here’s the links to the Flash and Download versions of the tutorial.

The Options Bar

Enjoy the weekly shenanigans, happy shooting and keep watching d’em apertures! 😉

Tips for Photo Walks

Hey all, sorry for the late posting today – in the middle of the week I don’t have as much time to put material together. However, a few weeks ago Scot Sherman and Michael Stein took a photo walk with some listeners from their Digital Photography Show while in Vegas. That, in conjunction with a new site developed specifically for photo walks, made me start thinking about the keys for success to photo walks, and what our local group (The South Carolina Photography Guild) does on a regular basis. Since I had already offered to share those thoughts with Scott and Michael, I figured it’d be an interesting subject for a “Thursday Thoughts.” So, I starting putting pen and ink together for a PDF supplemental post this week, and that’s been completed. In the interests of keeping the post short so everyone can enjoy the two-page diatribe on “Keys to Successful Photo Walks”, I’ll bid you all a thoughtful Thursday. Happy Shooting and remember to watch those apertures!

ETA:  Jeff Revell was interviewed on the DPS which was released yesterday. He does a write-up on the subject today (3/20), so I am going back into this post to add this link to that post.  Congrats Jeff!

Selective Color, Part III

The Tuesday tutorial for this week is the final installment in making selections based on a specific color, or range of colors. The first demonstrated how to use the Magic Wand and Lasso tools to copy an item onto it’s own layer, while preserving the rest of the image for editing.

Part II looked at using the history brush to bring back color in a specific part of an image for a unique way of identifying one colorful object of an image.

In this final installment, I use the Color Range method to demonstrate how you can make a selection based on the range of color.

The Quicktime version is up and ready for download via the link provided or in iTunes. The flash-based version is uploading right now, but will likely not be finished before the 7pm deadline. For those that prefer the flash web-based version, check back later this evening, as the linked path should be finalized by then. Tune in tomorrow for more web gems. In the meantime, I would like to give another round of thanks for all that are tuning in to the show and sharing their thoughts, comments and feedback with me both personally and in the comments area. That’s all for today. Happy shooting out there and watch your apertures:

ETA:  Flash-based version is up – thanks for the patience! 🙂

Selective Color, Part III

Tuesday tutorial teaser

Today, I am going to show you yet another technique for making specific color selections, but as noted in the title, this is just a teaser – the tutorial is not finished in production, so I should have it up later this evening (around 7).  In the meantime, I would like to thank everyone again who has been reading, watching, listening, and sharing their feedback.  Let’s keep it up – what other tips, tricks, techniques and stuff do you want to hear in tutorials?  I’m listening… 🙂

Big Blue Bowl – Selective Color, Part 2

The tutorial for this week is the second in what will hopefully be a three-part series showing the various ways that you can approach selective coloring in Photoshop. Last week, I went over the technique of using the lasso and selection tools to select your color component and then putting that on its own layer. This week, I look at the history brush. You can quickly see the differences between each and how each has its advantages and disadvantages.

I gave a shout-out to Scott Sherman and Michael Stein’s Digital Photography Show on the video, but you really do need to listen in. Rudy Winston from Canon is on this week and according to the show notes, gives some really good insights and dialog on the Canon line. Kudos to Scott and Michael for incorporating the info into their podcast – I can’t wait to listen to it tomorrow during the commute. Additionally, I spoke with Scott on the phone today too, so that was a neat experience to actually talk to one of the established regulars of the photography community – if you’re reading, thanks for taking the time to chat with me Scott!

For those that prefer the flash version, here it is: Selective Color, Part 2

For the others, the Quicktime version is linked as a media file, and is also available in iTunes. Here’s a sample image of the final product as a teaser:

Selective Color applied to a Blue Bowl

Don’t forget, you can now sign up for email notifications of new posts to the blog. No worries about spam or hokey solicitations from me, I don’t even see that stuff. It’s all automated, and this way you can save space on your toolbar and widget space. One more thing that is done for you, so sign up for it today! As a final note, thanks to all the listeners who have been downloading and watching the videos. I’ve received several kind emails with ideas for future tips, so plenty of creativity is on its way for 2008.

Well, that’s about all for today. Tune in tomorrow for my trip around the web, compiling all the news and reports trickling out of PMA. Happy shooting, and as always, watch those apertures!