Life Lessons (and a tutorial)

The last week has been an interesting one… I got a call at work saying that my wife was at the doctor’s office and they were transferring her to the hospital as a precautionary measure for some elevated blood pressure levels. Needless to say, the next few days I was not thinking much about getting a new podcast tutorial out. After getting every test known to mankind done, the good news is that she is fine and will be sticking around for a while. The bad news is that she needs to go on some blood pressure medication and she has now joined the ranks of Vytorin membership (although her dosage is lower than mine).

That was Wednesday and Thursday.

Friday was pretty much a “recovery day” and I attended to the typical daily minutia that was not taken care of on Wednesday and Thursday.

Saturday, I had a photo assignment for a real estate agency, so I headed out to Daniel Island and shot the property from every angle you could think of. On the way back, I stopped off to get some pumpkins for carving today at one of the local farmer’s market vendors. The pumpkins and flowers made for such vibrant colors I couldn’t help but take some pictures there too.

So, now it’s Sunday and I’ve settled down in to do the post processing from my shoot yesterday, look at my fantasy football setup for the day, and record a tutorial for the blog!

It’s a quickie today, but something that has a lot of uses, and is so easy once you know how to do it, you’ll find yourself playing with Photoshop more and more as a result. The subject is creating backgrounds, and it’s pretty cool. Check it out: Creating Backgrounds in Photoshop

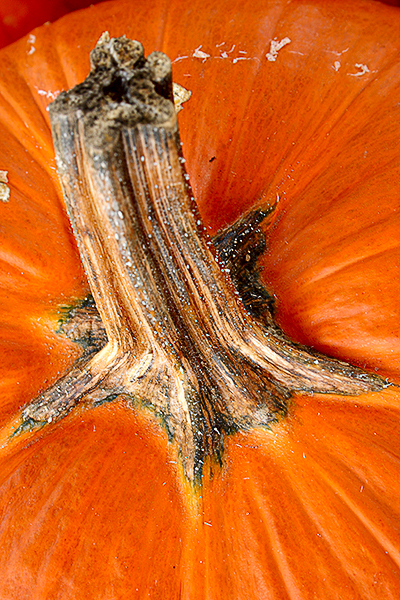
In the meantime, here’s one of the better shots that came from the pumpkin outing:

[display_podcast]

Tuesday’s Tutorial – Creating Actions in PS

While I don’t have a regular schedule for releasing content, tutorials or otherwise, the alliterative bonus of having a tutorial on Tuesdays tastes terrific to tongues. And…since i posted it before midnight, it technically was released on Tuesday, even though it’s 11:20pm! Well, what was neat about this was that on my weekly visit to Photoshop User TV, Matt Kloskowski showed how he created an action for curves adjustments in LAB, and this same technique is what I used for the sharpening aspect of my work flow. While I also have the LAB action assembled, I had split that up into three different ones (one at 3 hashes, one at 2 hashes, and another at 1 hash). Check out the video on their weekly blog post here: Photoshop User TV. I gotta admit though, it was kind of cool though to see a technique I use also be showcased in the tip from the likes of Matt Kloskowski. So, in keeping with the use of layers adjustments as a means of applying different effects repeatedly for evaluating images, my tutorial follows the same theory, but applies it to sharpening rather than curves.

It’s kind of long (12 minutes) because I went through every step, AND I left a mistake in intentionally to show how you can edit an action while you are recording it! Take a peak at it here: Creating a Sharpening Action in Photoshop

As for consolidating the curves adjustments from 3 to 1 using this technique, I actually will pass on that because for me, I am usually pretty close in my “guesstimation” of what will work, and I just want the action to do that for me, not multiiple layers of different curves adjustments. Sharpening is tougher though, so I think it’s more valuable as a method in that regard. We’re all different though, and that’s what makes the world go around, so if you like it, go for it! Enjoy and have a great Wednesday. Oh, and I would be remiss if I didn’t give Matt the courtesy of a link to his site on Lightroom Killer Tips. Check them out too…I am always learning from this guy…

Applying Gradients to Text in Photoshop

Another tutorial has been uploaded and is ready for viewing. This tutorial shows how to use layers to apply a gradient effect to text inside of Photoshop. With the layers, you can preserve the text and the gradient independently of one another for future editing and customization, depending on the need and use. Check it out by visiting the tutorial page for it today:

Applying Gradients to Text in Photoshop

As always, feedback, comments and ideas are always welcome either here or via email: Jason AT Canonblogger DOT com! Thanks for tuning in and happy shooting!

Type Tool presets

On the heels of the last tutorial, this week, the focus shifts to pre-sets. While Photoshop is not the best program for creating style sheets for text, the presets can make things easier if you want to re-use the same format. So, check out the latest video tutorial. It’s online now and again under 5 minutes for those on the go. In the meantime, happy shooting! I’ll have some pics up from the weekend later this week. ETA: Link is fixed, was pointing to an earlier tutorial on a different tip for the type tool. Sorry for the mix-up.

Type tool Presets

Type Tool Tricks

Today’s treat talks truthfully to type tool tricks! Terrific! I love alliteration, in case you couldn’t tell! All joking aside, since shorter videos seem to generate more interest (5 minutes or less), I’m trying to keep it under 5 minutes per video, so check out the latest one today, on manipulating text in Photoshop. Today’s is kind of neat because it shows a not often used (at least to my knowledge) palette – the character palette! Here the video shows how you can stretch a font across the width of the entire image without changing the font size or type (horizontally scale the text in other words). Check it out:

Type Tool Trick

Sharpening in LAB Mode

That’s right, the podcast is done…this is part deaux of what will likely be a three part series that speaks to my work flow in LAB mode. The first tutorial dealt with curves and luminance adjustments in the LAB color space, and here, I illustrate how to sharpen in the LAB color space. Great stuff here, and I also briefly touch on producing an action that will create various layered sharpness levels so you can pick and choose which suits your needs best.

Also helpful are some formulas I’ve learned on what works best for various scenarios. I intended to include these in the podcast, but I am trying to cut down on podcast length and keep extraneous info to a minimum. Nevertheless, the various sharpness levels are relevant, so I am including them here:

For people, portraits, etc.: An amount of anywhere from 120-150%, a Radius of 1.o, and a Threshold of 10 works well.

For cities, architecture, etc: An amount ranging from 50-65%, a Radius of 3 and a thresh hold of 2 does great.

For general everyday use: For all others, I try an Amount in the range of 80-85%, a Radius of 1, and a Threshold of 4.

As always, these numbers are not set in stone, and will vary depending on the types of photos you are working with and your particular tastes. Nothing is ever set in stone in a subjective field like photography, so take this information with a grain of salt, and pepper to your own tastes.

Anyway, without further ado, here’s the Sharpening in LAB tutorial! Enjoy! (And feel free to leave a comment or idea – if you do, you’ll be the first!)