Aspect Ratio adjustments explained

I can’t tell you the number of times I’ve gone to print pictures I’ve taken only to find that I had composed it in a way that a portion of the image was lost when printed because it had to be cropped out to fit on the paper.  Today I am going to share a technique in Photoshop that will help you get around that pesky limitation.

First a little background – the reason why we are losing part of the picture is because we are changing the aspect ratio.  What is aspect ratio?  Simply enough, it’s the relative size of the long side of the picture to the short side.  Aspect ratios are often referred to by their lowest common factor.  So, a 4×6 print uses a 3:2 aspect ratio.  (Aspect ratios usually are stated with the larger of the numbers coming first…)  An 8×10 has an aspect ratio of 5:4.  Want to print a 16×20?  Guess what – it’s got an aspect ratio of 5:4 too!  Here are some of the most common aspect ratios that you see in photography:

4:3 – Point and Shoot Cameras
3:2 – 35mm Film cameras and most APS-C sensor cameras (SLR’s)
1.81:1 – APS-H Mode (High Def)
3:1 – APS-P (Panoramic)

So, with an SLR camera, since your sensor approximates an aspect ratio of 3:2, getting an 8×10 print means you need to keep your subject matter in from the edges because when you crop to the new ratio, at least one of those edges (and a little of the other) will be lost from the crop.  So, having now explained  “why”, let’s now look at the “how” (as in how to fix it!) in the delayed tutorial for the week:

Ladies and Gentlemen, Mr. Scott Kelby!

You’ve surely learned by now that my Q&A with Dave Cross on Monday, and the subsequent discussion with Matt Kloskowski on Tuesday, had to mean that another one was coming, right?  For those of you living under a rock for the past ten years, those two are but 2/3rds of the Photoshop Guys crew.  The guy that started it all, Scott Kelby, has taken the time to sit down and chew the fat with us here, so to wrap up this series, I’d like to present, the Founder of NAPP, the CEO of Kelby Media, and Photoshop Guy – Mr. Scott Kelby! Continue reading “Ladies and Gentlemen, Mr. Scott Kelby!”

Q&A With Dave Cross!!

That’s right, you read that right – I got a chance to get with none other than the Photoshop Guys and ask a few questions about Photoshop, their own projects, and tackle everything from product preferences to personal projects and activities, and even a few personal perspectives thrown in for fun!  Here’s a chance to catch up on the latest with them including their podcasts and shows.  So, let’s just get right down to the brass tacks here…with so much content, it’s broken into three separate posts for today through Wednesday.  Getting things started is Mr. Dave Cross!!! Continue reading “Q&A With Dave Cross!!”

Photoshop is not a bad word

A lot of photography conversations revolve around the question of how much editing has been done to a picture.  Terms like “sooc” (for straight out of camera) or raw, or “minimal editing” are involved.   I also have been known to encourage capturing the best pictures you can in camera.  But does that mean editing in post process is a bad thing?  No, definitely not.  For some, it has become a bad thing though, and phrases where “photoshop” has become a verb have been bandied about a lot.  I’ve heard everyone from amateurs to pros say things like “We’ll just photoshop that out later” or “Can you photoshop my eyes?”. Continue reading “Photoshop is not a bad word”

Can you trust your meta data?

We all talk about tags, and flags and meta data whenever we are importing our photos into Photoshop, Lightroom, Aperture, or whatever program you use.  While there are discussions ad infinitum about the value of adding extra tags to your photos like “2010” or “Canon” or “family vacation” or whatever labels you like, there is an underlying set of “fixed” data that contains HUGE amounts of information about your picture, and that is the EXIF data. Continue reading “Can you trust your meta data?”

Five Best Kept Secrets of Photoshop CS5

By now you should know all about the latest and greatest features of Photoshop CS5.  People have been talking until the cows come home about Content Aware Fill, Puppet Warp, and the other “sexy” features of CS5 (and they are pretty awesome, sure).  Heck, you may even know about some of the JDI (just do it) features, but there is still so much under the hood of CS5 that the gurus and pros haven’t even discussed yet.  After taking some time and tinkering around inside CS5, here are five features that I am surprised are not getting more “air time”…I am calling them:

The 5 Best Kept Secrets of Photoshop CS5

1.  Sharing Your Monitor – In Cs5, the feature has been added where you can share your monitor with others so you can show people exactly what you are looking at.  I can totally see this as a feasible solution for clients that are remote to your location, and travel costs need to be kept down.  Even training seminars could be conducted this way…imagine sitting at your computer at work (or home) and watching an instructor teaching you live from their own desktop!  Very cool!

Sharing Your MOnitor

2.  Refine Edge Backgrounds – I know, refine edge has been around for a while, and we are used to seeing the “marching ants” around our selections…but now Adobe has gone and added different backgrounds to help you better make refinements to selections.  The options are the traditional Marching Ants, and several new options like Overlay, Black, White, and Layers (my favorite).  This is a huge time saver when trying to make selections from within a photo!

Refine Edge Backgrounds

3.  Paste in Place – Another godsend!  After making selection refinements and masking off your layer selection, it’s now super easy to take another image from your clipboard and paste it directly into the active document.  Done with a simple keyboard shortcut: Shift+CTRL+V (Shift+Command+V on the Mac)

Paste in Place

4.  Cache Settings – are now adjustable to your own library preferences.  If you have mostly smaller sized images in your library, you can tweak the cache to Tall and Thin to accommodate your particular editing and library needs.  Likewise, if you are used to working with larger files, then you can customize Photoshop to Big and Flat for those purposes as well.

Cache Settings

5.  Stroke Settings – I cannot remember if this was in CS4, primarily because I didn’t have much interest in CS4, but now having used CS5 to a pretty decent degree, I am so glad this is now black instead of read by default, so I am including it here.

stroke

There’s my five “best kept secrets” of Cs5!  It takes some time to kick the tires and check out everything that new programs have to offer, so be sure you download a trial copy from Adobe.  It’s free!  Have you downloaded your trial yet?  What are your favorite “under the hood” features?  Any that you feel aren’t getting enough press or coverage in the photo circles?  Sound off in the comments!  In the meantime, don’t forget to step away from the computer periodically and take pictures! 🙂  Happy shooting and we’ll see you back here again tomorrow!

Migrating Photoshop to a New Computer

Over the past three years or so, I’ve had several people ask me about what’s involved in migrating from one installation of Photoshop to another, or what’s involved in moving from an old system to a new system.  With Photoshop, it’s just not as easy as it is with other applications for a number of reasons:

1.  Dependencies – While Photoshop is insanely popular, this popularity has spawned an entire industry of third party applications called plug-ins that get installed into Photoshop.  If you simply remove Photoshop without considering these 3rd party “apps”, you could lose their functionality.  There are also other things that become part of your work flow in Photoshop that you may want to save too, including actions, scripts, font folders, brushes, and much more.

2.  Licensing – Because it’s not a cheap application, Adobe has to carefully manage licensing, which means that any serial number can only be activated twice before it gets “locked”.  This allows you to have an installation on a desktop and a laptop, or a work computer and a home computer.  Well, if you go an just un-install or delete the files for Photoshop, you may find yourself unable to activate again should you re-install on a new computer.  The way to avoid this is to ensure you de-authorize (or deactivate) before uninstalling.  This will free up the license for use again.

3.  Other add-ons – Photoshop also has other add-in elements like automation tasks you may have added over time.  I have a few from On One, Topaz Labs, and a few others that I’ve gathered over time.  Make sure you check to make sure these don’t have installers with licensing too, because that can also be problematic for a software migration.

4.  System settings – Unlike e-mail, some settings and preferences don’t stay with you during the course of a migration.  So, it’s often helpful to grab screen captures of various setup windows so that you can get things configured just right once you get in your new digs!  Here are the 11 screens you may want to capture before un-installing off any computer:

PS Preferences

PS Preferences

PS Preferences

PS Preferences

PS Preferences

PS Preferences

PS Preferences

PS Preferences

PS Preferences

PS Preferences

PS Preferences

PS Preferences

As you can tell, there’s a lot to consider.  And, given the length of this post already with the included screen captures, to make things easier in terms of reference information, I’ve put together a step-by-step procedure to migrate Photoshop from one computer to another that you can download for free!  Enjoy!

Migrating Photoshop

Happy shooting and we’ll see you back here again tomorrow!

Creating a Monthly Desktop Calendar

I alluded to it yesterday, and have already had several people inquire about the procedure to create this desktop calendar.  It’s really quite clever, and kudos go out to Jeffrey Friedl over on his site for the script:  http://regex.info/blog/photo-tech/calendar He does a decent job at the basic explanation, but since we are a visual world, here are some step-by-step instructions on how to run things from beginning to end!  Fair warning – this does require Photoshop as the script (I don’t believe anyway) will run in Lightroom because it uses layers…

1.  Download the script from the link above (I downloaded to my desktop on Windows XP)

Step 1 - Download the script

2.  Copy the script from your desktop (or whatever download location you configured for your browser) to your Photoshop folder, as indicated in the screen shot.

Step 02 - Copy script to Photoshop Folder

3.  Open Photoshop (if it was already open, you should probably close PS and restart it)

Step 03 - Open Photoshop

4.  Open the picture you want to apply the script to (I started with the largest size desktop I wanted to configure it for, in this case 1600 x 1200.

Step 04 - Open the image to apply the calendar

5.  Navigate to the Presets option in Photoshop and open the script

Step 05 - Locate the Script from Photoshop Menu

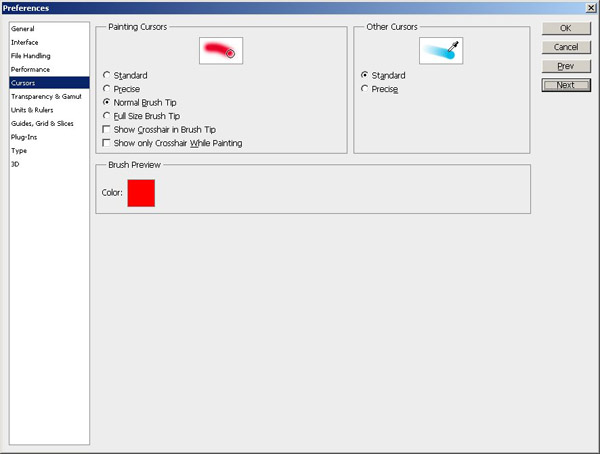
6.  The interface lets you select certain information such as the month it will run for, when the week starts, etc.

Step 06 - Configure Calendar Options

7.  Special mention here to include certain holidays – if you have custom days (say birthdays, anniversaries, etc) to add, create a text file for reference and point the script to that txt file location.  If you don’t want certain days highlighted,you can leave this option un-checked and proceed with the script.

07 - Specify dates to highlight if desired

8.  It may take the script some time to run (it took me about 58-61 seconds to run it on my computer, but I was multitasking with other things at the time…).  When it’d done, you’ll get a stack of a lot of layers that looks like this, with the default layer selected of “Picture Mask”.  Note:  I’d also recommend checking the option to rasterize most text layers otherwise you’ll have up to 30 additional layers of text (one for each day of the month)! The layers underneath this are where all the really cool stuff is, and the other layers are dates and effects that you can change to suit your own tastes.

Step 08 - Customize Layers to taste

9.  Once you have tailored the layers to suit your needs, simply flatten, save as a jpg and configure your desktop to use that image!  Since I typically will save to multiple desktop dimensions, I start with the original and re-size to each output, from largest to smallest saving each as a jpg then letting the script use that to create the desktop calendar.

Step 09 - Save and distribute your new desktop calendar!

There you have it!  The nitty gritty details on how to create a really slick looking desktop calendar for you and your clients.  Simply print as pictures through your favorite venue if you like and watch the sales come in!

One final little news note that is time sensitive – DIY Photography has a very creative approach to contests and the prize package is worthy of a nod (don’t know how he/she/they managed to come up with this big bag of goodies!), so stop over here and throw your hats in the ring:  http://bit.ly/aRQa9l

See you back here tomorrow for the latest in photo goodness!  I’ll also bring up a couple tips on how to tweak the layers to your own ends, but feel free to begin exploring your own creative approaches! 🙂

It's Official – CS5 has been released!

Yup, the day it became available for purchase/download, the trials also became available – a first for Adobe!  I’ve already downloaded it and am starting to play with it for the first time (was not a beta tester).  Suffice to say, it’s pretty slick and yes, as I said yesterday, I am getting the upgrade!  Rather than show you screen shots and pore over the list of new features which has been done ad infinitum, I did a short video of some of the settings I like to adjust on an initial install.  So, here is that video straight from YouTube!

The Easter Egg had some cool trivia too. For instance – does anyone (outside Adobe) know how many babies were born to members of the team during production? WHo is the queen of the tenth floor? Is the wizard still there? If so, where is he now? Neat little nuggets just waiting to be discovered all in CS5!  Got the answers or your own nuggets?  Sound off in the comments! 🙂

Also, a final reminder about the April giveaway – some lucky participant will win an Expo Disc from the folks over at Expo Imaging.  Get your balance-themed photos in before midnight tonight to have a chance at winning!  Here’s the link:  April Giveaway