Win, Listen, and Bang!

This week’s show is a doozy – I talk about the latest contest, (#3 for 2009), have a fun conversation with Jason Loucks, then tackle some tips on photography fireworks.  Of course the show always takes care of a couple listener questions and answers, so it’s 45 jam-packed minutes of photography fun.  Here’s the show notes:

The Third Photo Contest, sponsored by OnOne software.  Rules and entry information are posted on Tuesday’s blog, and you can enter your photos here.

Here’s the sites and twitter folk we talk about during the show:

  • www.freelanceswitch.com
  • www.smashingmagazine.com
  • www.tutsplus.com
  • www.css-tricks.com & Chris Coyer on Twitter
  • www.w3schools.com

Shooting Fireworks

  • Use a tripod
  • Make sure you have spare batteries (and fully charge all batteries)
  • Shoot with a low ISO
  • Set your shutter between 4-8 seconds for best results
  • Try adjusting the zoom in or out for attention grabbing light trails

Enjoy the show, hosted by the folks over at Personal Life Media!  Happy shooting, and be sure to share your own tips and tricks for shooting fireworks by tomorrow and I’ll try to put all of them together along with some (hopefully) inspiring photos for enjoyment.  In the spirit of the show, don’t forget the trailing question:  What was your first camera?

Creative Composition – Vignetting Photos

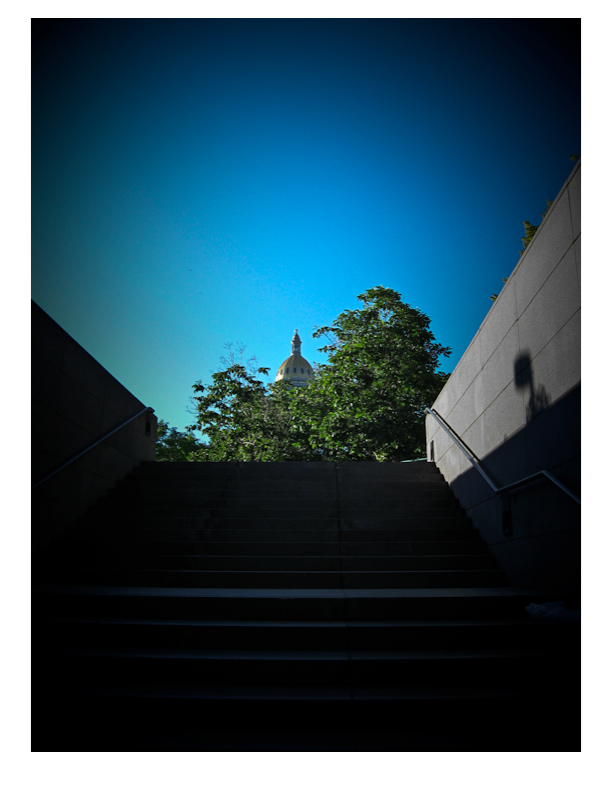
In general we learn that placing your subject dead center in the frame is something to avoid – creatively speaking it can kill a picture.  While this holds true as a general rule, I was walking into work yesterday morning and the sky was a brilliant blue, with the capitol bulding of Denver right dead center in front of me, and I thought that might make an interesting attempt at breaking the rules if only I had my camera….and then it dawned on me, I did have a camera.  Granted, not my trusty 40D, but the smaller Powershot As500 IS.  So, on a whim out it came and I snapped off a few frames of it.  The vertical came out the best compositionally speaking, but it still lacked something to bring it into what I would consider the “creative” realm.  After all, it is a rather mundane shot, and something you would expect the typical tourist to capture.  So, how could I create interest…and then it dawned on me:  vignette!  That would bring the eye in more, focus attention where I want it to go. So, into Lightroom I went, and sure enough it did create a little more visual interest.  I thought I’d share that view with you here today:

vignette

Granted this is still something that I would probaby personally consider a snapshot from my library of countless snapshots, but it does serve to illustrate that post processing in software can create more visual appeal and vignetting is one way to achieve those ends.  So, the next time you are about to toss a shot, ask yourself:  Could I improve this with a little vignette?  Give it a whirl – you never know whegn a little vignette might surprise you!

On that note, it’s always helpful to remember that post production work can make or break a shot.  Yes, the better your images are to start with, the less work you have to do in post, but that is not to say that post processing is a bad thing…so regardless of whether it’s a little dodging here, burning there, perhaps a litle vignette, or even applying some plugin processing from your OnOne Plugin Suite 4.5, always be willing to explore!

Oh wait – you don’t have the OnOne Plugin Suite 4.5?  Well, go figure, just the luck – today starts the July photo contest here on the blog, and entries are now being accepted in the Flickr thread here for some lucky reader to win their very own copy of the Plugin Suite from OnOne!  Pretty cool as this is a retail value of $500 for this package, so you can imagine the creative possibilities!  Feel free to capture away, and share your favorite shot in the contest.  You can find all the rules from the announcement post yesterday, but get out and shoot for your chance to wina free copy of this great software suite!

For those of you expecting the podcast today – year-end in state work means processing financials so we were working late today to get a lot of T’s crossed and I’s dotted before the clock struck midnight – so the podcast did not roll out today, but I promise it will roll out tomorrow and I’l be talking more about the photo contest then too, as well as answering viewer and reader questions, so if you have any to throw out in the mix, now’s your last chance to get questions in before the show goes live tomorrow!  Got a questio about photography, gear, software, tips, tricks, techniques?  Share it in the comments or with me via email.  Happy shooting for now and we’ll see you back here tomorrow for the podcast.

Grab the RSS Feed

Let me count the ways…

The age old phrase of “let me count the ways” seemed like as good a theme as any to announce the newest contest from the blog here for the Learning Digital Photography podcast.  I just got word from the folks at OnOne software that they really liked the post on Genuine Fractals – so much that they would like to participate in a giveaway!  Can you guess the prize?  Yup, that’s right, the entire OnOne Plug-in Suite:  4.5!   This is an amazing offer, as the package normally retails for $500!  That’s five hundred big ones!  I don’t know about you, but if I had an opportunity to win a software package worth $500, I’d certainly stand up and listen…so, since we’ve got this contest announcement for the month of July that involves software, there will be no software review today.

Oh yeah, so anyway, that’s the prize package.  How do you enter?  Easy – just like the last couple of contests – it just requires a little participation.  A new thread will be set up on Flickr for people to contribute photos.  (It’s already live but entries will not be accepted until midnight Mountain time tonight.)  Here’s the rules:

  1. Since the contest sponsor is onOne – then the theme shall be Numbers.  I am not going to interpret or give any ideas here, but if your photo incorporates something to do with numbers (any number, multiple numbers, use of numbers, whatever), then it will be accepted.
  2. Join the Learning Digital Photography Flickr Group – the images will be shared in there anyway, and this is a great way to see other inspirational images from people that are regularly contributing to the common pool…just make sure you post your images in the thread titled Numbers Contest (easily linked for you right here)
  3. Photos will only be accepted for the month of July (and that are uploaded during that month, so no archived images will be accepted)  Only 31 days to enter so get clicking! 🙂
  4. One photo limit per participant.  Sorry all, but with a prize package this huge, I know there’s going to be a lot of entries, so in order to make judging easier one entry per person.
  5. Photo manipulation is acceptable – after all, it’s for a prize that encourages massaging those pixels, so edit away!  However, you just be the original copyright owner of the photo used – no “borrowing” the work of others.  People found using others images will be removed from consideration.
  6. Images should be no larger than 800 pixels on their longest side, and no shorter than 600 pixels on the longest side.  If you need to upsize a photo, use the onOne Genuine Fractals trial!  🙂  On that note, please also refrain from using digital frames to increase image dimensions – images with frames that advance will be cropped.
  7. By submitting images, you agree to allow your photos to be featured in the web gallery and here on the blog without expectation of compensation.  The three finalists will have an opportunity to have their photos link back to their Flickr Stream, website, or blog if they like as the finalists will be notified of their advancement one day in advance of being featured on the blog.
  8. The product is being offered by the folks from onOne on the basis that it is NFR – not for resale.  The prize cannot be re-sold to someone else.
  9. Judging will be done by myself and I have one representative from onOne who will also assist with making the determination.  Decisions of the judges are final.
  10. There will be three rounds of judging:
    1. As in the past, the initial pool will be whittled down to ten and the images collated into a web gallery for display here on the blog.
    2. Three finalists will then be pulled and featured here on the blog for a final day or two of consideration.
    3. Last, the grand prize winner will be declared after even more careful determination from all participating judges.  OnOne has generously donated their time for judging as well, so we’ll compare notes and come to a mutual consensus to determine the winner.

Good luck to everyone and have a Happy month of Shooting!  Thanks especially go out to the good folks at OnOne for their generous contribution of the Plugin Suite 4.5 Software for some lucky reader/listener/participant.  Happy shooting and we’ll see you back here tomorrow!

Grab the Blog Feed

Rate the Podcast on iTunes

Digg the Podcast on PLM

Wacom Bamboo Fun: Hardware Review

The good folks at Wacom were kind enough to donate a Bamboo Fun to me for review on the blog a while back.  In order to really get a full handle on it though, I wanted to use it within the context of my at-home work flow.  You see, I’m not a newcomer to tablets, as at work and through  previous experience, I’ve grown quite accustomed to their usage.  I’ve had to instruct people on how to use, configure the basics, and such on their computers. as well as used them in many of their varying sizes (most recently being the Cintiq).  Having said that, I’ve never really had the need to incorporate a tablet in my home work environment for a number of reasons.  Before I get into the reasons though, let go over some of the basics…and rather than a listing of pros and cons, I am following a slightly different format this time. I should also give fair warning that there are a LOT of pictures coming, so for the graphic avoiders in feeds, you may want to visit the site…

Installation

Installing this product can’t get much easier.  Regardless of whether you are running a Windows or Macintosh environment  (it really doesn’t matter a whole heck of a lot) the system will auto-detect the drivers for your Bamboo fun.  Still, it never hurts to go through the CD installation on their provided media, so I thought I’d share with you the process (and a few bonuses) of installation.  It’s pretty much identical, but I am showing the screen shots from Windows:

Here’s the main splash screen where you can choose what to do, ranging from installation to viewing video tutorials, or browsing the CD contents…

install1

I opted to do the driver installation first, and got this following message…
install2

Then the notice that the pen drivers were being installed…
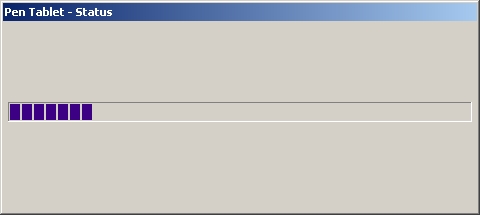
install3

Then notification that installation was complete…
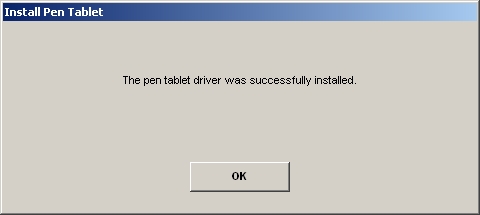
install4

After finishing that, I was offered the video tutorials on how to do different things.  For first-time users, a very useful resource…
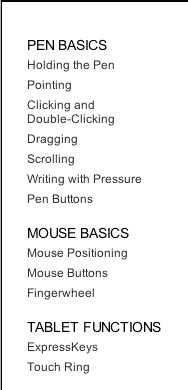
install5

And finally the extras that are included on the CD.  I am not sure about files with an extension of x32, but believe this is a carry-over from Macromedia software like Flash.  Since I do not own Flash, I can only guess based on my own research…
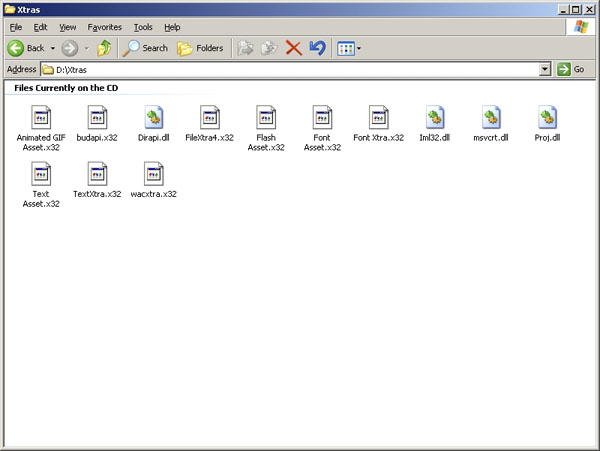
install6

Ad additional CD also gives you a copy of Photoshop Elements 5, Nik Color Efex Pro 2, and Corel Painter Essentials 3.0, which also help to offset the cost the the product.  I didn’t want to open this and negate the serials or licenses of the products contained, but did scan the front side so you can see what you get in the companion CD:
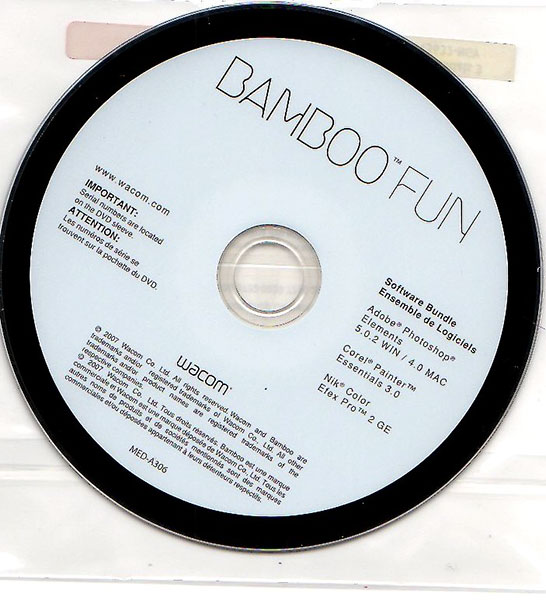
bamboofun0021

Configuration

The added buttons at the top of the tablet make for some very intuitive advancements in its usability and properties.  Rather than cover each of these in detail, screen views of each tab (there are four total) should be indicative enough of the control and customization you can get:
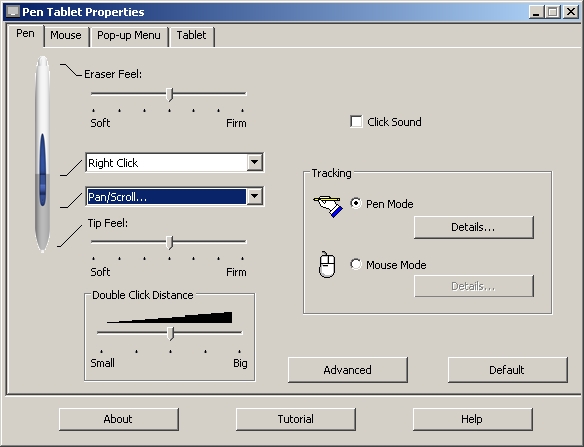
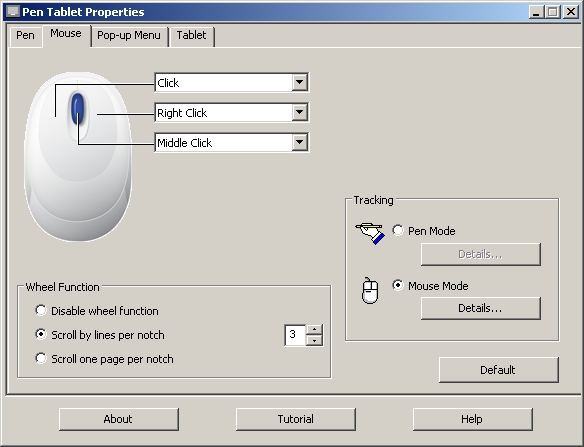
config1

config2

config3

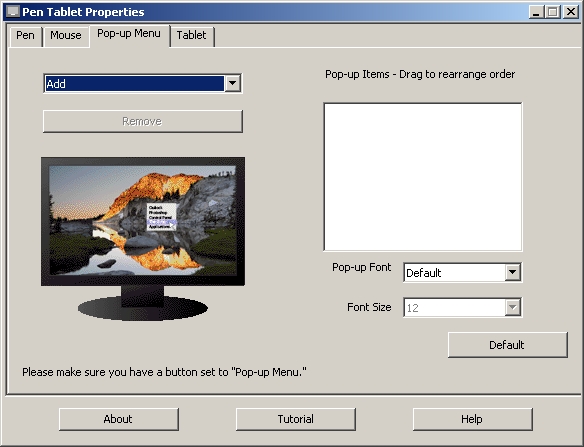
Pop Up Configuration

The pop-up tab is probably the only tab that isn’t completely self-explanatory, so let me delve into a little more detail here. The reason why is because you can program common keyboard combinations (like the ones I referenced in my post last Friday) to be controlled from the tablet (provided you have “Pop-up menu” selected as on option on the tablet tab (seen next)…

Here’s how you do it:

First, click the drop-down to indicate what it is you want to program on the tablet.  For me, the biggest advantage would be in incorporating keyboard keystroke combos so I have to switch less between kb and tablet.
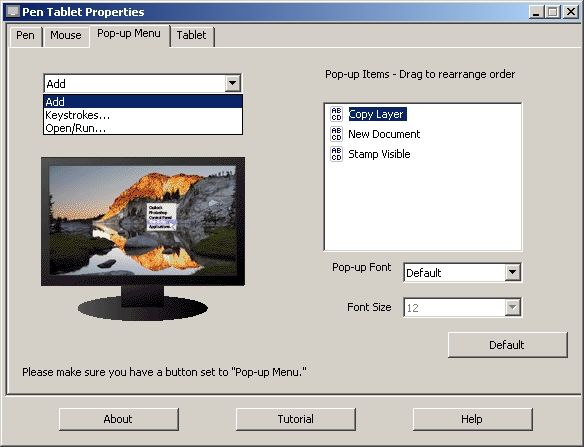
popup1

You’ll get a window now where you can define the keystrokes you want simply by typing that keystroke set in the blank space…
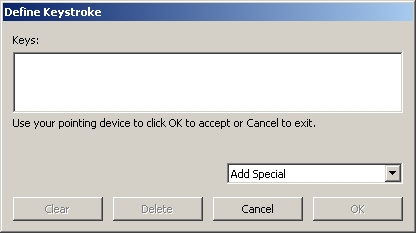
popup2

The tablet will detect your keystrokes and populate the fields
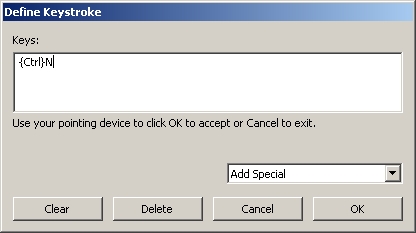
popup3

Then, give your keystroke set a name…
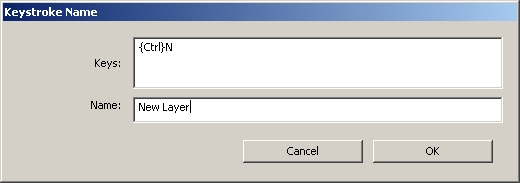
popup4

and Click OK.  You can see the ones I programmed below…
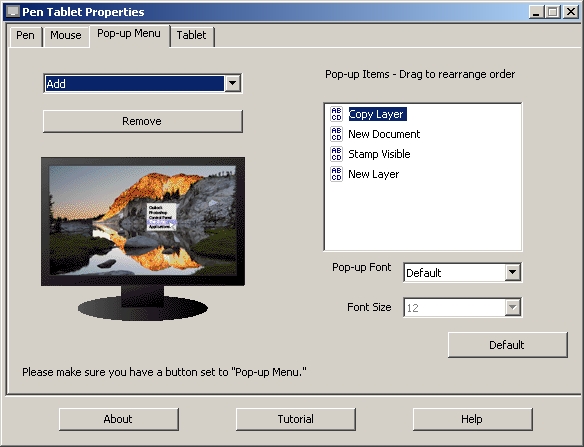
popup5

Last but not least, you can also include special keystroke combinations that are unique to your system (like Printscreen on Windows), as shown next:
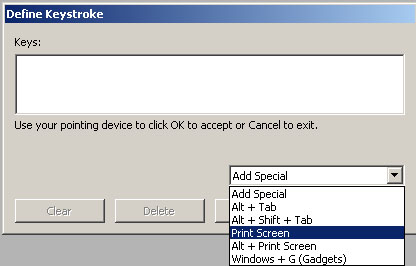
popup6

So, you can see how having the pop-up tab configured with your most commonly used keyboard combinations, as you can reduce the swapping between inputs even more!  Very cool!  And here’s what the right-click menu looks like once inside Photoshop:
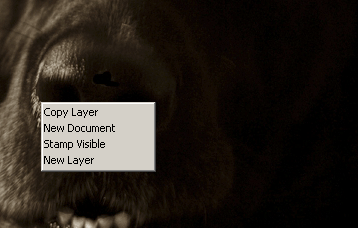
popup7

But, make sure you have a button set on the tablet to “drop down” (as shown next…)
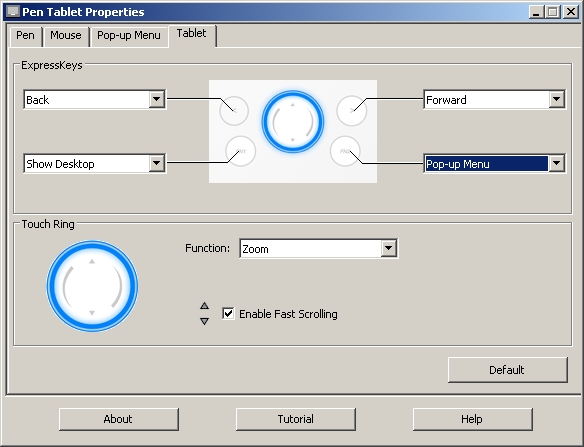
config41

Mechanics

Here is where your specific work flow may have an impact.  On my Windows desktop environment, I have a 19″ and a 17″ LCD, so that’s roughly 36″ of real estate that this tablet (which measures roughly 6×4″) has to cover.  What this means is that movements on a scale that size makes everything larger proportionally speaking.  You can adjust the tablet settings under the pen mode details screen to manipulate for just one monitor instead of all screens, but if I am going to use a tablet, Idon’t want to jump between that, a keyboard AND a mouse…two inputs is all I really would want to switch between, but that’s just personal preference.  But, for those that are interested, here’s how you make that adjustment in the pen settings tab of the tablet properties.  Click on the pen tab of the tablet properties, then the details button to get this screen:
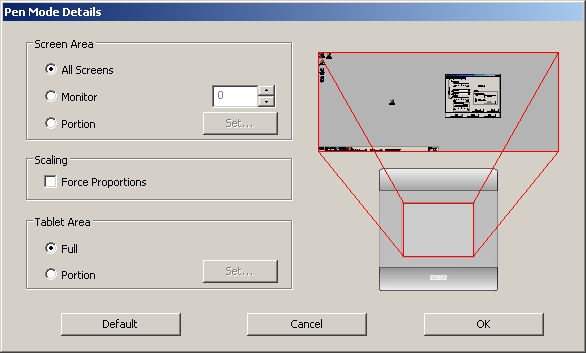
config5

From here, change the button from “All Screens” to “Monitor”.  It will default to the monitor you have set ot #1:
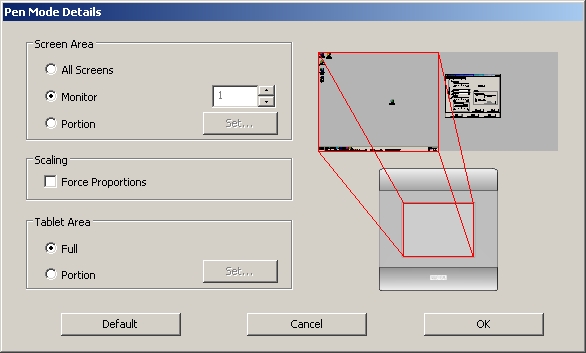
config6

But you can use the arrows to set it to monitor two if you prefer:
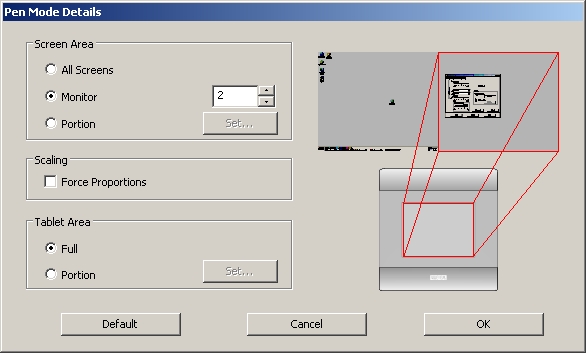
config7

On my Macbook Pro, since I only had the one monitor, the experience was quite different as I had less real estate for the tablet to cover – with only a 15″  LCD of screen space to cover.  So the pen was much less sensitive to location on the touch pad given that less than half the real estate was needed to cover the range of the screen (and I noticed greater position control even when I did just the 19″ monitor versus the 15″ LCD of the MBP – it’s just a happenstance of the tablet size, and the only way to do that would be to increase the tablet size – at the expense of desk real estate space…pick your poison, ya know?)

Usage

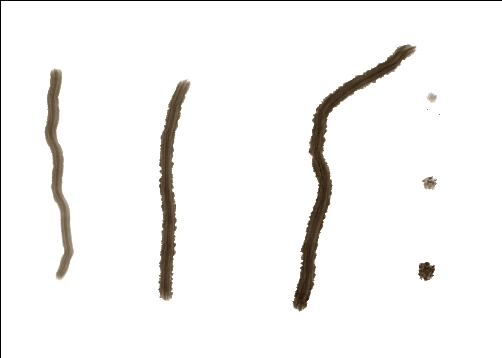
Tablets rock!  Let’s just get that bias out of the way right off.  If you want the ultimate in cursor control (and when I say cursor I mean movement of your tool, whether it be a brush, a pencil, an eraser, clone stamp, whatever, it’s just amazing).  The first major difference between a mouse and a tablet is touch sensitivity.  No matter how you tap a mouse, it delivers the same intensity or strength when it paints in Photoshop.  With a tablet, this is not the case at all.  How hard you press determines the strength of the brush.  This is truly remarkable as now you can apply just a touch, or go full hog on anything you want from painting, to clone stamping, and anything you want.  To demonstrate, I created a blank document and selected some brush settings to illustrate what I am talking about.  Take a look:  from left to right are light touches to hard pressing with the pen…followed by dots of the same strength top to bottom.
use1

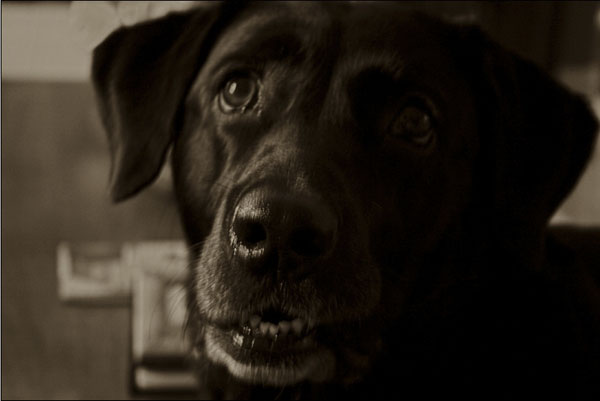
So now you can control things like jitter, hardness, and a whole myriad of options that you didn’t have before (well, at least not to the same degree anyway) with just a mouse.  I know what you’re thinking now – “Great, for graphic design that’s super cool, but how can I use this as a photographer?”  Excellent question!   Ever catch a picture where the eyes are darker and you want to brighten them up?  Well, now you can with greater ease and control both of area, intensity of the lightening (or darkening) by using the pen tool for the Bamboo Fun.  Take a look at the sample below, where I took an underexposed picture of the dog and selectively lightened the eyes and teeth, here’s the before:
use5

and after:

use4

One of the best parts is that this functionality is there in whatever application you use that incorporates brushes.  I tried it in Photoshop, Lightroom, and Corel Painter Pro (I installed a demo version of the last one for this review).  The Bamboo Fun can also expand your ability to clone things out, say a stray light pole or some telephone wires, or even the nasty -ex that you want out of that super cool shot of you in Hawaii!  The possibilities are limitless both for graphic designers and photographers.

So, this now begets the question of why I don’t have one in my home environment.  The main reason is because I’ve never had the need at home.  Most of the time I am at work, and if I need to work that requires that level of control, the work hardware has always been there for me.  Granted I’ve also gotten used to the Wacom Cintiq which has a much larger surface area, so I have even a greater degree of control over the desktop, cross-hairs, and all brushes, so it’s also a matter of being spoiled – I just can’t afford a Cintiq at home, or justify its need – I am just not that much of a re-toucher either with photos or in graphics design creation.

Additionally, for me, the use is only really there in graphic design, because I am also of the mentality of “getting it right in camera”, so I don’t like to do a lot of edits in photos.  Of course no one is perfect so I do occasionally need to do some fine tuning that requires a tablet.  In cases when I do, I just take the photo in to work and do the retouching there as the tablet does give a much greater amount of control than any mouse or trackball will.

When I’ve not been successful in camera, it’s not that my home work flow is good enough, it’s just that the tools are already there for me if needed at work, so the financial justification really hasn’t been there.   As my personal usage has been increasing lately though, I must admit that I am thinking more and more about adding a tablet to my home work flow.   So, would I would recommend this?

Yes!  This would make a great tablet for anyone who does not have access to a tablet elsewhere, or if you are looking to enter the tablet market – the Bamboo Fun is a great entry level tablet, that takes up minimal desk space while offering a maximum range of precision and control.  I think for my own personal usage, I would probably prefer a larger tablet because I do have the desk space, and have been accustomed (as I said) to the Cintiq, so perhaps the Intuous 4 would be more easily incorporated…but only time will tell!)

Finally, as prone as we are to repetitive motions, and with conditions like Carpal Tunnel Syndrome becoming much more common, the tablet does offer a much less repeated motion tendency than a mouse or a tablet.  So, if you make the move to a tablet, you are only decreasing your chances of things like Carpal Tunnel and repetitive motion problems in your wrists.

Two thumbs up (in Siskel and Ebert style) for the Bamboo Fun from the good folks at Wacom.  Many thanks for the demo product, and I am sure the listening/reading audience appreicates their generosity as well.  Happy shooting everyone, and we’ll see you back here tomorrow for an exciting software review that includes the announcement of our latest contest, which is starting in July!).

Painting with Light

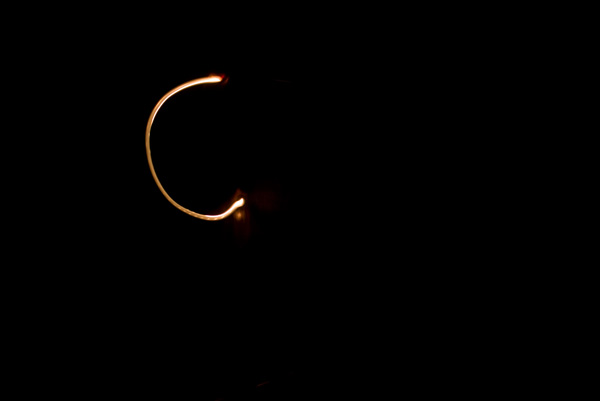
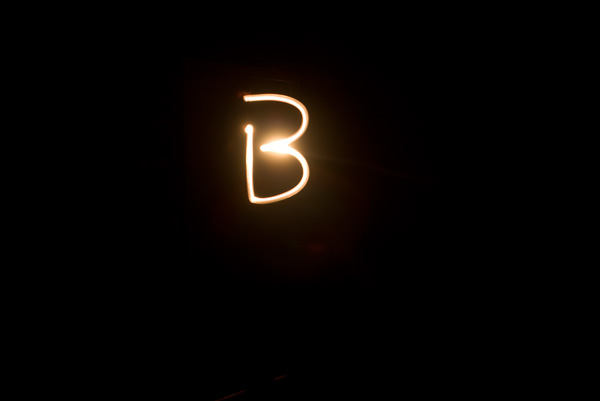
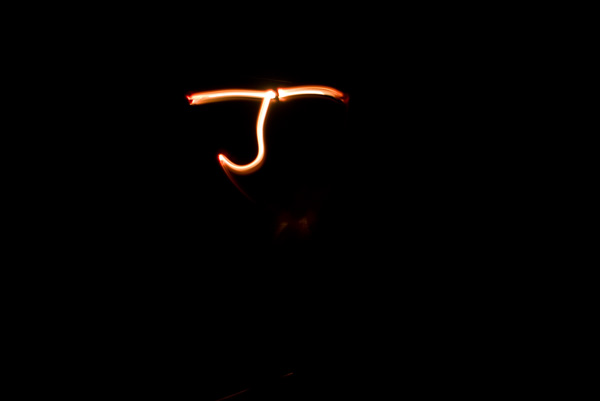
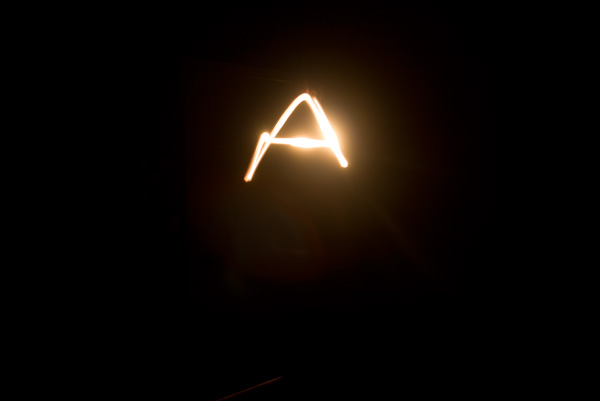
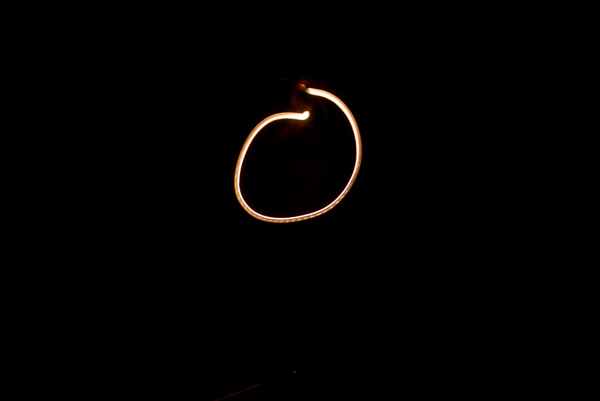
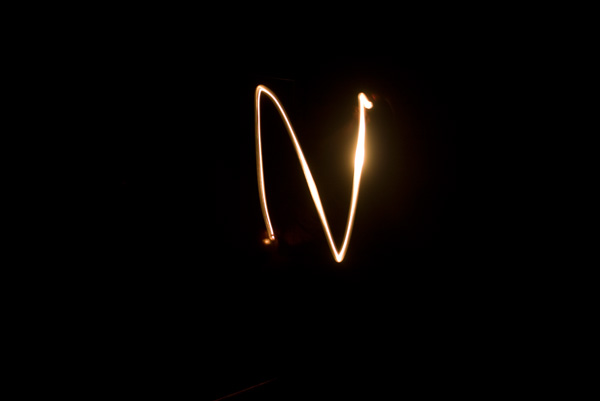
About a year ago, Joe McNally gave a talk at Google where he referenced the roots of the word photography.  The two roots are photo and graphos, and the meanings are light and write.  We so often hear of people “painting with light”, and after seeing a few people demonstrating how they use flashlights to paint and write with light, I thought it might be fun to give it a whirl.  So, I set up in my den/basement room/office/man cave with the camera on a tripod and went about the goal of writing with light.

To set the scene, I put the camera on it’s lowest aperture for the lens (f3.5), and this way everything around would get thrown out of focus.  I set the shutter to 5 seconds, and the ISO to 100.  That way I would have enough time to draw each letter, and produce little noise as possible.

Next was to set a point of focus – enter my light stand as a model.  I set the focus on that (about 6 feet away), and then switched to manual focus on the lens so the point wouldn’t change.  Next step – mark the floor so I know where to stand (anything works – for me it was a USB flash drive).  Finally, I moved the light stand out of the way and started to eliminate other sources of light, as  I also wanted the surroundings to be completely dark.  So I turned off the computer (monitors give off an amazing amount of light, closed the blinds (even at night, street lights can push stray light into your image), and shut the door to the room.  Working off the handheld flashlight now, I changed the camera to start on a 10 second delay to give me time to get into position.
_mg_0354

_mg_0355

_mg_0352

_mg_0356

_mg_0360

_mg_0361

_mg_0362

The rest is in the post processing.  Since I was in the middle of re-installing Windows and freshening things up last night, I’ve not had time to composite these together, but you get the idea of where I am heading!  Give it a try yourself – painting with light can be fun!  Have a great weekend everyone, happy shooting and we’ll see you back here Monday morning!

And then there were three…

First off, some software news that we all may want to stay abreast of – Adobe has released the latest updates for Camera Raw and Adobe Lightroom.

The ACR update applies to CS4 users, Elements 7.0 users, and Premiere Elements 7.0 users, and includes raw conversion algorithms for the Canon 500D, the Powershot XS1 IS, the Nikon D5000 and several Hasselblads, as well as some other camera updates for Olympus, Sony, and Pentax.  It’s version 5.4 and is now out of beta and available for download.  The updates for Windows and Mac are available here:

Camera Raw

For Lightroom users, the update takes you to the latest stable release of version 2.4.  So, if you are running version 2.3 or earlier, this update is a recommended one for you.  It basically is the same as the ACR update for Photoshop and other programs, but since there’s no secondary GUI for the converter portion, it’s just built into the program update.  You should be able to over-install it on top of your current installation, but as with everything else, I always recommend backing up your system and important files prior to updating things like this that can have an impact on your entire library.   The downloads for Windows and Macintosh are available here:

Lightroom

Now, onto the more exciting news…speaking of Adobe and all, as you may recall, there was a contest held here at Canon Blogger on the Learning Digital Photography podcast a while back and the winner is slated to get their very own copy of Lightroom from the folks over at Adobe.  Well, I am happy to announce here today that The Adobe Lightroom Contest has entered it’s final phase here at Canon Blogger/Learning Digital Photography!.

As you  may recall, as alluded to above,  a few podcasts back, I had the honor of sitting down with Tom Hogarty and talking shop about Lightroom, it’s purpose, development, and lots of fun stuff about photography in general.  At the end of the show, Mr. Hogarty generously donated a copy of Lightroom to some lucky listener of the podcast.  We started a photography Flickr thread, and the entries started pouring in.

After 58 entries came in that met the criteria we were looking for, the contestants were narrwoed down to 10 finalists, which were then compiled and put on display here at the blog (and you can see all of them here).  We now have narrowed the field down to three possible contenders for the grand prize of the Lightroom software.  We’ll talk a little more amongst myself and Mr. Hogarty to see which is the “best of the best”, but the three that we are now in our final phase of considering are:

Blooming Orchid


Black-and-white Magnolia Blossom


The Foggy Lighthouse

Once we have the grand prize winner determined, one of these three people will have a copy of Photoshop Lightroom arriving on their doorstep soon.  Thanks again to all the entries – we’ve actually worked quite diligently on this to really get a sense of which image captures the essence of both photography, what Lightroom processing can do for your creativity, and also purely on the artistic merit.

Again, thanks to all the entries for the contest – the latest one is still going on for another week – the winner will get a 33% discount code to FotoQuote Pro – and to enter that all you have to do is make an entry here on the blog!  (Limit one entry per person per day).  Keep on shooting and sharing – happy shooting and we’ll see you back here again tomorrow!

Software Review – Genuine Fractals 6.0

Don’t get too excited – no software giveaway on this one folks, as I’ve not had a chance to call OnOne yet and see if they’d be interested in participating in a contest.  Instead, I am working off a trial version of one of the premiere up-sizing software programs on the market – Genuine Fractals from the good folks over at OnOne software.  Available for both Mac and Windows, this product really has developed a good name for itself in the industry.  While reputation may precede it, I have been wanting to give this product a try for some time now, so here we go!

To do this review, I decided to just share the work flow on a particular image that I happen really like, but because it was a pretty heavy crop, never really had a chance to see it in print very large as the limitations of Photoshop prevented more than a 4×6 image.   The first step was to open that image:

before
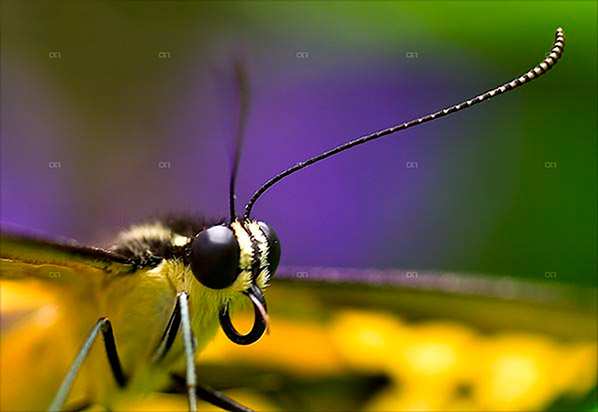
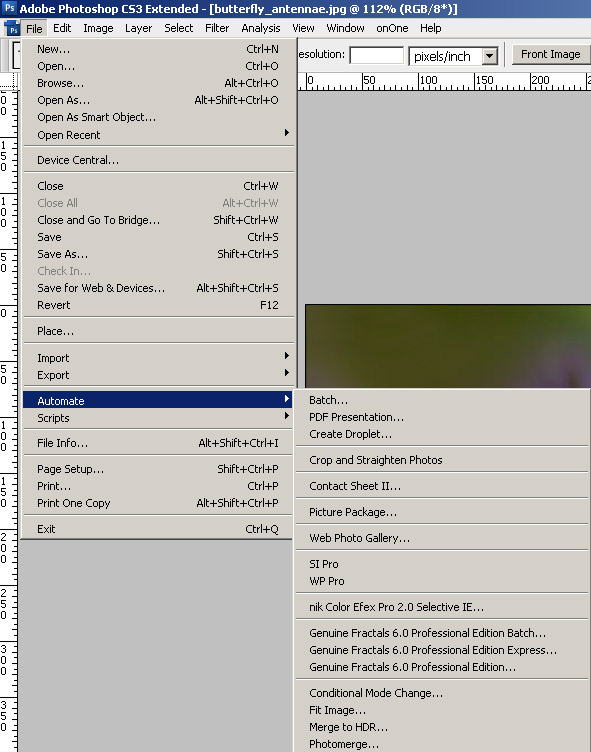
Here we’ve got this heavily cropped image of a butterfly I liked – and the capture shows the image is a 600px photo.  Way to small to print – I want at least an 8×10.  So, after installing Genuine Fractals, I loaded that in Photoshop by going to the File | Automate option and it showed up in there:

fractals1

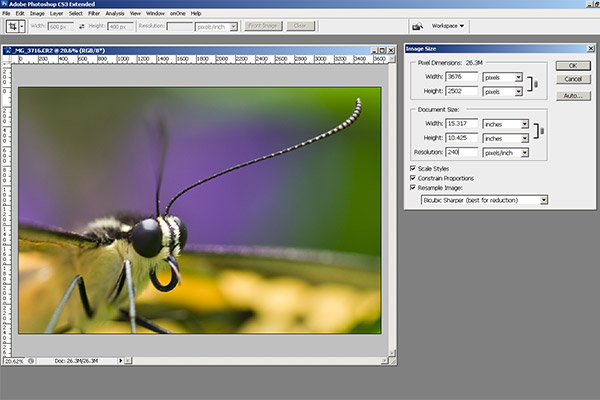
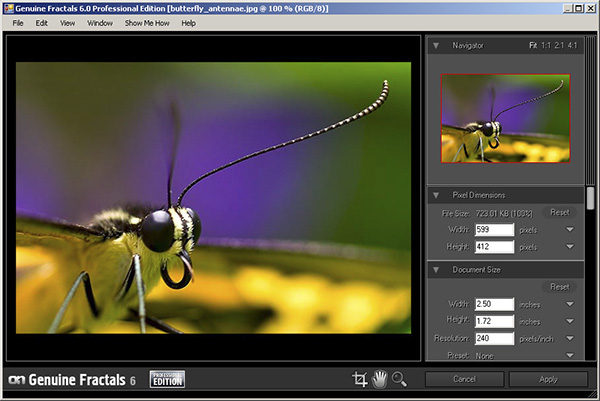
So, after selecting that, I got the GF window, which shows the current image dimensions, and the upsizing options, as shown below:

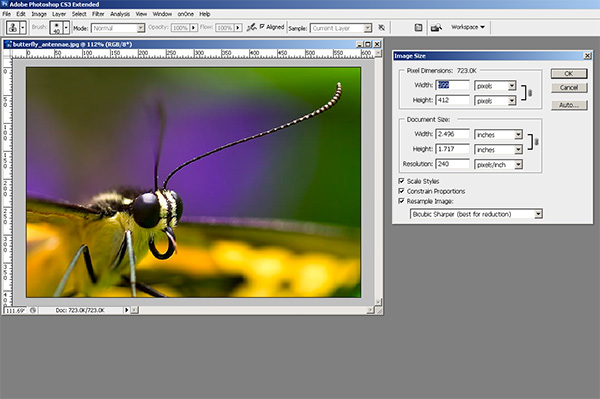
fractals2

You can see the default dimensions of 2.5×1.72 just will not work for anything useful other than a desktop background or a postage sized stamp.  I need to make this bigger.  So, I plugged in the values that would take me up to an 8×10, and in this case the aspect ratio wasn’t exactly on, so I took the short side up to 8″, and that put the long side at 11.6″ roughly.  Nothing I can’t crop out a little as I move through post, so here’s the larger sized image.

Butterfly

The little dots are the logo of OnOne software so yo can disregard that because when you purchase the software, those go away.  Instead, click on the image and zoom in on the antennae for a better idea of how it handles the up-sizing process.  I was actually pretty impressed.  Granted this image is unusable as it stands because there is too much jpg artifacting since I was working off an already processed image, but if I was going off the original raw, the results would likely be that much better – and the results are much more impressive.  Take a look at this next one.

fractals3

That”s the original file, a roughly 15×10″ image, cropped to about the same dimensions and then sized for the blog here.  I’d include a hyperlink to the re-sized version, which blew up to about 75″ on the long side, for the same approximate increase in percentages (500% – GF claims boosts up to 1000%), but it really is too huge to accommodate on the web.  Besides, since it is copyright-protected, just putting that large a file out there is like – oh I dunno – like leaving your garage door open for thieves to steal your car! 🙂 ! Think about 75 inches though!  That’s like 6 foot wide.  We’re talking billboard sized posters now, and the degradation in image quality is much less because I was working with the original file.

So, whether you are trying to recover size from an accidentally compressed image, or trying to increase an image to use in large applications – you can see how Genuine Fractals might be a route to consider.  It may be a pricey option at$300 retail, but when you sell just one billboard print – the software expense is covered.

I’d give GF6.0 a two thumbs up just because it produces such impressive results.  To me, the proof is in the pudding!  So, what do you all think of the software?  Does anyone else use it?  I’d like to hear others opinions, as well as some alternatives if you have any.  I am pretty convinced, and should I ever need to up-size, I know where I am going from here!  Happy shooting and we’ll see you back here tomorrow!

Friday Fab Five

For something new here on the blog, I thought it might be fun to share some of my favorite keyboard shortcuts in Photoshop.  The idea here is that people will share their top five in the comments area and we can get an idea of many more keyboard shortcuts than we ever could have found out on our own (unless of course you are some Photoshop guru like The Photoshop Guys and the trainers/instructors of the world that do this for a living and already know all the shortcuts.)

So, anyway, here’s my Friday Fab Five Photoshop shortcuts and what they do:

  1. CMD/CTRL+J = duplicates your existing layer
  2. CRTL+ALT+SHIFT+E = Stamp Visible  This takes all your visible layers and merges them onto a new layer.  Increases file size, but very cool
  3. CMD/CTRL+’ = (yes, that’s apostrophe) – it activates the grid in your preferences.  Since my grid is set to every 33.33% and one subdivision, it basically shows a Rule of Thirds grid overlay on my images – very handy for compositional cropping
  4. Left and right brackets – decrease and increase your active brush, whether it’s for clone stamp, healing brush, eraser, history brush – whatever
  5. Alt+Eyedropper = you can drag the eyedropper outside of Photoshop to sample a color in another application (great for color matching)

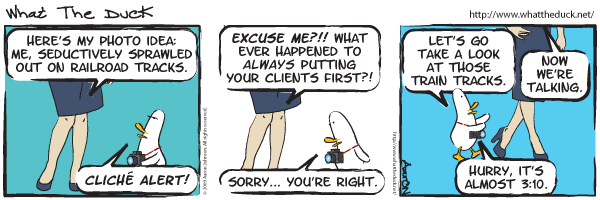
So, those are my five for this friday – what are yours?  Sound off in the comments!  In the meantime, have a great weekend and happy shooting! I’ll leave you with my favorite What the Duck cartoon of the week:

wtd732

Grab the Feed

Seven Super Summer Tips

Since the podcast went live yesterday, the compositional theme was kind of put on the back burner, so I’d like to bring that back to the forefront today with something everybody likes…a list!

For some reason lists of bullet points seem to generate a lot of feedback, and garner the most interest, so here we go with a set of what I am calling “Seven Summer Super Photo Tips”

  1. Shoot early, shoot late – it’s the “Golden Rule” – and I think we all know about it, so this is just a reminder.
  2. Shoot often – seriously, the eye does not improve creatively without practice, so get out as often as you can
  3. Shoot outside your comfort zone – Like landscapes eh?  Shoot some portraiture, macros, or event work.  Nothing gets creative juices flowing better than a challenge.
  4. Shoot lower than you stand – or higher, whatever – take a different vantage point as that can make all the difference.
  5. Shoot with one lens – Preferably with a prime as this will force you to zoom in or out with your feet, changing your perspective and getting your skills down really rote on the focal length you chose.
  6. Shoot with a friend – nothing makes the post shoot high more gratifying than chimping your shots with a photo buddy.
  7. Shoot for yourself – often photographers are thinking of what clients want, what an editor would like to see, or what may sell well on a stock site.  While it’s true that money puts bread on the table, it’s often liberating to shoot without the pressure of a paycheck.  Your results may surprise you!

So, there they are – seven super summer shooting photo tips!  There’s got to be more thoughts out there though on how to get the most of your imaging eforts, so let’s here from everyone – what are your best tips and tricks for capturing the world around you?  Sound off in the comments.  As always, happy shooting and we’ll see you back here tomorrow.

Grab the feed

Reviews, Interviews and Vista Views

The latest episode of the Learning Digital Photography podcast is now live and for those of you picking this up in your feeds, make sure you stop over to iTunes or the via PLM to download the show.  This week, I go into a little more depth on how I conduct reviews of hardware and software as there have been quite a few listener questions about that particular subject matter.  Thanks to everyone who wrote in to share their thoughts and feedback!

In the second segment, an interview with fellow photog and NAPP member, Erik Bernskiold where we talk about not only what we like about NAPP, but about how we are gearing up for the summer fun of photography, with tips, tricks and suggestions from Erik on everything from Floral Photography to Landscapes.  We also get a little insight into Eriks’ blogging and web design background as he’s become quite the expert on the subject matter!  Not too bad for someone who’s not even out of school yet!  For more details on Erik, follow these show note links:

Many thanks to Erik for taking the time out of his schedule to sit down and talk with me on the show.  It was a lot of fun!  For the remainder of the show, I throw out some additional tips on landscape photography, and tackle a few listener questions.  Lots to listen to, so be sure to tune in, either from the download over at PLM or via iTunes.

A final little asterisk on the show:  I mistakenly recorded the intro as episode #25, when it’s episode #24.  Also given that I forgot to add the theme music to the entire compliation – it might as well be called the “blunder” show…but rather than spend time on a few minor nits trying to fix it, I’d rather just get the show and respective notes out to y’all for your listening enjoyment.  So, on that note, happy shooting, enjoy the show, and we’ll see you back here tomorrow!