The quintessential PDF that started it all – my 49 Photo Tips Cheat Sheet! Over the course of my foray into the world of photography, I have been been busy compiling of my favorites and some unusual ideas for photography. Ranging in subject matter from how to improve your composition to gear tips, making money, photo walks, and everything in between, here are 49 Photo Tips – all compiled nice, neat and easy as a PDF for easy download and reference (top 50 lists are so cliche! 🙂 )! This was initially launched as a freebie several years ago, but has grown in such popularity, and takes enough of a draw on my bandwidth for hosting and file storage, that I had to start charging for it. But, for less than a cup of Starbucks coffee (it’s only $2.99), you can get your own digital copy of the
49 Photo Tips Cheat Sheet
49 Photo Tips Volume 1 – The Original Cheat Sheet
Remember, we learn best by sharing with others, so if you like it – tell your friends, they’ll like you better! If you have an idea for future inclusion, then tell me! I am always looking for new ideas, sources of creativity and ways to learn and improve so by all means, let me know if I got something wrong, or if you have an idea to include.
And if that’s not enough, Volume 2 is available here:
After a while, landscapes are really just a matter of metering your light, exposing correctly, and composing to position lines in appealing perspectives. The same goes for many other types of photography too. Whether you are talking about candid street photography, event photography, and even architecture – it’s all about timing, composition, and exposing for the light.
Portraiture though, brings a unique set of circumstances to the table though. The timing is much more controlled, lighting is managed more strictly, and little is left to chance. Yet, even in these controlled environments, many photographers have trouble because of the fears associated with guiding and instructing people on how to pose. It’s understandable, considering all that goes into posing your subjects, as well as the fact that some subjects aren’t the best at being guided.
To those ends – here’s some basics to start with in posing your subjects. For starters, focus on the face – it’s what we all gravitate toward anyway, and body posing can be very complex depending on a persons body style. By focusing on the face, you can really highlight that which we all look at anyway. Here’s the simple secrets to posing a persons’ face: Continue reading “The Basics Behind Posing Your Subjects”→
As with most things, your camera needs maintenance too – and I’ve waxed here periodically about establishing a maintenance schedule, cleaning schedules, and the whole schmear – but I’ve never addressed the specifics of cleaning that most important piece of equipment – the sensor in your camera. As I dive in here, it bears mentioning that I am not advocating any one of these over another – just sort of laying the foundation on the various ways that are available:
1. Having someone else do it – Most camera stores offer this service for around $50, so if the idea of getting anything near your sensor just gives you the heebie-jeebies, by all means, this option is a good one for the nervous Nelly.
2. Air Blowers – These are rapidly becoming one of the more popular options as they are relatively cheap, easy, and don’t require messing around with chemicals. You simply put your camera into the cleaning mode, insert tip of the air blower near the sensor and puff it a few times remove and you are done. Some claim fantastic results with these while others say stubborn dust won’t come off from this method. The advantage of this approach is that you never have to touch your sensor (technically the filter in front of the sensor) with anything! The downside is that results may not get everything off.
3. Sensor swipes – Certain swipes are made just for camera sensors that use hydrostatic charges to remove dust from your sensor. It’s got an advantage in that it’s a dry cleaning approach so requires no chemicals. I have heard of some who are reluctant to use this as foreign fibers and materials can get in the swipe which could scratch your sensor.
4. Chemical cleaning – Pec Pads, Eclipse alcohol and sensor swipes all combine in this method to give the most thorough cleaning, virtually guaranteed to remove even the most stubborn dirt from your sensor. The risk – doing it wrong can permanently damage your sensor and the cost of buy-in is a lot higher than other methods. Once you buy-in though, the long term cost drops rapidly!
Since I only mentioned it briefly at the beginning, I should also clarify that the idea behind cleaning your sensor is actually a misnomer – all of these solutions are cleaning the filter in front of the sensor – the sensor technically never gets cleaned unless you use option 1 – sending it in for a cleaning. All the camera vendors (Canon, Nikon, Pentax, etc.) offer this service, but the downside there is multi-faceted in that it’s usually more expensive, you have to go without your camera for a period of time, and there’s shipping involved!
What methods do you use? I know some people that combine multiple approaches, while others simply just shake it out once and a while (heck, I read a story once of a guy that used his t-shirt! – not sure how valid it is, but you get the gist). Sound off in the comments with your own cleaning products and approaches!
As some die hard friends and colleagues are aware, Canon Blogger, suffered a catastrophic failure about a year or so ago now, and I’ve slowly been crawling along as I try to resurrect the archives, and get everything back online. The process has been a tedious one as with nearly ten years of content, some was lost for good when the server crashed, other content survived in the last backup that was performed. Be that as it may, I recently was reading an article on Medium about The Rise of the Rent Seeker and thought to myself, “Oh my GOSH, this nails on the head exactly what I was trying to say way back in 2011 when Adobe made the switch to the subscription model for their software licensing model. This was such a good read that I wanted to share it (thus realizing another two or three articles that were lost, but now recovered courtesy of The Wayback Machine) in the context of my original thoughts. You can read my original articles here and here.
In a nutshell, this most recent article from Medium explains that:
…the economy has two kinds of entrepreneurs: profit seekers and rent seekers, and those who participate in the latter are redistributing the wealth from the subscribers pocket to their own. Adobe has made the shift to this model, and as such, they are extracting value, but not giving any real value back….”
It goes on to elaborate about how the technical space is inherently badly suited for innovation and development when they convert to this model. But the statement made is pretty powerful:
Increasingly, mature software vendors who have run out of innovation runway turn to rent seeking, increasingly we are are told that the subscriptions will soon be everywhere and there is a real problem with that.
Toward that end, it raised the question in my mind: Does that mean Adobe has stopped innovating? What else can be added Photoshop or Photoshop Lightroom to improve our workflow? I honestly don’t know as I’ve stopped upgrading as of CS5 and LR 4. I’d love to hear others thoughts on whether or not Adobe has really been all that innovative over the past 3-4 years. It was telling though, that the author actually used Adobe in his illustration of the dangers of entering into a subscription model:
Adobe Reference in Medium Article
The article does give a little bit of validation to me though, in seeing someone else so much more eloquently than I as to why renting is almost always (in the long run) not in the best fiscal interest of the consumer.
A lot of the time people ask me what suggestions or recommendations I can give them when they look for a photographer. It’s usually because the person is not in an area I can get to, or it’s a family member or a friend that wants to pick my brain (even though it hurts sometimes! 🙂 ) When I get this question, I tell most people that choosing a photographer is much like choosing a house or real estate: It’s all about location!
What do I mean by this? Simply put: a photographer can shoot on-location. I see many photographers speak to their ability to shoot on-location, and this is an important aspect of many genres ranging from wedding photography, to band photography, and even architectural work. Heck, last week I did a maternity shoot that was “on location.” So, why is this such an important thing to be able to stake claim to? Three key things come to mind for me:
1. Adaptability – Being able to shoot on location means you can adapt. If the surroundings are beautiful, you can adjust your composition to include elements of the scene to give a sense of time and space to an image. If the surroundings aren’t so beautiful, then it equally means you are able to diffuse things so that you can’t tell where a shot was taken – only that it’s a beautiful shot!
2. Controlling – Yes, being able to shoot on location means you are adaptable, but it also means you can control for a number of factors, and of utmost importance here is the ability to control the light. You can bring flash to fill shadows, or scrims to bring shadows to harsh light. If a photographer can control for the light in a scene – the shot will improve by a factor of ten in most instances.
3. Fundamentals – Given the above two factors are in place, this also usually means that the photographer brings a certain set of fundamental skills to the table. He or she knows an aperture versus a shutter setting, and can likely tell you whether ISO 100 is better or worse than ISO 32000 (depending on the look of course!). Although many like to wax esoteric about photography in abstract terms (myself included), there are certain fundamentals that every photographer worth their salt would and should know. If you can shoot on location, you likely have these fundamentals.
These are just three of the factors that I think about when I see a photographer say they are an “on-location” photographer. Of course the proof is in the pudding, and while I certainly would not pick a photographer solely on whether or not that term is included in their online presence, the ability to back up statements with a solid portfolio (and yes, an interview if you have the time to talk to a potential photographer!)
While we all like to think we have these traits, and in enough of a capacity to “bring it” for any client – let’s face it…some photographers are better than others. Either they’ve got a natural knack for it where others have to work harder at it, or they’ve just simply been shooting a lot longer. Seriously…time means practice, and the more you practice, the better you are at anything! There are photographers who have been shooting for decades and some of us can’t hold a candle to them. Meanwhile, others have been shooting for days, and I often stand in awe of their work. So, consider the above three things when you decide to hang out your own shingle – because people will likely be looking for these traits. Do you have them? Do you have more? Less? Something different? Something new?
What traits do you bring to the table? Or better yet, what traits do you think are important for potential clients to consider when hiring a photographer? The above is just my opinion – but that doesn’t mean it’s the ultimate answer! Am I right or am I way off base? Sound off with your own thoughts as the conversation is always the best part about this blog! Can’t wait to hear what you have to say! Until next time, keep the comments coming – oh yeah, and keep on shooting!
For this first of two holiday weeks for the year, the blog will be turning to more of an esoteric theme. Tips, tricks, tutorials, and the like are all fine and dandy, but this week I’d like to pose a question fo whether we are shooting for fun or money!
While clearly we all start in the craft because we love it as a form of expression. We are captivated by capturing the moment, painting a scene with light and color. if we learn the craft well enough, and our eye gets discerning enough, others may ask us to take pictures for them! Or even better, ask if they can have a copy of something we’ve already done. Praise is a wonderful ego boost and source of flattery, and while we all may mask it with self-deprecating remarks, humor, or coyness – no one likes the compliment better than someone who wants to pay them for their work!
“Getting paid to do something you love” is an oft-quoted sentiment, as is the idea that “if you love what you do, you’ll never work a day in your life”. But, truth be told, if you make your living in photography, there is going to be a certain amount of pressure to perform – or produce results. And the minute to take something you love and try to earn a living at it – the pressures of running the business side will reduce the passion you have for the subject. It’s the nature of the beast. You have to eat. You have to have shelter. If you can’t afford those two necessities, how much will you really “love” working as a professional photograper?
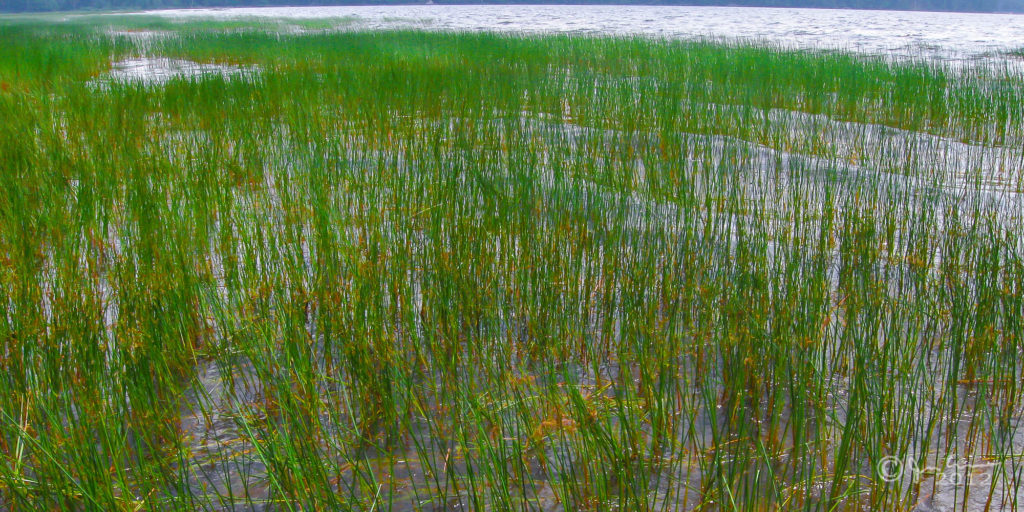
The shot today is a perfect example…I absolutely love this shot:
Adirondack Weeds
From a critique perspective, this is a horrible shot. The angle is all wonky, the horizon isn’t straight, there is really no subject, and I probably butchered the saturation in post production. But, for me…when I was canoeing with my family this last summer, we were cooling off in Raquette Lake, and I was sipping a lukewarm beer. My brother and brother-in-law were to my left and right…the nephews were out galavanting around being pirates or whatever young kids pretend on trips like this. We were cut off from the world (well, not really, but as close as one can get since there was no cell reception, and only a 9-5 Park Ranger available to sell you firewood at $5 a bundle)., and this shot reminds me of that day. I loved that day, and for that reason, I love this shot!
This shot will never sell though – for no one else except those on this trip, this shot is meaningless until now. I cannot make anything off of this picture. Yet I feature it today on the blog because I took this shot for fun…
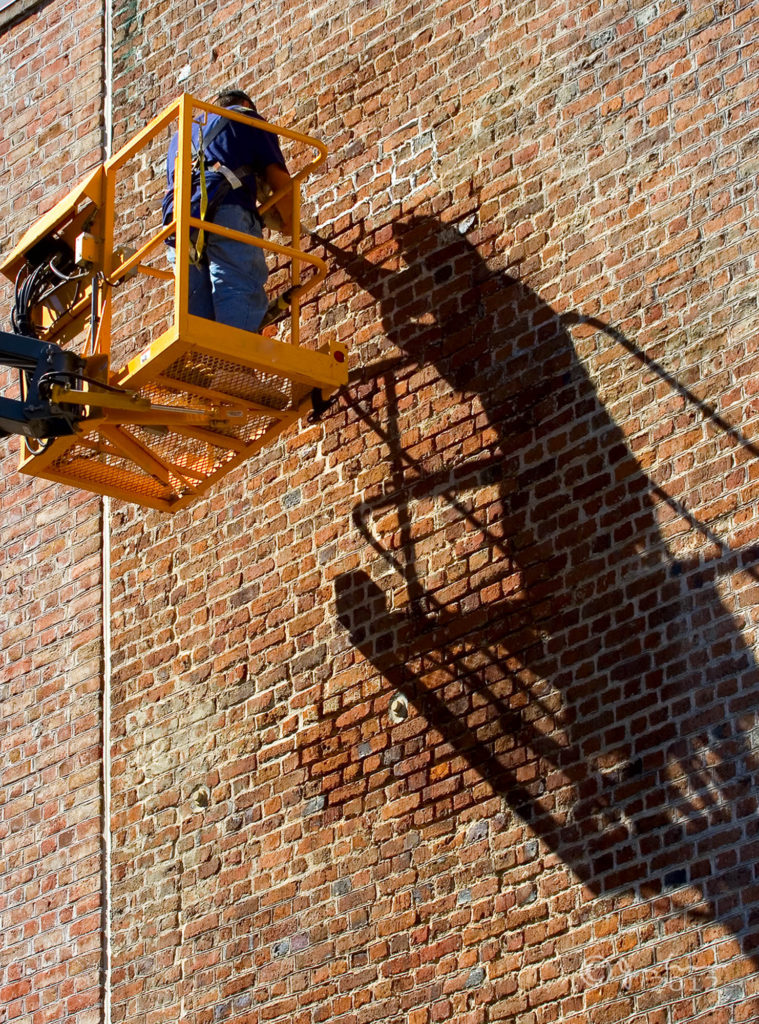
The comparison shot I am about to show you actually sold for me on iStock. Now granted, it’s not like I’ve made a ton of money off of it (it only sold once or twice), but it actually sold!
I was on a photo walk, scouting out areas for the South Carolina Photography Guild (now defunct), and the shadow of the guy on the crane, along with the wet bricks from where he was repairing and cleaning the masonry work just stuck out for a reason. I took it from a few angles and this one was the best of the 3 or 4. In the end, it was kind of a boring shot, but it was pretty tack sharp, and when I opened my first iStock account ages ago, figured it’d be a good sample to submit to show I had enough of a grip to consider stock work. The image was approved, along with 4 or 5 others, and my istock account was opened. Within a few days, there was a sale on this shot. Do I like it? Not really. It’s probably on some construction workers website, or someone wanted it for a church bulletin, or a school project or other long-since completed project. It doesn’t really inspire me though.
Which image brought me more satisfaction? Which one brought you more? Would you pay huge amounts of money for either shot? Probably not. I wouldn’t either. Thus, this is the dilemma we face.
It’s no secret that most photographers don’t make huge amounts of money. Yet, somehow the ability to say that “I am a professional photographer” is something said often with a sense of pride. Is it because you know the crap out of pixels, shutters, and apertures? Or is it because you made 50.1% of your revenue from photography last year? Or is it because you love to hear the sound of the click? Last but not least, could it be the excitement at seeing something you made come out beautifully on either a printed tangible piece of paper or in a web page…saying “this is my artistic vision that I want to share with you”. Why do you take pictures? What motivates you?
So often, photos that inspire you are ones taken from new angles, or from angles that you can’t normally get to, or think to get to. Monopods are great tools in this regard…you can extend a monopod up over your head for more of an aerial perspective, or even turn it upside down to get an angle that might be otherwise pretty awkward or uncomfortable to get into just to get a unique shot. I love my monopod!
While the good money will always add features and functions that don’t exist on lower end models, I do think that even the most basic of monopods can be useful – to the degree that even going with a Wal-mart brand or generic named vendor can be a sound investment. If you are talking about just getting to a place you can’t get to on your own (or even with a tripod), the difference between aluminum and carbon fiber on a monopod doesn’t have as much impact here in my opinion.
Now if you are going for the stability factor, yes, a sturdier monopod would likely yield better results, but how much better do you expect from a single-legged support mechanism? Seriously – even with your own two feet, you can get pretty steady with your shots if you use a good holding technique, tucking your arms in, leaning on a wall or tree, and going between breaths (or shooting between heartbeats as my former Drill Sergeant said in the Army.) How is one foot going to get you more stability than two feet? On it’s own, not much, so I don’t sweat much over the vendor here…
Check out these low angle shots I got with just a Wal-mart tripod and some creative thinking:
The Denver Art Museum, shot near midnight. The camera again, was upside down (I rotated it in post), and I held the foot of the monopod to get this low view. EXIF Data: ISO 100 33mm f/8 8 second exposure (it’s a tad blurry when you zoom in…)
This serene harbor was shot with the monopod, and the camera braced up against a tack shop. EXIF data: ISO 100 18mm f/11 5 second exposure
I shot this waterfall with the camera upside down and me holding the foot of my monopod while the camera was as close as I felt comfortable putting it close to the base of the waterfall. EXIF Data: ISO 100 21mm f/11 2.5 second exposure
This shot was taken with my monopod and the camera braced against a streetlight. EXIF Data: ISO 800 22mm f/22 4 second exposure
I was reading a book recently called “Beyond the Obvious” by Phil McKinney (great book by the way) that challenges people to think about concepts and questions, and then encourages people to look beyond the knee-jerk reactions and responses. This same mentality exists in the world of photography. We see a scene, a portrait, or something that catches our eye and our instinct is to capture that “something”.
McKinney illustrates his point in asking the reader to answer the question:
“What is half of 13?”
He then goes on to show that there are many responses to this. The canned answer is always 6.5, and that’s what came to my mind too. But in going “beyond the obvious”, he shows that if you think about it from the perspective of say, a deck of cards, and 13 cards in a suit. Since the ten, jack, queen and king all are values of 10, then really, half of thirteen in that scenario is 5.5, not 6.5. You could also say that half of thirteen is really “thir” with “teen” being the second half! By illustrating that you can divide either numerically or semantically, entirely different perspectives, thoughts, and answers can be right at the same time! Once I got on the mental plane of looking at things differently, my own result was that half of 13 could also be 1 or 3 – applying the semantic concept to the number…
That is such a great concept, and one I’ve always tried to help people understand here in many different ways. The “half of thirteen” way is probably one one the most succinct I’ve ever seen though. Let’s take that concept now and apply it to photography. Go get your camera! Right now…seriously! Go get your camera, and pick some random object in your room, office, or where ever you happen do be. I don’t care if it’s your SLR, P&S, or camera phone.
Now what? Take 13 pictures of that object. Make each one different! Change the angle, change the light, change the object itself. It doesn’t matter what you do, just do 13 different things. I can guarantee you that at least one of those photos will be something new, unique, and even compelling. Now, take the most compelling one, and post it here. To get you started on the right mentality, if you’re not already, here’s my own set of thirteen:
Wreck of the Peter Iredale 3
Wreck of the Peter Iredale 5
Wreck of the Peter Iredale 13
Wreck of the Peter Iredale 10
Wreck of the Peter Iredale 7
Wreck of the Peter Iredale 11
Wreck of the Peter Iredale 8
Wreck of the Peter Iredale 9
Wreck of the Peter Iredale 1
Wreck of the Peter Iredale 4
Wreck of the Peter Iredale 6
Wreck of the Peter Iredale 12
The shots above come from the “Wreck of the Peter Iredale” – on the coast of Astoria, Oregon. Now, granted, the setting sun, and the unique nature of the composition made my 13 shots a little easier, but there’s now reason you can’t do the same. Take a speaker and shoot it from as many angles as you can. Run out of angles? Try a different tack and change the lighting! What happens if you pop an on-camera flash? Try throwing your hand up to act as a barn door of sorts. There’s no end to potential…it just takes thinking outside the box!
A great question came up in my Twitter feed a while back, and felt it was worthy of putting together a short post to help explain the whole concept of zoom on cameras. The original tweet asked:
“What’s the best focal length on a lens to reach 400 yards so I can see a 1 inch square at that distance?”
We started talking about different long length lenses, such as the 400mm, 800mm, and 1200mm lens options from Canon. All were (are) very pricey and beyond the budget for my friend. he then started asking why a 35x zoom point and shoot wouldn’t be an option. So, the discussion turned to a teachable moment! How exciting for a teacher! The recap is two simple points:
Point #1 When manufacturers refer to the zoom of a lens, whether it’s a P&S camera, binoculars, or digiscopes, they are referring to how much of a magnification one can get over “normal viewing conditions”. Notice how I put the last part in quotes. What are normal conditions anyway? What kind of vision is normal? 20/20 vision? And what are we looking at? Something 10 yards away or 400 yards away. The point here is that there are so many subjective factors, the “zoom” isn’t really has hard and fast a number as one would think. We can approximate sure, but it’s not set in stone, and certainly a measurable distance is nothing more than a rough guess.
Point #2 The zoom of an SLR lens isn’t at all on par with the zoom of other equipment – it actually is a hard and fast number. Simply put, the zoom of a lens is the ratio of it’s longest reach to it’s shortest reach. A 70-200mm lens starts with a focal length of 70mm and ends with a focal length of 200mm. This is the distance from the focusing point to the sensor. So, a 70-200 lens has a “zoom” of 200/70 or almost 3x. A 100-400 lens would have a zoom factor of 4. it’s simple math for SLR lenses.
This is a classic example of where the same term can mean different things to different people.
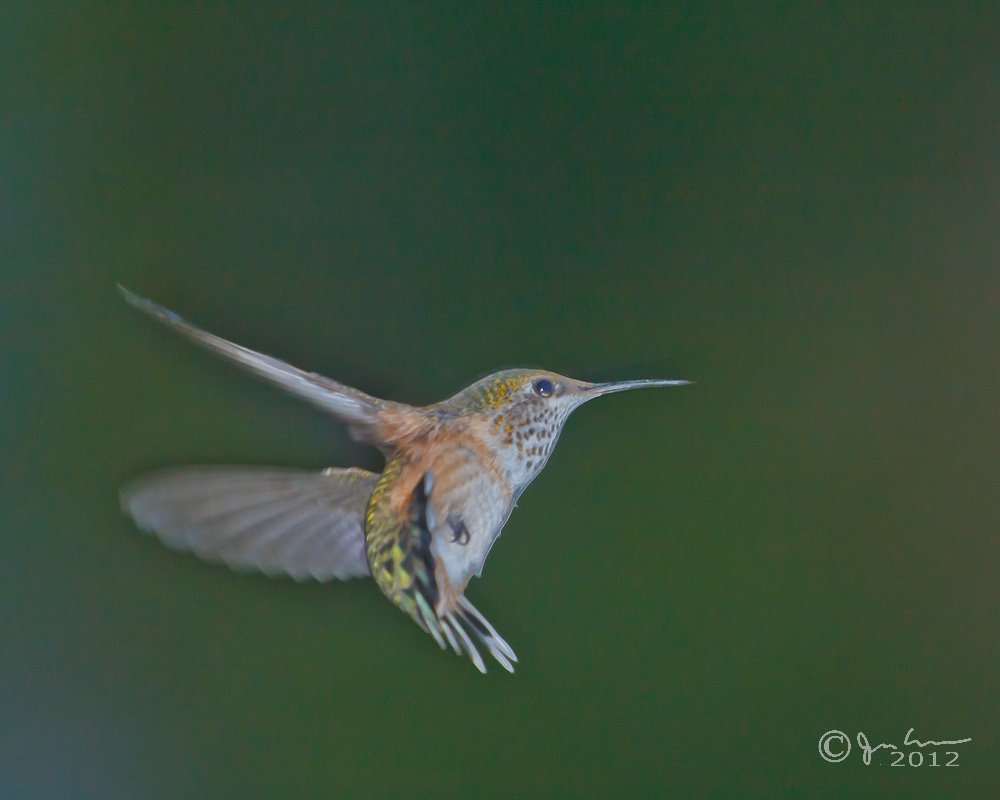
So, my answer to him? Well, to see something at 400 yards large enough to take a decent picture you would likely need an 800mm lens or 1200mm lens. You also probably need a 1x or 2x TC to really get far enough. The problem with taking a picture at this distance is that heat, atmospheric conditions, and just the physical limitations of optics would not make for appropriate conditions to capture decent images. Most wildlife photographers I know of like to get closer than 400 yards from a subject to take their picture, and for good reason. The distance to subject is of prime importance in capturing wildlife photos. Zoom or no zoom (prime lenses), there’s no substitute for proximity! Photography all too often comes down to something along the lines of real estate mentalities…location, location, location!
My best example? A hummingbird I shot from a mere 15 feet away!