5 Tips for Better Pano Photography

With Apple and Android phones, the ability to take panorama photographs has really changed the landscape (if you’ll pardon the pun 🙂 ) for still photography in this genre. You can get some truly stunning results without the need to stitch several photographs together in heavy desktop applications like Photoshop anymore. Like anything else though, there are things you can do to increase your keeper rate, and things to avoid (unless you like deleting tons of photos).  Here are Five Tips To Improve Panorama Photos:

Tip #1 â€“ Make sure you scope out the scene all around you.  Believe it or not, the iPhone panorama photo feature goes to nearly 300 degrees from left to right.  This means you will almost be doing a complete circle.  Is there anything on your left or right that you particularly want to be in the photo, or the draw of your photo?  Make sure that you initially face that particular person or scene.  Then turn 90 degrees to your left before you start shooting.

Denver Airport  Panorama
Denver Airport Panorama

(I wanted to make sure the plane on camera right was fully in the frame, and my first short, the pano ended right before the hallway on the right, so it looked like it was cut off…)

Tip #2 â€“ Go slow!  The iPhone will tell you to slow down if you start moving too quickly from left to right, but at that point, it’s likely too late.  Stop the shot and start over.  Don’t get impatient because your wife (or husband, or significant other or friend or whoever) wants to get to your ultimate destination.  The amount of time it takes to completely capture the pano scene is about 15 seconds from left to right.  Add another 15 seconds to review the image on screen before you leave the area (you may have to re-shoot).  Finally, add another 15 seconds to your itinerary in case you really do need to re-shoot!  Just as a buffer, I’d add a final 15 seconds in because…well, you never know!  All in, that’s one minute of their lives that your S.O. will have to wait for you.

Tip #3 â€“ Consider the lighting – If your scene varies a lot from dark areas to light areas, that will not bode well for capturing a pano with the iPhone.  Why?  Quite simply, it can’t capture the dynamic range of our eyes.  Low light to bright light can be tough for the sensor to handle, and extremely low light scenes will introduce a lot of grain too.  Most of the time, shots that result from these scenarios will be unusable.  Exceptions to this would be city skyline shots.  The bright lights will be blown out, and the skyline itself will be all in shadow, but that’s ok – that kind of contrast is actually a good thing for skyline shots!

dark pano - what not to do
dark pano – what not to do

(Clearly, the bright light of the lamp and the darker area of the living room made for a bad contrast between bright and dark areas here…this is a bad shot imho..pano or no pano!    )

Tip #4 â€“ Consider the framing from top to bottom.  When shooting pano shots from the iPhone, you can’t rotate the camera to go into landscape mode – it must be recorded in portrait mode.    This means you may get portions of your scene at the bottom, the top, or both that you might not otherwise want in a final photo.  Re-frame accordingly as you conceptualize the shot!

Similarly, consider what’s off-camera to the immediate left and right. Is it the road you’re on or a coastline? Unless you take up several frames when viewing this kind of shot, it may end up looking a bit odd.

Finally, consider that you do not necessarily have to go the full range from left to right or right to left. Some the best types of scenes for panoramic photography are better off from perhaps just a little bit more than a standard picture. Here for example, an architectural shot, or perhaps a larger group of people. Everyone automatically presumes that panos are best utilized in landscape photography. While this is true, there are usages outside of that genre.

Colorado – Not Just Sunsets!

While working through the material for today and next week, a friend called up and asked if I’d be interested in joining him for a stroll through downtown during sunset.  Being one to never turn down a sunset, or a photo walk, or city architecture, I readily agreed.  So, we met near downtown Denver.  Gregg and I had been talking about setting up a sunset shot of the city skyline for some time now and we’d had some ideas for a good place to scout it out.  But, tonight his motive was different. Continue reading “Colorado – Not Just Sunsets!”

Creating HDR Panos with PTGui

A while back I had approached a few companies about putting together an article on how to create panoramas.  One of those companies was PTGui – and I’ve finally had a chance to put together a few images through their software to take a look at the processing and stitching quality.  First impressions are good…what I especially liked is that the software has the ability to render both panoramas as well as HDR processing algorithms.  While a dedicated work flow that addresses panoramas and then a separate work flow to address HDR work may yield better results, I’ve gotta say that PTGui does an impressive job for a multi-function program: Continue reading “Creating HDR Panos with PTGui”

The Perils of Polarizers

Happy Monday all!  My apologies at the absence on Friday – it seems some gremlins absconded with all my time on Thursday, so in the absence of any halfway decent content, decided to make it a legitimate “no blog” day heading into the weekend.  But, a new week is here, and I’ve got a cool topic to cover briefly with you…that being:

Polarizing Filters

Polarizing filters can be a godsend – they can really bring out blues in a sky, or minimize reflections in windows, and can really help to improve the quality of your work.  At the same time, polarizers can also be very tricky to use.  On my recent trip to Arizona (I shot a weekend with Rich Charpentier of The Airstream Chronicles), there were many opportunities to bring out the gorgeous blue sky, and contrast it with the amazing colors in the orange rocks that the American Southwest is known for.

The problem with polarizers is that the blue that is brought out is not a consistent blue – it usually gets stronger as you move toward the light source.  So, when you go to stitch things together, the results can be less than satisfactory with evident banding and shifts on hue of the blue skies.  Take a look at the example below to see what I am talking about regarding the banding…

Pano

See how the sky has blues that aren’t consistent?  It’s because I did not rotate the filter to accommodate the shift in blues as I shot across the scene.

Another problem is kind of hinted at above – what if you have a sky where you want the blue to pop, but the foreground includes a water reflection that is an integral part of your composition?  The answer here is to expose both with, and without the polarizing effect, and then blend together the two shots later in post production.  Masking off parts of images is much easier to deal with than the polarizing effect in the sky, but it’s a pitfall of panorama photography to be aware of.

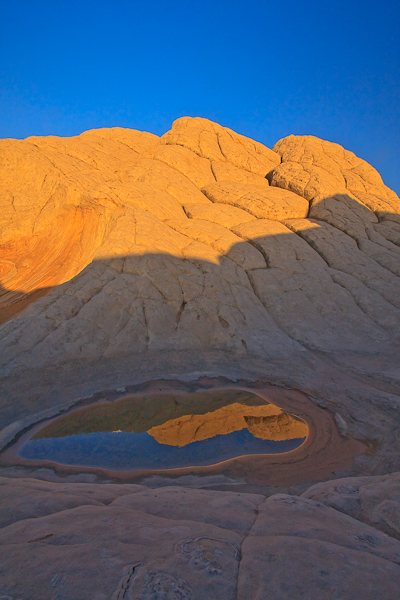
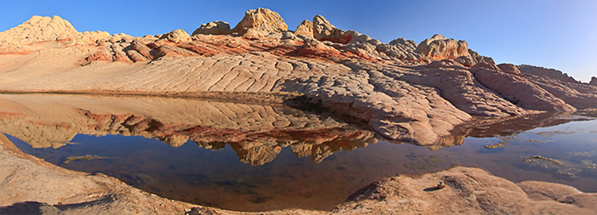
As it happened, later on that day I was capturing another scene where there was no sky, so it was a non-issue.  Here, the key is to remember to spin your filter so that the reflection does reveal itself, otherwise you will think you are doing something severely wrong when you can see the reflection with your eye, but not through the lens.  I probably spent a good five minutes trying to change the angle of view before I realized it was just a quick spin of the filter to reveal the reflection below me…

Reflections in White Pocket

As, as you can see, there are benefits to polarizers and there are also downsides to consider as well.  When used correctly, they can really add to the character of an image.  For those looking at specific recommendations, here are the ones in my gear bag:

But enough about my thoughts on polarizing filters – what about you?  Do you think they are legitimate tools to alter a scene?  What about reproducing the effect in post production?  Which ones do you use?  Do you have a favorite or do you prefer all photography “au naturale”?  Sound off in the comments or via email!

Happy shooting and we’ll see you back here again tomorrow for more photography goodness!

The Moment it…"Oops"!

We all know the real phrase, made famous by none other than Joe McNally, and his well-received book “The Moment it Clicks””…(and a great read, so go check it out if you haven’t already).  However, that’s just Joe… I seem to encounter more blunders than brilliance.

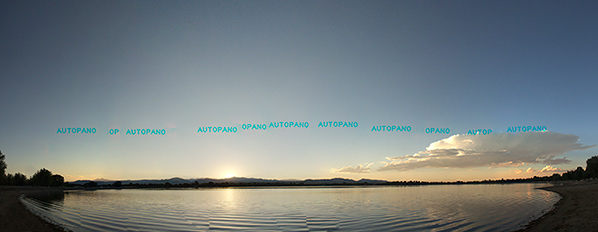
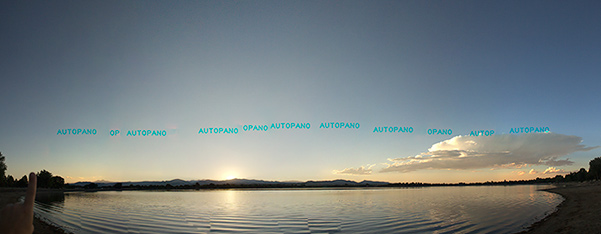
For instance, I was working on the photos from the weekend shoot and had a rather good set I wanted to put into a panorama shot.  Before taking the good set though, I decided to run a test on some older images on a new program that came  which came recommended to me from Alex Saunders over at Tenuous Thread called AutoPano Pro.  So, in working with the trial software, I went into Lightroom and grabbed my 12 or 13 photos to stitch together from my archives and see how it did for a test run.

Well, because the stitching of 12-13 images can take a while, I left it and came back the next day to find I had grabbed one of the wrong images.  Can you find my “oops”?

August Sunset
Here's the edited version

August Sunset (original pano stitching)
Pre-post production

So, my foibles and failures in attention to detail thrown wide for the world to see!  🙂  It can be fun though when you look at these things lightheartedly and just have a good chuckle though.  Anyone else have any stories or foibles they want to share?  Comments are open…

5 Tips to Better Landscapes

The most common questions I get here on the blog center around the idea of how to take better pictures.  Whether those “better pictures” are better landscapes, or portraits, wildlife or events, everyone wants suggestions on how to approach the practice of taking pictures better.  Esoteric and creative considerations aside, there are some fundamental “tricks of the trade” that, by and large, will almost always improve your craft in pretty much any genre.  So, today, I thought I would take a moment to share 5 “tricks” I’ve learned that always lead to better landscapes: Continue reading “5 Tips to Better Landscapes”

How I shot Lightning!

Today the post is going to revolve more around a set of photos I took the other day – you see while en route back to the house, I noticed that the clouds were passing over the mountains and the sun was starting to set.  It had the makings for a really nice sunset.  Never one to turn away the opportunity to capture a sunset, I hurried home and gathered my gear, and took off to my favorite spot near the house for landscape work.

Well, the clouds and the sun didn’t really cooperate so I gave up on that and starting fiddling around with some HDR kinds of things.  I saw a traffic light nearby and there wasn’t much traffic so tried to time some bracketed exposures (my shutter speed was getting near 30 seconds on the top end of the bracket).  Some possibilities developed, but nothing too earth shattering, and I was starting to feel a few drops of rain, so I packed up to head back over to the house – about 2 miles away.

As I was coming back to the house, the clouds that evaded me on the mountainous horizon were ominously hanging over the cityline of Denver (another scene I’d been meaning to shoot) and flashes of lightning were coursing through the clouds, with some pretty regular spikes coming down.  All of this was about 30 miles away, and heading away from me so i was feeling pretty safe except for the possibility of some raindrops now and then.

So, I found a nook by the open range, set up the camera on my trusty tripod, and tried to recall things I’d read about how to shoot lightning.  Apparently some of it stuck, because I came away with this:

lightning_blog
Lightning over Denver

So, how did I do this?  I kept four key things in mind:

  1. I used my tripod!  Stability was key because every single exposure was no less than 15 seconds!  When shooting lightning, you want to open the shutter for a longer time to increase your odds of catching it.  Because it was flashing so regularly I eventually dropped my shutter to 15 seconds and still managed 6 or 7 really good captures.
  2. Keep the noise Down – I dropped my ISO to 100 for all shots and made sure long exposure noise reduction was turned on in camera.  Sure it took twice as long to capture each image, but in the long run it was worth it because there was much less noise to process on the back end.
  3. Don’t touch the camera!  I set the camera to bracket exposures and put it on a two-second delay.  So, by the time the camera shutter opened I was no longer touching it, and then the second and third shots fired automatically.
  4. I made sure I was in a sweet spot of my lens.  Part of this is knowing your gear – I was shooting the 10-22mm (wide angle) from Canon, and know that when it goes below f4 it can get fuzzy.  So, I was at f11 for most of my shots.  Great depth of field and everything is sharp!

Well, a fifth one was post-processing.  After a few rather unpleasant attempts to process as HDR images, I enlisted the aide of friend-of-the-blog Terry Reinert, who you know from our podcast talk a short time ago.  Terry is wicked smart (he’s an engineer) and knows the heck out of HDR.  I asked him what I was doing wrong (because the clouds were getting blotches scattered through them and generally looking poorly).  He gave some insights, what he was finding yielded better results and sent me a low res sample via email.  I liked the path he took, but the colors were not quite where I remembered them from Sunday, so dove in again with the new-found knowledge.  I tried a few quick variations on his technique, but in the interests of time, just did a short version to post here.  Once I get my final edit done (probably this weekend, I will likely be adding the image to my portfolio, so will also post that here as well.  For now though, I wanted to share the back story and a quick version of one processed version that I found appealing.  I am not crazy about the black across the bottom, but since my time was limited here, I’ll likely be addressing that this weekend when I have more time.  For now though, the quick version and a panorama crop looked kinda cool!

Thanks go out to Terry for giving a hand.   In our discussion he also mentioned possibly doing a tutorial on blending using the images, so keep your eyes on Terry’s blog (Where Art and Engineering Collide) as I may be a featured artist!  (How cool would that be?) ETA:  On posting the link to his blog, I see he’s already put his tutorial together – thanks Terry! 🙂

In other blog/photo news, as you all know from yesterday, the OnOne Giveaway concluded with Pete Petersheim being the big winner.  The new contest is underway though, with a new thread up at the Learning Digital Photography group on Flickr, so be sure to stop in there and share your images in the new thread (the theme this go around is “Fun” since the price is a Wacom Bamboo Fun!)  Good luck to everyone and don’t forget to have some fun!

Happy shooting and we’ll see you back here again tomorrow!

Grab the Feed

Not Tuesday but Moo-Day

Tuesdays seem to be daunting days for the podcast, so I may have to adjust the schedule some…I am thinking Fridays in the future, but would welcome suggestions.  For the time being, here’s a couple shout outs and photos for your Tuesday enjoyment:

First off, thanks go out to Rob Jones of Towner Jones Photography for another nod from his blog.

I’d also like to pay special thanks to Dave Cross of NAPP fame.  I saw a pretty big blip up on the blog from about a week or two ago and when recently looking at Google Analytics, saw he had given me a mention from his blog back on Dec. 1st.  Thanks so much Dave, and although it’s been said, it’s worth saying again – my thoughts and prayers are with you and your family.

Lastly, shouts to fellow NAPP member Mitzs who also gave me some link love on her blog, Pursuing Photoshop!  Thanks for that! 🙂

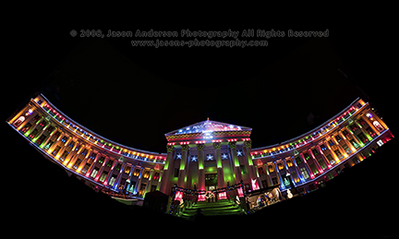
And now, for the POTD entries, I was able to contribute to Jason Moore’s ongoing Geographic Composition series which is featured on his blog today, so here’s that photo:

Denver Civic Center

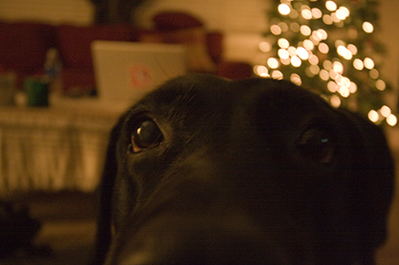
And last but not least, since I got the 10-22mm lens (finally, after a year or so of debating which wide angle to get) on Friday, I was playing with the zoom and looking at the angle of view when my dog came right up to the lens the other day.  Instinctively, I snapped the shutter.  The aperture was wide open and the shutter speed was way to slow so the image quality is horrible, but the image itself is just hysterical.  Her name is Maggie, but we call her Moo for short.  So, in honor of her, I am closing today’s post with her:

Moo

Happy shooting, and we’ll see you back here tomorrow!

Denver Area Photowalk

Meetup Pano

As some of you may recall, Scott Kelby held a worldwide photo walk a few months ago to promote his new book that was coming out on Lightroom 2.  Well, since then several smaller photo walk clubs and groups have formed and begun their own outings.  Denver was no exception and our first official photo walk this last weekend had a really good turnout of roughly 15-20 people.  About half of us even got together afterward at a local eatery to share stories and get to know one another better.  Everyone is posting shots over on the Meetup site and at the Flickr site as well, so stop in there to see some of the talents showcased in those venues.  The shot above is a pano I stitched together from the occasion.  With more photo walks to come, this definitely has some positive energy about it.

The last of the panoramas (for now)

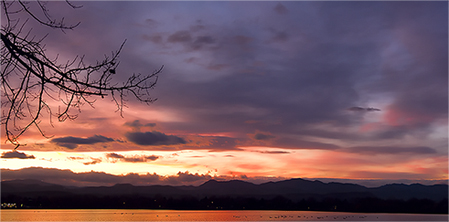
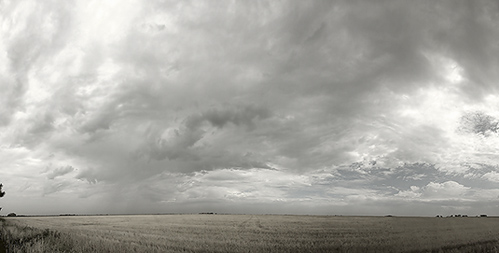
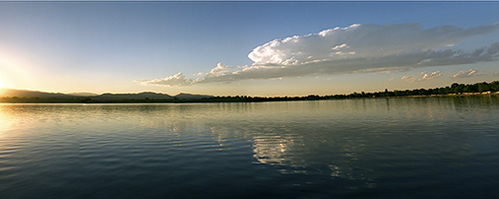
As promised, I have a black-and-white version of the original panorama from the trip across the country finished. Also, as I finally had some down time with the camera, I took off in search of some sunset scenery (I am used to sunrise shots from SC, so now I have to switch to sunsets being on the western side of the country!). I found one two days ago, and the scene really screamed “this is a pano” to me, so my first shots from Colorful Colorado are also for the benefit of panoramic photography! Enjoy these shots. The latter of the two (the sunset) was my inclusion in the upcoming Geographic Composition series hosted by Jason D. Moore so be sure to stop in there tomorrow for a look at the others in this regular event. The theme this go-around was “transitions”, and I thought this was an appropriate shot – my first shot in CO, and the water, to mountains, to sky, plus some super nice color transitions to boot.

Black and White Panorama of the Kansas Skies

Colorado Sunset Panorama

Jason D. Moore – Geographic Composition Series: Transitions

Well, that’s all for today, Thursday. Remember, Jason’s Geographic Composition Series collection will begin tomorrow, but since I am posting this rather late (9PM Mountain time), the readership will likely see this tomorrow morning. Until tomorrow night then, happy shooting and watch those apertures!