As an avid proponent of doing due diligence, I’ve always encouraged people to do research on lenses before buying them. Whether it means renting them from vendors like LensProToGo, Rent Glass, or through vendor relationships, it’s a great way to get a first hand look on how lenses perform under a variety of circumstances. This was the case when I’d been the benefactor of a solid relationship with the folks at Sigma. I spent about a month kicking the proverbial tires on one of their latest lenses to hit the market: the Sigma 8-16mm lens. Continue reading “Hardware review: Sigma 8-16”
Category: Hardware Reviews
Hardware Review – Sigma 50-500mm
A while back I teased about a forthcoming lens review (nearly 3 months ago actually, in the Teaser Alert), and after several project shoots, the holidays, and scheduling delays, I am finally getting my act together to bring you the latest gear review…that of the Sigma 50-500mm. As a word of caution, you should be forewarned that the Sigma line-up of lenses that I have reviewed has become quite extensive. Right away this should tell you two things:
- Sigma has been quite generous with me in terms of making a variety of lenses available. They likely are doing this for a number of reasons, but primarily because they know that I will give a fair, honest, and 9 times of out 10, a positive review of their equipment.
- I like Sigma lenses! It should be no secret by now that I do like their lenses. They are optically on par with what one would expect from lens manufacturers by todays standards. Heck, sometimes I think the optical quality even exceeds that of the main brands out there (of course here I mean Canon and Nikon). The price is almost always right on – sometimes the price tag is a little high for my taste, but the advantage that Sigma has is that they are what is considered a “third party lens”, and because of that designation, their pricing is a notch below comparable lenses made by either Canon or Nikon for equivalent glass.
So, when Sigma came calling (actually I called Sigma), with the 50-500, the game face was put on. Right off the bat, here Sigma has been more than generous because I have now had this lens in my possession for nearly 3 months! I’ve posted a few photos from this lens over the past three months, so you may see some repeated images here, but they serve the purpose of demonstrating the various settings that I have used to shoot and test this glass. Having set the stage, let’s get started with the review. In the past, I’ve talked about things in terms of Pros and Cons, listing first the things I like, then the things I was not as much a fan of. While it has worked to a degree, I am trying to make things more uniform in the review section, so will start adhering to some more concise points and then indicating whether it is a pro or a con. Ladies and gentlemen, I give you the
Sigma 50-500mm f4.5-6.3 Review

1. Focal Range: The focal range is how lenses are most commonly identified, and this is the measure of how much “zoom” there is in the lens. Here, the description says it all. This lens ranges from a widest point of 50mm to an impressive “zoom” of 500mm. On a crop sensor camera, that means you are looking at a range of 80 to 800mm! By any standard, this is a pretty wide range, encompassing a difference of nearly 700mm in focal adjustments. I am going to call this one a Pro.
2. F-Stop Range: The f-stop range is the measure of the minimum (or maximum depending on your way of thinking) aperture the lens can handle at various lengths. When dealing with a zoom lens, as you move further out, the elements have to compensate for the change in the length by increasing the size of the opening of the aperture, so you will see adjustments as the lens “zoom” increases. The Sigma 50-500mm is dialed in to a minimum aperture opening of f4.5 to f6.3. So, at the widest zoom of 50mm, the lowest aperture setting you can get is f4.5. Likewise, if you zoom this all the way out to 500, the minimum aperture is f6.3. So, don’t be misled by the numbers, shooting this lens at 500mm will not afford you the f4.5 that is capable at the widest setting any more than the f2.8 is available on a 70-200 at the longest zoom. When you have zoom lenses, there is a compromise in aperture capabilities that must be met when zooming out, and such is the case here. I did some experimenting at various focal lengths, and here are some apparent limits at different zooms:
| Focal Length | Minimum Aperture |
|---|---|
| 50mm | f 4.5 |
| 70mm | f 5.0 |
| 100mm | f 5.0 |
| 135mm | f 5.6 |
| 200mm | f 5.6 |
| 250mm | f 6.3 |
| 300mm | f 6.3 |
| 400mm | f 6.3 |
| 500mm | f 6.3 |
Given the technology of aperture limitations in zooms, I would say that the Sigma is on par with what the expectations would be for this range. To build this lens for any lower aperture settings would make the lens both heavier and longer. I don’t even want to think about what it would do to the price either! It’s not the greatest in aperture abilities, but it’s no slouch either. I’m going to have to thrown an “Even” flag on this.
3. Noise: I brought in the noise consideration based on my first Sigma lens I ever purchased, the 70mm Macro (f2.8) which did not have HSM. The inclusion of HSM in almost every lens since has been a Godsend. This holds true for the 50-500mm as well. It’s super quiet and has convinced me that I will never stray off the Hyper Sonic Motor (or USM on Canon glass, ever gain! ‘Nuff said. Pro
4. Size/Weight: My last big lens I reviewed here was the 18-250. It was a respectable weight, but this is by far the heaviest lens I’ve ever tested. Weighing in at a shade upder 4.5 lbs (that’s 1970 grams for you Metric folks), it can cause some serious arm strain after extensive shooting. I would recommend using either a monopod or a tripod for this lens whenever possible. It also bears mentioning here that due to the weight of the lens, you want to support it in the provided collar. Supporting the rig by the camera can result in some serious shear force, which can rip the lens right off the camera. Other size considerations involve the length of the lens both fully closed and fully extended. This will draw some eyes at either end…whether it be the short side (8.5″) or the long side (12″)! Here’s a comparison shot with it next to several other lenses so you can get an idea of its relative size:

Another consideration to take into account about this size is the filter required. For those interested in using the ND filters to protect front elements, you will need a 95mm filter to cover this – not a cheap thing to purchase by any means. Ultimately the size/weight considerations really will depend on your personal ability to handle it effectively. For me, most of the time it was not a factor, so I’ll acquiesce and call it a Pro.
5. Build Quality: In line with expectations, the Sigma quality showed here. Their now easily recognizable textured exterior exudes professionalism, and just feels good in your hands. Given the weight of the lens, you don’t want to hold this gingerly, but at the same time, if the body took a slight bump from another lens in your bag, the “other lens” would likely bear the brunt of it. No questions here. It’s a Pro.
6. OS/IS/VR: Due to the limited aperture range, and the weight, the presence of OS is invaluable. Using the OS allows you to keep your aperture value low, allowing for bother faster manipulation and shorter shutter speeds, as well as some nice bokeh in the background when your distances are good. What was extra nice about this is the ability to toggle between the vertical and horizontal planes to control vibration in different circumstances. When I was on a monopod, I switched to OS 2 to help control vertical (or up and down) vibration. When shooting handheld, I was on OS 1 most of the time, under the premise that my own face, body and camera holding helped to minimize the vertical and thus needed more help with horizontal. When I was on a tripod, I turned it off per normal procedures for when using OS/IS/VR. In my book, having versus not having OS/IS/VR is definitely a Pro.
7. Cost: The average retail market for this lens is approximately $1500. Given the focal range, the aperture range, and other considerations thus far, it seems to be pretty competitive. The Canon lens with the longest zoom range is their 100-400 and that factors in at $1800. Nikonians can salivate over their 80-400 for $1850. Both price in over the Sigma lens, and it still gives an extra 110-150mm of variable range. For my own personal budget, that’s a tougher call because while I would love to own this lens – I would have to sell something else to do so, and am not sure I want to dispose of anything else in my camera bag at the moment…the jury is out on this for me personally, but for those interested in purchasing any time soon: Pro
8. Image Quality: Image quality is always subjective to the viewer/shooter, so here I will just let everyone defer to their own tastes by sharing a few sample images taken over the last few months:


Miscellany:
Other features that bear mentioning here include the locking mechanism and the focusing rings. I thought about including the latter in the build quality, but decided to bring it in here for discussion. First, the locking mechanism is a handy feature to have for keeping the lens locked in place to prevent lens creep. The idea is a good one, but for this particular lens, it would not lock in the “zoomed” position, where I would have thought lens creep would be more of an impact, than in the “closed” position. Having said that, from the lunar shots I did (as shown above), the fully extended lens did not experience much, if any, creep. This could be because the lens was recently brought back from a service stop where knobs and buttons and toggles were all tightened and such.
This brings me to the focusing rings. The rear focusing ring is the one used for fine tuning and the front ring is for zoom. This was an adjustment for me as my other zoom lenses have these rings reversed (where the zoom is on the back ring and the focus is on the front ring). it forced me to change my style of shooting a little, but since I was working off a lens-mounted setup most of the time rather than a camera-mounted setup, my shooting habits were already being adjusted anyway. The last part is that the zoom ring did seem a bit tight to move. Whether this is by design or because of the recent factory adjustments, I am not sure, but it was just a tad stiff to adjust.
Summary:
All in all, the Sigma 50-500mm is a great lens. It stood up for the challenges of both wildlife and aerial photography, as well as lunar and even a portrait shot of the canine companion. The compression it exhibits at the far end (which is characteristic of these long zooms) is to be expected, but I would probably not be using this for landscapes unless I was in a pinch and had no other lens with me. Still, it could be done, depending on what kind of landscape you are trying to capture. The zoom really had no noticable effect on image quality without going into some serious pixel peeping, and thus, meets or exceeds all criteria that I can think of. I would definitely make a positive recommendation on this lens for either a wildlife or sports shooter where distance from subjects is often greater than 10-15 feet. (The minimum focusing distance at 500mm is something like 6 feet!)
That does it for today – I hope you enjoyed the review and photo gallery from the Sigma 50-500. Here’s the final results/scores I give the lens:
| Category | Score |
|---|---|
| Focal Range | 8 |
| F-Stop Range | 7.0 |
| Lens Motor Noise | 8.5 |
| Size/Weight | 7 |
| Build Quality | 9.5 |
| Optical Stabilization | 8.0 |
| Cost | 7.0 |
| Image Quality | 8 |
Have you shot with this lens? Share your own thoughts in the comments or with me via email. Likewise, if you have a lens you would be interested in having me review, feel free to drop me a line or share your requests through the comment area as well. Special thanks to Sigma for giving me such an extended testing period to review the lens, and we’ll see you here again soon! Happy shooting!
Hardware Review: Sigma 18-250
The subject of today’s post: The Sigma 18-250mm lens review! You read that right – Sigma has a lens that covers the range of 18-250. This allows you to go from relatively wide angle shots at the 18mm end to zooming pretty far in at 250mm on the opposite end. But, is the quality really there?
I took the lens through its paces over the weekend and here’s what I found out about the Sigma 18-250! In the interests of full disclosure, I should also note that this was actually requested by myself for review, and that I am not being compensated in any manner by the good folks at Sigma. So, this is, in fact, a loaner and I am required to send it back no later than June 26th. Since I will be busy next weekend, decided I should get the review shots done with this weekend so the lenses can be shipped back on schedule.

Pros:
- Weight – this has a nice solid feel to it. With I think a total of 13 elements in here, it’s no surprise that it doesn’t feel the slightest bit flimsy. The weight adds a certain durability, but I still took things carefully as this is only on loan from Sigma for the purposes of this review. Compared to the 70-200, it certainly felt heavier, but I am not sure what the comparative weights are. All in all though, I think the weight is a good thing.
- Noise – Excellent! My prior experience with Sigma is my own 70mm Macro, which does not have the HSM (hypersonic motor). That thing is NOY-ZEE! This, on the other hand, rivals the USM operation of Canon lenses. Compared to the 70-200L glass I own, the two are pretty close to each other in terms of silence in operation. The test I did for this was switch focus to manual, then take the lens all the way out to the opposite end of its last focus point. I then switched it back on to AF and listened for the motor operation. Sure, I could hear it when listening, but man was it quiet!
- Range – This is without a doubt, my most favorite element (bad pun) of this lens. The fact that I could go from wide angle work to close up work with such ease makes this an ideal lens for things like photo walks (which are becoming more and more popular), or for just a go-to lens on a regular basis without having to switch out.
- OS – Optical Stabilization – the equivalent of IS on Canon lenses. While I don’t own a Canon IS lens for direct comparison, I will say that it went a full stop faster than my 70-200mm CanonL f4.0 did at the same focal length/light. In a day and age where fast glass is becoming pretty much the standard, I would say this meets the mark.
- Size – This lens is remarkable compact – standing at almost half the height of my 70-200 comparison lens. Think about that – a wider range of zoom and half the length. I can store this vertically in my bag, saving precious cargo space for other accessories and accouterments. Alongside would be the 70mm Macro, the 10-22mm, lensbaby, flash and other such items. Very tempting for that reason alone.
- Feel – The signature brushed metal feel of Sigma lenses is present here and it just exudes “cool” and “professional”. No bells or whistles, no fancy L rings or anything, just brushed smoothness. Gotta love it!
- Image Quality – The bugaboo, the real deal, the end result – the pictures! So how does it stack up? Pretty well actually, but rather than wax on, I’ll just share some images I took for you to judge the IQ – just remember to distinguish IQ from compositional quality! 🙂 Here’s the results…


")


Cons:
- Weight – Yes, I am listing weight as both a pro and a con – the weight did get to me after a while of shooting on the 40D. While it’s durability is not in question at all, the heaviness can get on your wrist and forearm. I should put this qualifier out that I am still recouperating a tender arm from our move last July, which I am for the most part over, but it still flares up with extended use. So, things like shooting for a day can wear on me. Lighter is always better, but if I had to choose between durability and lightness, the former would win every time. Take what you wish from this con then…’nuff said.
- Cost – It retails at B&H for $529, which is always a big price tag to swallow no matter what you are buying. Then again, when you look at a comparable lens from Canon that has the OS/IS built-in, the Canon counterpart goes for almost twice that at $1025 (and you still don’t get the same range of focus). While it may be a lot to pay on first glance, you really are getting quite a bit of bang for your buck.
Truth be told, I couldn’t find much else to nit on. I also liked the fact that they made this lens so you can put the lens hood on while also leaving the cap able to attach. Don’t ask me why, but I like that… Believe it or not, the lens also performed fairly well with portrait work too. I did a few test shots with yours truly as the subject and even got one I liked! So, would I recommend this lens? Absolutely! To see a complete gallery of photos I took this weekend, including the portrait ones, and even a few of the moon last night with a TC attached), follow this link:
Sigma 18-250 Gallery of Images
Well, that should be enough content for the day (I know, my reviews are long-winded), so get out and shoot (with a Sigma if you like! 🙂 ), and we’ll see you back here tomorrow. Happy Shooting! Don’t forget – would love to hear reader thoughts and ideas for product reviews – let me know in the comments or via email!
Hardware Review: Hoodman Loupe
As mentioned previously in the monthly contest series post, this month the featured vendor is none other than Hoodman. Their patented and widely recognized CF cards and loupes are proudly made in the U.S.A. (the only ones I know of that can make this claim), and are virtually indestructible. They have generously donated one of their Loupes for the contest winner, and allowed me a chance to review it as well. So, without further ado – here is the latest in the hardware review category for the blog:
Hoodman Loupe
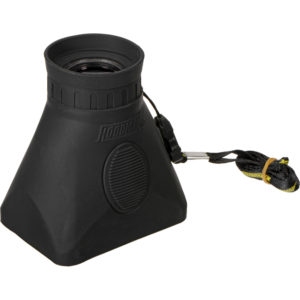
The whole purpose of the Hoodman Loupe is to block stray light from hitting your LCD. In sunlight or hazy scenarios, it can often be challenging to view your screen, and even change settings if you own a newer camera. Given it’s simple function, the review aspect of this really is a simple matter to determine, does it do the job it claims to do or not.
Not only did it completely block all ambient light with ease, the Hoodman Loupe also seemed to make the on-screen photo much more brilliant and crisp than I had remembered before using it. That surprise was further mitigated by seeing how compact the Hoodman Loupe actually is – at roughly 2 inches long and an inch deep. Not only did it perform adequately, but at this compact size, the Hoodman Loupe is an easy addition to your camera bag with the minimal footprint it takes up in space.
Most rubber or manufactured products attempt to make things slick of shiny and in so doing, the product becomes quite slippery and difficult to hold. Not so with the Hoodman Loupe, as the rugged rubberized exterior was nicely made, and I was pleased to get an easy grip on it. Although easy to hold when in use, I was not as thrilled with the ease of porting. The short trap that they provide to carry it around your neck is much too short for me. Now granted, I am 6’1”, but certainly no giant, and the size was just awkward for me. While the quick release snap does attenuate it to a certain degree, the idea of keeping it tethered somehow is a little more reassuring (I have a penchant for losing small items when taken away from my body…LOL) The accompanying carrying case was a nice addition, but did serve to really make it easier to carry…this seems to only serve as a storage container for when not in use so you can differentiate it from other gear in your bag.
I did recall after using this that a DIY solution was suggested by Larry Becker, of NAPP notoriety (he does the weekly NAPP News segments and writes his own blog at Larry’s Cheap Shots), and think his belt clip idea is both innovative and and highly functional. If the folks at Hoodman made this accessory and slapped their brand on it, I’d be half inclined to purchase the entire kit from them directly.
It’s a fairly simple idea in total, and not much else to say other than – it works! The sturdy construction, and compact nature of it is perfect for any photographer who wants to utilize their LCD. For those of us with older cameras where shutter, aperture, ISO, and all other settings done via dials and the top viewer, it may not be as relevant, but for shooters using more recent gear like the Canon 50D, 60D, and 7D, the back screen is used much more to make these adjustments, so a device like the Hoodman Loupe could be a huge aid in making sure you’ve got your settings where you want them. For $80, you almost can’t go wrong! This is definitely the accessory you never thought you needed, but you really did!
Remember, this very Loupe is being given away at the end of the month, so for your chance to win this cool accessory, don’t forget to submit your BLOCK themed photo in the Flickr thread here. Good luck to those who enter, and thanks again to the folks at Hoodman for their sponsorship and contribution!
Hardware review: The Tether Table
A while ago I was thinking about what would be the best way to set up all the hardware for a studio scenario and blogging about it with the reading audience. The idea of the Tether Table came to me quickly and on approaching the folks at Tether Tools, it was met with equal enthusiasm. So, in short order, one was dispatched to me for review here on the blog – this will be the one given away in the upcoming end of month finale for the March Flickr Contest. So, without further ado, I give you:
The Aero-Master Tether Table
The Tether Table is a pretty straightforward device – it comes with the table itself, made out of T6 Aerospace Aluminum (whatever that is). Regardless of what the official name is – this table is pretty solid – I have no doubts as to whether it might bend under the weight of a laptop. What I found to be really nice is that it spins onto a tripod (sans head of course) quite nicely, and just as easily fits over the top of a light stand. The stability is also pretty equal between the two once it’s locked down.
So, how does the table lock down? There’s four little Allen screws that tie the female acceptor tube to the bottom of the table through the top. Their design makes them lay seamlessly flat so no worries about your laptop getting off kilter. Here’s a few sample shots to show you the design:
")
")
The other part that bears mentioning is the additonal kit item (not included normally with a Tether Table) is the Jerkstopper – a handy little device that attaches at both the laptop and camera end to avoid getting cables tugged out of your connection points. They really help to keep equipment from falling, plugs or connectors from getting ripped or damaged, and the add-on value is well worth the $22! Here’s the product shot from Tether Tools site to give you an idea…

The first problem I found was that it does require either a light stand or a tripod. So, if your camera normally goes on a tripod (mine does) and you have an external flash that goes on the light stand (mine does), then either the flash has to become more of a portable device (enter the wireless trigger system), or you need to get another light stand. I initially lucked out in that I am/was running the triggers through their paces for my good friend Kerry Garrison over at Blackbelt Lighting for an upcoming review this Friday, but the need for another light stand has become pretty clear to me. When I am using two-light setups though, things could get complicated, but that’s a personal gear issue, nothing really to do with the Tether Table itself, so no harm no foul there.
The second problem I found was budgetary. While the sturdy construction and clean polished look and feel are certainly features I can appreciate, being on a budget, the cost of entry to obtain a Tether Table of this caliber is a little pricey for my blood. At $179 for the Table and another $22 for the Jerkstopper kit, we’re over $200 and while it’s not inconceivable, it’s certainly rich for the enthusiast blood. For most professionals it is easily justified and likely something you can itemize in an invoice if needed. So, not completely out of reach, but up there for sure. Oh well, no one ever said photography was going to be cheap!
When all is said and done, I do think it’s a worthwhile investment. These can be invaluable in a studio or on-location shoot where you need to be moving around in between shots. The benefits of both the Tether Table and the companion Jerkstopper could be invaluable in a number of environments, including macro photography, food photography, portrait photography, and most product photography where a dedicated preview monitor would be super handy to have! To that end, I will be sad to see it go, but alas, the Contest Series gets priority! Thanks to the folks at Tether Tools for their generous contribution, and best of luck to all the participants! (If you haven’t entered your photo yet, the theme is FLAT, and the contest link is both here and at the top of the page!)
Have you got an idea for a product review? Is there something you’d like to see a test drive on? Sound off in the comments and I’ll try my darndest to make things happen! See you next time here on the blog. (And don’t forget the Facebook page where the “Behind-the-Scenes” video is posted on using this very table!…”Likes” and comments there are always appreciated too!).
Hardware Review: Sigma 70-200 f2.8
The kind folks at Sigma have become quite the regular contributor to the review section here – as you keep asking for lens reviews, the Sigma brand keeps coming up, and they continue to be generous with my participation in the loaner program. Thus far the lens line-up I’ve reviewed from the Sigma Collection include:
- Sigma 8-16mm
- Sigma 4.5mm Circular Fisheye
- Sigma 50mm f1.4
- Sigma 10-20mm
- Sigma 18-250mm
- Sigma 70mm Macro
Having compiled quite the list of review lenses, I am happy to announce the latest addition to this review series (some day I hope to have reviewed every lens Sigma has! 🙂 ) I give you the Sigma 70-200 f.28…
This lens is the comparable one to the Canon 70-200 f2.8, and while I’ve not had a chance to test the Canon equivalent, there are some optical similarities. I won’t go so far as to compare it to my own Canon 70-200 f4.0 simply because there are enough differences that it would be an apples to oranges comparison. So, here I’ll just share my own thoughts and shots on and from the lens for everyone to consider. Here is everything from soup to nuts:

The (Alphabet) Soup
This is the 70-200 F2.8 EX DG OS HSM lens – quite a mouthful, but all of these features are important. The EX signifies that this lens has benefitted from the now signature finish of Sigma lenses. It’s smooth but rugged, and hard to really explain, but denotes quality and professionalism while being also understated – it means business. I’ve raved about the finish that Sigma puts on their lenses and this one is no exception. Top Notch! The DG? That means it’s optimized for Digital use. To quote Sigma,
“These are large-aperture lenses with wide angles and short minimum focusing distances. With an abundance of peripheral illumination, they are ideal lenses for Digital SLR Cameras whilst retaining suitability for traditional 35mm SLRs.”
In other words, the f2.8 means the aperture is designed for the width and opening, optimizing the amount of light that comes in, and minimizing barrel distortion. The end result of all this means you spend less time in post fixing things. A definite plus in my book!
OS is the now easily recognizable label of optical stabilization. These lenses have built in mechanisms that counter your movement to allow for shooting at slower shutter speeds. Slower shutter speeds, wide open apertures all means you can shoot and get quality results in lower light! I’ll go into more details on their OS features later though.
HSM refers to the Hyper Sonic Motor, which means nearly whisper quiet movement as the lens picks up on the AF points. Less noise means less distraction. This is good regardless of whether you are shooting portraits, wildlife, or street photography. Remember, it’s not about the photographer, it’s about the photo, and the HSM is an added bonus to help achieve that end goal!
The Nuts
All the acronyms in the world won’t tell you a thing about lens performance though, and neither will my blathering about this or that, so let’s just get to the nuts. I went out with the lens to take some test shots and basically get a feel for the optical quality throughout the lens. I took some at short range (70mm), some in the middle (ranging from 120-150mm), and some at the long end (200mm). Shot groups also were mixed between simple test shots (a street) to portraits, and landscapes to get an idea of the focal range. Here’s said shots!
The 70mm shots


Mid-range Shots


Long Range Shots


")
Here, you can get an idea of both the optical quality and range of the optics as well as an idea of how it would perform in a variety of functions. I should also note that I have done literally no post production work in these at all. The only sharpening that was applied was on output sharpening from Lightroom, and that was set “For Screen” by default on all my images. In other words, nothing has been tweaked. Having said that, let’s take a look at some of the pros and cons of the optics overall.
Pros ~
I absolutely love the bokeh on this lens at long range. It compresses subjects nicely for portraiture, and throws the background nicely out of focus with some great treatment due to the optics. These shots were taken in afternoon light, and the sun was coming in and out of the scene – which could change the settings quickly. We were shooting on a monopod, and with IS on so the minor changes in shutter speed (these were aperture priority shots) didn’t really affect us. The f2.8 end came out nicely too, which was as expected though – that’s the whole reason for the f2.8 My excitement was primarily lent toward the bokeh at the long end which came out to about f4.5 Not too shabby!
I also was a huge fan of the OS – optical stabilization. It had two settings…OS 1 for shooting handheld, which counters both vertical and horizontal axis movement, and if you are shooting on a monopod (which is common with heavier glass), you can switch to OS 2, which turns off the one axis (horizontal I think). This allowed me to take some pretty decent shots at a hockey game a few weeks ago. You may recall seeing a gallery of those shots here on the blog. I was toggling between the OS1 and OS2 for that series so some shots did come out better than others – the ones with OS2 were the sharper in the set!
Another advantage here is that the collar for tripod or monopod mounting is included. I had to shell out an additional $50 for my Canon when I bought the f4, so seeing it included here was a happy surprise. I hate to go on and on here, but there was one other feature that bears mentioning and that is the smooth rotation I was getting from the lens as I worked it through the focal range. Either this was brand new, or had just been serviced because it was about the smoothest glass I’d seen from Sigma yet…and given the laundry list up top, that’s saying something!
And finally, the last big notch in favor of it, is – of course – the price. Coming it at $1700 this lens is certainly not cheap. However the savings is still there as it offers a s$200 over the Canon equivalent which comes in at at $1900! For the cost conscious (and who isn’t these days), that $200 can go toward many other accouterments in your shopping cart! And from what I can tell, the image quality is pretty darn good. (I got my prices from B&H Photo – the Sigma one is here and the Canon one is here)
Cons ~
This was much heavier and bigger than I anticipated. It was longer than my own 70-200 from Canon. Now I grant you my own is only an f4.0 and does not have the OS (or IS if you prefer – for the strict Canonistas out there). But I was a little surprised. I think that’s why my initial shots were a little oof – out of focus – because my arms just weren’t used to carrying the weight around. Lesson learned though – when moving into the fast glass category, at least shoot with a monopod, arm strain is greatly reduced!
The other big con was battery drain. All the time I could hear the OS kicking on and off as it would sense movement, even as I walked around. This caused some noticeable drain on my battery and I found myself swapping out after about 3 hours of shooting. Maybe this is typical of optically stabilized lenses and I am just not used to it, but the drain was something else that I had to take into account. I did have a spare with me, so it wasn’t that big a deal – but I certainly could not have shot all day on only two batteries with this lens.
While the collar was included, I don’t believe the lens hood is. Now the test unit I had did include a nice lens hood with the butterflies to avoid as much vignetting as possible, but that would likely add to the cost. Based on prices seen on B&H though, that’s only in the neighborhood of $25 (Direct link to Sigma marketplace here).
The Decision:
I would loved to have held onto this lens a while longer, and truth be told, will probably end up buying it. The Canon 70-200f4 may be working its last days in my bag, just because the faster glass and features are sure to see much more use from me. Coming up tomorrow, the results of the October contest giveaway – and announcing the November giveaway…make sure you stop in for that! Happy shooting and we’ll see you then!
Hardware Review: Rogue Flash Benders
One of the most common search criteria on Google that coincides with photography is that of lighting. It’s no surprise as photography really is all about the light, and when making and taking photos (yes, there’s a difference), one of the key things that people can grasp quite easily is the success of a photo is often very dependent on the lighting. Continue reading “Hardware Review: Rogue Flash Benders”
Hardware Review: Think Tank Airport International V2.0

We all have camera bags. Whether you use a Point-and-Shoot, an SLR, or any other type of camera, you are putting it somewhere eventually that could be defined as a bag. These bags are made in such a variety of shapes, sizes, colors, and straps, it’s really amazing sometimes how many options there are for the photographer today. But like it or not, if you have a camera – you are gonna need a bag! Continue reading “Hardware Review: Think Tank Airport International V2.0”
Lexar Pro 300X CF Cards – Giveaway and Review
Got the need for speed? These new Lexar cards are just insanely fast. I got a few of these recently to give away on the LDP contest series over on Flickr (which is underway now by the way). It was actually a set of three, but a review was in order, so one of the three got opened for testing. Continue reading “Lexar Pro 300X CF Cards – Giveaway and Review”
Hardware Review: Sigma 4.5mm Fisheye (Circular)

As things start to settle down again, I’ve got a pile of reviews pending work, so this past weekend, while in bachelor status temporarily, I really knocked out a few projects, including getting caught up on some overdue reviews and blog writing. Today, the first of these projects is the Sigma 4.5mm fisheye lens review. This is a super cool lens, and has a lot of opportunities for creative exploration. I took the typical test shots indoors to get a feel for where it’s strengths and weaknesses are, how it focuses, and then took to the streets. Continue reading “Hardware Review: Sigma 4.5mm Fisheye (Circular)”