I’ve not been in the gear market for a while, but while discussing some technical stuff with colleagues over in the NAPP forums, had some time to check pricing in various outlets for used gear, and there are some deals going on these days! In my previous experience, used gear would go for roughly 10-15% less than the new retail equivalents. That percentage is apparently a bit low now as some gear is selling for up to 25% off new pricing! So, if you’re in the market for gear, check out the used market for some serious savings! Here’s a few items I saw in just a mere matter of minutes:
Nikon D7000: New = $1200, Used = $1000 (16%)
Sony A580 kit: New=$899, Used = $699 (23%)
Sigma 50mm f1.4: New=499, Used = $420 (15%)
Canon 500mm f4: New=$7000, Used=$5600 (18%)
Canon 5D Mark II: New=$2500, Used=$2135 (15%)
There’s more out there, but that’s just a sampling of what you can expect to see. The nice thing is many of these items include useful accessories like bags, straps, cases, and media cards as incentive pieces…savings add up even more (about a 20% average in my estimation). For what it’s worth, I used the forums from Fred Miranda to look up used gear pricing and B&H for retail equivalents. Your mileage may vary.
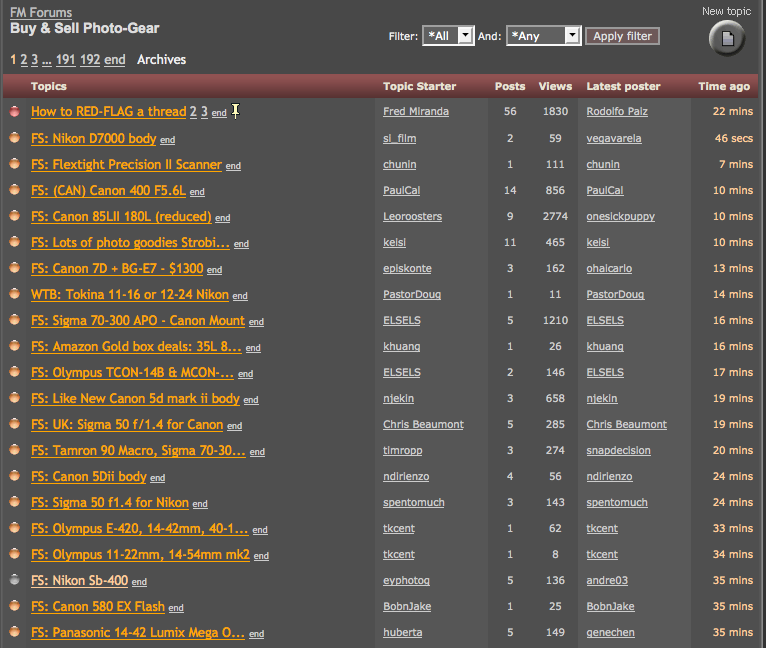
Buy Sell Listings
What sort of discount would you expect to pay for used gear over it’s new counterparts? Is 15% the new minimum? 20%? 30% What’s considered a “good deal” anymore? Since I’ve not been in the market to buy anything lately, am totally not sure where things are except what I’ve seen above. Those sound good to me but I have not scoured all of the internet to be sure…so, let me know if you’ve had similar or different experiences. Likewise, if you’ve got any of your own deals you’ve noticed recently? Sound off in the comments!
Most of the time the subject of the a photo is easy to see – whether it’s a portrait, landscape, travel, or architecture. While these subjects are easy to identify, the use of shadows in these topics is not discussed as often as it should be. We spend so much time trying to get the lit portion of our images in focus, composed to our satisfaction, making sure things are sharp, and all the rest, we sometimes miss the value of shadows in our imagery.
The shadows of an image can be just as important to the composition as the lit parts are. When talking about how to light images with strobes and studio lights, the use of shadows to give definition is often discussed, but the same discussions can be germane to naturally lit photos too. Remember, the word photography means to paint with light (photo and graphos), so even the absence of light can be significant in defining our images.
Whether you shoot portraiture, architecture, landscapes, or even abstracts, shadows can and do play a role in how you compose your images. Do you look at the shadows in your images? What story do shadows tell in your work?
Share your own thoughts on how to accomplish a story by shooting with shadows below in the comments – would love to hear others feedback. In the meantime, keep on shooting.
We all have Circadian rhythms or body cycles that are tuned specifically to us…whether you identify that as being a morning person or a night owl. This also applies to your creative rituals too though. Because our body clocks all operate on a unique pattern of restfulness and alertness, we have different times when we are the most creative. Our mind is able to focus on creative ideas and energies, and the distractions of the rest of the world aren’t nearly as distracting. The windmills are out there and we tilt away at them with every fiber of energy! Do you know when your creative zone occurs?
For me, that time often comes right around midnight. If I am not too sleepy, or I power through the initial desire to just go to bed, my mind suddenly becomes much clearer, my vision focuses, and I get so much done from my creative space, it’s kind of eerie. Tracy woke up once to find my literally typing a million miles a minute…the thoughts couldn’t get out of my brain fast enough. After about 3-4 hours of it though, my entire body just shuts down. The exciting thing though, is that I’ve been able to identify this creative zone. I know if I need to get some writing done, or some post production work on photos, or anything creative – those are the hours when I get the most accomplished.
We’re all different though, some people have this rush of creativity in the morning, or in the middle of meals or other activities. I’ve talked to so many people who still are unsure of when they really are at their creative best. When people attend workshops and get immersed in a creative world, the ideas flow much more naturally. The same holds for conferences, seminars, and any type of learning environment. It’s like the mind knows that other creatives are around and the energy for learning and expression is much higher than what we are normally exposed to. The trick comes in being able to identify when your creative zone normally happens when you are in that daily routine. Is it right when you wake up? After that first cup of coffee? Right before you go to bed at night? Or is it on those sleepless nights at 2am when your creative juices just start flowing?
Often when I talk to people about their work flow one big question and the need to do some pixel based editing in Photoshop, one of the questions that often comes up is “Why can’t I do X in Lightroom?”
Most of the time, it involves answers that include explanations of pixel based editing versus parametric editing, and lots of other technical reasons as to why certain things can’t happen in LR. But sometimes (and this is the best part), I find out they are adding to their work flow because it can be done in Lightroom! One of the most common ones is masking effects. When I show people this, I almost always get a “Holy Cow!” or some other variation on the “cow” part.
So, today I thought I’d share a quick tutorial on how to implement masking edits in Lightroom. Let’s take a look at the base image I am using here – a boat dock on Raquette Lake in the Adirondacks of upstate NY:
So, the dock here is a significant portion of the subject, but it’s way darker than the rest of the image, and really could be increased by a stop or two relative to the sky. So, rather than round trip to PS, let’s see what we can do here. I’ll start off with making a general masking selection of the entire area. So I check the Adjustment Brush (near the top of the Develop Module on the far right hand side), and then at the bottom of the image (over on the left), there’s a box that says “Show Selected Mask Overly”. I check that box. Then I just start painting!
It’s a prety broad brush I’ve used, so we need to clean it up, as some of the water got caught and that will leave an ugly halo effect if I don’t take care of it. So, to get more detailed selections completed, I zoom in, and then switch to erase mode while still showing the mask. This is in the lower options of the Adjustment Brush, on the right hand panel – see where it has “A”, “B”, and “Erase”? Click the erase and start painting again to undo the mask:
You, of course, will have to adjust the size, feathering and opacity of your brush to taste, and to accommodate your brushing technique as needed (hint: Wacom tablets work better than regular mice or trackballs). Once you’re finished with your refining of the mask, go ahead and uncheck the option to display the mask and see your results.
At this point you can actually do something else kind of cool – hover your mouse over the dot that is on display and then slide it to the left or right as you see the exposure increase and decrease for the selected area! Pretty cool, eh? This same technique works with other features in the adjustment brush, whether you are working on eyes, teeth, dodging, burning, or even skin softening. The scrubby slider is a nice feature in here. Then, finally, one thing I’ll do is make a side-by-side comparison of the image in a before and after mode to make sure my changes aren’t too garish or over the top (you can do a side-by-side comparison, top and bottom comparison and even split the screen between the two for a more detailed look):
Side by Side ViewLooks pretty good for this quick tutorial…and here’s the final image after our masking edits are done:
Adirondack DockNow I grant you that this is probably not a portfolio image, but it hopefully was helpful in illustrating how you can mask and edit your photos inside of Lightroom without having to do the round trip as often to Photoshop!
Like this tip/trick? Got any other comments, questions, or curiosities of how to leverage Lightroom more in your own work flow? Sound off in the comments, and as always, keep on shooting!
I had to bake bread for a work potluck today. That’s ok, I like cooking, and it seems others do too, because most of the time the dishes I serve are some of the first things to disappear. I decided last night to do something simple, but often popular: banana bread!
When it was done, the house sure did smell good from the caramelized sugar, bananas toasting, and who doesn’t like bread? (I know, I know – lots of carbs aren’t good for you…) But, every once in a while it’s fun to indulge. As luck would have it, this particular loaf of bread had some nice colors and tones to it, so naturally, I started thinking about my other hobby – photography!
With bread there’s so much you can do from capturing details, to using a shallow depth of field, to creative lighting and shadows, everything becomes a cornucopia of possibilities. Here’s a few of my selects from just ten minutes of prep, 60 minutes of cook, and ten minutes of shoot time!
Want a slice? What tasks have you taken and turned them into photo opportunities? The lesson learned here today (hopefully anyway) is to take something you have to do and make it something you want to do! In this case, it was a win-win scenario for me, but what about you? Sound off with your own fun-filled (or food-filling) photo projects!
Twitter, Facebook, microblogging, blogging, Audioboo, websites, statistics, logos, graphics, web design and more! It’s a lot to take in and more often than not photographers who are just getting started ask me “Which ones should I choose?” It’s a tough question because there’s no unilateral catch-all answer that will fit everyone. As always, the answer starts with “It depends…”
So, to better address the question I decided to bring in a pro who deals with this stuff all the time. That’s right ladies and gentlemen, we have another podcast! This is episode #56 of the LDP show, and I shared about an hour or so with Kirsten Wright talking about social strategies and best approaches and practices. It’s an entire industry, and there are some who claim to know and then those who really do know their stuff. Kirsten comes with some impressive credentials and a fresh outlook/perspective that many of us need. It’s a good kick in the…well, a good way to get motivated to get going in the right direction!
Make sure you check out her site over at Wright Creativity and make sure to add her on your Twitter, Facebook, LinkedIn feeds, and everything in between. She’s got gems and nuggets of brilliance galore to share. I’m booking her soon here to help me get things streamlined (in case you haven’t noticed, my schedule has not been as consistent lately as I’d like it to be – Kirsten is my kick in the #$%^!)
If you need some focus, direction, and a good reality check, Kirsten is the one to give t to you. Get it for free here in the latest episode of Learning Digital Photography: Is Blogging Dead? with our guest of the hour – Kirsten Wright!
When we approach the topic of depth of field, most people nod along about how the composition can change pretty dramatically when moving between various apertures – but have you ever really studied the differences? Take some time and do an exercise. It’s not that difficult, and really seeing the differences in photos can totally lift the roof on your approach to composition. For this exercise, I took a scrap piece of lumber, and nailed 6 framing nails into it about two inches apart from each other.
Step two was to set up the lighting, the tripod, and the “wood art” in a scene where i could adjust the aperture and keep everything else constant. With my own little studio set here in the house, that was accomplished easily enough. I set the focal point on the nearest nail, and dialed in the exposure I wanted. Then, I switched to manual focus so as to not bump or have the camera try to shift it for me and dialed through the various f-stops.
Step three – simple post production: camera calibration, white balance, and lens correction. I also applied a 75 value to the sharpening slider from the detail panel, but did so universally. So, with everything but aperture constant, here’s the results:
So, at this point you should have enlarged the photos above, and scrolled through the entire gallery so you can see exactly what is sharp at f2.8 all the way through f16. By the time you get to the end, so much has changed and often gradually, it’s hard to see the difference. But if you look at the f2.8 and f16 shots side-by-side – they are worlds apart compositionally speaking. Now I grant you, nails hammered into a 2×4 piece of lumber 2″ apart is not the most artistic piece ever shot, but it hopefully illustrates what can happen to a photo simply by changing the aperture and keeping everything else constant!
WHere do you think creatively adjusting your depth of field would work? Try to think outside the box here too. A few ideas for starters:
A flower from close up…
A portrait shot, with background blurred
Macro photography – bugs and insects, computer chips and parts
There’s a whole world out there with plenty of opportunities to create gorgeous photos with only your creativity to limit you. Where do you want to go today?
A friend of mine is going on an extended backpacking trip, and space is already tight, so he approached me to see if I had any ideas on how he should go about running his SLR for an extended period of time without being able to charge or re-charge. A couple ideas came to mind:
1. First, just buy a battery for each day – not the cheapest route, but the easiest way to ensure power is had all along.
2. Second, what about renting these accessories? If he has two of his own, then renting 5 would run half the cost…
3. Another option was to get a battery grip. Here he could use his own for as long as possible, then switch to disposable AA batteries…
4. Last but not least, solar power…I’ve considered these and even saw them in REI – they were a tad expensive and I am not even sure how one would go about connecting these to an AC charger. You’d need the solar panel, then a male USB/AC converter, then the charger. And the other factor would be how much of a charge you could get off that…in addition to weather concerns. What if it’s not all that sunny?
Given the options, my final recommendation was to go with option 3. It’d be a sound investment, would actually make the gear easier to hold on to, and often more stable than going w/out. He agreed and will likely buy based on my recommendation. It’s always a good feeling to be helpful to others, but before he does, I asked him to hold off for a day or two if possible, because I wanted to throw the question out to the readership…what ideas does the audience have for my friend?
Some of the rental outfits I’ve pointed him to include:
I’ve not had the benefit of experience with any of these vendors as we have a local camera rental shop that gives pretty good rates, so I always rent local from them. Anyone have any experience with the national rental outfits? Would really be helpful to get some external input here as he is leaving soon on his trip and could use some direction. Sound off with your ideas!
A fellow photographer mentioned to me the other day that there did not seem to be a good resource online where one could go and read reviews on photography books. Sure, there’s the canned ones from Amazon, Borders, Barnes and Noble, etc., but nothing that was out there just for photography books!
I started searching and sure enough – she was right! So, as a sort of philanthropic venture, I decided to create a website for this purpose. While the design is a work in progress (we all know about WIP’s, right?). but the site is live and the forums are ready for people to start contributing their own reviews on any number of photography books. I’ve tried to break the categories out in a hopefully logical structure, so take a peek, register (it’s free) and start sharing your own thoughts about books from your own library!
Who knows – in time, this could become a pretty exhaustive library of reviews, and discussions on the state of the photography book industry! To do it though, I need your help, so take a moment and register today! Happy reading!
Over the weekend I had the distinct pleasure of joining my colleague and good friend Kerry Garrison (who you probably know from Camera Dojo) out “in the wild” as we traveled to the Breezy Point Resort north of Brainerd MN (about three hours west and north if the twin cities) and spoke at their Northern Lights conference. Through the coordination of our sponsor, Nations Photo Lab, and the conference hosts, MNNPA, we had a wonderful time. Not only did the coordinators treat us like Rock Stars (we did give some autographs though), the attendees were quite engaging too.
The pre-conference sessions were set to start at 12, and our gig started at 5. After a few of the logistical things were addressed that always come up with hosting conferences (they even had a live wedding going on one room next to us – what a great opportunity for a bride to get a wide range of photographers applying their trade), we got rolling. A mere five minutes into our introduction, we paused to add even more tables and chairs to the room as more and more people started filing in. For a regional conference to have a crowd this big during a pre-conference tech talk was quite surprising, but also very enjoyable. So, what did we talk about?
The topic was none other than Lightroom 3! We talked about how to navigate around, some of the benefits and tips and tricks of LR to soon realize that we are very fortunate to be in the position that we are. It was humbling to realize that we really are on the cutting edge as so many people are using Lightroom 1, LR 2, or even earlier generations of Photoshop for their workflow. Our discussion quickly was adapted to both demonstrate why and answer questions on what makes Lightroom 3 such a useful tool for both established and emerging photographers.
The questions raised were just wonderful ranging from very broad-ranging ones like “Why should wedding and portrait photographers care about upgrading their work flow?” to ones as detailed as “Can Lightroom manage PSD files?” and “How can I keyword photos during import?” By the time our two hour segment was up we had barely covered the import process, a little bit on the adjustment brush, and the nuts and bolts of things like cropping, selective color, and black and white conversions.
Ours was the last segment for the day and we were then invited to the after party over in one of the adjoining houses. Food snacks, drinks and such were all available and in abundance. With the abundance of spirits, everyone was in great spirits themselves as we laughed and talked further with lots of people about photography stuff until the wee hours of the morning. By 1am we were done though and needed to head back to our respective cities (myself to Denver and Kerry to Anaheim, CA). So, during our road trip back to Minneapolis for the return flight, we decided to record this show for you. Answers to all the questions above and more are here, as well as a few photo opp stops! Thanks for taking the time to listen, hope you enjoy it and we’ll be back again soon with more photo goodness!