Lately the internet has been teeming with people fixating on the latest iPhone release, and questions are coming through the woodwork asking the same question over and over. Everyone thinks they are coming up with an original question, just because they changed one word here or there, but essentially all these questions come down to smart phone cameras versus traditional cameras. I’ve answered the question so much via email, in forums, on Reddit, and in Quora that I finally said “enough is enough”. For all who want to ask the question, I am going to direct you to this post!
Smart Phone Cameras in a nutshell
Let’s break down this phrase a bit – smart phone cameras What does this mean? It means the phone vendors like Apple, Samsung, LG, Huawei and the rest are adding cameras as software applications to sit on top of these cell phones. I’ll say that one more time for clarity. At their core, these devices are cell phones. So, on that basis alone, why would anyone want to draw a comparison between an add-on feature to a device designed with photography in mind?
The answer lies in dollar bills. That’s it – money! Vendors want to sell more devices, and if the phones can’t really be improved (let’s face it, cell phones are merely a function of the network they are on), then sales plummet! Think about it – iPhones, Androids, and the rest all must be on a cellular network for their original designed purpose of making phone calls, right? So, off the top of your head, how many cellular providers can you name? Not regional ones. I mean Tier 1 providers! I came up with 4/5:
Verizon
AT&T
T-Mobile
Sprint
US Cellular (don’t really wanna count these guys, but ok…)
I think the phone makers agree:
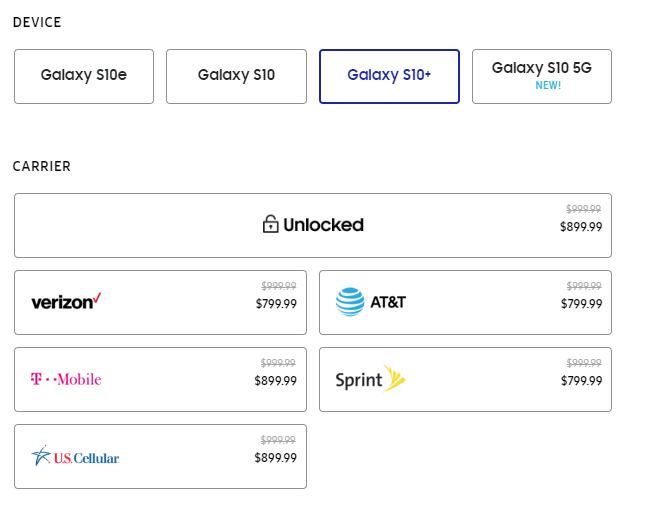
iPhone Carriers offered

Samsung carriers offered
The others, like metroPCS, Cricket, Go Phone, etc. are really just smaller ones that piggyback on the major providers networks (and many are actually owned by them!)
So, don’t fall for the hype. iPhones, Samsungs, and every device out there as far as their phone service goes, is only as good as the network it lives on. They can’t sell products that way, because the experience will be different for everyone, based on the network and where the customer lives relative to the towers. So, cell phone vendors try to stand apart by their add-ons. That is the only reason why every vendor tries to hype their accessory apps like cameras, computer speeds, and media storage aspects of these ridiculous tiny devices (of course tongue in cheek when you consider that these devices have more processing capacity than what we had when sending a rocket to the moon!).
But, everyone likes cameras, and photographs are a part of our lives. We are a visual society, so everyone wants a camera they can always have with them. Naturally, since we always have our cell phones with us, it’s sheer brilliance to make the camera feature the selling point.
But the cameras are crap.
There, I said it. Cell phone cameras are crap compared to dedicated cameras. Don’t believe me? Check this out:
Here is a photographic representation of various camera sensor sizes ranging from a medium format camera, all the way down to the sensor sizes of point-and-shoot cameras, with their actual dimensions (courtesy of Wikipedia):

I don’t even see a cell phone camera listed, so off to Google I went in search of the actual dimensions of a cell phone CCD sensor for capturing images. Here’s what I found…

So, the sensor in a smart phone is about 7mm x 6mm in physical size. The author claims that’s “about the same as a 1/2.5″ sensor”. I actually think it’s closer to the 1/1.7″ range, but that’s miniscule…
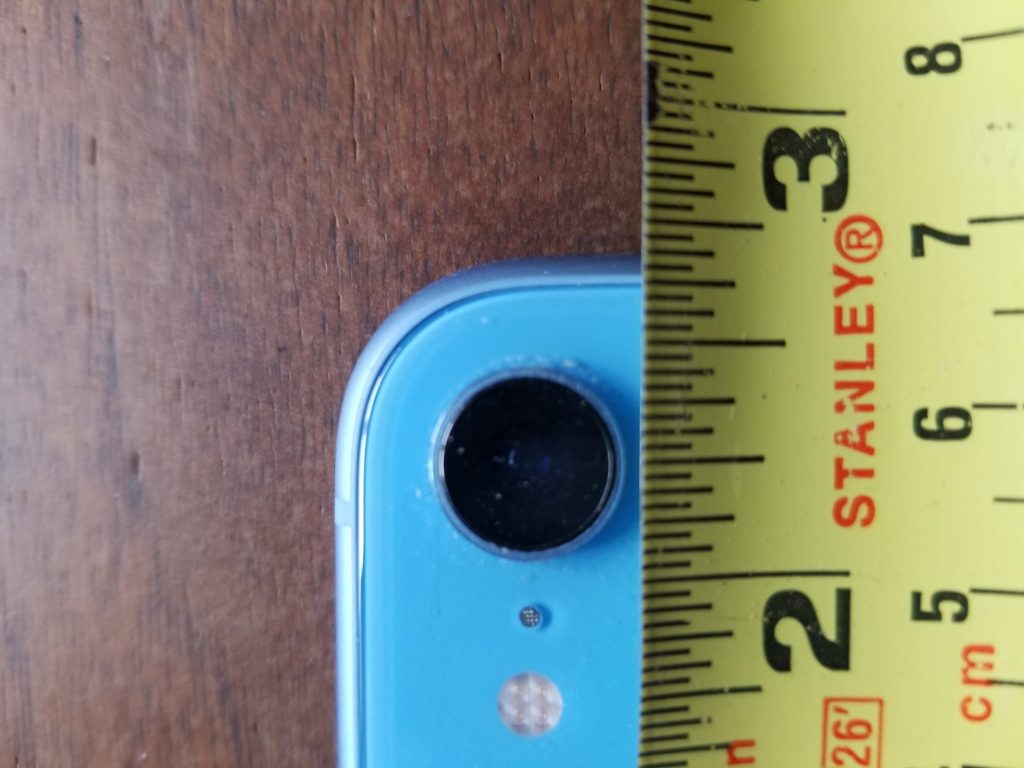
A meaningless measurement from the outside looking in, but it looks to me based on the lens that the sensor is about 1/3 of an inch. Interesting that this sort of information is not readily available from Apple, Samsung, or other phone vendors. I wonder why?
The answer is because at the end of the day, the sensor on these cameras are teensy tiny miniscule little things that are crammed into the innards of a phone, trying to get you to buy into the fact that the CCD sensor of the phone (thus making it a “smart” phone) is better than the sensor of an SLR, or even a point and shoot.
I’ll go to my grave saying that it’s not better, and never will be. Simple physics prevents it.
Lenses
If you ask any photographer the question of what camera to buy (excluding talk of the smart phone cameras), invariably, they will tell you that it’s not the camera you buy into – it’s the camera system. More specifically, it’s the glass that matters. The reason for this is because the camera is just a box that houses the sensor, and it’s the lens that defines the clarity of the shot, your aperture range, and even the sharpness of the glass comes into play. I know photographers that refuse to by Tamron or Sigma glass because they claim it’s “not as sharp as Canon” lenses. I’ll leave that argument aside for now, because the point here is to highlight that even if we were to exclude the sensor as not being as much of a factor based on this concept, we need to now look at the lenses in these phone cameras.
So, let’s do that for the iPhone 11:
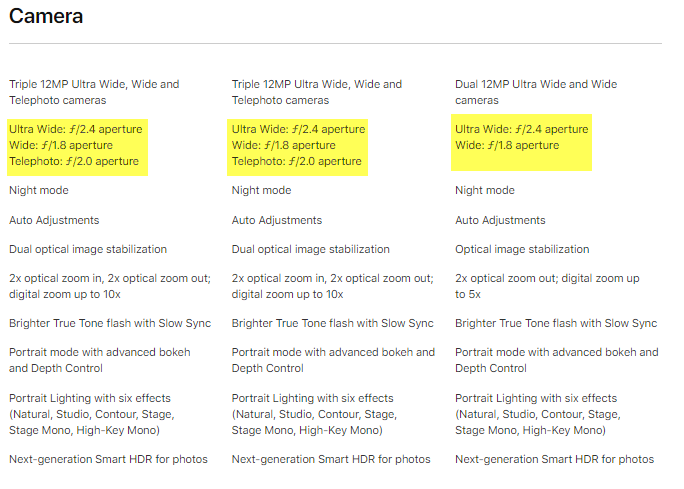
That’s actually better than I would have thought, because most predecessor phone cameras had fixed or nearly fixed aperture sizes on their lenses. But a range from 1.8 – 2.4 aperture opening is impressive, as it’s nearly a full stop (read more about apertures and F-stops here) so I’ll grant that. Now let’s compare that to the absolute cheapest lens for a Canon lens at B&H Photo (I looked at the EF and EF-S lens mounts). I also could have picked Nikon, Pentax, or another maker, but I am CanonBlogger for a reason: 🙂

So, for $125, I can get a lens that goes from an f1.8 all the way up to f22? (That’s about a 6 full F-stop range by the way, for those of you keeping score..) A smart phone camera will never compete with that. Now, for the average Joe (or Josephina) consumer, what does that matter or mean? It means from a smart phone, you’ll always get images that look like this:

And never get images that look like this:

Now, with my rant over on the differences between the camera apps and sensors in phones versus the dedicated SLR and even point and shoot cameras, I need to clarify something.
Software
The way that phone cameras are able to get some apparently stunning imagery is not because of the camera – it’s because of the software. So, if you really want to compare apples to apples, the comparison should be between phone camera software and standalone software. And I will grant you that the software the developers at Apple and Samsung have done some amazing work as to what’s baked into the computational algorithms. The problem lies in the fact that it’s baked into the phone. We have no control over it.
Now, devil’s advocates will say “There’s an app for that” and sure, there are tons, but that’s not a fair comparison, now is it? Comparing a software app from a phone camera to a dumb SLR that has the sole purpose of capturing images makes no sense. So, if you want to get into a discussion of software comparisons, we can do that, but we need to make it an apples to apples comparison. Which one would you like to start with? We could start with a comparison to Lightroom, Photoshop, and others…

But if anyone tries to tell me that the hard baked software for photo editing in a phone can compare with Photoshop, Lightroom, or any of the above, I’ll… well, just don’t! 🙂
Printing
Does anyone print images anymore? I am not sure about that to be honest. With social media, Facebook, Instagram, Twitter, Snapchat, and LinkedIn (and probably a whole host of others that I am not hip to), we often are looking at images through this medium rather than by prints. So, my argument here could be meaningless, but…
Take a photo with a smart phone camera. Take the same photo with a point and shoot camera. Try to print them at your local print store. My guess is you’ll be able to print up to perhaps an 8×10 photograph from the cell phone. From the SLR camera – you can go billboard and poster sized effortlessly. Why? Because of the sensor and the pixels.
You see, cramming pixels more tightly together in a small teensy sensor is going to produce something called artifacting, which ultimately translates to bad pictures when you try to print to a larger medium. So, there’s that too…but again, perhaps I am long in the tooth because I don’t know anyone who prints photographs anymore. 🙁
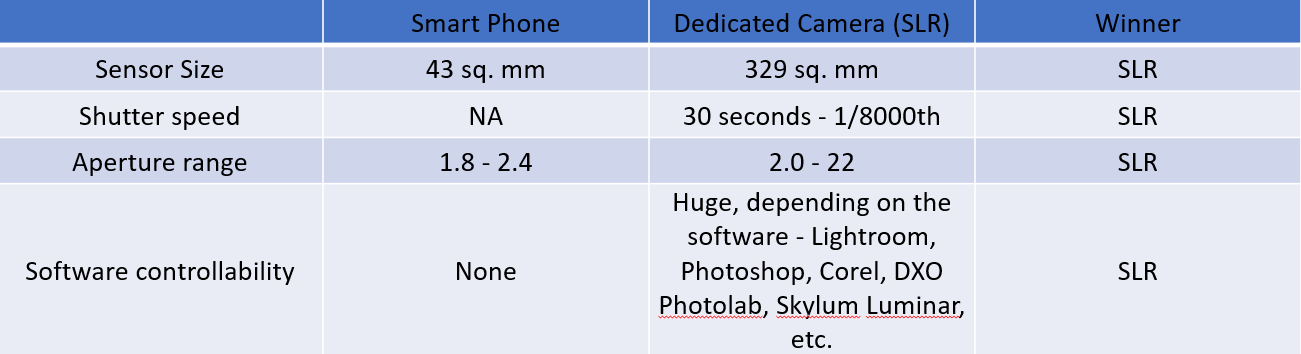
Conclusion
So, there you have it – the full explanation as to why a smart phone camera will never truly compare with a dedicated camera. The SLR will always win. In any category.
What say ye all, interweb citizens of the world? Agree with my assessment? Hate it? Sound off as to why you like what I have to say, or where I am just flat out wrong in my preconceived notions. Otherwise, I’m ready – what’s the next question…?