A lot of the time people ask me what suggestions or recommendations I can give them when they look for a photographer. It’s usually because the person is not in an area I can get to, or it’s a family member or a friend that wants to pick my brain (even though it hurts sometimes! 🙂 ) When I get this question, I tell most people that choosing a photographer is much like choosing a house or real estate: It’s all about location!
What do I mean by this? Simply put: a photographer can shoot on-location. I see many photographers speak to their ability to shoot on-location, and this is an important aspect of many genres ranging from wedding photography, to band photography, and even architectural work. Heck, last week I did a maternity shoot that was “on location.” So, why is this such an important thing to be able to stake claim to? Three key things come to mind for me:
1. Adaptability – Being able to shoot on location means you can adapt. If the surroundings are beautiful, you can adjust your composition to include elements of the scene to give a sense of time and space to an image. If the surroundings aren’t so beautiful, then it equally means you are able to diffuse things so that you can’t tell where a shot was taken – only that it’s a beautiful shot!

2. Controlling – Yes, being able to shoot on location means you are adaptable, but it also means you can control for a number of factors, and of utmost importance here is the ability to control the light. You can bring flash to fill shadows, or scrims to bring shadows to harsh light. If a photographer can control for the light in a scene – the shot will improve by a factor of ten in most instances.

3. Fundamentals – Given the above two factors are in place, this also usually means that the photographer brings a certain set of fundamental skills to the table. He or she knows an aperture versus a shutter setting, and can likely tell you whether ISO 100 is better or worse than ISO 32000 (depending on the look of course!). Although many like to wax esoteric about photography in abstract terms (myself included), there are certain fundamentals that every photographer worth their salt would and should know. If you can shoot on location, you likely have these fundamentals.
These are just three of the factors that I think about when I see a photographer say they are an “on-location” photographer. Of course the proof is in the pudding, and while I certainly would not pick a photographer solely on whether or not that term is included in their online presence, the ability to back up statements with a solid portfolio (and yes, an interview if you have the time to talk to a potential photographer!)
While we all like to think we have these traits, and in enough of a capacity to “bring it” for any client – let’s face it…some photographers are better than others. Either they’ve got a natural knack for it where others have to work harder at it, or they’ve just simply been shooting a lot longer. Seriously…time means practice, and the more you practice, the better you are at anything! There are photographers who have been shooting for decades and some of us can’t hold a candle to them. Meanwhile, others have been shooting for days, and I often stand in awe of their work. So, consider the above three things when you decide to hang out your own shingle – because people will likely be looking for these traits. Do you have them? Do you have more? Less? Something different? Something new?
What traits do you bring to the table? Or better yet, what traits do you think are important for potential clients to consider when hiring a photographer? The above is just my opinion – but that doesn’t mean it’s the ultimate answer! Am I right or am I way off base? Sound off with your own thoughts as the conversation is always the best part about this blog! Can’t wait to hear what you have to say! Until next time, keep the comments coming – oh yeah, and keep on shooting!
For this first of two holiday weeks for the year, the blog will be turning to more of an esoteric theme. Tips, tricks, tutorials, and the like are all fine and dandy, but this week I’d like to pose a question fo whether we are shooting for fun or money!
While clearly we all start in the craft because we love it as a form of expression. We are captivated by capturing the moment, painting a scene with light and color. if we learn the craft well enough, and our eye gets discerning enough, others may ask us to take pictures for them! Or even better, ask if they can have a copy of something we’ve already done. Praise is a wonderful ego boost and source of flattery, and while we all may mask it with self-deprecating remarks, humor, or coyness – no one likes the compliment better than someone who wants to pay them for their work!
“Getting paid to do something you love” is an oft-quoted sentiment, as is the idea that “if you love what you do, you’ll never work a day in your life”. But, truth be told, if you make your living in photography, there is going to be a certain amount of pressure to perform – or produce results. And the minute to take something you love and try to earn a living at it – the pressures of running the business side will reduce the passion you have for the subject. It’s the nature of the beast. You have to eat. You have to have shelter. If you can’t afford those two necessities, how much will you really “love” working as a professional photograper?
The shot today is a perfect example…I absolutely love this shot:
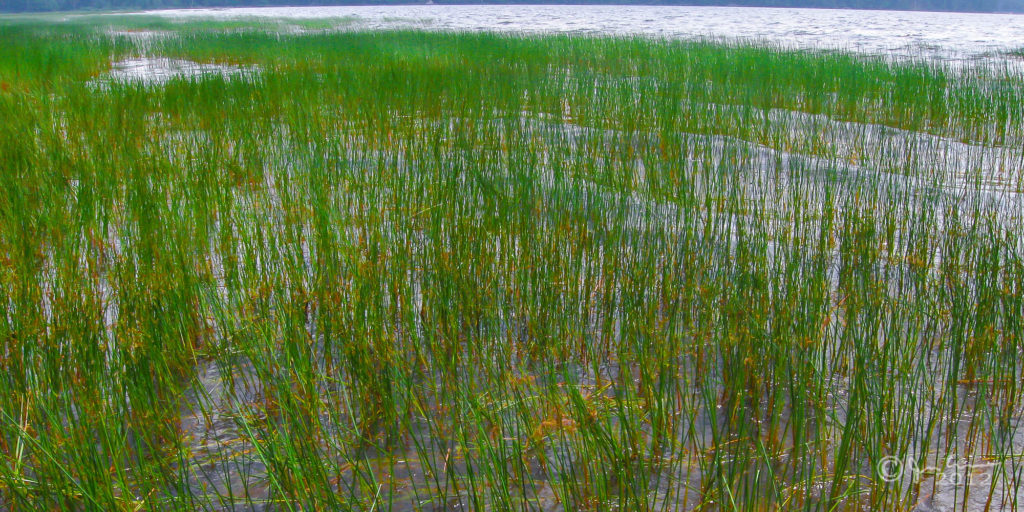
From a critique perspective, this is a horrible shot. The angle is all wonky, the horizon isn’t straight, there is really no subject, and I probably butchered the saturation in post production. But, for me…when I was canoeing with my family this last summer, we were cooling off in Raquette Lake, and I was sipping a lukewarm beer. My brother and brother-in-law were to my left and right…the nephews were out galavanting around being pirates or whatever young kids pretend on trips like this. We were cut off from the world (well, not really, but as close as one can get since there was no cell reception, and only a 9-5 Park Ranger available to sell you firewood at $5 a bundle)., and this shot reminds me of that day. I loved that day, and for that reason, I love this shot!
This shot will never sell though – for no one else except those on this trip, this shot is meaningless until now. I cannot make anything off of this picture. Yet I feature it today on the blog because I took this shot for fun…
The comparison shot I am about to show you actually sold for me on iStock. Now granted, it’s not like I’ve made a ton of money off of it (it only sold once or twice), but it actually sold!
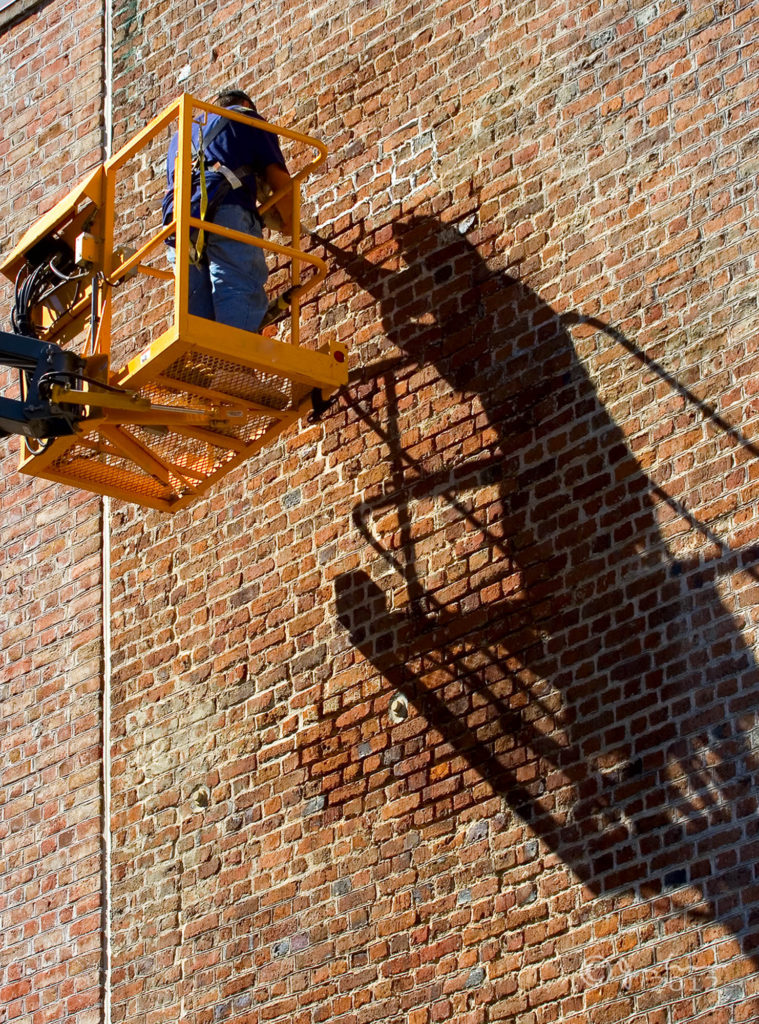
I was on a photo walk, scouting out areas for the South Carolina Photography Guild (now defunct), and the shadow of the guy on the crane, along with the wet bricks from where he was repairing and cleaning the masonry work just stuck out for a reason. I took it from a few angles and this one was the best of the 3 or 4. In the end, it was kind of a boring shot, but it was pretty tack sharp, and when I opened my first iStock account ages ago, figured it’d be a good sample to submit to show I had enough of a grip to consider stock work. The image was approved, along with 4 or 5 others, and my istock account was opened. Within a few days, there was a sale on this shot. Do I like it? Not really. It’s probably on some construction workers website, or someone wanted it for a church bulletin, or a school project or other long-since completed project. It doesn’t really inspire me though.
Which image brought me more satisfaction? Which one brought you more? Would you pay huge amounts of money for either shot? Probably not. I wouldn’t either. Thus, this is the dilemma we face.
It’s no secret that most photographers don’t make huge amounts of money. Yet, somehow the ability to say that “I am a professional photographer” is something said often with a sense of pride. Is it because you know the crap out of pixels, shutters, and apertures? Or is it because you made 50.1% of your revenue from photography last year? Or is it because you love to hear the sound of the click? Last but not least, could it be the excitement at seeing something you made come out beautifully on either a printed tangible piece of paper or in a web page…saying “this is my artistic vision that I want to share with you”. Why do you take pictures? What motivates you?
I was reading a book recently called “Beyond the Obvious” by Phil McKinney (great book by the way) that challenges people to think about concepts and questions, and then encourages people to look beyond the knee-jerk reactions and responses. This same mentality exists in the world of photography. We see a scene, a portrait, or something that catches our eye and our instinct is to capture that “something”.
McKinney illustrates his point in asking the reader to answer the question:
“What is half of 13?”
He then goes on to show that there are many responses to this. The canned answer is always 6.5, and that’s what came to my mind too. But in going “beyond the obvious”, he shows that if you think about it from the perspective of say, a deck of cards, and 13 cards in a suit. Since the ten, jack, queen and king all are values of 10, then really, half of thirteen in that scenario is 5.5, not 6.5. You could also say that half of thirteen is really “thir” with “teen” being the second half! By illustrating that you can divide either numerically or semantically, entirely different perspectives, thoughts, and answers can be right at the same time! Once I got on the mental plane of looking at things differently, my own result was that half of 13 could also be 1 or 3 – applying the semantic concept to the number…
That is such a great concept, and one I’ve always tried to help people understand here in many different ways. The “half of thirteen” way is probably one one the most succinct I’ve ever seen though. Let’s take that concept now and apply it to photography. Go get your camera! Right now…seriously! Go get your camera, and pick some random object in your room, office, or where ever you happen do be. I don’t care if it’s your SLR, P&S, or camera phone.
Now what? Take 13 pictures of that object. Make each one different! Change the angle, change the light, change the object itself. It doesn’t matter what you do, just do 13 different things. I can guarantee you that at least one of those photos will be something new, unique, and even compelling. Now, take the most compelling one, and post it here. To get you started on the right mentality, if you’re not already, here’s my own set of thirteen:
The shots above come from the “Wreck of the Peter Iredale” – on the coast of Astoria, Oregon. Now, granted, the setting sun, and the unique nature of the composition made my 13 shots a little easier, but there’s now reason you can’t do the same. Take a speaker and shoot it from as many angles as you can. Run out of angles? Try a different tack and change the lighting! What happens if you pop an on-camera flash? Try throwing your hand up to act as a barn door of sorts. There’s no end to potential…it just takes thinking outside the box!
A great question came up in my Twitter feed a while back, and felt it was worthy of putting together a short post to help explain the whole concept of zoom on cameras. The original tweet asked:
“What’s the best focal length on a lens to reach 400 yards so I can see a 1 inch square at that distance?”
We started talking about different long length lenses, such as the 400mm, 800mm, and 1200mm lens options from Canon. All were (are) very pricey and beyond the budget for my friend. he then started asking why a 35x zoom point and shoot wouldn’t be an option. So, the discussion turned to a teachable moment! How exciting for a teacher! The recap is two simple points:
Point #1 When manufacturers refer to the zoom of a lens, whether it’s a P&S camera, binoculars, or digiscopes, they are referring to how much of a magnification one can get over “normal viewing conditions”. Notice how I put the last part in quotes. What are normal conditions anyway? What kind of vision is normal? 20/20 vision? And what are we looking at? Something 10 yards away or 400 yards away. The point here is that there are so many subjective factors, the “zoom” isn’t really has hard and fast a number as one would think. We can approximate sure, but it’s not set in stone, and certainly a measurable distance is nothing more than a rough guess.
Point #2 The zoom of an SLR lens isn’t at all on par with the zoom of other equipment – it actually is a hard and fast number. Simply put, the zoom of a lens is the ratio of it’s longest reach to it’s shortest reach. A 70-200mm lens starts with a focal length of 70mm and ends with a focal length of 200mm. This is the distance from the focusing point to the sensor. So, a 70-200 lens has a “zoom” of 200/70 or almost 3x. A 100-400 lens would have a zoom factor of 4. it’s simple math for SLR lenses.
This is a classic example of where the same term can mean different things to different people.
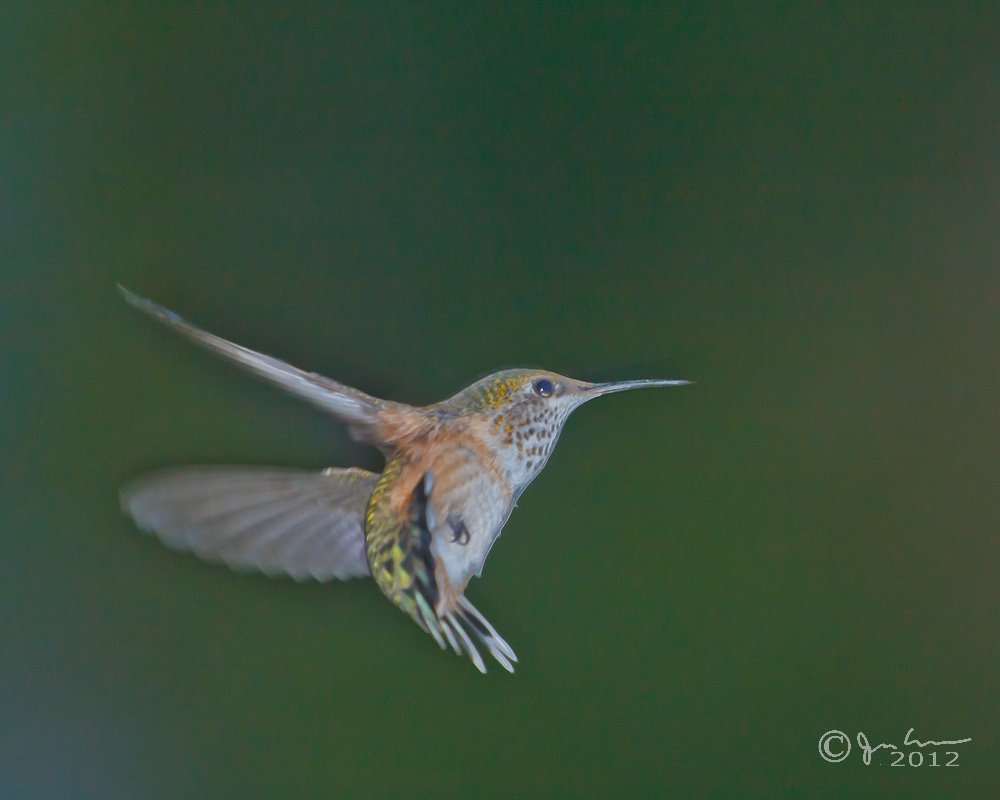
So, my answer to him? Well, to see something at 400 yards large enough to take a decent picture you would likely need an 800mm lens or 1200mm lens. You also probably need a 1x or 2x TC to really get far enough. The problem with taking a picture at this distance is that heat, atmospheric conditions, and just the physical limitations of optics would not make for appropriate conditions to capture decent images. Most wildlife photographers I know of like to get closer than 400 yards from a subject to take their picture, and for good reason. The distance to subject is of prime importance in capturing wildlife photos. Zoom or no zoom (prime lenses), there’s no substitute for proximity! Photography all too often comes down to something along the lines of real estate mentalities…location, location, location!
My best example? A hummingbird I shot from a mere 15 feet away!
Ever feel like your creativity is at a standstill? Something got it on hold? The common belief is that creative or mental blocks come from trying too hard to actually be creative. So, how can we stop trying to hard? It’s not that we should stop trying per se. It’s more that we need to stop trying to make every image a powerful image. Being playful often starts with just laughing at yourself. Seriously…laugh at yourself. Do something stupid or silly. That becomes infectious and can move you forward to play.
In being playful with your work, it’s often even more helpful to put down the tripods, and SLR’s. Put down the lenses and filters. Put down the soft boxes and fill flashes. Being playful means letting go of the “rules” of photography. I’m reading David DuChemin’s book, The Inspired Eye (available now on his website – use EYE3Free for 20% off through Sat.), and in it, he speaks to this idea that that inspiration can come from play.
Some ideas from David include taking a day and try taking pictures whenever the mood hits. Even if you are shooting through wet glass, or in a moving car. Take a picture with your focus ring taped down. The softness from the out of focus shot can force you to look at something more generic like the lines and energy of a scene. It really is inspired capture that David is going for here, and that can definitely come from play.
One of my favorite images from my own library is a niece – I was literally playing. I wasn’t expecting anything great, or show-stopper quality. Just goofing around. I was laughing and being silly, and so was she. I took the camera to ridiculous angles, knowing it wouldn’t work (or so I thought). Just goes to show you the power of play in photography:

The upshot? Take time to play – only good things can come from it!
Most of the time the subject of the a photo is easy to see – whether it’s a portrait, landscape, travel, or architecture. While these subjects are easy to identify, the use of shadows in these topics is not discussed as often as it should be. We spend so much time trying to get the lit portion of our images in focus, composed to our satisfaction, making sure things are sharp, and all the rest, we sometimes miss the value of shadows in our imagery.

The shadows of an image can be just as important to the composition as the lit parts are. When talking about how to light images with strobes and studio lights, the use of shadows to give definition is often discussed, but the same discussions can be germane to naturally lit photos too. Remember, the word photography means to paint with light (photo and graphos), so even the absence of light can be significant in defining our images.

Whether you shoot portraiture, architecture, landscapes, or even abstracts, shadows can and do play a role in how you compose your images. Do you look at the shadows in your images? What story do shadows tell in your work?


Share your own thoughts on how to accomplish a story by shooting with shadows below in the comments – would love to hear others feedback. In the meantime, keep on shooting.

We all have Circadian rhythms or body cycles that are tuned specifically to us…whether you identify that as being a morning person or a night owl. This also applies to your creative rituals too though. Because our body clocks all operate on a unique pattern of restfulness and alertness, we have different times when we are the most creative. Our mind is able to focus on creative ideas and energies, and the distractions of the rest of the world aren’t nearly as distracting. The windmills are out there and we tilt away at them with every fiber of energy! Do you know when your creative zone occurs?
For me, that time often comes right around midnight. If I am not too sleepy, or I power through the initial desire to just go to bed, my mind suddenly becomes much clearer, my vision focuses, and I get so much done from my creative space, it’s kind of eerie. Tracy woke up once to find my literally typing a million miles a minute…the thoughts couldn’t get out of my brain fast enough. After about 3-4 hours of it though, my entire body just shuts down. The exciting thing though, is that I’ve been able to identify this creative zone. I know if I need to get some writing done, or some post production work on photos, or anything creative – those are the hours when I get the most accomplished.
We’re all different though, some people have this rush of creativity in the morning, or in the middle of meals or other activities. I’ve talked to so many people who still are unsure of when they really are at their creative best. When people attend workshops and get immersed in a creative world, the ideas flow much more naturally. The same holds for conferences, seminars, and any type of learning environment. It’s like the mind knows that other creatives are around and the energy for learning and expression is much higher than what we are normally exposed to. The trick comes in being able to identify when your creative zone normally happens when you are in that daily routine. Is it right when you wake up? After that first cup of coffee? Right before you go to bed at night? Or is it on those sleepless nights at 2am when your creative juices just start flowing?
When is your creative zone?
Often when I talk to people about their work flow one big question and the need to do some pixel based editing in Photoshop, one of the questions that often comes up is “Why can’t I do X in Lightroom?”
Most of the time, it involves answers that include explanations of pixel based editing versus parametric editing, and lots of other technical reasons as to why certain things can’t happen in LR. But sometimes (and this is the best part), I find out they are adding to their work flow because it can be done in Lightroom! One of the most common ones is masking effects. When I show people this, I almost always get a “Holy Cow!” or some other variation on the “cow” part.
So, today I thought I’d share a quick tutorial on how to implement masking edits in Lightroom. Let’s take a look at the base image I am using here – a boat dock on Raquette Lake in the Adirondacks of upstate NY:

So, the dock here is a significant portion of the subject, but it’s way darker than the rest of the image, and really could be increased by a stop or two relative to the sky. So, rather than round trip to PS, let’s see what we can do here. I’ll start off with making a general masking selection of the entire area. So I check the Adjustment Brush (near the top of the Develop Module on the far right hand side), and then at the bottom of the image (over on the left), there’s a box that says “Show Selected Mask Overly”. I check that box. Then I just start painting!

It’s a prety broad brush I’ve used, so we need to clean it up, as some of the water got caught and that will leave an ugly halo effect if I don’t take care of it. So, to get more detailed selections completed, I zoom in, and then switch to erase mode while still showing the mask. This is in the lower options of the Adjustment Brush, on the right hand panel – see where it has “A”, “B”, and “Erase”? Click the erase and start painting again to undo the mask:

You, of course, will have to adjust the size, feathering and opacity of your brush to taste, and to accommodate your brushing technique as needed (hint: Wacom tablets work better than regular mice or trackballs). Once you’re finished with your refining of the mask, go ahead and uncheck the option to display the mask and see your results.
At this point you can actually do something else kind of cool – hover your mouse over the dot that is on display and then slide it to the left or right as you see the exposure increase and decrease for the selected area! Pretty cool, eh? This same technique works with other features in the adjustment brush, whether you are working on eyes, teeth, dodging, burning, or even skin softening. The scrubby slider is a nice feature in here. Then, finally, one thing I’ll do is make a side-by-side comparison of the image in a before and after mode to make sure my changes aren’t too garish or over the top (you can do a side-by-side comparison, top and bottom comparison and even split the screen between the two for a more detailed look):


Like this tip/trick? Got any other comments, questions, or curiosities of how to leverage Lightroom more in your own work flow? Sound off in the comments, and as always, keep on shooting!
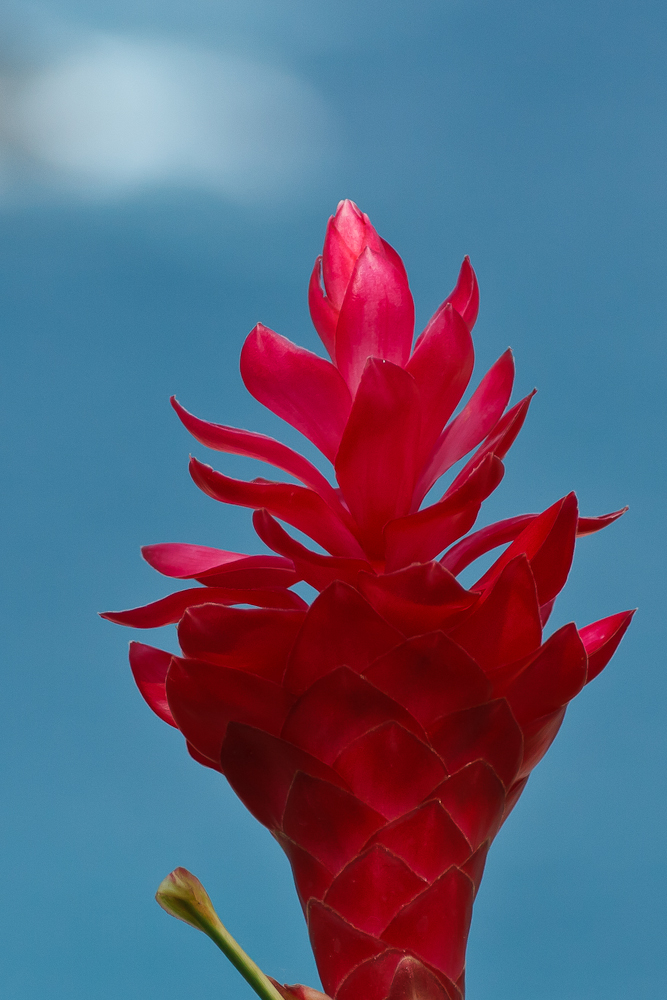
As you may or may not have noticed, the blogging schedule has sort of gotten re-aligned again. I had slipped from the 5-day schedule down to a 2-day schedule, but during a recent getaway, I was able to get things back on track. Hopefully there won’t be any more changes to what is now a Mon-Wed-Fri setup, but news-breaking or other earth shattering info may trump the normal order of the universe! In any case, during the break, I happened across a few really good photo ops. Some gorgeous vistas and scenery, plus an occasional animal sighting from the trip to Puerto Angel Mexico (you’ll get more info if you subscribe to the free PhotographyBB magazine as a full-length article with many more photos is due out next month).
Nevertheless, since photos have not been at the forefront, I wanted to dedicate an entire post to sharing some photos from the trip here with you. So, without further ado, some selects from the trip!