Go soak your gear!

It pays to review your web traffic periodically because I just learned a way that your bathtub can be used for photography!  Not only is it a good place to mellow out after a stressful shoot, but it also makes a heckuva softbox!  I was on a forum that had referenced the blog and a guy had some product that he placed in his tub.  I thought it was an interesting idea, and decided to give it a try.  As it turns out, the tub is a great place to put your gear!  Granted, not to soak it (sorry, but I had to tease the title that way), but to act as a great background and softbox combined in one.

Here’s a few sample shots.  For all the tech-types, these are pretty much straight out of camera (or sooc) – all I did was adjust the WB for Flash and adjust the ACR sharpening from 25 to 75.  All are resized to 650px wide for the blog.  Here’s the setup:  I took the Canon kit lens (18-55) on my 40D, threw on the 550EX, and set everything to default values.  Shutter at standard sync speed of 250, aperture at f8 and ISO at 100.  I powered the 550EX at it’s standard setting, on camera (relax strobists – I can hear you shuddering from here),  and started firing a few shots.  I pointed the flash to camera right and got this:

ruler1

Yup, that’s a God-awful shot, with a nasty shadow.  Perhaps I could ditch the shadow.  Since we’re not exactly using conventional wisdom here, let’s try it with the flash pointed straight at the subject:

ruler2

Hey!  That’s actually not too bad.  It’s not that great, and still definitely a “Meh” kind of shot as it’s still got something of a shadow.  So, I spun the flash to fire above me and bounce off the ceiling:

ruler3

Voila!  You know what?  For being a spur of the moment thing, and without a lot of pre-planning or preparation, that’s not bad at all.  And, it was shot in a bathtub!  Anyone else out there have a bathtub?  Try some shots in it for different items.  I used a tape measure, but what about a pen, or a microphone, or a printer, or even a lens?  I bet you could get some pretty cool results with very little setup!  Anyone else have some odd or unusual ways to get clean backgrounds and even lighting on the cheap?  Feel free to share your thoughts, ideas, and feedback in the comments.  Feel free to link your own efforts there too!  Happy shooting all and we’ll see you back here again tomorrow!

Setting bracketing exposures – shutter priority

As promised yesterday, today I will be talking about bracketing your exposures based on shutter priority.  After a couple comments yesterday that it seemed unusual to bracket on aperture rather than shutter speed, I felt that in this companion post I should acknowledge that, it is.  The reason for the post?  One of the downsides I mentioned is that your depth of field will change considerably from a wide open setting to that of, say, f22.  That can also be an upside though because as you merge bracketed exposures into an HDR image, you can also add depth of field if you make the adjustments in aperture priority over shutter priority.

Additionally, I led off with aperture priority because it’s not the norm, and as most readers will know – I try to approach things from a new perspective when possible.  Finally, as I followed up with in the comments section, the simple fact of the matter was that I could not remember whether 250 or 200 was the absolute middle point for shutter speeds (this is the risk of adding gray above the brain, rather than to the brain! *grin*).  So, I led off with the post where I knew the numbers rote! 🙂

So, in the interests of full disclosure, shutter speed is a more common way to go when making bracketed exposures.  After verifying my numbers in camera, here’s how it breaks down using shutter speed to bracket multiple times:

fstopshutter

I also realized that I did not give the step-by-step yesterday, so here’s the process I would follow:

  1. First, meter the scene, set your camera to ISO 100 and exposure priority and adjust to 1/250th of a second.  Check where your f-stop is.
  2. Second, switch to manual, and adjust all settings to match that metering.
  3. Third, adjust the shutter speed down to 1/30th of a second, and fire off 3 exposures and the camera will bracket over and under one stop.
  4. Fourth, adjust the shutter speed up to 1/250th of a second, and fire off a second set of three exposures (the camera will bracket over and under one stop).
  5. Finally, adjust the shutter speed up to 1/2000th of a second and fire off your last set of three exposures.

Voila!  You now have 9 exposures to merge together for a bracketed workup to take advantage of a high dynamic range, or for exposure blending, as desired.  Of course the same rules from yesterday also apply:

  • Be shooting on a tripod
  • Be using a remote release (or timer)
  • Be using mirror lockup
  • All other settings remain constant
  • and that lighting conditions aren’t changing appreciably
  • You are set to manual focus
  • Your lens is set to its hyperfocal distance

Any final thoughts to share on how to bracket exposures?  Anything I missed or additional tips to share?  Feel free to sound off in the comments section!  In the meantime, Happy Shooting and we’ll see you back here again tomorrow!

Setting bracketing exposures – aperture priority

Over the past few years, I’ve had several people ask me how to set bracketing exposures on camera bodies for multiple exposures.  When I say multiple exposures here, I am talking in excess of 3 shots.  The reason for this is because by default, most Canon cameras (at least all the ones I’ve put my hands on) only have a single over and underexposure allotment on each side of the initial exposure settings.

Let’s take a look at the numbers…say we meter a scene and it says that according to the center point, we should be at f8, with an ISO of 100 and a shutter speed of 250.  So, if we want to expose this multiple times over and under that initial group of settings, since Canon only allows 1 over and 1 under, we will need to make additional adjustments if we want more than the 3 exposure set.

Here’s the entire f-stop range (well, not all of it, but enough for our purposes):

fstop

So, in order to get the full range of exposure, our aperture would need to manually be set to f2.8, f8.0, and then f22 and then let the camera capture the over/under.

For ease of manipulation I always start at the lowest end and work my way up, so in this scenario, I’d start with f2.8, press the shutter 3x, then move up to f8, repeat the shutter press 3x, then finally to f22 and press the shutter 3x.  That would give me a nine stop range of the same image at different exposure settings.  It goes without saying here that in such scenarios, you would want to:

  • Be shooting on a tripod
  • Be using a remote release (or timer)
  • Be using mirror lockup
  • All other settings remain constant
  • and that lighting conditions aren’t changing appreciably
  • You are set to manual focus
  • Your lens is set to its hyperfocal distance

Things that are problematic with bracketing in aperture priority are:

  1. Your depth of field is changing considerably as you move from f2.0 to f32.o so much of what is out of focus at f2 will be considerably sharper at f32 even though you are set at your hyperfocal distance.
  2. Lighting conditions will change.  Unless you are in a studio environment and flash is the only light source, ambient light is constantly changing,and this will have an impact on your exposure values.  Granted if you move quickly and methodically, this can be minimized, but due to the ever-changing values of light, this is something to consider!
  3. Weather conditions will change.  The scene that was perfectly still 30 seconds ago while you did the first bracket may not have perfect stillness for the second bracket set.  Changes in wind speed, direction, and intensity can blur things like flowers, branches, grass, and even some objects that you otherwise would consider fixed.  (Ever see a lamp post in a strong gusty wind?  Or a street traffic signal?)

Any other mechanics, pros and cons or points of discussion I missed here?  Feel free to chime in with your thoughts on bracketing exposures based on apertures.  Don’t forget to tune in tomorrow too for the backeting exposures on shutter speed, along with its pros and cons.  Happy shooting and don’t forget the Twitter v bloging poll from yesterday!  If you’ve already voted, tell a friend!

Facelift Friday

With February now in the archives, I figured this may be as good a time as any to get a head start on some Spring Cleaning with the blog.  The theme I had been using for the last year or two had been getting a little dated, and the designer has not issued any updates since 2007.  Additionally, some portions of the blog just were taking more muscling to conform to the evolving standards of CSS, XHTML, plugins, and even WordPress itself.  So, consider this a Facelift Friday!

Those of you on the blog, you can see what I am talking about – this new theme is much more photo friendly – the header image is more standardized, so I can start putting more of my images into the rotation for everyone to enjoy.  Plugins also enjoy more support, as does the RSS, calendar, and other sidebar features.  For those of you picking this up via the feeds, please take some time to stop over and enjoy the new layout.  This is, of course, the “first look”, and I will likely be making some adjustments as things settle in, including widening the body width for the main posting area, and dressing up the edges a little.  Any ideas for what to consider?  More pics?  Perhaps some page links?  (I noticed the pages area is now not visible from the main one…)  Feel free to chime in now while I am still in “clean-up” mode!

Okay, so the Spring Cleaning is a little premature, but felt it was needed due not only to update some features, but also due to some coding deficiencies were brought to my attention (thanks, and shout outs to Kerry of Camera Dojo!).  Anyway, on a happy note, I’ll leave you with a little WTD humor since it’s been a while for a comic post:

What the Duck
What the Duck

Have a great weekend, and don’t forget to share your thoughts on the new theme/layout in the comments – it’s now or never to see your feedback implemented!  Happy shooting and we’ll see you back here Monday morning!

Great Green Gobs of Grapes!

This week has been a particularly creatively filled one here on the blog:

  • Monday I shared the HDR image workup from last weekend and published the weekly podcast
  • Tuesday had another shot showcasing the benefits of looking all around for ideas (including behind you!)
  • Wednesday was the more detailed explanation of the Lensbaby Composer and selective focus

And now today, another source of inspiration from the kitchen!  I was cleaning some grapes for lunches and was struck not only by their size (these things were huge!), but also by the cool way the light in the kitchen was bouncing off each grape in the colander.  It helped that the colander is stainless steel and reflected some nice green tones back onto the grapes themselves, making them look even greener.  On instinct, I took a few, and here’s the best of it (and although it was taken with a 70mm Macro, this was not taken from macro range – that should tell you the size of these guys):

Grapes Galore!

Not too shabby for a “spur of the moment” capture.  Nothing like what you’ll see over at Mike Palmer’s blog (he does a lot of cool shallow dof work with food photography, and is a friend-of-the-blog), but a step in the direction of creativity anyway!  Catch an cool colors in your kitchen lately?  Share your thoughts, perspectives, links to other images, ideas and feedback in the comments section!  Keep on shootin’ and we’ll see you back here for the Friday post!

The Lensbaby Composer

For those of you that are regular podcast listeners, you know I talked recently about the Lensbaby Composer and what it can do for your photos.  In the podcast you heard the terms “selective focus” but the term is kind of hard to explain without a visual, so I thought I might be able to do it better justice with a visual here today.  Take a look at this setup:

lensbaby1

So, if you are looking at a scene from camera view 1, and you want the sharpness of your image (your viewers attention) to focus on something at point B, it’s easy to do this.  Simply drop your aperture wide open and the depth of field will throw points A and C out of focus naturally.  Pretty easy, no photo editing, no trickery or anything involved – the mechanics of apertures and depth of field handle this for you.

Well, take a moment to consider things from the viewpoint of Camera Two.

lensbaby2

You still want the focus to be at point B, but because both A and C are also positioned relative to the camera at the same place (they are not in front of or behind the point of focus, they are merely off to the sides of the point of focus), dropping your aperture wide open will not throw A and B out of focus – they still there, just as sharp as point B.  Well, up until now, you’ve always had to take images taken under situation 2 and bring them into image editing software to blur, dodge, burn, and otherwise minimize the attention that points A and C got from the viewer eye.

Well, what the Lensbaby does, through it’s unique combination of lens elements that include an actual curved optic and a curved field of focus, giving you a round spot of focus, so that it allows you to set point B as a single point of focus, so that A and C will fall off in sharpness, bringing the viewer back to your desired point of what to look at.  (The eye will almost always naturally look for sharpness and light in images…)

So now, dodging, burning, blurring and other darkroom and software techniques are no longer needed!  The Lensbaby allows you to create these visions in camera, not afterward in post processing.  What does this mean for you?  More time shooting, and less time photo editing!  Who doesn’t want that?

The coolest part of the new partnership with Lensbaby is that they’re also offering anyone reading the blog or listening to the show an opportunity to get a 0.6x wide-angle/macro conversion lens for the Composer lens totally free! Imagine taking your creative visions to a whole new level with the Composer lens from Lensbaby – and then add the macro capabilities, and literally, the sky is the limit!  Your creativity knows no boundaries with lens-work like this!  So, if you are looking at adding the Composer lens to your gear bag (and you can purchase it from any retailer), then look no further, because from here you can get a free 0.6x wide-angle/macro-conversion lens from Lensbaby as a way of saying thanks.

Expanded creativity + Free gear = lots of fun

Sounds like a perfect equation for me!  So, stop on over to the partner website they made just for Canon Blogger listeners and readers to get your free lens today.  This is a limited time offer, and I am not sure when it will end, but the Composer and the companion 0.6x wide-angle/macro conversion lens (which you can get for free) would have been very useful this last weekend on the Eldorado shoot.  Remember the rock fissure?  Imagine if I had a chance to fade the DOF out away from the rock completely?  What about the rear window reflection?  Imagine if I could have faded the front window part out of focus completely?  Both of these shots might have ended up in my portfolio!  As they are, I’ve got two snaps that while interesting, will likely never get added to the print portfolio…

Does this help clarify how the Lensbaby works and what it does?  I know it’s a very simplified version, and the folks at Lensbaby have a lot more resources to help explain it than I do so be sure to visit their partner landing page here to learn more about it!  If you’d like to see some samples of the lens at work, (my lens hasn’t arrived yet) make sure to stop over to the gallery page here too!  Got some pics you’d like to share?   Link them here in the comments section (or even share then with the good folks at Lensbaby – they like to hear feedback from the field so share your thoughts and shots with them too!)  Finally, to learn all the details about this promotional offer, stop over to the page the folks at Personal Life Media have set up here.

If you do have pics and thoughts to share here, feel free as always to drop me an email, and you could be on the show!    For those interested in buying the composer, make sure to visit this link here to get the free macro conversion lens!  Questions, comments, feedback and ideas are welcome at my email address (as always) is jason <at> canonblogger <dot> com!

Check them out today – then get back out and keep on shooting!  Hope all your shots are good ones and we’ll see you back here tomorrow!

Look out behind you!

We’re always looking forward, upward and downward to find a unique perspective or angle on things – to create something unique and interesting.  Well, today, I’ve got an example of how sometimes the interesting shots are behind you!  In this particular case, it’s doubly true.

This is also from the photo walk out in El Dorado from last weekend, and what makes it doubly true is because we were out looking to capture the beuaty of the mountains, the trees, and the amazing Colorado skies.  At one waypoint between hiking trails, we took a rest stop and used some of the provided *ahem* facilities.  On returning to the vehicle, I saw this reflection in the rear window of the Expedition:

Rear View

So, the view was created from the back window reflection, and I only caught it by turning my eyes away from the mountains, landscapes, and opportunities in front of me!  When’s the last time you turned 180 degrees to get a shot?  Got any fun stories of when it did?  Share them in the comments!

Don’t forget to stop over and pick up the new feed in iTunes for the podcast and share your thoughts about the new show format!  Here’s the link:  iTunes feed Happy shooting all and we’ll see you back here tomorrow!

Can ordinary be interesting?

A while back I took Tracy out for an afternon/evening in Denver.  I agreed to leave my camera behind, but in case she wanted to catch a moment for posterity’s sake, I grabbed the P&S one she asked for as a Christmas gift.  After her initial interest waned in taking pictures, I ended up with the camera in hand (go figure) and even shared a few here on the blog (remember the bottle caps in the grocery?).  Anyway, it got me to thinking about how to take ordinary scenes and make them interesting.  I guess that’s part of the role of being a photographer:  making the ordinary extraordinary.

We do see the world differently than others, and by capturing our vision, and then sharing it with the world with our particular expression, otherwise ordinary scenes can be seen in a new and different light.  With that idea in mind, here’s one I captured recently (with my own camera) that kind of spoke to me in that way:

_mg_8521

What made this unique for me was the ambient light.  No gels, no lighting tricks or anything – it was on our weekend getaway, and since not very many places outside of mountain cabins have things like wood stoves, the idea hit me to catch this scene.  What makes it (for me) is the fact that the ambient light is very “fireside”.  The tungsten light combined with the sun setting behind the trees outside made this a perfect scene.  So, up went the tripod, the shutter went long, and I kept the aperture up, and noise down.  (5 seconds, f10, and ISO 100 for the techies in the crowd).

I think it worked, but would like to hear from the readers out there.  Does this work?  Can ordinary scenes be made extraordinary?  What about the role a photographer has?  Is there really a “symbolic” or larger purpose for people who enjoy taking pictures?  What do you enjoy about photography?  Feel free to sound off in the comments, as there are no wrong answers here…

In the meantime, happy shooting and we’ll see you back here Friday!

The Power of Action

Until this last weekend, I had very limited experience with astrophotography.  The concepts and techniques of the field are well documented, and I have read several articles on the subject.  What this last weekend demonstrated to me, (and what I often tell everyone who reads this blog), is that there is no better way to learn something than to just get out and do it!  This is the power of action!

Over the course of a pleasantly long weekend with my wife, we had an opportunity to view an absolutely breath-taking night sky, without the pollution of light interference.  The pure darkness of the mountains, coupled with the lack of urban and suburban sprawl, revealed the brilliance of the night skies to me.  As I shared the moment with Tracy, a part of me finally caved and said “Sorry, but I’ve got to take a picture of this!”  Admitting defeat as a camera widow, she went inside, and I tried to recall the articles with their knowledge:

  • Tripod (critical for stability!)
  • Shoot wide (calls for fewer adjustments during long exposures which also means longer shutter speed allowances)
  • Shutter release (never release the shutter manually on such scenes – increases too much vibration)
  • In camera noise reduction…(long exposures tend to create noise as a consequence)
  • Higher aperture (for greater depth of field)
  • And then there was something about the shutter speed…no more than…what?  I could not for the life of me remember!

So, with the digital mantra in place, I tried many different exposures.  My first attempt was a 30 second exposure at f8.0 and ISO 100.  The on-screen results were not that great.  So, I took things to the extremeon my next shot, 30 second exposure, f8.0 and ISO 3200.  The result:  I saw stars on screen!  Excited at the prospect ofcapturing the scene, I promptly returned to the secluded getaway mentality, forgetting the cardinal rule of digital:  to shoot many, many shots, and at many, many settings.

What I also forgot is that in astrophotography there are more than the above considerations to take into account.  After getting home and realizing my blunder, I re-read the articles and remembered that as a general rule, ISO should never go above 800, and because the earth is always moving, you should never shoot an exposure longer than 5-10 seconds, because stars will blur by then.  (As was evidenced during post processing…)

So, the result was nothing too rewarding.  Certainly nothing that will get me fame in fortune in National Geographic or anything like that.  I did manage to massage something close to what we saw with some post work (including some serious Noise Ninja assistance, drastic curves adjustments, the glowing edges filter, and a little black and white conversion, just for starters…

Night Skies

While the end result is “not too shabby”, it certainly is nothing like these stellar (literally and figuratively) shots from Astropix.com I must admit that I am now considering adding to my gear collection, and that I need to refresh on the techniques of astro-photography, the best method for learning is to simply get out and shoot.  Want to capture the light?  Then here’s teh call to action, because it is, after all, the only way to capture the world around you in images!

For those interested in learning more about astro-photography, here’s a couple resources I’ve got in my bookmarks (how I wish I had my computer with me at the time!):

If anyone has their own links, resources, tips, tricks, suggestions, and ideas for astrophotography, feel free to share them in the comments.  In the meantime, thanks for stopping in and we’ll see you back here again tomorrow.

Thursday Thoughts with… Andrew Rodney

This is an historic day for CB, because our next guest here for the Thursday Thoughts series takes thing to a whole new level of quality information.  Our guest this week is none other than Andrew Rodney.  He has agreed to carve some time out of his already busy schedule to contribute to the series here.  Who is Andrew Rodney?  Andrew is a renowned instructor, NAPP Hall-of-Famer, published author (of Color Management for Photographers, Hands on Techniques for Photoshop Users), and well known contributing writer to several magazines including PDN, Publish, Photoshop User, Electronic Publishing, Digital Output, MacWeek, Digital Photo Pro and Professional Photographer.  He also regularly contributes to the forums of the NAPP community, and is considered by many to be one of the best around at color management and is a regular contributor for the Epson Print Academy.  (Which is coming to Denver in April too!)

CB:  Hi Andrew, and thanks so much for taking the time out of your schedule to participate in this.  I’ll get right to things…first with a few of the standard questions.  How long have you been a photographer?

AR:  I started as a kid. My dad gave me his camera, an Exakta VXIIa 35mm that at the time was pretty cool camera with interchangeable viewfinder. Plus it was a left-handed camera. Like many, my first experience in the B&W darkroom was one of amazement upon seeing ones first print come up before my eyes. I assisted a very good commercial photographer in LA in the early 1980s after which he kind of forced me to go to Art Center to get a degree in photography. I left the fall/winter of 1983 to work for the LAOOC who were staging the LA Olympics that summer. I got to shoot for them for 7 months, including the games themselves. It was my first introduction to sports photography and Fujichrome! I went back to Art Center, got a degree in 1988, shot locally doing mostly editorial and corporate/annual report work. Left LA in 1994 for Santa Fe and a new career that wasn’t income generated from shooting.

CB:  What kind of gear have you used over the course of your career?

AR:  From Exakta I went to Pentax, then Nikon, then Canon (as well as Hasselblad, Sinar). I shot with a lot of Kodak DCS cameras too, dating back to the original DCS-1. Now I’m using a 5D-MII, which I’m very impressed with. I’ve been lucky over the years to be able to shoot with a lot of digital capture devices I could never afford to buy. Betterlight scan backs, Leaf and Phase backs and so on.

CB:  So, you’ve clearly been shooting since the film era.  Did you have any particular favorite or are you still shooting with it?

AR:  I became a big fan of Fujichrome, despite its original reputation in 1984 when we were testing it for the Olympics (Fuji was a sponsor). Prior to that, I was a Kodachrome shooter. I can’t recall the last time I shot film that wasn’t for some Film vs. Digital test. I don’t miss film at all, sorry. I had to do a lot of scans in my time, like working all night in the darkroom, it gets weary after awhile.

CB:  I must say, testing film for use in the Olympics is sufficiently impressive!  How about your computer setup?  Do you prefer Macs, PC’s, Linux, or some other variant?

AR:  Mac, since 1988. In the old, old days, Photoshop only ran on a Mac!

CB:  Fair point…and now for the zany question of the day, Chocolate, Vanilla, or Strawberry?

AR:  Chocolate if forced to pick just one.

CB:  With all the sundry stuff out of the way, let’s move into an area with a little more granularity. Photographers often enjoy hearing helpful and constructive critiques of their work, as we are aware of how much we can grow from it.  However, we’ve also all had the “nice shot” and “cool” comments when we’ve shared our work.  What was the singular most useful critique or comment you’ve ever had on work you’ve shared publicly?

AR:  My god, that’s a though one! A great deal of the learning process at Art Center was the “crit”, from both instructor and fellow students. I think that total honesty with the understanding that much of this is subjective is key. That said, I spent two weeks on the Amazon River doing a photo tour with Jay Maisel who is one of the best instructors I’ve ever had. His approach to working with light, color and gesture is always in the back of my mind when shooting. If you ever have a chance to hear Jay speak, it could change the way you look at the world as a photographer. I don’t recall who first suggested that its critically important to scan your frame prior to capturing an image when time permits, really thinking about what’s in the frame and why its important to the image. Cropping after the fact is equally important because sometimes you really need to study the image after capture. Jay really reinforces the idea of ensuring everything in the cropped final is important to the total image. I really love Lightroom’s non-destructive cropping. It pays to revisit images you haven’t looked at in some time and seeing if indeed, the crop works or not.

CB:  Kind of makes me want to go back and look at some of my past images using Lightroom now!  What about giving critiques though?  If someone was asking you for an honest critique of their work, what 3 factors would you look at most (excluding friendships or family relatives, we’re talking professional or fellow photographer-types here)?

AR:  There’s that initial first look that either pulls me into the image or it doesn’t. Going back to Jay, I ask myself “is does this image say anything about light, color, gesture or more than one”? Second, I ask myself,  “Would I want to have this image on my wall, can I view it over and over again and see something new”? There are many images that I find successful that I might not want to view every day. Third, ask myself if I find the image successful due to the image or the presentation (which try to dismiss if possible). I’m seeing a trend these days with images that are printed really, really large because the size makes the image seem more important or more successful. But size doesn’t count; it doesn’t make a lesser image better.

CB:  Wow, I’d not thought of the impact that print or presentation size can have on how imagery is received, but that’s a great point!  Let’s move into something more software and technique oriented.  Being as well-versed as you are in color-management, you know that as Photoshop and other software programs mature and develop, new ways to create images are presenting wider options and possibilities. If you had to choose between the gear or the software as the only way to create, which would it be and why?

AR:  The gear. I’m finding less and less the need or desire to do work in Photoshop once I’ve used Lightroom, my modern digital “darkroom” to process the Raw images. I have to have software! The Raw (even the JPEG) is useless without a way to interpret what is nothing more then a big pile of zero’s and ones. The gear and latent film image, without a processor is equally inadequate. The software doesn’t create the image, so we have to rely on the photographer and some capture device. Some of the newer software is interesting in how it attempts to allow the user to produce some “looks”, like HDR that were not possible or darn difficult in the analog days. I find however that many prosumer photographers (if I can use that term), even some pro’s use software to mimic a “look” someone else has created and I think that’s usually a shame. I have to wonder if we really need plug-in’s that automatically make your image look like someone else’s style.

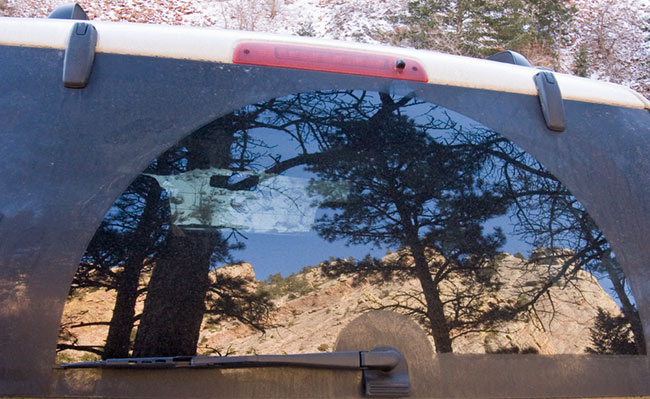
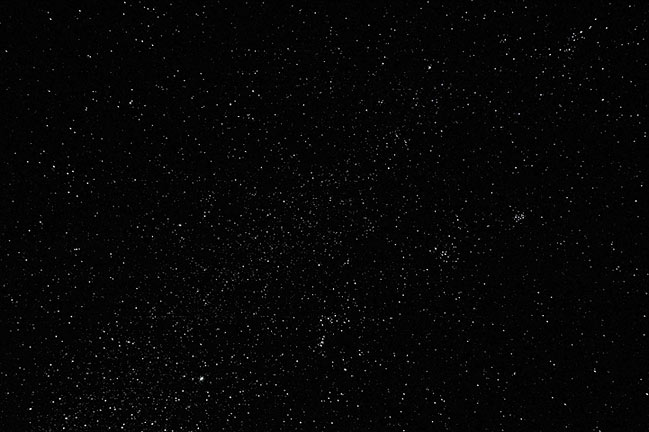
CB:  So, in looking at images you’ve captured with your gear, if you had to pick three pictures out of your entire portfolio to represent your approach to photography, or your artistic vision, which ones would you pick (feel free to share images here)?

Tosh

The image called “Tosh” (Macintosh my dog at the time) that became my logo is near and dear to my heart and was one of a series of such images I did in the early Photoshop days (I started on version 1.0.7).

Digital Dog Photography

Digital Dog Photography

Two recent images from my trip with in 2007 were influenced by Jay (who I’ve known since I graduated from school). I’m uncomfortable with the term “artistic vision” although I do recognize that there’s some creativity involved in making (my) images.

CB:  These shots are fabulous, and it’s nice to learn a little background of your well-known image of “Tosh”!  Thanks so much for sharing these.  Any final thoughts you’d like to share about the state of photography or any catch phrases that you keep in mind when shooting?

AR:  I’m still so surprised that many users who are shooting Raw don’t realize that the LCD preview on their cameras and the histogram isn’t based on the Raw but the JPEG. And they don’t fully associate the differences in shooting for Raw versus JPEG in terms of proper exposure (Expose to the Right). As for catch phrases, I hate the term “accurate” color. You can’t define accurate without measuring the color and 99 times out of 100; measured color produces quite unattractive imagery on a display or output to a print. So when I shoot, I try to view the scene as I hope to express it on output, knowing neither the JPEG preview nor what I first see of the Raw data in my converter is going to be accurate to my memory vision of the scene. It’s still our job to render the print from what we “saw” when we captured the image or wish to visually express.

CB:  Let me say it for the record right here, that I did not know the histogram is based off the jpg and not the raw image.   As for the rest of your closing thoughts, you’ve definitely given me some food for thought, as well as the rest of the readership.  Andrew, again, thanks so much for taking the time to participate.  Have a great time at Photoshop World – I wish I could be there to take a class from you!

Well gang, that’s it for today.  There’s really nothing I can say to really “wrap things up” like I usually do.  You can find Andrew on the web at his website: Digital Dog, as well as through the NAPP forums.  There’s just tons of information on his website, including articles, links, ICC profile services, and much much more, and he is always very helpful to everyone in the NAPP forums!  Suffice to say, after hearing from Andrew, my own position on the learning curve just seemed to drop a little further.  Thanks so much to Andrew, and let’s hope we can take the insights he has shared with us here on the Thursday thoughts series and strive to make our own work better.  Happy shooting and we’ll see you back here tomorrow!