Welcome to Whitehorse

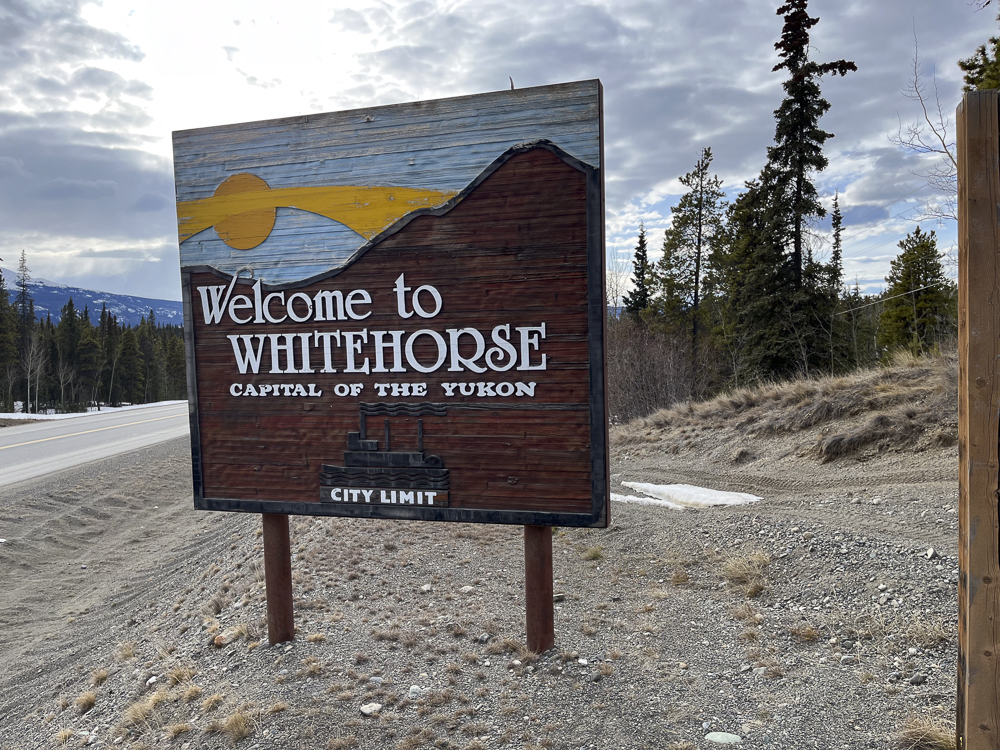
“Welcome to Whitehorse”, the sign says, “Capital of the Yukon”!

Shortly on the heels of work sending me to the frigid north of Yellowknife, where I had a rare opportunity to see the Northern Lights in all their glory, I found myself sent back to the north again, for a second round of training in none other than Whitehorse. I was ecstatic. This trip to Whitehorse was cathartic for me on several levels:

The first predates me. My father visited this town over 50 years ago when he and my uncle transported a car to the owner from the US to Fairbanks Alaska. Their route landed them in Whitehorse prior to the final trek of the Alaskan Highway when it really was nothing more than a roadway of rocks and gravel. Apparently, back then the trek did quite a number on the tires of those who struck out for points west. This was even before Alaska was officially a state of the US (I think they went in 1962). The shanty town they stopped in was the last stopping point for those destined to points west during the Gold Rush of the late 1800’s. They said it had changed little in that time up to the 1960’s, and I learned why when I checked in:

Best Western Gold Rush Inn

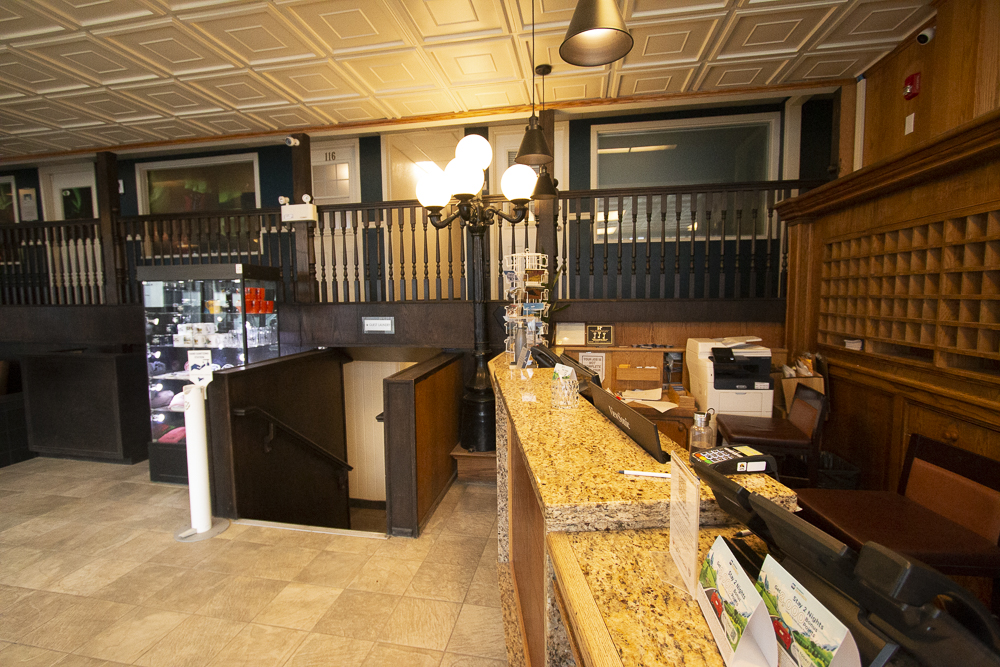
The rustic décor and nature of the Best Western and Goldrush Inn notwithstanding, the remote town of about 28,000 people was very quaint and reminded me a bit of Oneonta NY where I went to high school. Not a lot of the “fluff” of civilization here, and apparently Whitehorse has some of the purest cleanest air in the world if you buy into their promotional content from the Yukon News of 2011.

My training events covered a period of seven days – five on the first week, and two days on the following week. Thus, I had a unique opportunity to do a number of excursions while I was there. These included:

  1. A hike to Miles Canyon (30 minutes one way)
  2. A hike from the Black Stairs to the White Horse
  3. A trek along the Yukon River
  4. Sampling brews from the local breweries (there were 3 of them) that proudly claim using frozen hops as their ingredients.
  5. A trip to Skagway Alaska

1. The Hike to Miles Canyon

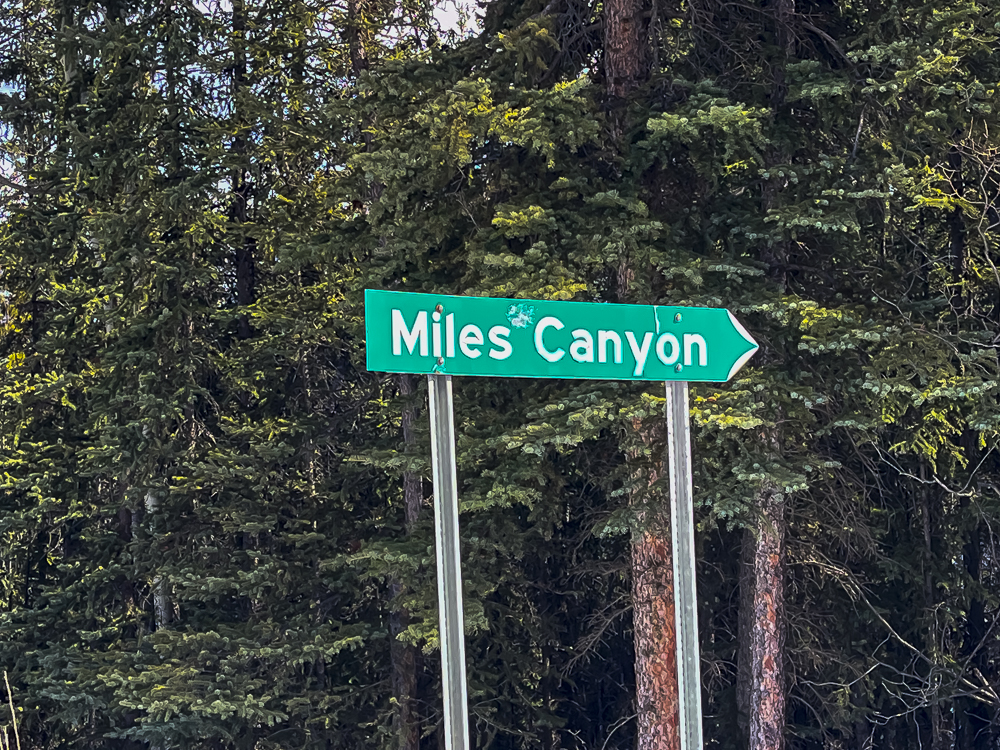
Miles Canyon is named after General nelson Miles from the US Army as he explored the Yukon back in the 1800’s. I did not even know about it, until on one day (I think my first Sunday), I was scoping out how to get to Robert Service Way, and drove past a road that said “Scenic Area – closed seasonally”. There were a lot of cars parked around the entrance though, suggesting people were walking down the road to the canyon, which did turn out to be the case.

Me being the intrepid explorer of paved roads across the Americas, looped back, parked and hiked/walked the canyon on a whim. I’m so glad I did:

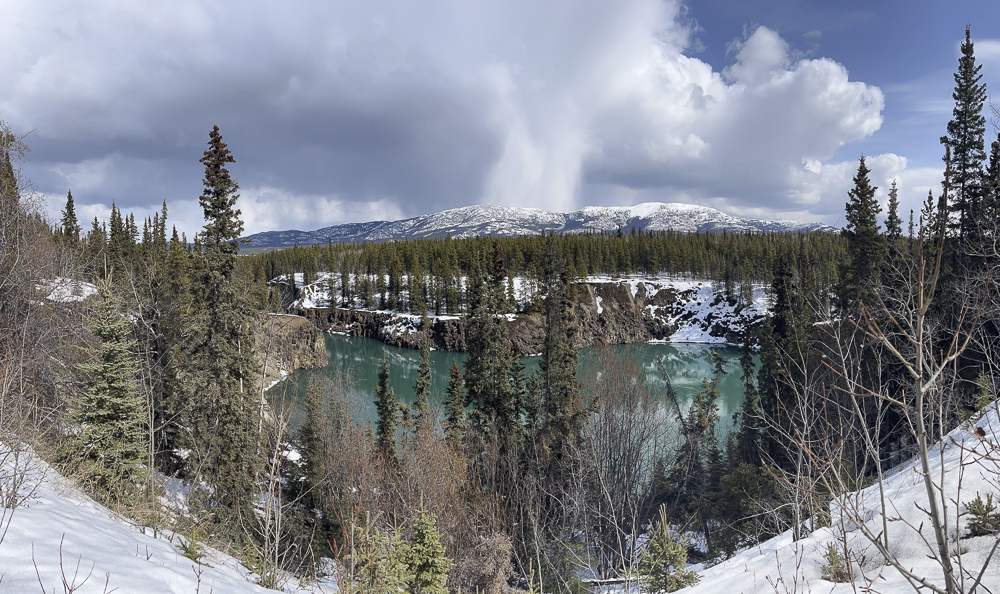
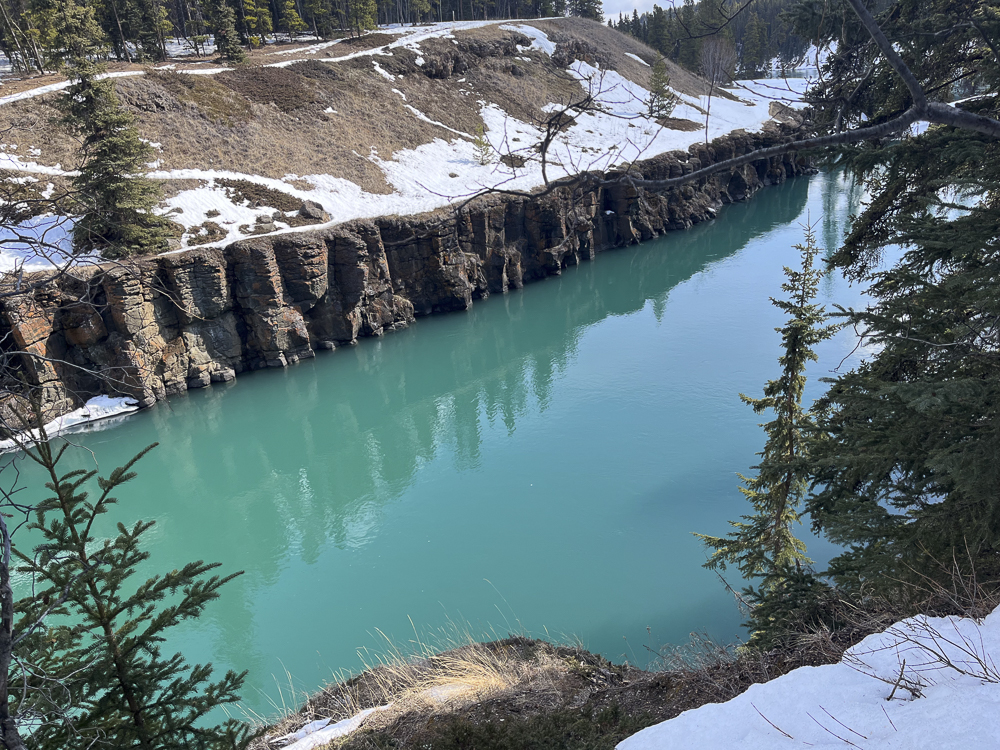
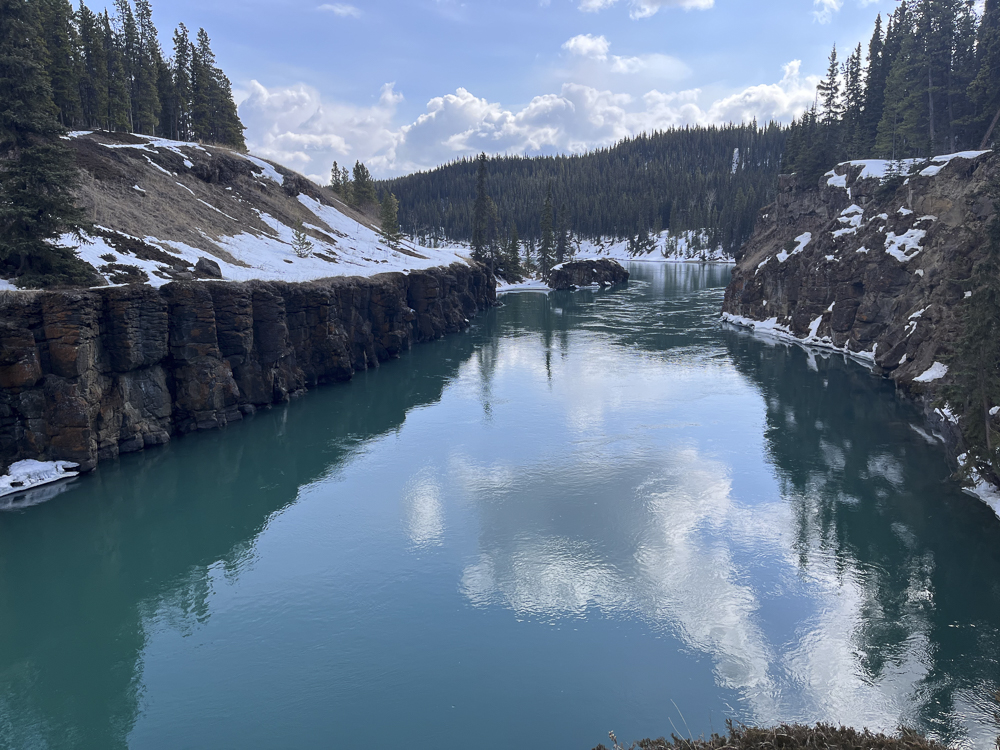
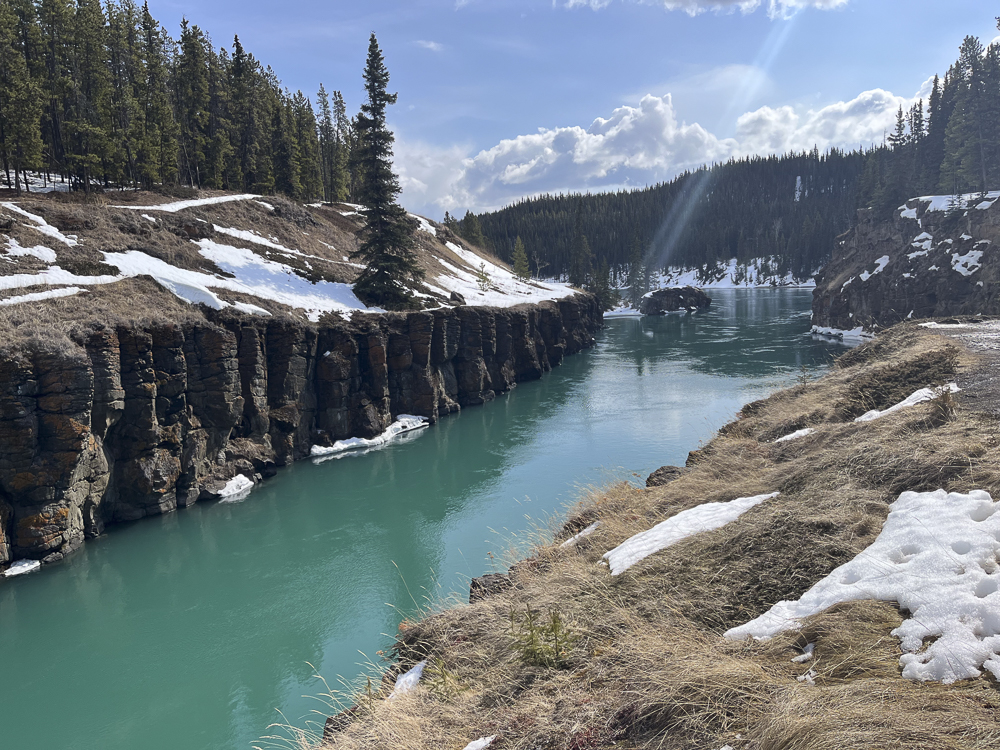
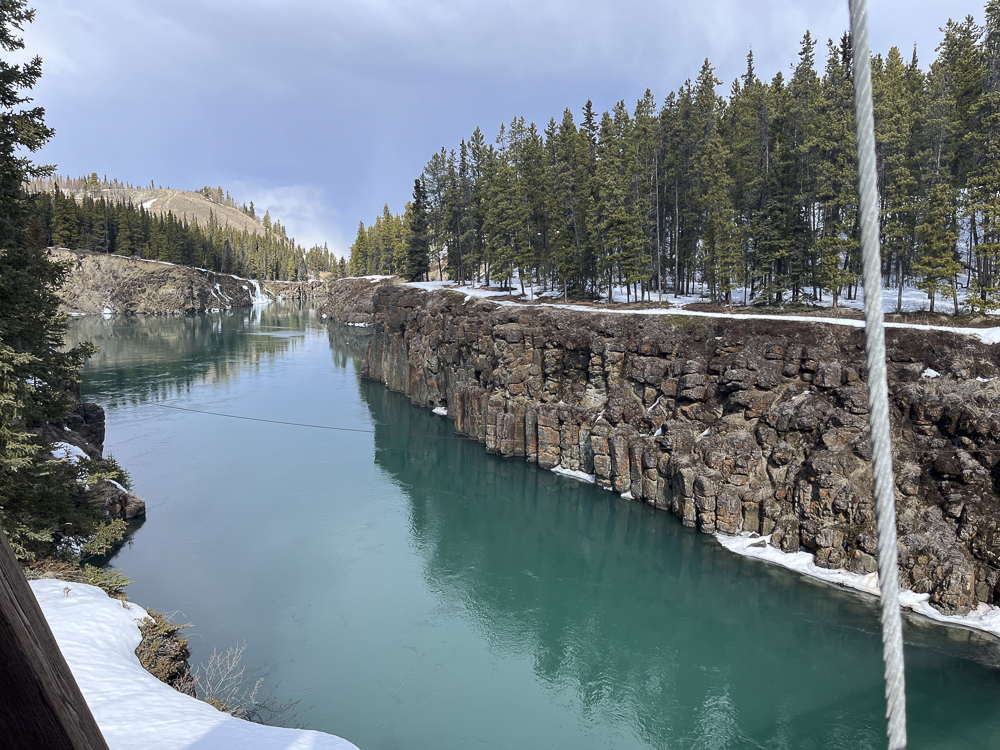
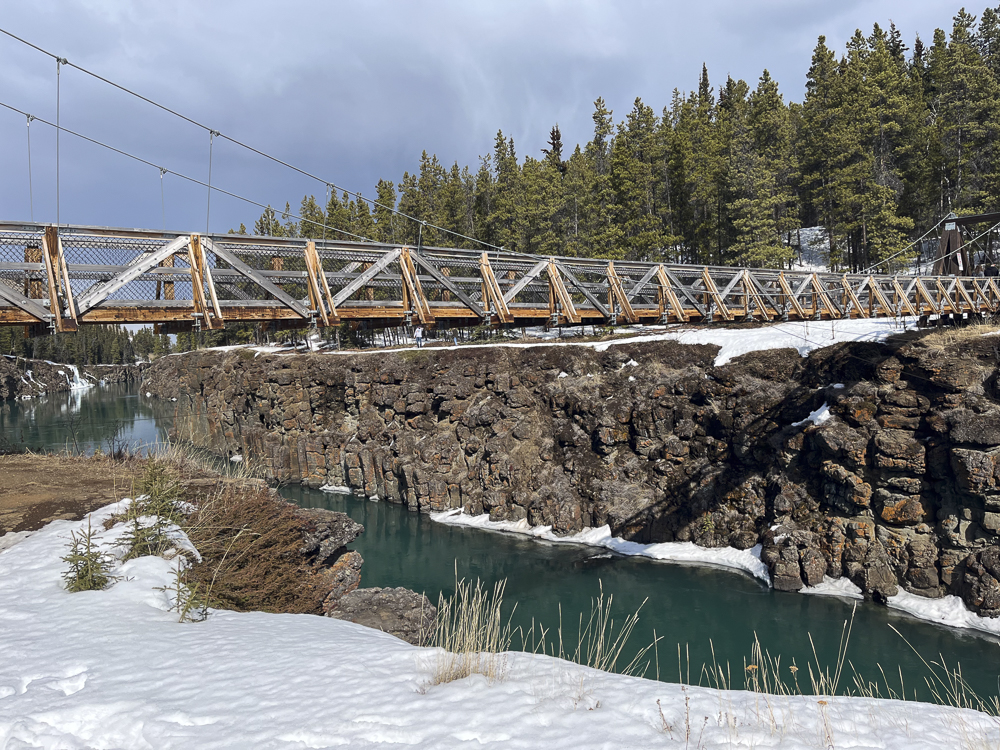
The most incredible part of these scenes is that these photos are (for the most part) straight out of camera. I did a few minor edits for exposure and white balance, but that green is real! One of the tourist placards says the green is from the basalt rocks at the river bottom, so it is not green algae or anything. We are seeing down to the river bottom there!

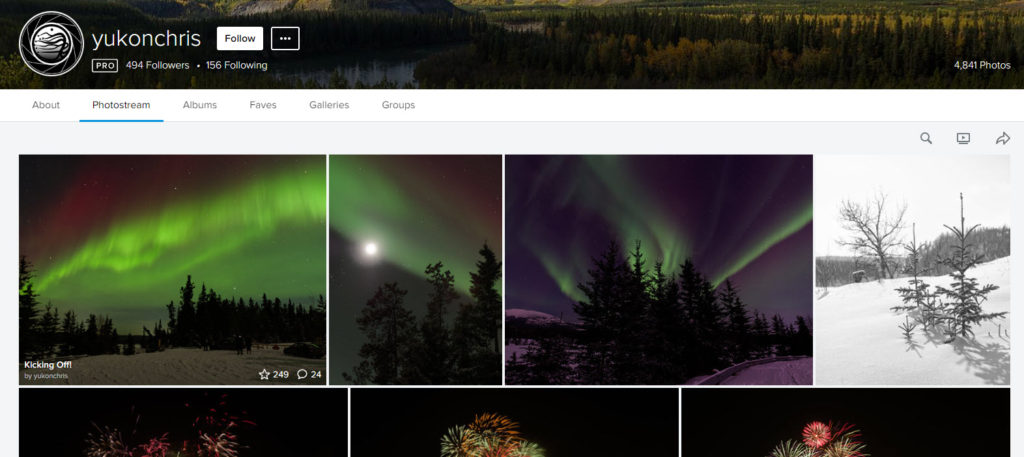
I would be remiss if I didn’t mention the kind gentleman, Chris Wheeler (and his wife), who I met while they and their dog were walking back up from the canyon below. He had a camera strapped to his chest, so we got to talking and he shared a comment on my prior post about Yellowknife. I did not know what I was messing with. If you want to see some spectacular photographs of the Northern Lights, check out Chris’ photo stream on Flickr: https://www.flickr.com/photos/chrisnorth/

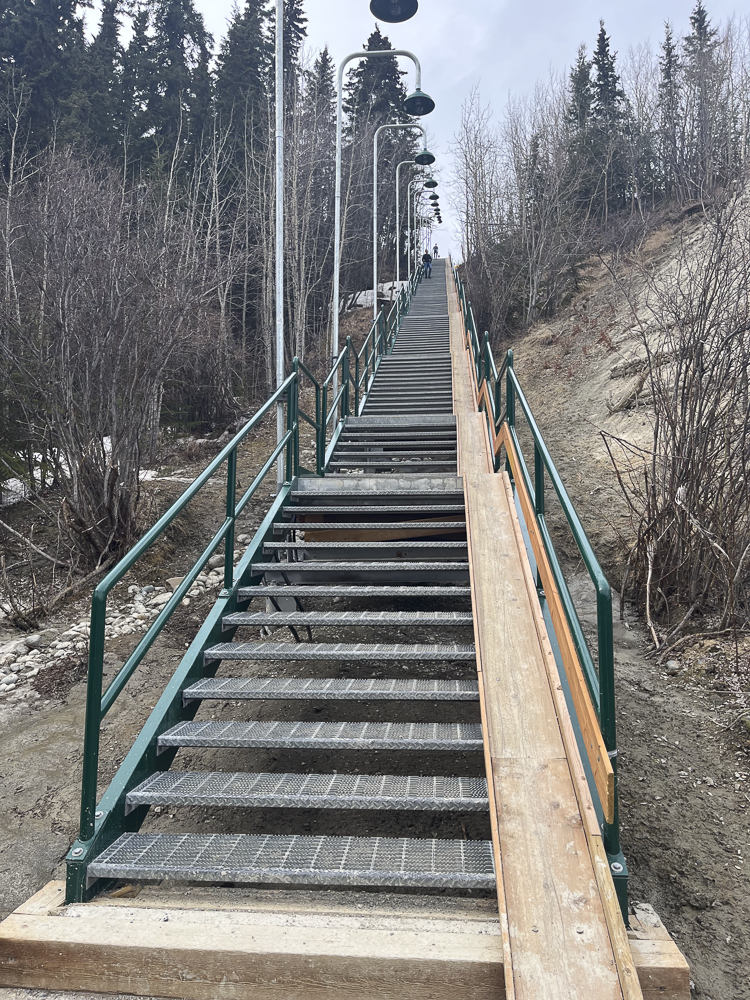
2. Black Stairs to the White Horse

A clever heading, but that’s really what they call these points of interest locally, despite the fact that neither the stairs are black, nor is the horse white, but it does have a nice poetic ring to it! Nonetheless, the climb of over 270 steps was in and of itself without taking a break an accomplishment for me, even though a kid immediately after me ran up in 30 seconds and didn’t even look winded!

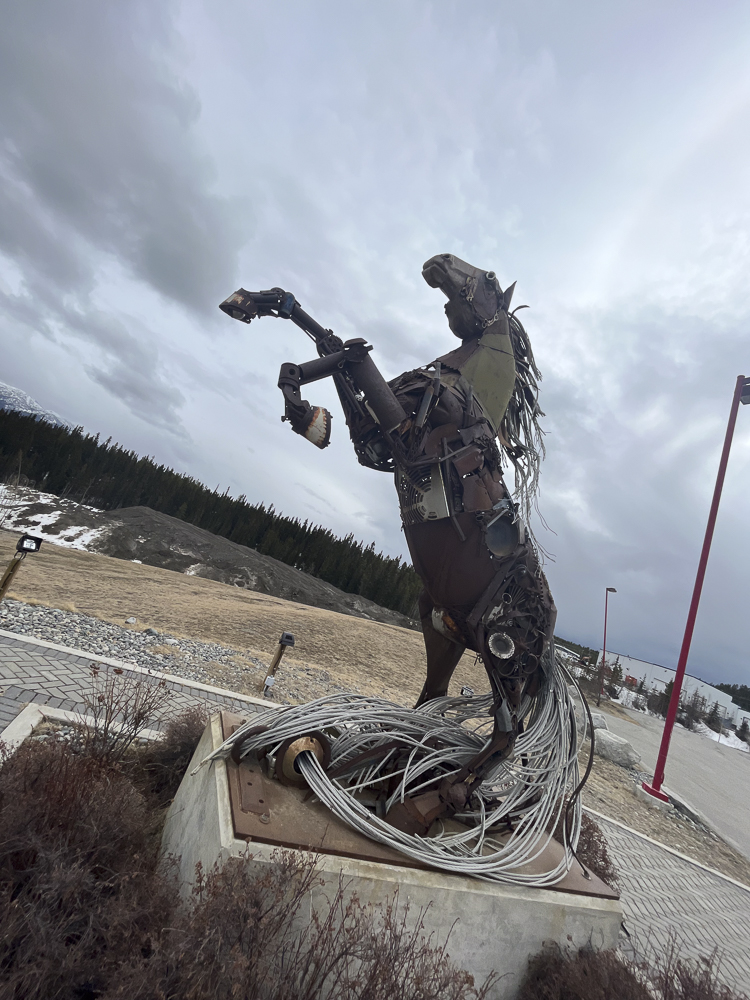
Once at the top, a trail loops around the back side of the local airport, and you can continue on to the White Horse, which I thought was a pretty cool sculpture, made from donated parts of broken down equipment from local residents over time.

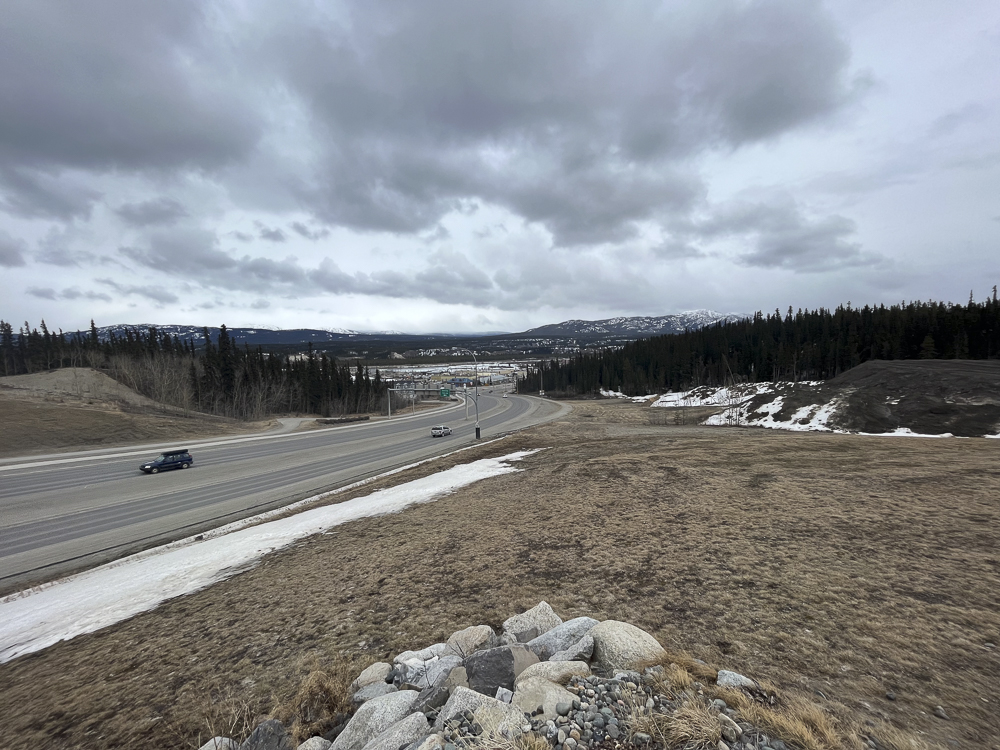
It was about a 5K walk to the horse sculpture, so round trip, a 10K! The reward for this walk/hike/excursion was a view of the road down into the main area of Whitehorse proper.

The Cremation of Sam McGee

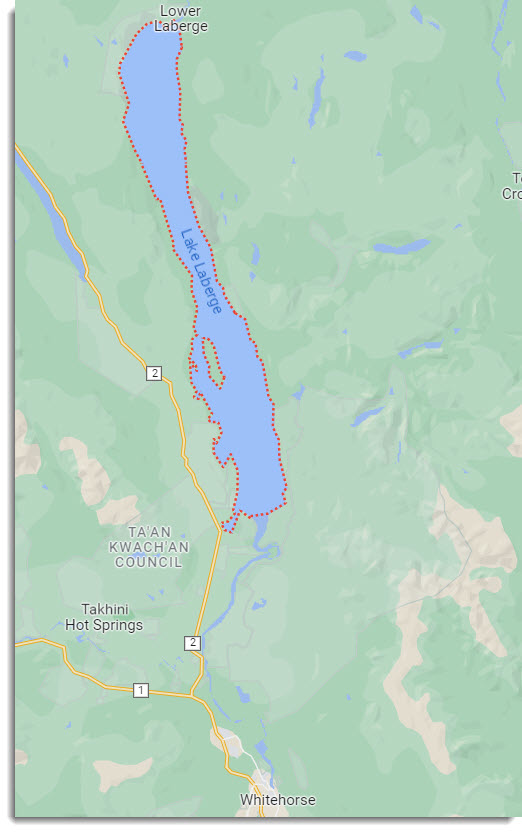
The second bit of nostalgia, comes from the poem by Robert W. Service. I believe this got a nod on my prior post, so won’t regale that story again here, except to say that Service was kind of smitten by the Yukon in his day, and he actually wrote that poem while living in Whitehorse. The reference to Lake Lebarge in the poem was none other than Lake Leberge just north of Whitehorse.

Till I came to the marge of Lake Lebarge, and a derelict there lay
It was jammed in the ice, but I saw in a trice it was called the “Alice May.”
And I looked at it, and I thought a bit, and I looked at my frozen chum
Then “Here!” said I, with a sudden cry, “is my cre-ma-tor-eum!”

From Memory, Google if you want to find a source 🙂

I did visit but it was completely covered in snow, so the photographs are rather underwhelming and not worth sharing. Instead, just to show for frame of reference, the lake itself is actually quite large considering – 20 miles long and 3 miles wide according to Google anyway. It’s no Lake Superior but a substantial body of water nonetheless. The shape reminds me of Long Lake in NY where my dad and I often did canoe trips as a kid. I bet that’d be a fun canoe trip. But if I see the Alice May though…I’m outta there!

Conclusion

This post is getting rather long-winded, but I’m ok with it, and I hope you, dear readers – all 12 of you anyway, are too. I shall return tomorrow or perhaps next week with the rest of the stories from this trip, along with some more photos.

  1. Walking the Yukon River
  2. Whitehorse Brewery Tour
  3. WHitehorse to Skagway

It’s the cliffhanger effect, I know, because I am saving the best for last. The pictures from my trip to Skagway are just incredible! Tune in again to hear “the rest of the story”!

Skin in the Game

Whenever photogs start conversations with me about their gear, their studios, their work, or any other such thing, I get a lot of questions. Once we get the normal fun stuff out of the way (new gear, new shoot locations, new software, new this and new that), we eventually settle down into more serious topics that I don’t see discussed a lot in most outlets. These conversations usually take one of two paths:

  1. Shoot time versus business time
  2. Shoot time versus continuing education

While each consideration is valid in its own right, my problem as I have these conversations more and more is that photographers are always look at them in an A or B scenario. The truth of the matter is, nothing ever really occurs in a vacuum. We can have conversations that start with the platitude of “All else being equal…” with the best of intentions. But, if you think about it, do things ever happen like that? Of course not!

So, why do we always look at A versus B scenarios? A successful photographer is best served (at least I think), by considering all three of the above facets at the same time. The same holds true in other sectors too. You have to spend time in all three or else you will find one (if not more) of three things happening:

#1 – You Stop Shooting

If you stop shooting, you get rusty. You get out of practice. You forget how to do some of the advanced things that got you to where you are in the first place. Mastering your gear means staying on top of it, and like anything else in life, you either use or it lose it. There’s no two ways about this. I’ve heard people say that shooting is like riding a bike – once you learn, you never forget. While there may be a modicum of truth to that, I can promise you that if you’ve not ridden a bike in ten years, your first few outings may be a little wobbly. You may have the basics down pat as that part is rote, but the rest only comes back with continued use. The same holds true across any discipline. This is why the best athletes in the world are training year round (there never really is an off-season for NFL, MB, NBA, or NHL players. They are the best of the best because they are always practicing.

Whether it’s football, baseball, basketball, hockey, or even cycling – the serious ones are always training:

#2 – You Stop Marketing

If you don’t spend any amount of time marketing, promoting, and working on the business side of things, you may be one of the best shooters in the world, but no one is going to know you very well. It’s one thing to tweet and Facebook or Google chat with your friends and colleagues, but it’s another thing entirely to cold call or submit proposals to businesses for photographic needs. If you don’t submit your work or get any buzz out there about your work to other businesses on a regular basis, then you are likely leaving business opportunities behind. Clients don’t just line up at your door waiting for you to answer, and while some may fall backwards into prime opportunities, most only get there with hard work and persistence. If you stop being persistent in your business, then it won’t be much of a business. So, keep at the business side too!

#3 – You Stop Learning

Probably one of the most needed, least justified, and most difficult things to address is continuing education. It’s ongoing, never ending, and sometimes the most difficult thing to address. I’ve seen so many photographers who have reached a certain degree of skill and success who fall into this trap and think “Who is gonna teach me about software or composition? I know what I’m doing!” The ego is a fragile thing for photographers, and its important to be cognizant of this. If you close your mind to learning new things, or consider learning resources as ones that are “beneath” you, there are likely opportunities being left behind. The best example I can think of here is the film to digital transition. Many film shooters failed to recognize the benefits of digital and these old school success stories became the ones trying to catch up once the worm had turned and everyone was going digital. Early adopters were able to stay current and stay relevant. Stragglers are now struggling to keep up.

If you don’t stay current, and don’t keep fine tuning your talents (because we are always learning no matter who we are), then I promise that you will begin to fade. Not learning also means that you are not staying on top of new trends and needs of the market. It’s important to do things like attend seminars, workshops, and to read! (Yes, I said read!) There are so many resources out there that it can be tough to whittle things down to the best resources to learn from, and while some are better than others, there’s good material out there everywhere.


So, whether it’s shooting time to keep your skills up, business time to keep things afloat, or learning to stay on top of new and trending markets, it’s important to balance all three of these. Do I have a magic number or proportion that will fit for everyone? Of course not – this formula is not a static number, and will change depending on not only the person, but where you are. If you’ve spent the last 4 years in a photo school, the practice and education are likely good for a while, but the business needs attention. Likewise, someone who’s at the five year mark may need to consider getting in a few workshops or conferences to get up to speed on current trends and market shifts.

What formula do you need? Only you can really know what the best thing to focus on next should be. The important thing though is to make sure you keep your skin in the game – on all fronts! Where you go from here is up to you, but hopefully today’s post has given you food for thought!

With that in mind, what are your thoughts? Are there other factors here? Sound off in the comments with your own ideas on how to keep current and stay afloat. As is always the case, you gotta keep shooting, so don’t forget that part of it, and we’ll see you back here next time!

The Smart Phone Versus the SLR?

Lately the internet has been teeming with people fixating on the latest iPhone release, and questions are coming through the woodwork asking the same question over and over. Everyone thinks they are coming up with an original question, just because they changed one word here or there, but essentially all these questions come down to smart phone cameras versus traditional cameras. I’ve answered the question so much via email, in forums, on Reddit, and in Quora that I finally said “enough is enough”. For all who want to ask the question, I am going to direct you to this post!

Smart Phone Cameras in a nutshell

Let’s break down this phrase a bit – smart phone cameras What does this mean? It means the phone vendors like Apple, Samsung, LG, Huawei and the rest are adding cameras as software applications to sit on top of these cell phones. I’ll say that one more time for clarity. At their core, these devices are cell phones. So, on that basis alone, why would anyone want to draw a comparison between an add-on feature to a device designed with photography in mind?

The answer lies in dollar bills. That’s it – money! Vendors want to sell more devices, and if the phones can’t really be improved (let’s face it, cell phones are merely a function of the network they are on), then sales plummet! Think about it – iPhones, Androids, and the rest all must be on a cellular network for their original designed purpose of making phone calls, right? So, off the top of your head, how many cellular providers can you name? Not regional ones. I mean Tier 1 providers! I came up with 4/5:

Verizon

AT&T

T-Mobile

Sprint

US Cellular (don’t really wanna count these guys, but ok…)

I think the phone makers agree:

iPhone Carriers offered

From the Apple iPhone 11 Splash page

Samsung carriers offered

The others, like metroPCS, Cricket, Go Phone, etc. are really just smaller ones that piggyback on the major providers networks (and many are actually owned by them!)

So, don’t fall for the hype. iPhones, Samsungs, and every device out there as far as their phone service goes, is only as good as the network it lives on. They can’t sell products that way, because the experience will be different for everyone, based on the network and where the customer lives relative to the towers. So, cell phone vendors try to stand apart by their add-ons. That is the only reason why every vendor tries to hype their accessory apps like cameras, computer speeds, and media storage aspects of these ridiculous tiny devices (of course tongue in cheek when you consider that these devices have more processing capacity than what we had when sending a rocket to the moon!).

But, everyone likes cameras, and photographs are a part of our lives. We are a visual society, so everyone wants a camera they can always have with them. Naturally, since we always have our cell phones with us, it’s sheer brilliance to make the camera feature the selling point.

But the cameras are crap.

There, I said it. Cell phone cameras are crap compared to dedicated cameras. Don’t believe me? Check this out:

Here is a photographic representation of various camera sensor sizes ranging from a medium format camera, all the way down to the sensor sizes of point-and-shoot cameras, with their actual dimensions (courtesy of Wikipedia):

I don’t even see a cell phone camera listed, so off to Google I went in search of the actual dimensions of a cell phone CCD sensor for capturing images. Here’s what I found…

From https://improvephotography.com/55460/what-is-the-focal-length-of-an-iphone-camera-and-why-should-i-care/ )

So, the sensor in a smart phone is about 7mm x 6mm in physical size. The author claims that’s “about the same as a 1/2.5″ sensor”. I actually think it’s closer to the 1/1.7″ range, but that’s miniscule…

A meaningless measurement from the outside looking in, but it looks to me based on the lens that the sensor is about 1/3 of an inch. Interesting that this sort of information is not readily available from Apple, Samsung, or other phone vendors. I wonder why?

The answer is because at the end of the day, the sensor on these cameras are teensy tiny miniscule little things that are crammed into the innards of a phone, trying to get you to buy into the fact that the CCD sensor of the phone (thus making it a “smart” phone) is better than the sensor of an SLR, or even a point and shoot.

I’ll go to my grave saying that it’s not better, and never will be. Simple physics prevents it.

Lenses

If you ask any photographer the question of what camera to buy (excluding talk of the smart phone cameras), invariably, they will tell you that it’s not the camera you buy into – it’s the camera system. More specifically, it’s the glass that matters. The reason for this is because the camera is just a box that houses the sensor, and it’s the lens that defines the clarity of the shot, your aperture range, and even the sharpness of the glass comes into play. I know photographers that refuse to by Tamron or Sigma glass because they claim it’s “not as sharp as Canon” lenses. I’ll leave that argument aside for now, because the point here is to highlight that even if we were to exclude the sensor as not being as much of a factor based on this concept, we need to now look at the lenses in these phone cameras.

So, let’s do that for the iPhone 11:

That’s actually better than I would have thought, because most predecessor phone cameras had fixed or nearly fixed aperture sizes on their lenses. But a range from 1.8 – 2.4 aperture opening is impressive, as it’s nearly a full stop (read more about apertures and F-stops here) so I’ll grant that. Now let’s compare that to the absolute cheapest lens for a Canon lens at B&H Photo (I looked at the EF and EF-S lens mounts). I also could have picked Nikon, Pentax, or another maker, but I am CanonBlogger for a reason: 🙂

So, for $125, I can get a lens that goes from an f1.8 all the way up to f22? (That’s about a 6 full F-stop range by the way, for those of you keeping score..) A smart phone camera will never compete with that. Now, for the average Joe (or Josephina) consumer, what does that matter or mean? It means from a smart phone, you’ll always get images that look like this:

And never get images that look like this:

Now, with my rant over on the differences between the camera apps and sensors in phones versus the dedicated SLR and even point and shoot cameras, I need to clarify something.

Software

The way that phone cameras are able to get some apparently stunning imagery is not because of the camera – it’s because of the software. So, if you really want to compare apples to apples, the comparison should be between phone camera software and standalone software. And I will grant you that the software the developers at Apple and Samsung have done some amazing work as to what’s baked into the computational algorithms. The problem lies in the fact that it’s baked into the phone. We have no control over it.

Now, devil’s advocates will say “There’s an app for that” and sure, there are tons, but that’s not a fair comparison, now is it? Comparing a software app from a phone camera to a dumb SLR that has the sole purpose of capturing images makes no sense. So, if you want to get into a discussion of software comparisons, we can do that, but we need to make it an apples to apples comparison. Which one would you like to start with? We could start with a comparison to Lightroom, Photoshop, and others…

But if anyone tries to tell me that the hard baked software for photo editing in a phone can compare with Photoshop, Lightroom, or any of the above, I’ll… well, just don’t! 🙂

Printing

Does anyone print images anymore? I am not sure about that to be honest. With social media, Facebook, Instagram, Twitter, Snapchat, and LinkedIn (and probably a whole host of others that I am not hip to), we often are looking at images through this medium rather than by prints. So, my argument here could be meaningless, but…

Take a photo with a smart phone camera. Take the same photo with a point and shoot camera. Try to print them at your local print store. My guess is you’ll be able to print up to perhaps an 8×10 photograph from the cell phone. From the SLR camera – you can go billboard and poster sized effortlessly. Why? Because of the sensor and the pixels.

You see, cramming pixels more tightly together in a small teensy sensor is going to produce something called artifacting, which ultimately translates to bad pictures when you try to print to a larger medium. So, there’s that too…but again, perhaps I am long in the tooth because I don’t know anyone who prints photographs anymore. 🙁

Conclusion

So, there you have it – the full explanation as to why a smart phone camera will never truly compare with a dedicated camera. The SLR will always win. In any category.

What say ye all, interweb citizens of the world? Agree with my assessment? Hate it? Sound off as to why you like what I have to say, or where I am just flat out wrong in my preconceived notions. Otherwise, I’m ready – what’s the next question…?

Finding Clients…

I don’t often use the blog as a venue for talking about photography business, but recently many colleagues have asked me about how I approach things here, in terms of finding sponsors for contests, giveaways, workshops, and all the content that gets delivered here.  I should preface my comments by saying that the blog, my photography, writing, and podcast endeavors are not my primary source of income.  I should also probably say that I’ve gotten more wrong than right in my style and approach over the past 11 years.

Having said that, I am starting to get more right than wrong lately, and the portion of my income that is generated by the blog, podcast, and writing has seen something of an increase relative to my “real job” revenue (in IT).  So, what’s been my secret to “finding clients”?  Here are 4 methods I’ve used the most to attract people to the blog, the podcast, the contests, and my writings:

#1 – Be personable

With so many people out there that offer products and services, there’s bound to be someone that can do exactly what you do.  Or, they can do it better.  For the same price!  Or less!  Or free!  How can anyone expect to compete with that in today’s day and age?  It should come as no surprise to most that what sets you apart from others isn’t your service, it isn’t your product, marketing, revenue, client list or anything like that – at the end of the day what sets you apart is you! People will come to you because they like your approach, your personality, and how you treat them.  In my case, that means people come to listen to the podcast, or read because they like my attitude as much as my content.  The same holds true in your business – so rule # 1 is to be yourself!  I do that by socializing with fellow photographers through meet-up outings (like photo walks), user groups, and basically staying engaged and connected with my peers and colleagues (which I know I should do, but have been slacking a lot lately).

#2 – Be reachable

Let’s face it, with Twitter, LinkedIn®, forums, websites, email, instant messaging and smart phones all giving us 24/7 access to whatever we want anymore comes with a price. 

Social Media

With our access to others comes a certain measure of reciprocity, which means others also expect some measure of access to us.  While you don’t have to give answers or respond to inquiries within seconds or minutes – make it a general rule to respond to people within 24 hours during the work week. After all, with e-commerce moving at lightning speeds, not responding to an email or message in a timely manner can be a deterrent as much as anything else, so be reachable!

On weekends if you prefer to shut off, that’s fine, but let people know.  On Friday, set up an out of office message and say that.  “I’ll be spending the weekend with the family – looking forward to the down time.  I’ll be back on Monday!”  This lets people know that you like to hear from them, and will respond, but that it isn’t as immediate as you normally are.

#3 Be approachable

I spent an afternoon with someone a while back who was pretty well known in local circles.  The subject of conversation was photography of course, and in the course of discussion just got a sense that this person not only was well-known, but knew it.  I wasn’t talked down to by any means, but I got the distinct impression that I should be “honored” to be graced with his presence and flattered that he gave me a few hours to talk.  While it was all well and good, the conversation made it seem like I should be quick, get to the point and don’t waste time.

Clock

While we all have multiple commitments, and are moving at what feels like the speed of light just to keep up, it often can come across as an attitude.  Make sure when you are with colleagues, clients, or potential clients (because you know to treat everyone the same, right?), that you slow down, listen as much as you talk, and pay attention to cues that you might be giving off the wrong vibe.  This guy was so engrossed in talking about his latest project he just assumed that I was interested, would be flattered to even be considered for inclusion in it, and didn’t realize that I hadn’t talked for almost 20 minutes.

Suffice to say, he was a little surprised when I did the wrap up.  “Well, thanks for your time, it was fun talking to you. I’ll have to pass on the project right now as I’ve got too many other ‘irons in the fire’, so to speak.  If I have more time next year, I’ll let you know then.”

#4 – It’s okay to not know everything

There is nothing wrong with showcasing and highlighting your strengths and minimizing your weaknesses in anything whether it be a pitch to a potential client, or even showcasing your body of work or resume to a potential employer.  It is another thing altogether though, when in discussions to say “I can take care of that” to any question that comes up.  If your knee jerk response is to say yes to everything, you could be in for a serious problem come delivery time and they realize your InDesign® skills are far inferior to your Photoshop® and photography skills.

Clients can (and will) ask for the world. 

It’s important to keep them on track and your time scheduled carefully.  Taking on anything and everything to get the gig will not only reduce your total revenue for the job in terms of labor hours, but quality will suffer, and the client will often leave unhappy.  Unless you want scores of unhappy former clients giving less than stellar feedback, because you promised ABC and D, but only really gave them A and B, it’s a good idea to not promise the world.  In my experience it’s always better to under-promise and over-deliver rather than the other way around.

5 Tips for Better Pano Photography

With Apple and Android phones, the ability to take panorama photographs has really changed the landscape (if you’ll pardon the pun 🙂 ) for still photography in this genre. You can get some truly stunning results without the need to stitch several photographs together in heavy desktop applications like Photoshop anymore. Like anything else though, there are things you can do to increase your keeper rate, and things to avoid (unless you like deleting tons of photos).  Here are Five Tips To Improve Panorama Photos:

Tip #1 – Make sure you scope out the scene all around you.  Believe it or not, the iPhone panorama photo feature goes to nearly 300 degrees from left to right.  This means you will almost be doing a complete circle.  Is there anything on your left or right that you particularly want to be in the photo, or the draw of your photo?  Make sure that you initially face that particular person or scene.  Then turn 90 degrees to your left before you start shooting.

Denver Airport  Panorama
Denver Airport Panorama

(I wanted to make sure the plane on camera right was fully in the frame, and my first short, the pano ended right before the hallway on the right, so it looked like it was cut off…)

Tip #2 – Go slow!  The iPhone will tell you to slow down if you start moving too quickly from left to right, but at that point, it’s likely too late.  Stop the shot and start over.  Don’t get impatient because your wife (or husband, or significant other or friend or whoever) wants to get to your ultimate destination.  The amount of time it takes to completely capture the pano scene is about 15 seconds from left to right.  Add another 15 seconds to review the image on screen before you leave the area (you may have to re-shoot).  Finally, add another 15 seconds to your itinerary in case you really do need to re-shoot!  Just as a buffer, I’d add a final 15 seconds in because…well, you never know!  All in, that’s one minute of their lives that your S.O. will have to wait for you.

Tip #3 – Consider the lighting – If your scene varies a lot from dark areas to light areas, that will not bode well for capturing a pano with the iPhone.  Why?  Quite simply, it can’t capture the dynamic range of our eyes.  Low light to bright light can be tough for the sensor to handle, and extremely low light scenes will introduce a lot of grain too.  Most of the time, shots that result from these scenarios will be unusable.  Exceptions to this would be city skyline shots.  The bright lights will be blown out, and the skyline itself will be all in shadow, but that’s ok – that kind of contrast is actually a good thing for skyline shots!

dark pano - what not to do
dark pano – what not to do

(Clearly, the bright light of the lamp and the darker area of the living room made for a bad contrast between bright and dark areas here…this is a bad shot imho..pano or no pano!    )

Tip #4 – Consider the framing from top to bottom.  When shooting pano shots from the iPhone, you can’t rotate the camera to go into landscape mode – it must be recorded in portrait mode.    This means you may get portions of your scene at the bottom, the top, or both that you might not otherwise want in a final photo.  Re-frame accordingly as you conceptualize the shot!

Similarly, consider what’s off-camera to the immediate left and right. Is it the road you’re on or a coastline? Unless you take up several frames when viewing this kind of shot, it may end up looking a bit odd.

Finally, consider that you do not necessarily have to go the full range from left to right or right to left. Some the best types of scenes for panoramic photography are better off from perhaps just a little bit more than a standard picture. Here for example, an architectural shot, or perhaps a larger group of people. Everyone automatically presumes that panos are best utilized in landscape photography. While this is true, there are usages outside of that genre.

The Rule of Thirds in History

We’ve been looking at the Rule of Thirds in photography for compositional approaches, and I commented on what seems to be a trend toward the former being more popular in portrait work and the latter being more popular in landscape type work.  The idea makes sense as portraits have subjects within the picture, while with landscapes the subject IS the picture (the entire scene).  Click here for the full blog post with examples.

Well, today, I am taking advantage of the open sourced nature of Wikipedia (all images link back to the Wikipedia pages they came from) for some well-known works of art that have survived the test of time to see how they measure up under the Rule of Thirds.  The results are kind of interesting:

The first is from Picasso, from his Cubism work, titled Three Musicians…

Van Gogh

A super-imposed Rule of Thirds grid is rather telling.  While this construct is somewhat different, because of the style of Cubism, I found it interesting to see the lines that he painted also fell into roughly the same places as those of the Rule of Thirds.  And the hot point in the upper left is kind of close to the “face” of one of the musicians.  Does the rule of Thirds apply here?  Given the linear composition, my vote is Yes – what’s yours?

Next up, is Van Gogh, with a painting titled “Street Scene in the Montmartre”:

Vaon Gogh

Here, hot points are very much at play, with the people walking down the street, coming in at the lower left hot point, and the red splash of color on the windmill is very close to the upper right point.  The fence line also roughly follows the lower third so elements of both compositional styles are present here.  Does the Rule of Thirds apply here?  I’d say yes!  Do you agree?

Lastly, let’s take a look at one of the more abstract artists in history:  Monet, and one of my favorite works of his, “Impression, Sunrise”…

Picture 2

The sun – pretty close to the upper right hot spot, and teh reflection in the impressionist waters, almost as in line with the right third line.  The boater shadow, being an opposing color, stands out anyway, but it also helps the composition that the lower third intersects it to a degree.  Remember, art is not an exact science, and creativity wouldn’t have variation if subjects were always right on the hotspot.  Equally, it wouldn’t spark or inspire us to always place things on the thirds lines. These are guides, meant to help you compose in aesthetically pleasing and appealing ways.  Does the Rule of Thirds apply here?  Without a doubt, is my answer!  Am I wrong?  What’s your take?

These are but three single instances of works of art that have survived the test of time.  There is so much history to art and its creative appeal, but I would venture to guess that much of it has some elemetns of composition in common throughout the ages.  Yet, there will always be exceptions.  That is the challenge for today – do you know any famous works of art historically that break the rules?   What makes them work and why?  Share your comments here in the blog.

A few other tidbits to share today outside of the main focal point (get it? 🙂 ):

  • Three more days to the Worldwide Photowalk, hosted by Scott Kelby and with tons of sponsors and prizes.  Have you registered?  Some cities still have openings so check cities near you – there’s still time to register!  (It’s free!)
  • A fellow NAPP member had started a community forum thread asking about the graphics tablet pen as a useful tool, and Dave Cross stopped in to share that he made a blog post scheduled for yesterday.  I made a mental note to stop over and read it – great thoughts, and definitely worth the 30 seconds (I read his blog daily anyway)!
  • Last, but not least, I got an email recently about this new site where photographers of any background can upload images of their lighting setups or other creative perspectives and setups with light to share with the community at large.  It’s a great outlet and you can get some pretty incredible inspiration from it…the name is Light Test and coincidentally, so is the web address.  Check them out here.

As a final note today, as I always like to share sources of creativity, I’d like to give some special thanks to Elizabeth Gast (a.k.a. Firgs), of  Design by Firgs.   She has been instrumental in helping me think outside my own box of creative limits, and in working hard to improve both the quality of work and how I present that work.  Today, she featured me on her site as a “Hot Site!”.  While I am always going to take the self-deprecating approach, here I must simply and humbly say thanks to her.  Not only for the mention on her site today, but also for her instrumental help in helping me improve my own web presence with regard to branding and design styles (see my Twitter background for an example).

That’s enough for one day, doncha think?  Happy shooting and we’ll see you back here again tomorrow.

Grab the Feed

Hardware Review – Sigma 50-500mm

A while back I teased about a forthcoming lens review (nearly 3 months ago actually, in the Teaser Alert), and after several project shoots, the holidays, and scheduling delays, I am finally getting my act together to bring you the latest gear review…that of the Sigma 50-500mm.  As a word of caution, you should be forewarned that the Sigma line-up of lenses that I have reviewed has become quite extensive.  Right away this should tell you two things:

  • Sigma has been quite generous with me in terms of making a variety of lenses available.  They likely are doing this for a number of reasons, but primarily because they know that I will give a fair, honest, and 9 times of out 10, a positive review of their equipment.
  • I like Sigma lenses!  It should be no secret by now that I do like their lenses.  They are optically on par with what one would expect from lens manufacturers by todays standards.  Heck, sometimes I think the optical quality even exceeds that of the main brands out there (of course here I mean Canon and Nikon).  The price is almost always right on – sometimes the price tag is a little high for my taste, but the advantage that Sigma has is that they are what is considered a “third party lens”, and because of that designation, their pricing is a notch below comparable lenses made by either Canon or Nikon for equivalent glass.

So, when Sigma came calling (actually I called Sigma), with the 50-500, the game face was put on.  Right off the bat, here Sigma has been more than generous because I have now had this lens in my possession for nearly 3 months!  I’ve posted a few photos from this lens over the past three months, so you may see some repeated images here, but they serve the purpose of demonstrating the various settings that I have used to shoot and test this glass.  Having set the stage, let’s get started with the review.  In the past, I’ve talked about things in terms of Pros and Cons, listing first the things I like, then the things I was not as much a fan of.  While it has worked to a degree, I am trying to make things more uniform in the review section, so will start adhering to some more concise points and then indicating whether it is a pro or a con.  Ladies and gentlemen, I give you the

Sigma 50-500mm f4.5-6.3 Review

Sigma 50-500mm

1.  Focal Range: The focal range is how lenses are most commonly identified, and this is the measure of how much “zoom” there is in the lens.  Here, the description says it all.  This lens ranges from a widest point of 50mm to an impressive “zoom” of 500mm.  On a crop sensor camera, that means you are looking at a range of 80 to 800mm!  By any standard, this is a pretty wide range, encompassing a difference of nearly 700mm in focal adjustments.  I am going to call this one a Pro.

2.  F-Stop Range: The f-stop range is the measure of the minimum (or maximum depending on your way of thinking) aperture the lens can handle at various lengths.  When dealing with a zoom lens, as you move further out, the elements have to compensate for the change in the length by increasing the size of the opening of the aperture, so you will see adjustments as the lens “zoom” increases.  The Sigma 50-500mm is dialed in to a minimum aperture opening of f4.5 to f6.3.  So, at the widest zoom of 50mm, the lowest aperture setting you can get is f4.5.  Likewise, if you zoom this all the way out to 500, the minimum aperture is f6.3.  So, don’t be misled by the numbers, shooting this lens at 500mm will not afford you the f4.5 that is capable at the widest setting any more than the f2.8 is available on a 70-200 at the longest zoom.  When you have zoom lenses, there is a compromise in aperture capabilities that must be met when zooming out, and such is the case here.  I did some experimenting at various focal lengths, and here are some apparent limits at different zooms:

Focal Length Minimum Aperture
50mm f 4.5
70mm f 5.0
100mm f 5.0
135mm f 5.6
200mm f 5.6
250mm f 6.3
300mm f 6.3
400mm f 6.3
500mm f 6.3

Given the technology of aperture limitations in zooms, I would say that the Sigma is on par with what the expectations would be for this range. To build this lens for any lower aperture settings would make the lens both heavier and longer.  I don’t even want to think about what it would do to the price either!  It’s not the greatest in aperture abilities, but it’s no slouch either.  I’m going to have to thrown an “Even” flag on this.

3.  Noise: I brought in the noise consideration based on my first Sigma lens I ever purchased, the 70mm Macro (f2.8) which did not have HSM.  The inclusion of HSM in almost every lens since has been a Godsend.  This holds true for the 50-500mm as well.  It’s super quiet and has convinced me that I will never stray off the Hyper Sonic Motor (or USM on Canon glass, ever gain!  ‘Nuff said.  Pro

4.  Size/Weight: My last big lens I reviewed here was the 18-250.  It was a respectable weight, but this is by far the heaviest lens I’ve ever tested.  Weighing in at a shade upder 4.5 lbs (that’s 1970 grams for you Metric folks), it can cause some serious arm strain after extensive shooting.  I would recommend using either a monopod or a tripod for this lens whenever possible.  It also bears mentioning here that due to the weight of the lens, you want to support it in the provided collar.  Supporting the rig by the camera can result in some serious shear force, which can rip the lens right off the camera.  Other size considerations involve the length of the lens both fully closed and fully extended.  This will draw some eyes at either end…whether it be the short side (8.5″) or the long side (12″)!  Here’s a comparison shot with it next to several other lenses so you can get an idea of its relative size:

Lens Size Comparison

Another consideration to take into account about this size is the filter required.  For those interested in using the ND filters to protect front elements, you will need a 95mm filter to cover this – not a cheap thing to purchase by any means.  Ultimately the size/weight considerations really will depend on your personal ability to handle it effectively.  For me, most of the time it was not a factor, so I’ll acquiesce and call it a Pro.

5.  Build Quality: In line with expectations, the Sigma quality showed here.  Their now easily recognizable textured exterior exudes professionalism, and just feels good in your hands.  Given the weight of the lens, you don’t want to hold this gingerly, but at the same time, if the body took a slight bump from another lens in your bag, the “other lens” would likely bear the brunt of it.  No questions here.  It’s a Pro.

6.  OS/IS/VR: Due to the limited aperture range, and the weight, the presence of OS is invaluable.  Using the OS allows you to keep your aperture value low, allowing for bother faster manipulation and shorter shutter speeds, as well as some nice bokeh in the background when your distances are good.  What was extra nice about this is the ability to toggle between the vertical and horizontal planes to control vibration in different circumstances.  When I was on a monopod, I switched to OS 2 to help control vertical (or up and down) vibration.  When shooting handheld, I was on OS 1 most of the time, under the premise that my own face, body and camera holding helped to minimize the vertical and thus needed more help with horizontal.  When I was on a tripod, I turned it off per normal procedures for when using OS/IS/VR.  In my book, having versus not having OS/IS/VR is definitely a Pro.

7.  Cost: The average retail market for this lens is approximately $1500.  Given the focal range, the aperture range, and other considerations thus far, it seems to be pretty competitive.  The Canon lens with the longest zoom range is their 100-400 and that factors in at $1800.  Nikonians can salivate over their 80-400 for $1850.  Both price in over the Sigma lens, and it still gives an extra 110-150mm of variable range.  For my own personal budget, that’s a tougher call because while I would love to own this lens – I would have to sell something else to do so, and am not sure I want to dispose of anything else in my camera bag at the moment…the jury is out on this for me personally, but for those interested in purchasing any time soon:  Pro

8.  Image Quality: Image quality is always subjective to the viewer/shooter, so here I will just let everyone defer to their own tastes by sharing a few sample images taken over the last few months:

The Sigma 50-500 at 50mm

The Sigma 50-500 at 50mm f8.0

The Sigma 50-500 at 500mm f8.0

The Sigma 50-500 at 244mm f6.3

The Sigma 50-500 at 50mm f9.0

The Sigma 50-500 at 144mm f9.0

The Sigma 50-500 at 450mm f9.0

The Sigma 50-500 at 500mm f6.3

The Sigma 50-500 at 500mm f6.3
Kissing Squirrels

The Sigma 50-500 at 113mm f5.6

The Sigma 50-500 at 113mm f5.6
Chopper Series

The Sigma 50-500 at 332mm f8.0

The Sigma 50-500 at 500mm f6.3

The Sigma 50-500 at 332mm f16

Miscellany:

Other features that bear mentioning here include the locking mechanism and the focusing rings.  I thought about including the latter in the build quality, but decided to bring it in here for discussion.  First, the locking mechanism is a handy feature to have for keeping the lens locked in place to prevent lens creep.  The idea is a good one, but for this particular lens, it would not lock in the “zoomed” position, where I would have thought lens creep would be more of an impact, than in the “closed” position.  Having said that, from the lunar shots I did (as shown above), the fully extended lens did not experience much, if any, creep.  This could be because the lens was recently brought back from a service stop where knobs and buttons and toggles were all tightened and such.

This brings me to the focusing rings.  The rear focusing ring is the one used for fine tuning and the front ring is for zoom.  This was an adjustment for me as my other zoom lenses have these rings reversed (where the zoom is on the back ring and the focus is on the front ring).  it forced me to change my style of shooting a little, but since I was working off a lens-mounted setup most of the time rather than a camera-mounted setup, my shooting habits were already being adjusted anyway.  The last part is that the zoom ring did seem a bit tight to move.  Whether this is by design or because of the recent factory adjustments, I am not sure, but it was just a tad stiff to adjust.

Summary:

All in all, the Sigma 50-500mm is a great lens.  It stood up for the challenges of both wildlife and aerial photography, as well as lunar and even a portrait shot of the canine companion.  The compression it exhibits at the far end (which is characteristic of these long zooms) is to be expected, but I would probably not be using this for landscapes unless I was in a pinch and had no other lens with me.  Still, it could be done, depending on what kind of landscape you are trying to capture.  The zoom really had no noticable effect on image quality without going into some serious pixel peeping, and thus, meets or exceeds all criteria that I can think of.  I would definitely make a positive recommendation on this lens for either a wildlife or sports shooter where distance from subjects is often greater than 10-15 feet.  (The minimum focusing distance at 500mm is something like 6 feet!)

That does it for today – I hope you enjoyed the review and photo gallery from the Sigma 50-500.  Here’s the final results/scores I give the lens:

Category Score
Focal Range 8
F-Stop Range 7.0
Lens Motor Noise 8.5
Size/Weight 7
Build Quality 9.5
Optical Stabilization 8.0
Cost 7.0
Image Quality 8

Have you shot with this lens?  Share your own thoughts in the comments or with me via email.  Likewise, if you have a lens you would be interested in having me review, feel free to drop me a line or share your requests through the comment area as well.  Special thanks to Sigma for giving me such an extended testing period to review the lens, and we’ll see you here again soon!  Happy shooting!

49 Photo Tips Cheat Sheet

The quintessential PDF that started it all – my 49 Photo Tips Cheat Sheet! Over the course of my foray into the world of photography, I have been been busy compiling of my favorites and some unusual ideas for photography. Ranging in subject matter from how to improve your composition to gear tips, making money, photo walks, and everything in between, here are 49 Photo Tips – all compiled nice,  neat and easy as a PDF for easy download and reference (top 50 lists are so cliche! 🙂 )! This was initially launched as a freebie several years ago, but has grown in such popularity, and takes enough of a draw on my bandwidth for hosting and file storage, that I had to start charging for it.  But, for less than a cup of Starbucks coffee (it’s only $2.99), you can get your own digital copy of the

49 Photo Tips Cheat Sheet

49 Photo Tips Volume 1 - The Original Cheat Sheet
49 Photo Tips Volume 1 – The Original Cheat Sheet

Remember, we learn best by sharing with others, so if you like it – tell your friends, they’ll like you better!  If you have an idea for future inclusion, then tell me!  I am always looking for new ideas, sources of creativity and ways to learn and improve so by all means, let me know if I got something wrong, or if you have an idea to include.

And if that’s not enough, Volume 2 is available here:

The Basics Behind Posing Your Subjects

After a while, landscapes are really just a matter of metering your light, exposing correctly, and composing to position lines in appealing perspectives.  The same goes for many other types of photography too.  Whether you are talking about candid street photography, event photography, and even architecture – it’s all about timing, composition, and exposing for the light.

Portraiture though, brings a unique set of circumstances to the table though.  The timing is much more controlled, lighting is managed more strictly, and little is left to chance.  Yet, even in these controlled environments, many photographers have trouble because of the fears associated with guiding and instructing people on how to pose.  It’s understandable, considering all that goes into posing your subjects, as well as the fact that some subjects aren’t the best at being guided.

To those ends – here’s some basics to start with in posing your subjects.  For starters, focus on the face – it’s what we all gravitate toward anyway, and body posing can be very complex depending on a persons body style.  By focusing on the face, you can really highlight that which we all look at anyway.  Here’s the simple secrets to posing a persons’ face: Continue reading “The Basics Behind Posing Your Subjects”

Cleaning Your Sensor

As with most things, your camera needs maintenance too – and I’ve waxed here periodically about establishing a maintenance schedule, cleaning schedules, and the whole schmear – but I’ve never addressed the specifics of cleaning that most important piece of equipment – the sensor in your camera.  As I dive in here, it bears mentioning that I am not advocating any one of these over another – just sort of laying the foundation on the various ways that are available:

1.  Having someone else do it – Most camera stores offer this service for around $50, so if the idea of getting anything near your sensor just gives you the heebie-jeebies, by all means, this option is a good one for the nervous Nelly.

2.  Air Blowers – These are rapidly becoming one of the more popular options as they are relatively cheap, easy, and don’t require messing around with chemicals.  You simply put your camera into the cleaning mode, insert tip of the air blower near the sensor and puff it a few times remove and you are done.  Some claim fantastic results with these while others say stubborn dust won’t come off from this method.  The advantage of this approach is that you never have to touch your sensor (technically the filter in front of the sensor) with anything!  The downside is that results may not get everything off.

Air Blower Method

Giottos Rocket Blower

3.  Sensor swipes – Certain swipes are made just for camera sensors that use hydrostatic charges to remove dust from your sensor.  It’s got an advantage in that it’s a dry cleaning approach so requires no chemicals.  I have heard of some who are reluctant to use this as foreign fibers and materials can get in the swipe which could scratch your sensor.

Lensklear

4.  Chemical cleaning – Pec Pads, Eclipse alcohol and sensor swipes all combine in this method to give the most thorough cleaning, virtually guaranteed to remove even the most stubborn dirt from your sensor.  The risk – doing it wrong can permanently damage your sensor and the cost of buy-in is a lot higher than other methods.  Once you buy-in though, the long term cost drops rapidly!

PecPads

Since I only mentioned it briefly at the beginning, I should also clarify that the idea behind cleaning your sensor is actually a misnomer – all of these solutions are cleaning the filter in front of the sensor – the sensor technically never gets cleaned unless you use option 1 – sending it in for a cleaning.  All the camera vendors (Canon, Nikon, Pentax, etc.) offer this service, but the downside there is multi-faceted in that it’s usually more expensive, you have to go without your camera for a period of time, and there’s shipping involved!

What methods do you use?  I know some people that combine multiple approaches, while others simply just shake it out once and a while (heck, I read a story once of a guy that used his t-shirt! – not sure how valid it is, but you get the gist).  Sound off in the comments with your own cleaning products and approaches!