A while back I was doing some testing of new software for displaying larger panoramas on the blog here and came across a site called Momento360. Has anyone heard of this company before? I bet there are some truly spectacular photographs on display there but I’ve not uploaded enough to try to start finding others and sharing! So, in a lame attempt to see how well my photographs convert and then show up when shared, I thought I’d give it a try:
This photograph was taken a few years ago when I was down in Panama going from the one side to the other, and we hit the lake at the top between the locks. It was an amazing trip, but am not sure the photograph really conveys it well enough. That said, what I am more interested in right now is the user experience.
Did this work for you when you viewed it? If so, did you view it on a desktop computer, a laptop, or a mobile device? Were you in an app or on a browser like Safari, Chrome, or other? Let me know your experiences here…
Additionally, do you have any particular software programs that you have used for photographing and then sharing panorama photos in your social media streams? What has worked (or conversely, not worked) for you?
I don’t often use the blog as a venue for talking about photography business, but recently many colleagues have asked me about how I approach things here, in terms of finding sponsors for contests, giveaways, workshops, and all the content that gets delivered here. I should preface my comments by saying that the blog, my photography, writing, and podcast endeavors are not my primary source of income. I should also probably say that I’ve gotten more wrong than right in my style and approach over the past 11 years.
Having said that, I am starting to get more right than wrong lately, and the portion of my income that is generated by the blog, podcast, and writing has seen something of an increase relative to my “real job” revenue (in IT). So, what’s been my secret to “finding clients”? Here are 4 methods I’ve used the most to attract people to the blog, the podcast, the contests, and my writings:
#1 – Be personable
With so many people out there that offer products and services, there’s bound to be someone that can do exactly what you do. Or, they can do it better. For the same price! Or less! Or free! How can anyone expect to compete with that in today’s day and age? It should come as no surprise to most that what sets you apart from others isn’t your service, it isn’t your product, marketing, revenue, client list or anything like that – at the end of the day what sets you apart is you! People will come to you because they like your approach, your personality, and how you treat them. In my case, that means people come to listen to the podcast, or read because they like my attitude as much as my content. The same holds true in your business – so rule # 1 is to be yourself! I do that by socializing with fellow photographers through meet-up outings (like photo walks), user groups, and basically staying engaged and connected with my peers and colleagues (which I know I should do, but have been slacking a lot lately).
#2 – Be reachable
Let’s face it, with Twitter, LinkedIn®, forums, websites, email, instant messaging and smart phones all giving us 24/7 access to whatever we want anymore comes with a price.
With our access to others comes a certain measure of reciprocity, which means others also expect some measure of access to us. While you don’t have to give answers or respond to inquiries within seconds or minutes – make it a general rule to respond to people within 24 hours during the work week. After all, with e-commerce moving at lightning speeds, not responding to an email or message in a timely manner can be a deterrent as much as anything else, so be reachable!
On weekends if you prefer to shut off, that’s fine, but let people know. On Friday, set up an out of office message and say that. “I’ll be spending the weekend with the family – looking forward to the down time. I’ll be back on Monday!” This lets people know that you like to hear from them, and will respond, but that it isn’t as immediate as you normally are.
#3 Be approachable
I spent an afternoon with someone a while back who was pretty well known in local circles. The subject of conversation was photography of course, and in the course of discussion just got a sense that this person not only was well-known, but knew it. I wasn’t talked down to by any means, but I got the distinct impression that I should be “honored” to be graced with his presence and flattered that he gave me a few hours to talk. While it was all well and good, the conversation made it seem like I should be quick, get to the point and don’t waste time.
While we all have multiple commitments, and are moving at what feels like the speed of light just to keep up, it often can come across as an attitude. Make sure when you are with colleagues, clients, or potential clients (because you know to treat everyone the same, right?), that you slow down, listen as much as you talk, and pay attention to cues that you might be giving off the wrong vibe. This guy was so engrossed in talking about his latest project he just assumed that I was interested, would be flattered to even be considered for inclusion in it, and didn’t realize that I hadn’t talked for almost 20 minutes.
Suffice to say, he was a little surprised when I did the wrap up. “Well, thanks for your time, it was fun talking to you. I’ll have to pass on the project right now as I’ve got too many other ‘irons in the fire’, so to speak. If I have more time next year, I’ll let you know then.”
#4 – It’s okay to not know everything
There is nothing wrong with showcasing and highlighting your strengths and minimizing your weaknesses in anything whether it be a pitch to a potential client, or even showcasing your body of work or resume to a potential employer. It is another thing altogether though, when in discussions to say “I can take care of that” to any question that comes up. If your knee jerk response is to say yes to everything, you could be in for a serious problem come delivery time and they realize your InDesign® skills are far inferior to your Photoshop® and photography skills.
Clients can (and will) ask for the world.
It’s important to keep them on track and your time scheduled carefully. Taking on anything and everything to get the gig will not only reduce your total revenue for the job in terms of labor hours, but quality will suffer, and the client will often leave unhappy. Unless you want scores of unhappy former clients giving less than stellar feedback, because you promised ABC and D, but only really gave them A and B, it’s a good idea to not promise the world. In my experience it’s always better to under-promise and over-deliver rather than the other way around.
With Apple and Android phones, the ability to take panorama photographs has really changed the landscape (if you’ll pardon the pun 🙂 ) for still photography in this genre. You can get some truly stunning results without the need to stitch several photographs together in heavy desktop applications like Photoshop anymore. Like anything else though, there are things you can do to increase your keeper rate, and things to avoid (unless you like deleting tons of photos). Here are Five Tips To Improve Panorama Photos:
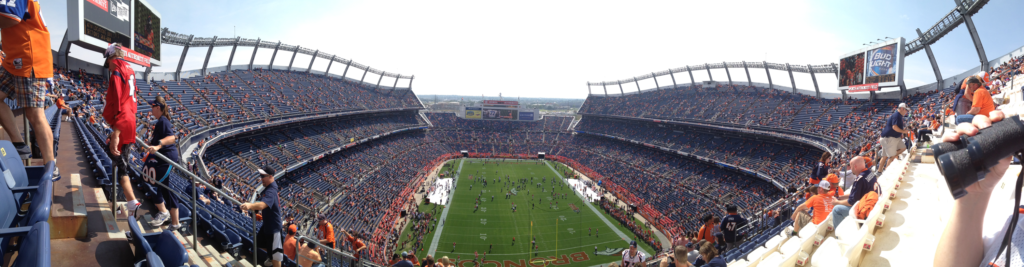
Tip #1 – Make sure you scope out the scene all around you. Believe it or not, the iPhone panorama photo feature goes to nearly 300 degrees from left to right. This means you will almost be doing a complete circle. Is there anything on your left or right that you particularly want to be in the photo, or the draw of your photo? Make sure that you initially face that particular person or scene. Then turn 90 degrees to your left before you start shooting.
Denver Airport Panorama
(I wanted to make sure the plane on camera right was fully in the frame, and my first short, the pano ended right before the hallway on the right, so it looked like it was cut off…)
Tip #2 – Go slow! The iPhone will tell you to slow down if you start moving too quickly from left to right, but at that point, it’s likely too late. Stop the shot and start over. Don’t get impatient because your wife (or husband, or significant other or friend or whoever) wants to get to your ultimate destination. The amount of time it takes to completely capture the pano scene is about 15 seconds from left to right. Add another 15 seconds to review the image on screen before you leave the area (you may have to re-shoot). Finally, add another 15 seconds to your itinerary in case you really do need to re-shoot! Just as a buffer, I’d add a final 15 seconds in because…well, you never know! All in, that’s one minute of their lives that your S.O. will have to wait for you.
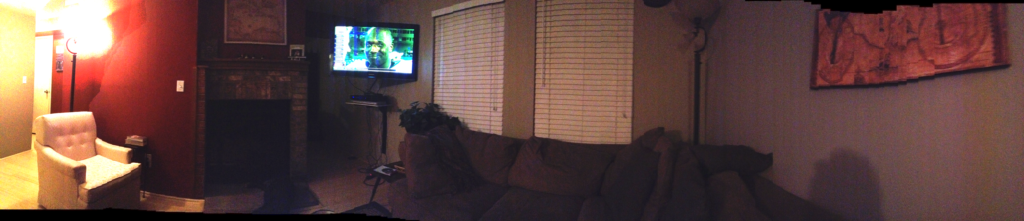
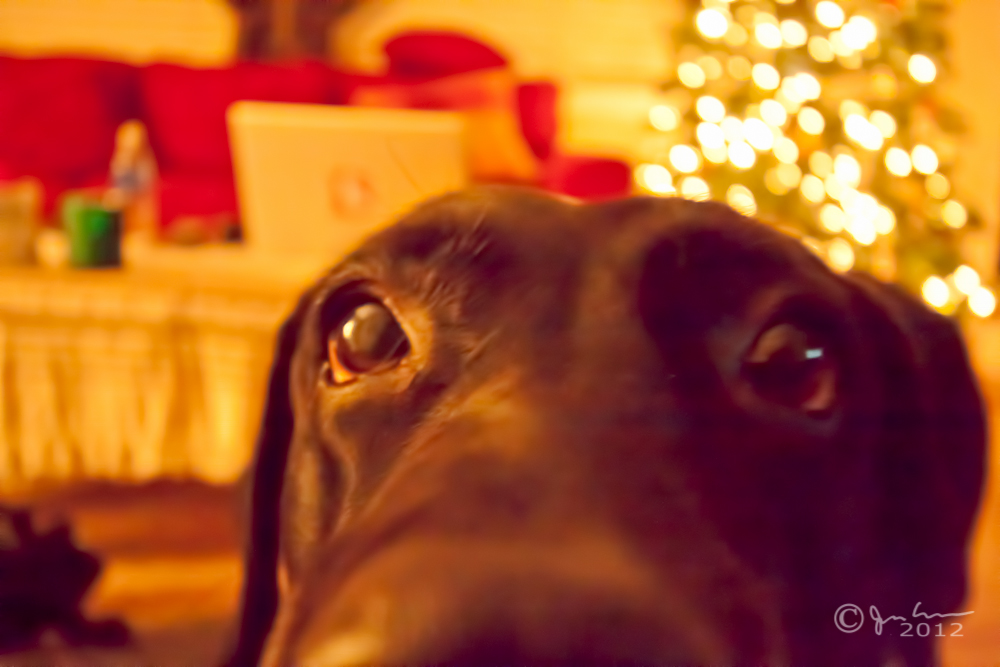
Tip #3 – Consider the lighting – If your scene varies a lot from dark areas to light areas, that will not bode well for capturing a pano with the iPhone. Why? Quite simply, it can’t capture the dynamic range of our eyes. Low light to bright light can be tough for the sensor to handle, and extremely low light scenes will introduce a lot of grain too. Most of the time, shots that result from these scenarios will be unusable. Exceptions to this would be city skyline shots. The bright lights will be blown out, and the skyline itself will be all in shadow, but that’s ok – that kind of contrast is actually a good thing for skyline shots!
dark pano – what not to do
(Clearly, the bright light of the lamp and the darker area of the living room made for a bad contrast between bright and dark areas here…this is a bad shot imho..pano or no pano! )
Tip #4 – Consider the framing from top to bottom. When shooting pano shots from the iPhone, you can’t rotate the camera to go into landscape mode – it must be recorded in portrait mode. This means you may get portions of your scene at the bottom, the top, or both that you might not otherwise want in a final photo. Re-frame accordingly as you conceptualize the shot!
Similarly, consider what’s off-camera to the immediate left and right. Is it the road you’re on or a coastline? Unless you take up several frames when viewing this kind of shot, it may end up looking a bit odd.
Finally, consider that you do not necessarily have to go the full range from left to right or right to left. Some the best types of scenes for panoramic photography are better off from perhaps just a little bit more than a standard picture. Here for example, an architectural shot, or perhaps a larger group of people. Everyone automatically presumes that panos are best utilized in landscape photography. While this is true, there are usages outside of that genre.
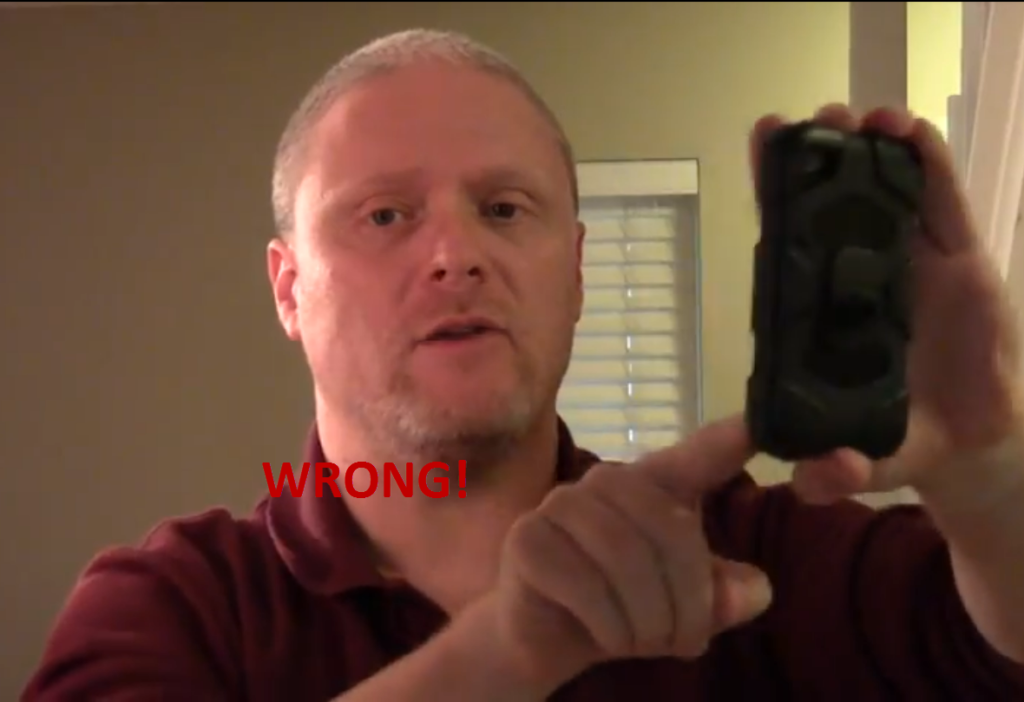
How you hold your camera is so important, yet so many of us take our camera grip for granted, assuming that we will naturally hold it in the most stable way available. For some, it does come naturally, but for most of us, bad habits can take root before we even know it. To that end, there’s a couple pointers I’ve put together on How To Hold Your SLR and How To Hold Your P&S. To wrap things up, today I’d like to share a couple tips on How To Hold Your Phone Camera.
Video seems to work for demonstration purposes, so again, YouTube to the rescue:
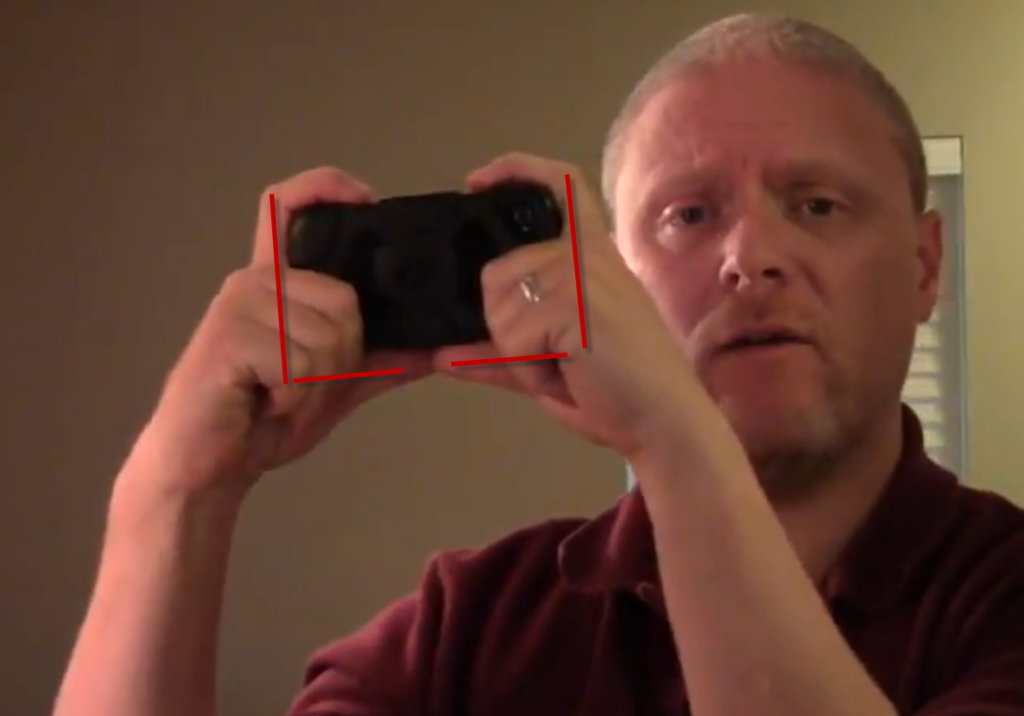
The takeaways from the video? Three simple ones:
1. Finger Curl – curl your middle fingers around the front lower side of your camera phone – this will add stability and will help subconsciously you to keep your armed tucked in
How to Hold your Smart Phone
2. Arm Tuck – Since I just mentioned it, avoid sticking your arms out – either to the side or in front of you. Extended your arms reduces stability and tends more toward camera shake. Keep your arms tucked in, elbows into your tummy by your waist.
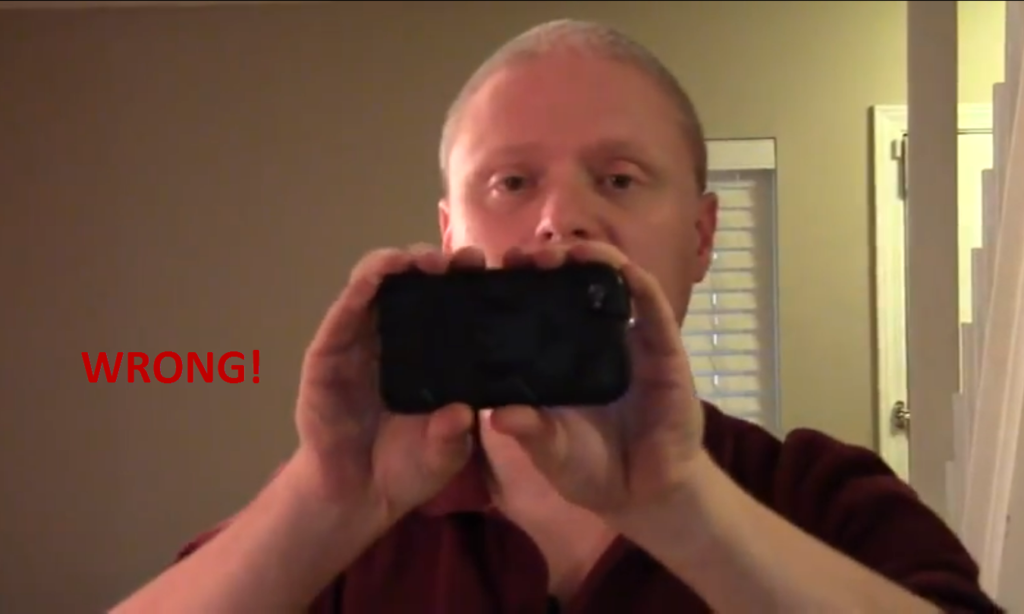
3. Double L – Make an L with both hands and cradle your camera phone into the corner of each hand. Position the phone so that your camera lens is on the topside. That way, your thumb (either left or right depending on phone model) will be at the ready for the trigger on the edge of your phone (don’t use the on-screen one).
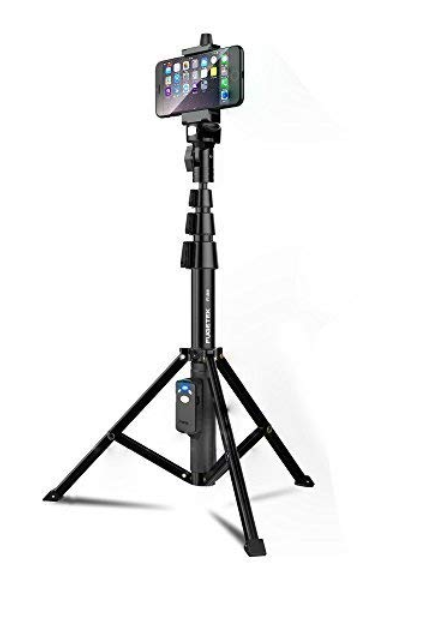
As always, there is no hard and fast set of rules to follow – using these techniques will not guarantee a stable shot. If you watch the video – notice even as I demonstrated, the camera shifted slightly even in my grip. The best way to hold any camera is not with your hands but with a tripod!
There are options out there for phone cameras now too – I like this one:
Got your own tips, ideas, or suggestions for hand holding a camera phone? What works for you? Do you use a tripod or a monopod? What gear would you recommend?
After last week’s picture presentation of how to hold your SLR camera got such an incredible response, many people chimed in via email, asking if I could do a piece on how to hold your Point-and-Shoot camera. While it’s not hugely different, the lack of a lens on the front to really give additional place to position your hands for support can be awkward for some people. I took the liberty of putting together a short video tutorial on how I’ve found positive results for hand-holding my point and shoot grade of cameras.
What is unique about it, is how I use my left hand (specifically my thumb and fore-finger) to brace the camera from underneath. It’s kind of counter-intuitive, but making cameras so small makes it more difficult to really get a good hold on them for producing stable shots. This technique demonstrated here should give you a good starting point:
Notice a couple of things are similar – how you stand, knees slightly bent, lean forward a little, and try to keep the camera closer to the core of your body. As you can tell, it’s really only a minor modification of how to hold an SLR, but an important one – otherwise you’ll find your arms flapping out beside your body, and your shots as less stable.
The question that will likely come out from this is whether the now common in-camera stabilization can account for hand holding better? The answer is yes, you can gain about half a stop to a stop of light (and if you don’t know what a stop of light is, come back later this week – I’ll be talking about that too!) from IS, but that’s only part of the equation.
How do you hold your camera? What if you are left-handed? What about right-eye versus left eye shooting? These are all factors that can require a bit of a modification to how you hold your camera, so chime in the comments section with what works for you!
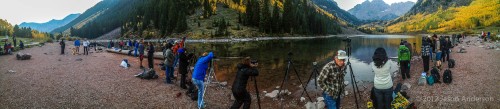
A while back I was up at Maroon Bells in Colorado, anticipating the peak of the fall colors. The lake there at the base of the Maroon Bells has become quite an idyllic scene for photographers of all levels to aspire to. So, I was not alone when I was there. Quite the contrary. The place was loaded with literally hundreds of photographers, bot from Colorado and even from places as far away as St. Louis (from those I talked to anyway).
One of the things that struck me was that from all the expensive gear out there, I saw many many people holding their cameras wrong. It honestly seemed like they knew more about the gear than about taking and making pictures. What do I mean? Simple. You can know all about the technical aspects of gear. You can learn what the maximum ISO settings are. Even get rock solid on frame rates, crop sensors, and all that techno-jargon pretty easily. All it takes is an internet connection and some time to memorize the numbers. But what you can’t learn online is good photography techniques.
Proper Holding Techniques
So, how do you hold a camera? Excellent question! This has been covered by many in the blogosphere, and inevitably, someone will likely say refer to Joe McNally’s “The grip” video. In this video, he talks about shooting hand held at slower shutter speeds, and introduces a grip technique for left-eyed shooters:
It’s got some great pointers in there, but many can get distracted by the “low light shooting” and the “left-eye shooters” concepts. Rest assured, there are elements of this whole approach that are universally applicable. Here’s some simple pointers:
1. Keep your arms tucked in – letting your arms go outside past your core body introduces instability…never a good thing when hand-holding.
2. Unfortunately for left-handed shooters, the camera vendors have designed cameras with the grip on the right side. This is the part where your fingers curl around the camera body, so just make sure your right hand is curled there. Most everyone gets this right…the part where there is a lot of variation is the left hand!
3. Keep your left hand under the camera and resting on the lens. Resist the urge to bring that left hand out to the side to turn the dial for zooming…you can do it with your hand on the bottom, and this way, you are providing more stability to the camera. The other upside is that by keeping that left hand under, you are also keeping your arms tucked in!
4. Stop using the LCD/Live Preview. I know, we all like a big screen and the bigger the better to see your shots…but so many people are migrating to using the live preview (especially when the camera has that articulating screen), and it’s introducing bad techniques. When you use the LCD screen – what happens? Your face goes back or your arms go out, and the camera becomes unstable. Keep using the viewfinder for as long as the vendors keep it on the camera! Keep your face planted up against that camera body…it helps with that whole stability thing!
A great way to test this is to take a shot using good technique and an identical shot using..well, a not-so-good technique. Compare the results and see what produces better results! Of course, some will likely chime in and ask “What if I don’t have an SLR?” That’s a great point, so if that describes you – make sure you come back later when I talk about how to hold a point-and-shoot camera (and a camera phone tutorial is coming too!) 🙂
Or, if you can’t wait to read the text (because let’s face it, we all wanna binge watch stuff these days anyway…)
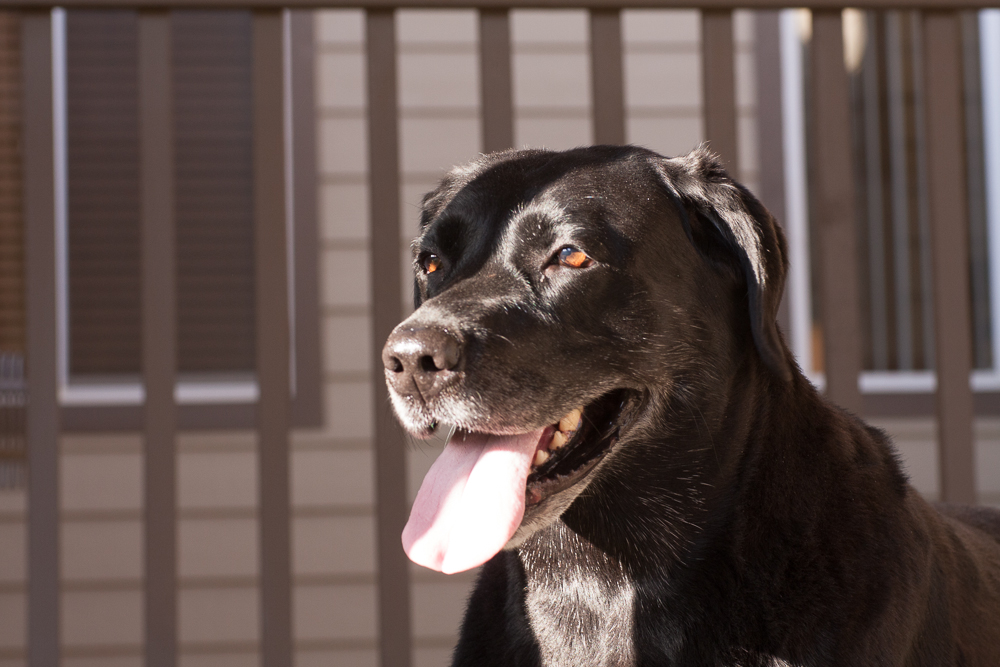
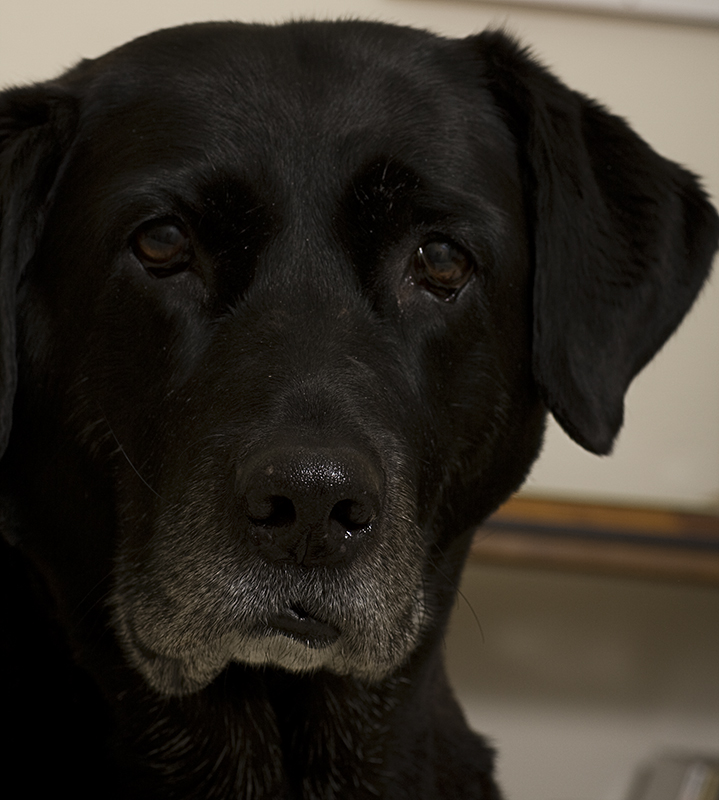
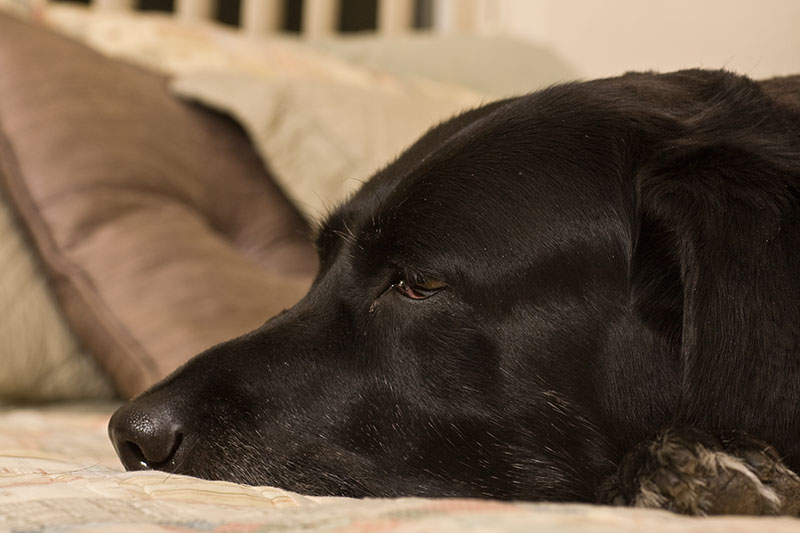
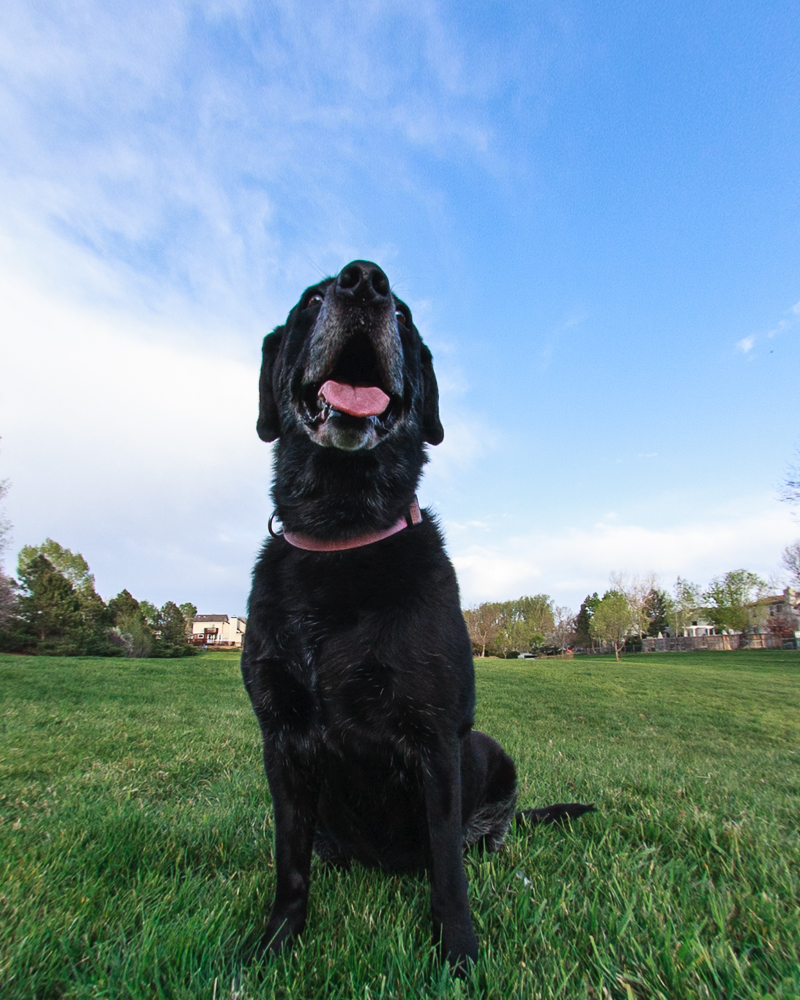
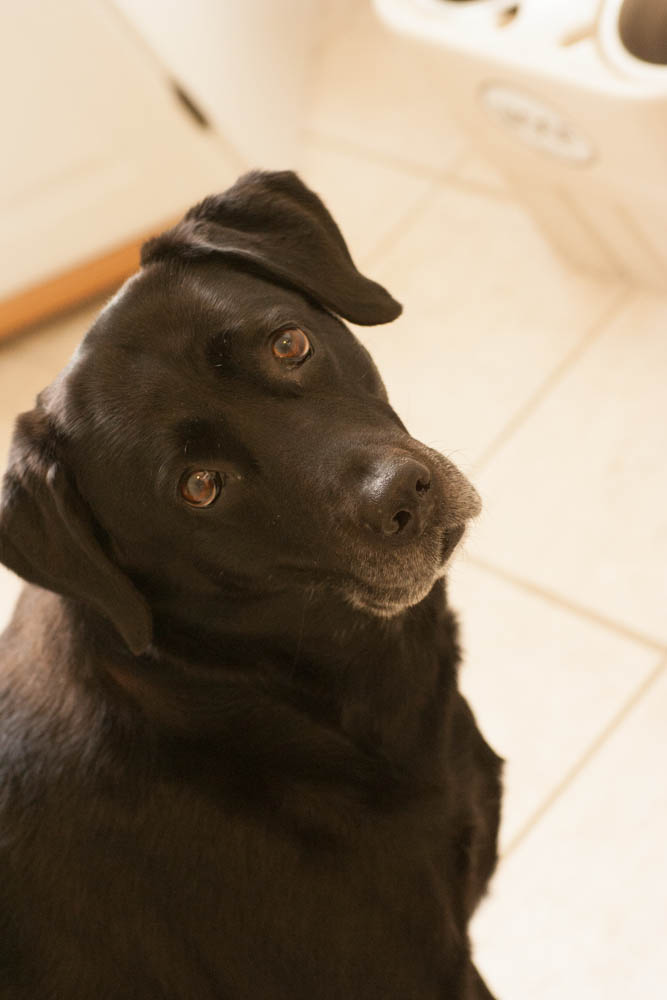
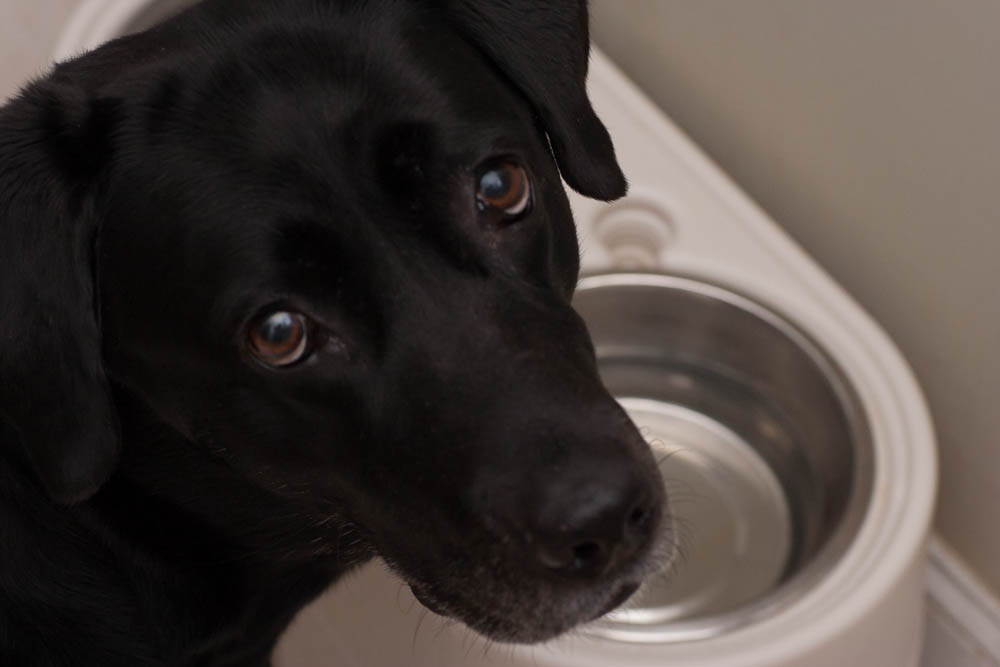
5/4/2013 was a sad day…after 12 years together, our family dog Maggie had reached a point where her body is just not able to sustain her anymore. Over the last 9 months we have seen her deteriorate slowly. Her Lab face always seems to defy the pain she is in as she perks up whenever we come in the room, take her on a walk, or give her some “floor time” to play. Play times have gotten shorter, walks are probably more appropriately referred to as stumbles and flat out face plants, and her smiles when we enter the room have changed first to tail thumps, and more recently, just an ear perk.
I remember when I first got her – a dozen years ago. I was a single guy in St. Louis, and many family and friends suggested I get a dog for companionship. This bundle of energy snuggled into my arms from the litter almost immediately:
Over the years, she grew, and enjoyed many many happy days. Some of my favorite moments include particular events. Here she is expressing her curiosity the year I got a 10-22mm lens, checking out the new gear in my bag:
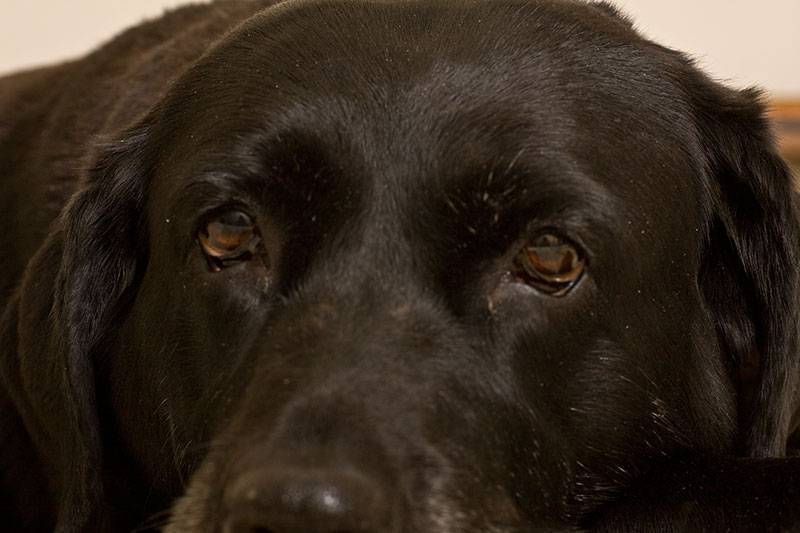
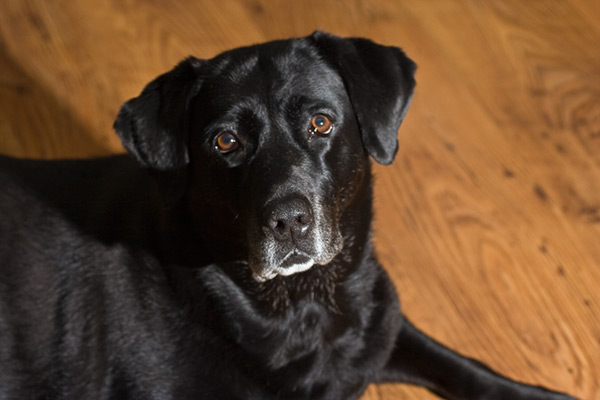
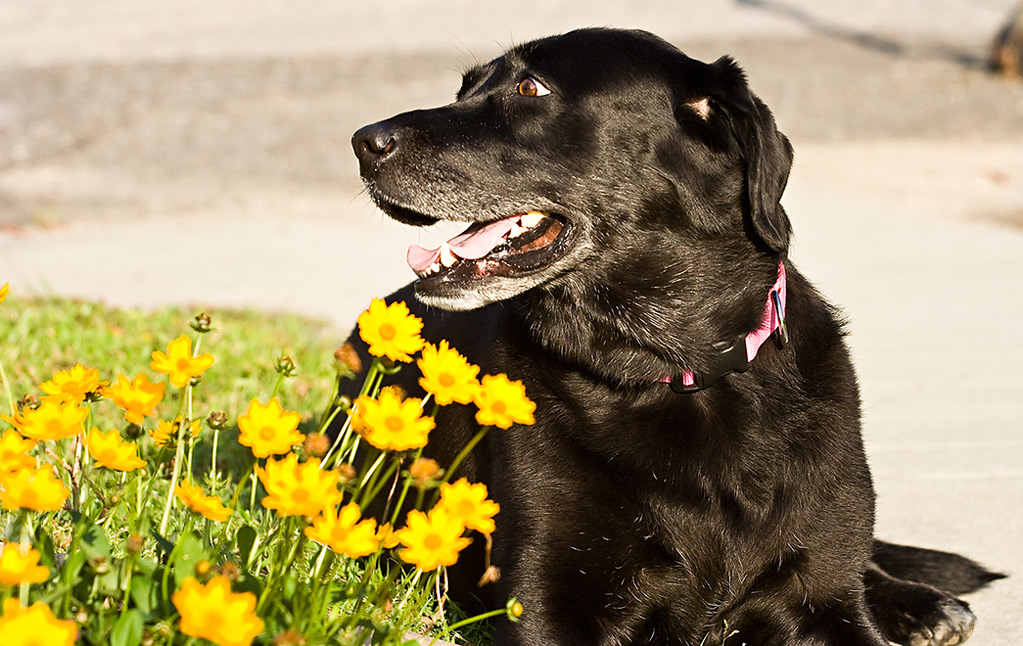
Us humans can take a page from our dogs, because they always seem to be smiling, happy to just be there, and both giving and receiving companionship, even just enjoying something as simple as a warm sunny day:
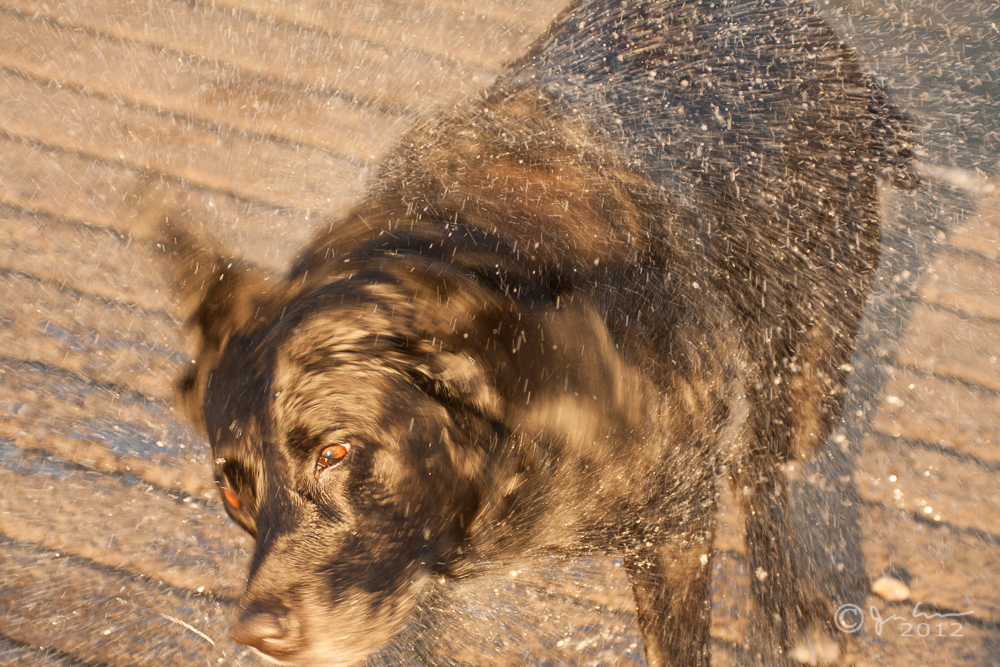
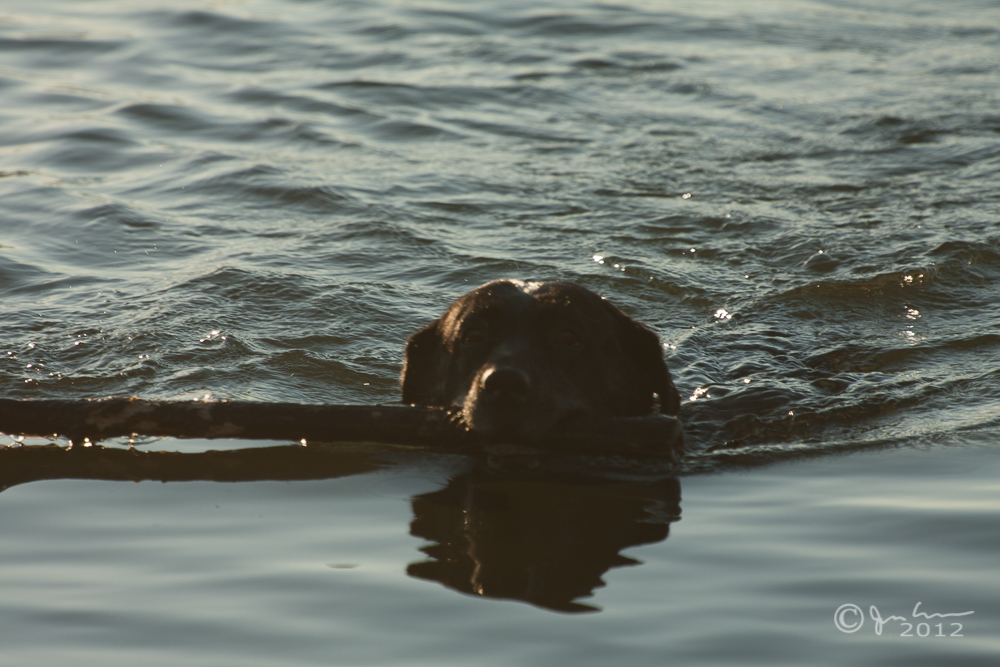
Being the Lab that she is, Maggie also enjoyed every moment she could in water, swimming, chasing sticks, and of course, giving me a dousing whenever I needed one…
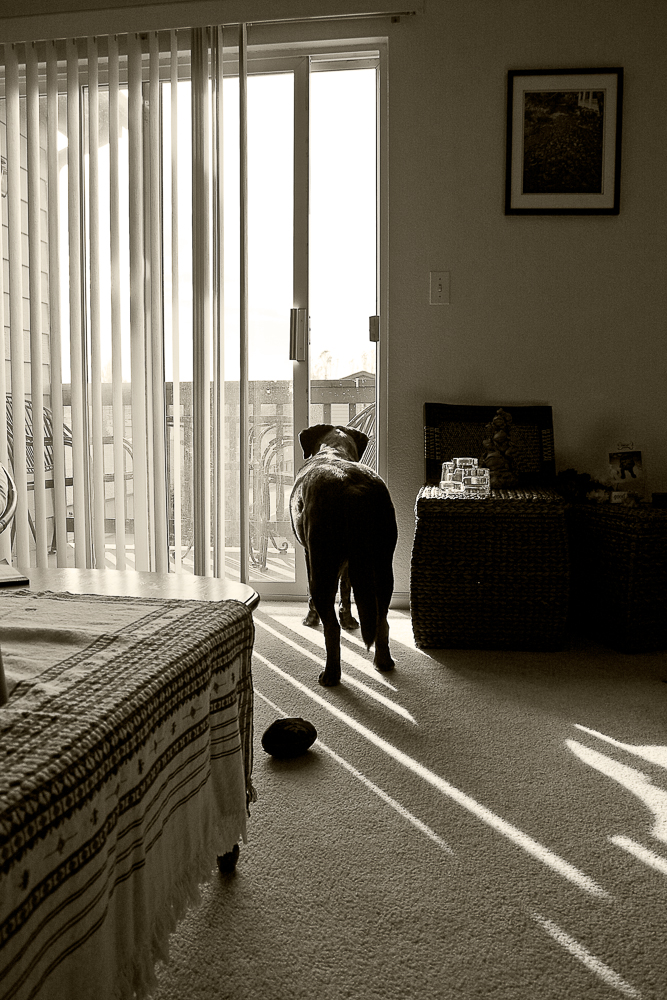
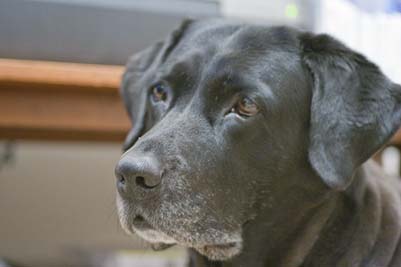
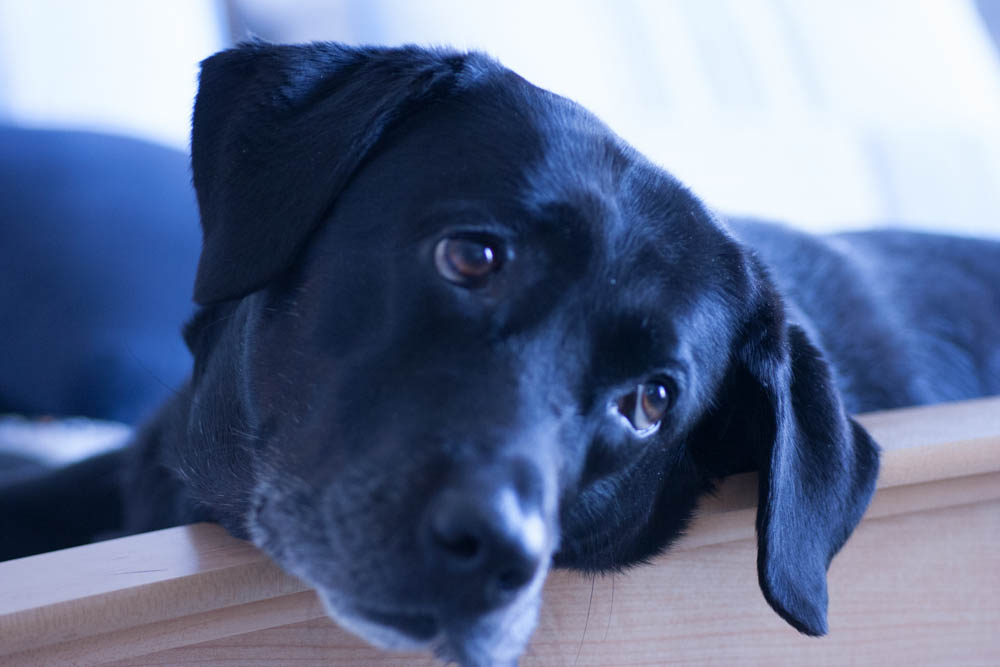
Maggie is such a good dog – and acutely aware of people and their emotions This dog never left my side when I was bedridden with pneumonia. When something is missing or unfamiliar, she is always on the alert, checking things out to make sure all is in order…
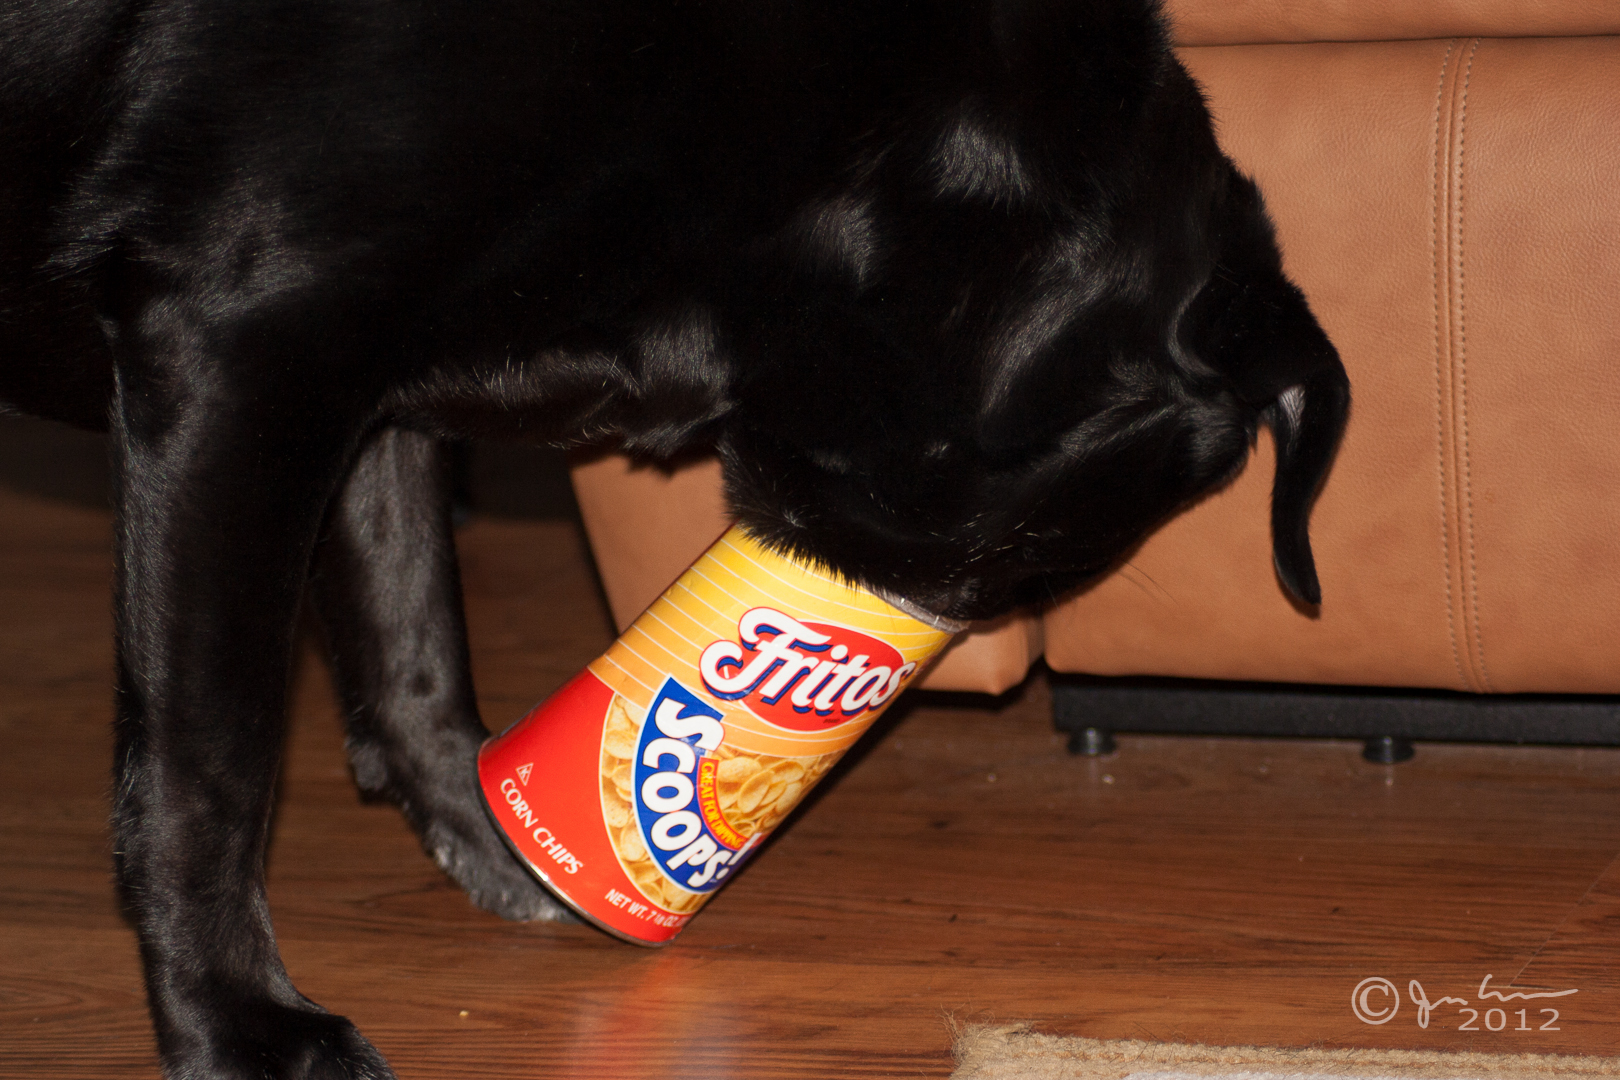
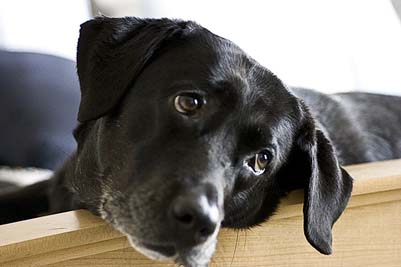
Not to say that she was always good – as sometimes Maggie would get into something either with our consent, or just from her own search and explore sessions…
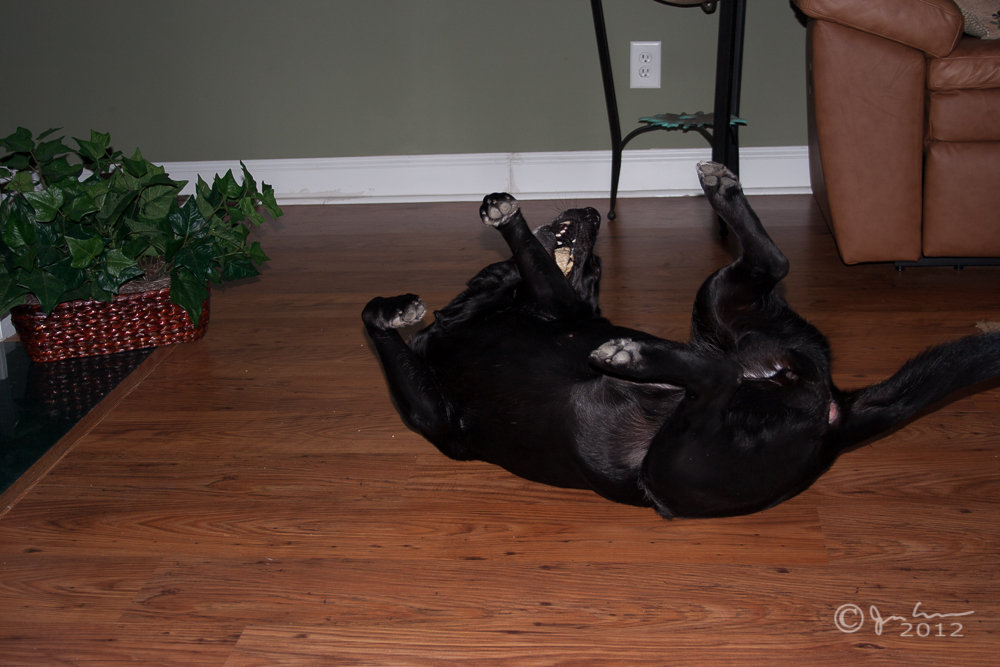
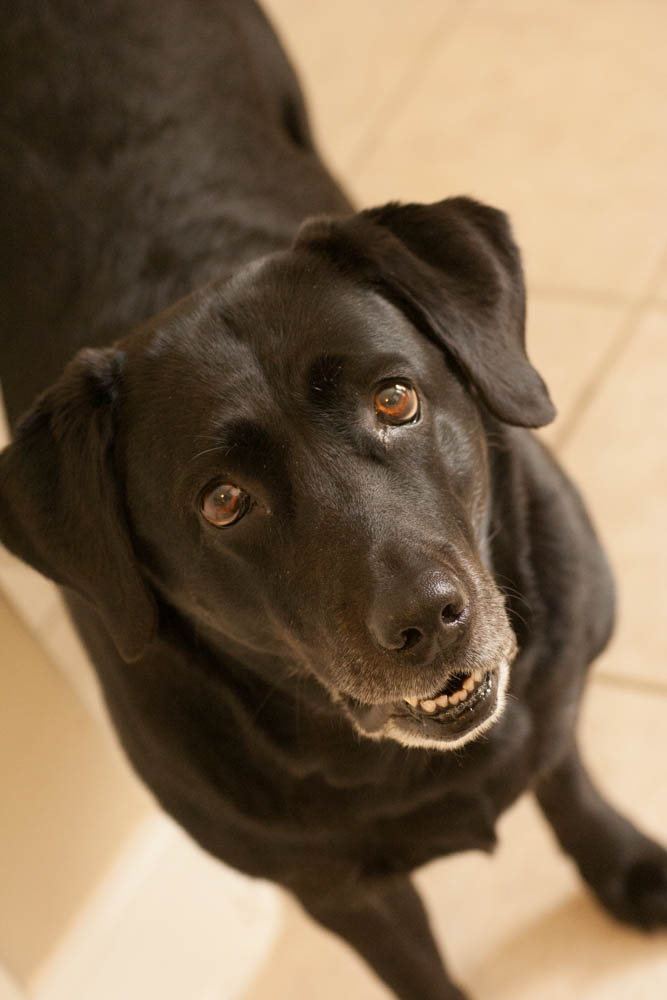
Her signature mark is a “happy wiggle” where she would literally throw herself down on the floor, and wiggle around on her back. This was always a sign that we knew she was in a happy place…
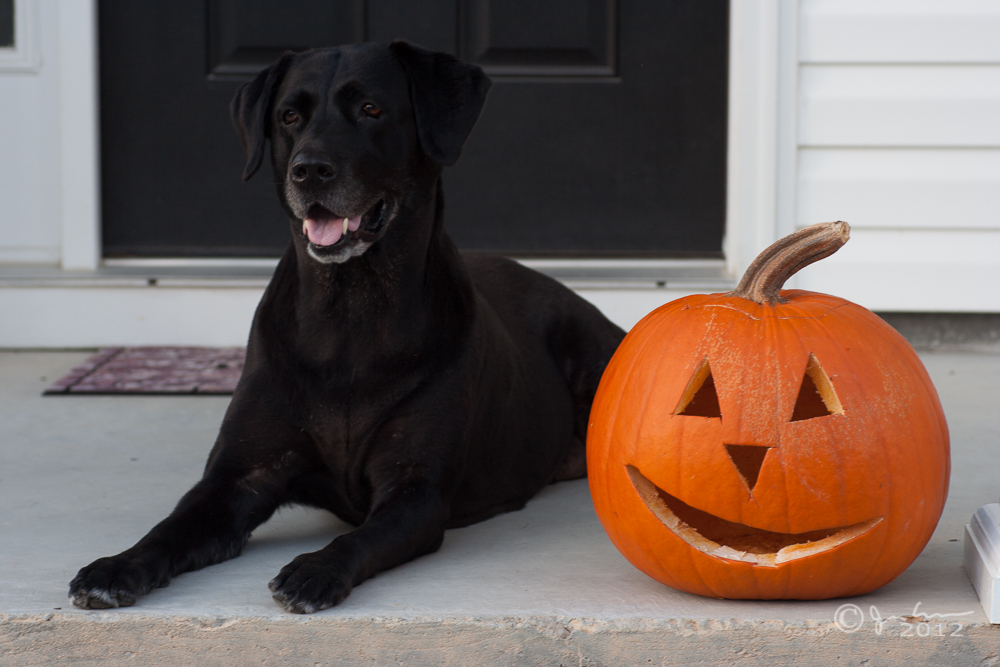
One of our favorite shots of her is one where she is obliging us with a pose over Halloween, so I feel compelled to share it here as well – so prim and proper…
So, we made the painful decision to let her go with some dignity. It was SO HARD to make this decision. We cried and reconsidered countless times whether we were doing the right thing or not. With no human children, Maggie really is our only child, and letting her go even today is something we feel physically ill about. She just can’t handle another move though – there are literally weeks, possibly only days left, so we opted to let her go gracefully…
It’s an inevitable part of the circle of life, and while the logical part of me knows and understands this, the emotional side of me will never be the same person again. It hurts so bad to let her go, even though I know she is going to a better place. Thanks for the lifetime of memories “Moo”…we love you! You were larger than life itself!
More often than not, blur in photos is a result of movement in the camera. This means that you are likely shooting with your shutter speed set to open and close more slowly than you can hold it in place to freeze the image in place. So, it may make sense to think that all you have to do is increase the shutter speed to one where you can hold it long enough, right? Well, maybe, but there are many scenarios where that option may not be available.
Shooting in low light is often a time when we find ourselves compromising our sharpness by trying to hold our camera slower than what we are capable of in order to capture an image. Another example would be where you want to smooth the water of an ocean view, a waterfall, or some other water scene. You may also want to introduce blur in one area of an image (say a race car), while keeping everything else sharp to convey the sense of speed and motion. In these scenarios, you can do one of a several things to increase the stability of your camera. One of the most popular is:
Add a monopod or tripod to the equation.
The reason why the tripod route is popular is because it is also one of the best ways to stabilize a camera, because let’s face it… a stationary object is better at holding our camera steady than we ever will. If you can’t use a tripod though, monopods are excellent secondary devices at minimizing the movement that may happen when shooting at slow shutter speeds. Choosing a tripod is a matter of personal preference and there are many things that can tie into your decision including budget, weight, and portability. Let’s consider each of these independently.
Budget
When it comes to budget, a tripod can be as cheap as $20, and can run upwards of $2000! Factors that will come into play include the weight element – carbon fiber is very sturdy, and very lightweight, but very expensive too. Aluminum counterparts are heavier, and while equally sturdy, you can save money by going with an aluminum equivalent.
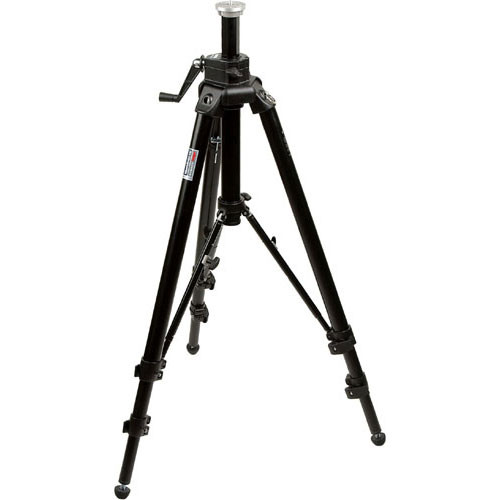
Weight
As just mentioned, weight can have both upsides and downsides. If you are a landscape shooter, lightweight tripods can easily be blown over by even a slight breeze. You can ensure stability by going with a heavier tripod, or by weighing it down (some folks use sandbags, camera bags, or other gear to help stabilize a tripod even further), but nothing is 100%. As you get heavier weights, it also can be a detractor, because now that’s additional weight that you have to carry with you (or maybe it’s your photo assistant, but someone is carrying it!)
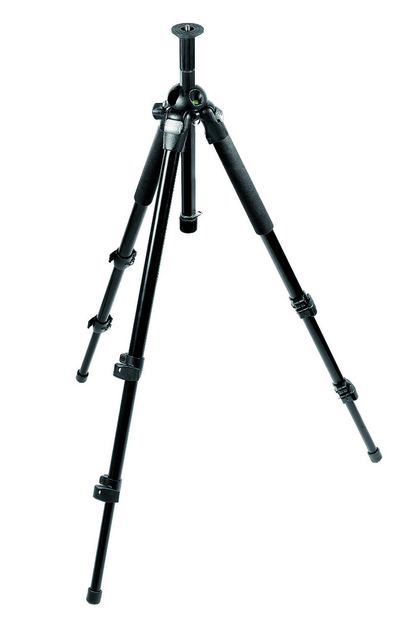
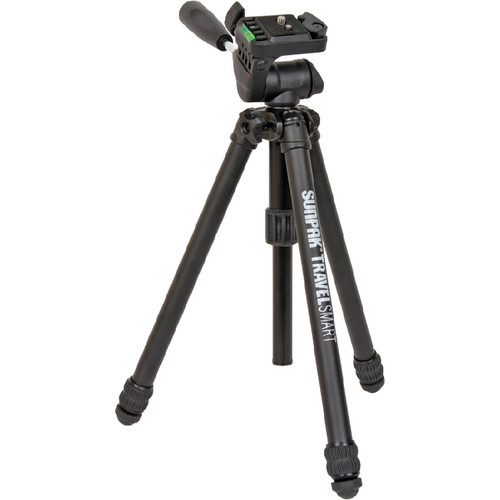
3. Size:
Another factor that comes into play is size. If you want something small and lightweight, then a tripod that has only 3 collapsing legs might not fit with an on-the-go lifestyle. You can opt for something smaller and more compact, but stability will be compromised. For instance, take a look at the popular Gorilla-pods (I own one and love it). These are super small, the legs can wrap around anything, but they are not the most stable tripod in the world. The legs can be contorted, but it also means that striking that perfect balance can be trickier.
Size
It’s all about trade-offs when you go to choose a tripod. Invariably, people will consider budget first and foremost in their decision (I know I did)… for which tripod to purchase, but I can tell you from experience, that you will quickly migrate from the $20 Wal-Mart one to a $100 one from elsewhere, and ultimately upgrade to a $300-$500 one from one of the big guns out there (i.e. Bogen, Gitzo, Vanguard, etc.). My one recommendation would be to just go in to the more expensive class first, because you will save yourself a lot of frustration and money in the end. Ultimately, your photos will be sharper and you’ll get much more gratifiying results because you got the right tool for the job – a tripod!
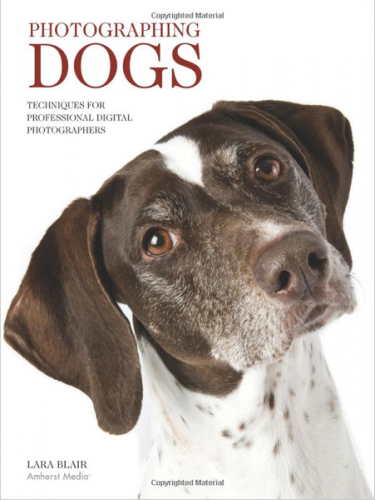
Photographers tend to photograph that which is closest to them more often than anything else. For me, that means photographing my dog. My dog is such a good dog too. She sits when I ask her to sit, stays when I tell her to stay, shake, and all the rest. But I’ve not had the best of success in taking pictures of her. Every once in a while, I got lucky in a shot or two, but something was missing. After reading Lara Blair’s book from Amherst Media: Photographing Dogs: Techniques for Professional Digital Photographers, I sort of head-smacked myself and said “Well, where was this book five years ago?!”
She offers insights in her book that only an experienced pro can really give you. For instance, as much as I love my dog and her trotting to me – I can’t tell you how often I’ve let her barge into me and my camera, thus resulting in my sending gear in for repairs from scratches, nicks, and re-alignments. One would think I’d learn from mistakes, but until Lara said:
“I hold mine high above my head when a dog is running at me”
I just kept on missing the obvious! Now I know better…just in time for my beloved pet to be the most docile and non-running pet in the world (sad to say, she is in her twilight years…every day I have left with her is precious!). Other great insights include shooting dogs from a lower angle (it makes them look larger than life, which is what owners want), anticipating session behavior (timid and aggressive dogs), and yes, handling the inevitable messiness to clean up from your studio!
Not only are her insights valuable, but her sample portfolio she includes to demonstrate various techniques, as well as insights on how and where to market yourself as a dog/pet photographer make this book an ideal resource for both the photographer turning to pet portraiture, as well as principles for setting up a pet-friendly studio. If you’re looking to make an entry or transition into pet photography, this is definitely one to include. My one nit for this book is that a substantial portion of the book is devoted to the business side. Lara talks a lot about branding, what outlets to visit, setting up your business, and other aspects of a pet studio. While these are very useful insights, these aren’t really specific to pet photography techniques. The technique portion is really only about 1/3rd of the book.
Don’t get me wrong though – it’s a great read, and very easy to get through. Often how-to books like this get either too wordy, or do not really have enough substance to them. Lara provides both, but does have a good portion that is tangential to the main topic. It’s all good content though, so it’s a very minor nit.
Just in time for Spring, so check it out at Amazon, or where ever you buy books get your own copy today:
Remember the axiom that on the web, content is king? While we all need to be cognizant of this, when your business is based on providing something – whether it be a product or a service, you simply must be pleasing your customers as well. That axoim has held true here on the blog too. Time and time again, people have told me not to worry about how often I publish posts, but rather to make sure that when I do post – the article provides good quality.
You don’t want to view lame photos and read articles that don’t have a lot of thought put into them. So, when I get busy at work, or am otherwise unable to give this site the attention it needs, readership tends to understand that while I may be gone periodically – I always come back, and it’s almost always good content.
Today, I’d like to share two stores:
Story # 1 – Basil’s Italian Restaurant in Corbin, KY
Basil’s
Chef Richard of Basil’s
Our first story is the result of a recent training trip to that neck of the woods. The clients I was training asked where I’ve been staying and where I’ve been eating. When I first started this gig, I was hesitant to share that info – until I realized that they were politely suggesting that they had good ideas for where to eat and visit. I started tuning in and have been getting recommendations across the country. Sometimes, in fact, I’ve attended a restaurant blindly.
This night was no exception. I arrived at the place at 7:20, palette readily salivating for some good pasta. I go in and the place, while nice, appears deserted. I must admit I was disappointed because it came so highly recommended. The place is a one-man shop, and he prides himself on his food from what they say. The next thing I know this “one guy” – Chef Richard – comes out and apologizes but says they are closed.
I acknowledge my oversight at not arriving sooner or checking their hours (they close at 7 because it’s in a residential neighborhood). I start to head out when he rattles off a few items (7 total) that he could whip up quick for me if interested. I don’t want to be a bother because this guy must be tired after a long day. We exchange a little dialogue, and the next thing I know, he is pulling me into the restaurant because he WANTS me to try their lasagne.
Only after being repeatedly assured that it’s not a problem, I take a seat in the otherwise almost empty place (there were a few people lingering at the bar). I order a merlot, and nosh on some garlic bread until the lasagne arrives. Oh. My. God. My mouth had died and gone to heaven! You know that taste of Italian – when it’s good but almost instantly when the acidic nature of the tomatoes hits your throat? It burns a little, right? This had the taste without the acid. It was amazing!
On top of that, Chef Richard and I ended up hugging briefly as I left 90 minutes later. I felt like I had made a true new friend. He genuinely wanted me to experience a wonderful and delicious meal, which I did!
The place was obviously closed, yet they went out of their way to provide both wonderful good food and stupendous service. And one man basically did it all!
*****
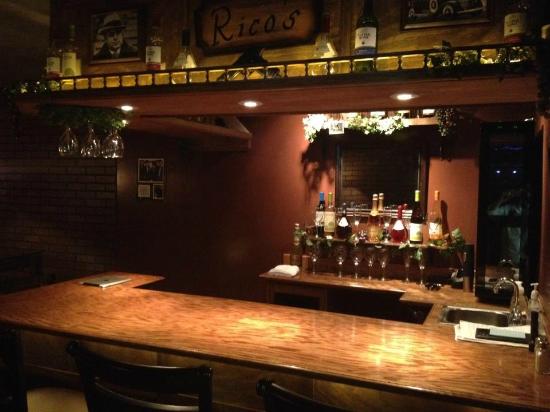
Story #2 – The Pink Slip, hotel restaurant in Nashville, TN
The Pink Slip
Our second story was at the Pink Slip in the well-esteemed Hotel Preston in Nashville. I hear from the shuttle driver that their in house restaurant is available, so I decide to try it. The velvet walls, female lounge lizard singer and guitarist try to evoke “jazz” but really only brings to mind “porn”. Yet it’s been mentioned, so I ask for a menu… The bar-maid (ironically, named “Bar”bara), takes a beer or something out to another table, gets another pair of gals a drink and a menu, then finally comes back to me 5 minutes later with a menu. I hear her rattle off some off-menu items to the gals and make a mental note to ask about the burger. Another 5 minutes go by and she finally gets back to me. Yeah, I can get the burger.
Do I want a beer? Fat Tire draft please – been a long week. A cursory nod, a beer is drawn and brought over. She tunes into Modern Family on the TV (a repeat by the way) as it starts up. Meanwhile the over-amped lounge lizard belts out some 90′s Madonna tunage. Oddly, (during a commercial) she asks if I am ready – uh, yeah, I ordered the burger? She nods and goes back to put the order in that I’d requested about ten minutes ago. I sip the brew, and about half way through, while sipping and reviewing email, ask for a glass of water, figuring the food is just about ready.
The water empties, and the beer disappears. Finally, the food comes, and while it’s not great, it’s not inedible. I scarf it down because the atmosphere is starting to give me a headache. Within 10 minutes I am done, and wait to get a check. Modern Family is almost over though, so I wait some more – I don’t want to interrupt, but will definitely make a note if she looks over. Finally, she looks over and I quickly ask for the receipt. She walks over and asks if I want some dessert – no thanks just a check please.
The bar was clearly open for business, had the grill on, yet I never felt less welcome in an establishment. The burger was on par with McDonalds – you could tell it was pre-made then heated and slapped on a bun before being tossed out to the side of the customer.
This place was almost like they were going out of their way to send the message that they had something more important to attend to than a customer – a repeat TV show.
*****
Which would you rather visit? Now granted, the food at the latter was not worth writing about, but the service sure was! Where content is king online, service is king in restaurants!
How does this relate to photography? Simple. You are only as good as you make your clients feel. There is so much competition out there these days – I can get good photographs from anyone. If you make me feel special though, you will stand out above the crowd. If you seem genuinely interested in me, it makes me feel special (even though I know I’m just another Joe…), and that can make you stand out. It takes dedication, passion and a lot of work, but the amount of passion you put into your work is directly proportional to your success.
But when you deliver just average photos, and seem bothered that the person is preventing you from working a larger gig (or table) and otherwise just not interested in even getting to know you, that can be bad for business. You may get a reputation as an ass. Which will kill the business first – your average photos or your poor attitude? While content may be king online, attitude is everything in small business.
Most photo gigs are small business. Remember the moral of the story here when you get a customer. Big or small, single or simple order, treat everyone special and you will succeed. Otherwise, you are doomed to fail.